There is absolutely nothing like the original Krakow sausage (kielbasa Krakowska). It comes as no surprise that this sausage has always been the top seller in Poland. It's the queen of kielbasas. It takes its name after the city in which it originated, the city of Krakow, one of the oldest cities in Europe.
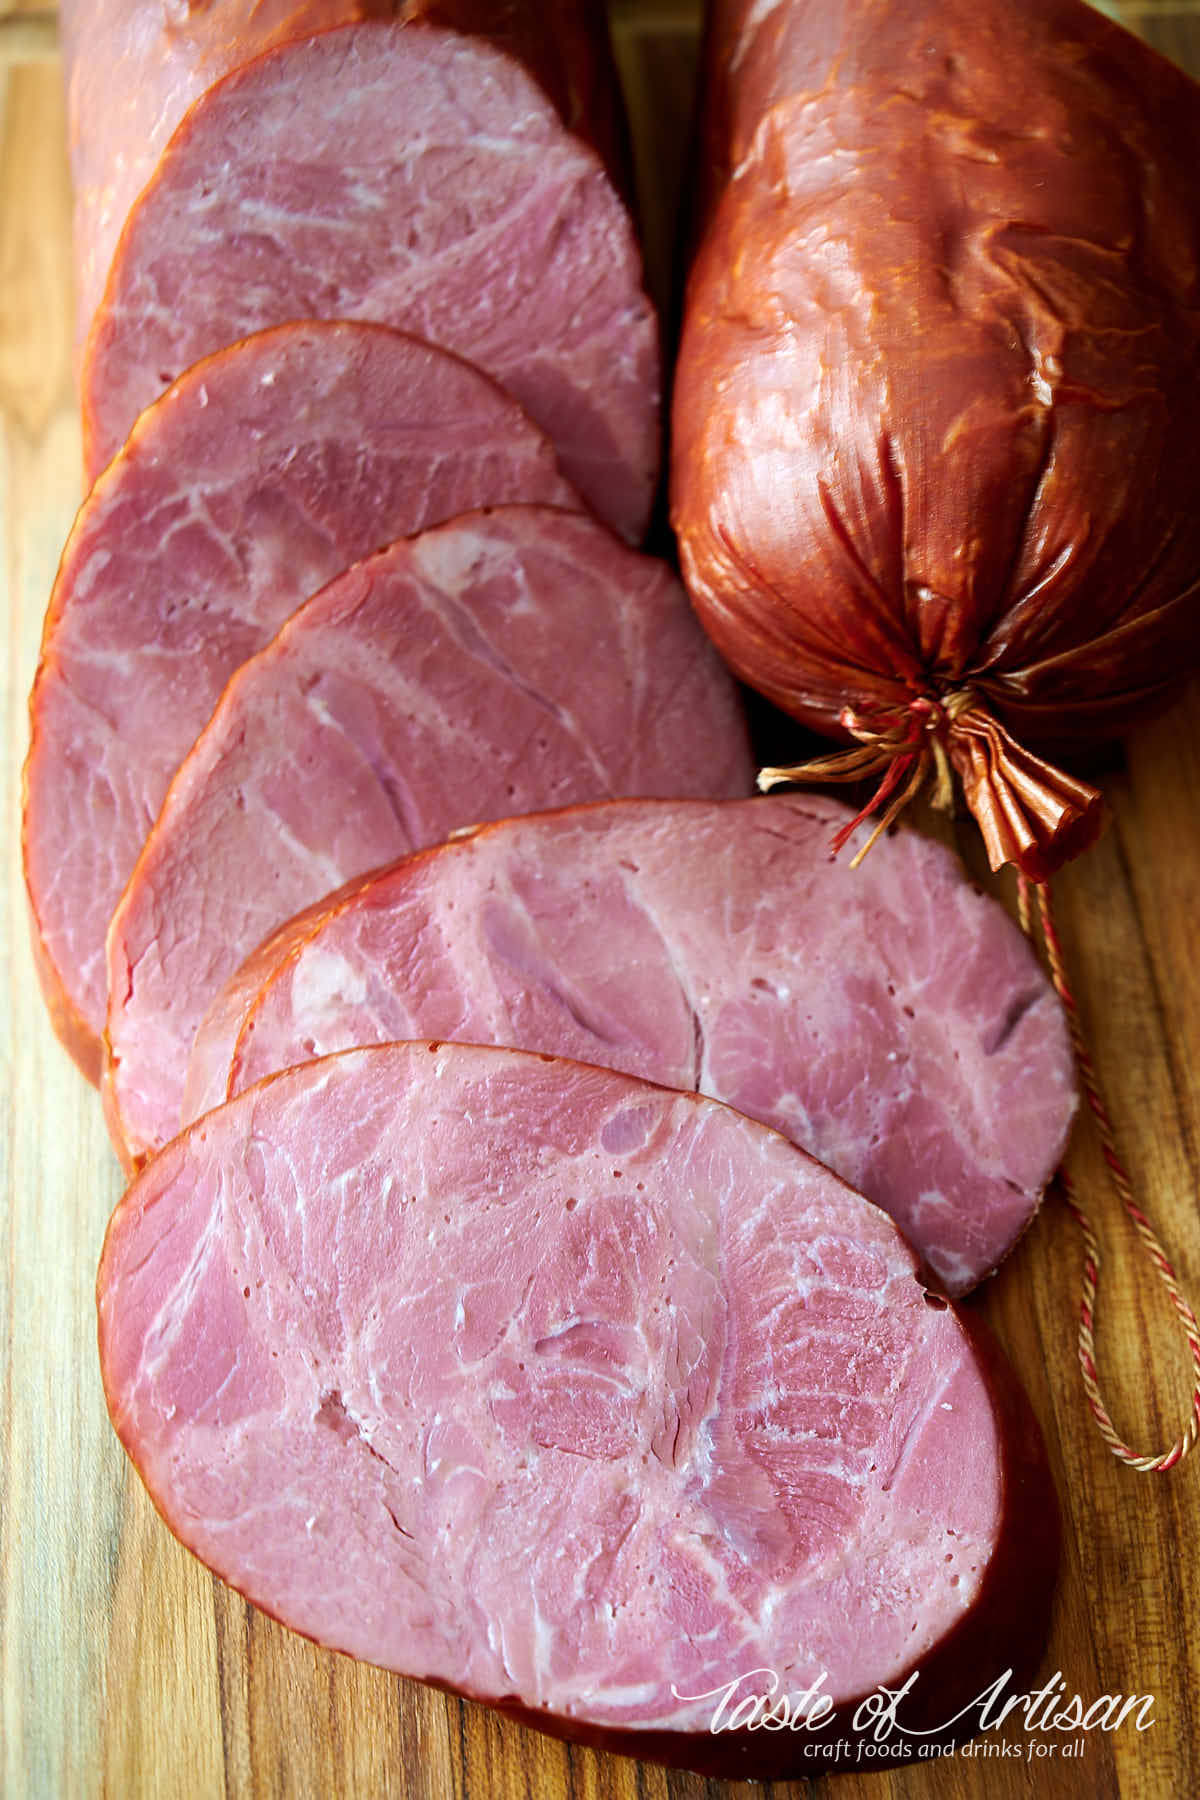
This recipe is for Kielbasa Krakowska Krajana. Krajana translates from Polish as 'cut in pieces'. In the context of Krakow sausage it means that the sausage is made of meat chunks that were never ground. Mostly. Ten percent of (slightly fattier) meat is emulsified to fill the gaps between and hold together large chunks of meat.
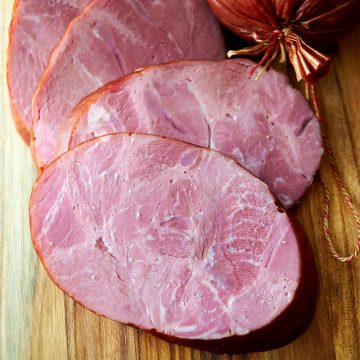
The original recipe for this sausage calls for 90% of lean class I pork and 10% of fairly lean (no more than 25% fat) class III pork. Krakowska is as lean as any sausage can get. Smoky and aromatic, this sausage reminds me of well-made old-fashioned smoked ham. Needless to say, it's one of my favorite sausages to make and eat.
About this recipe
This recipe originates from the official guide to meat products that was first published in Poland 1959, categorizing 46 sausages and 13 liver and blood sausages. In the update published in 1964 the number of sausages increased to 119. It also included 10 liver and blood sausages as well as 11 pates and meat loaves. You can find production guidelines for this sausage in official publications online and books, such as Marianski's Polish Sausages, Authentic Recipes And Instructions.
While I invite innovation and experimentation, I am fascinated by authentic and original recipes and always try to experience them first before trying modified versions. We are fortunate that these recipes were openly published for everyone to enjoy. Today's commercially produced sausages oftentimes are a far cry from what they used to taste or were intended to taste.
Making Krakow sausage
Making Krakow sausage is fairly easy with the right tools on hand. The meat is first cut in pieces and cured for 2 days. A small amount of fattier pieces is then emulsified. Both meats and the spices are combined and stuffed in large synthetic casings. The sausages are then dried, smoked and baked to get them to the specified internal temperature.
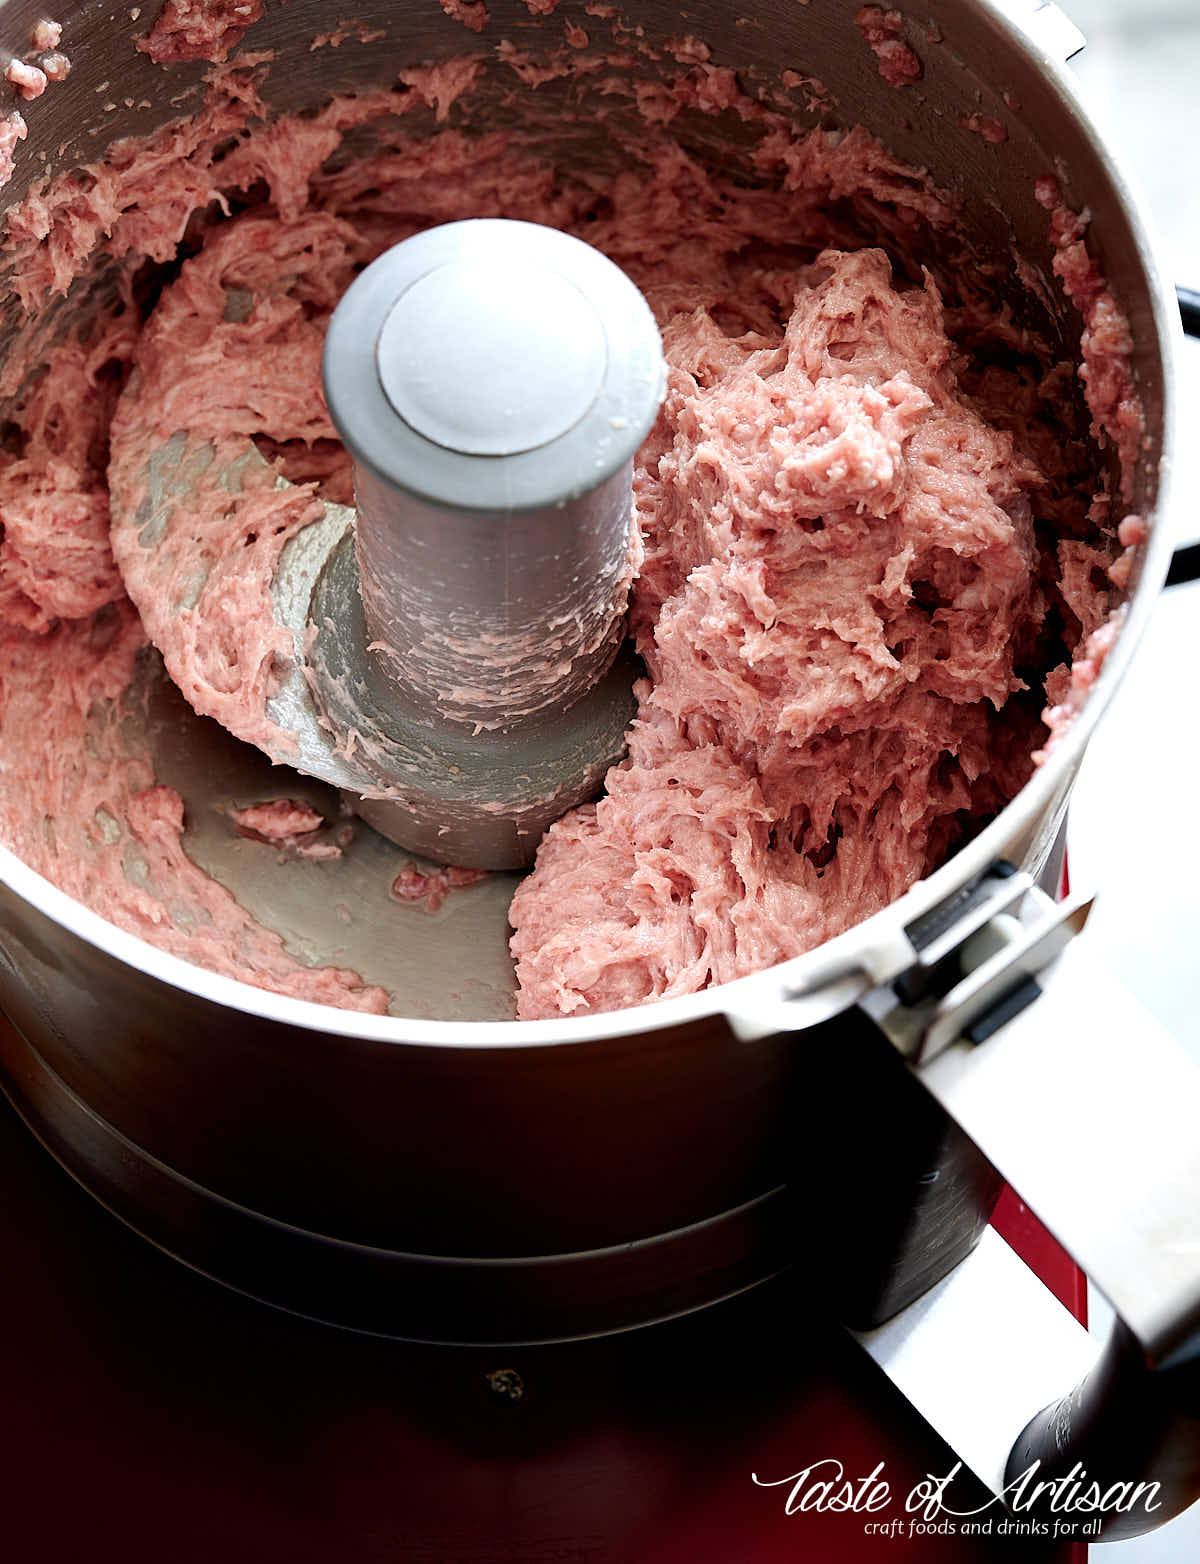
Emulsifying meat
Emulsifying class III pork can be done in a bowl cutter or a good food processor. Bowl cutters are very expensive and probably are an overkill for any home sausage maker. I find that I get a decent emulsification in my commercial grade food processor. Perhaps not quite as uniformly fine as you would get from a bowl cutter but perfectly adequate. That said, I never felt like it was an issue for the texture or taste of any of the emulsified sausages I've made (e.g. bockwurst). Only a close visual inspection will give that away.
Class III pork needs to be pre-ground before emulsifying so a meat grinder with a 1/8" (3mm) grinder plate would be of great help. That said, you can get away without one. Simply chop the meat very finely with a large chef knife or a cleaver before emulsifying.
Stuffing
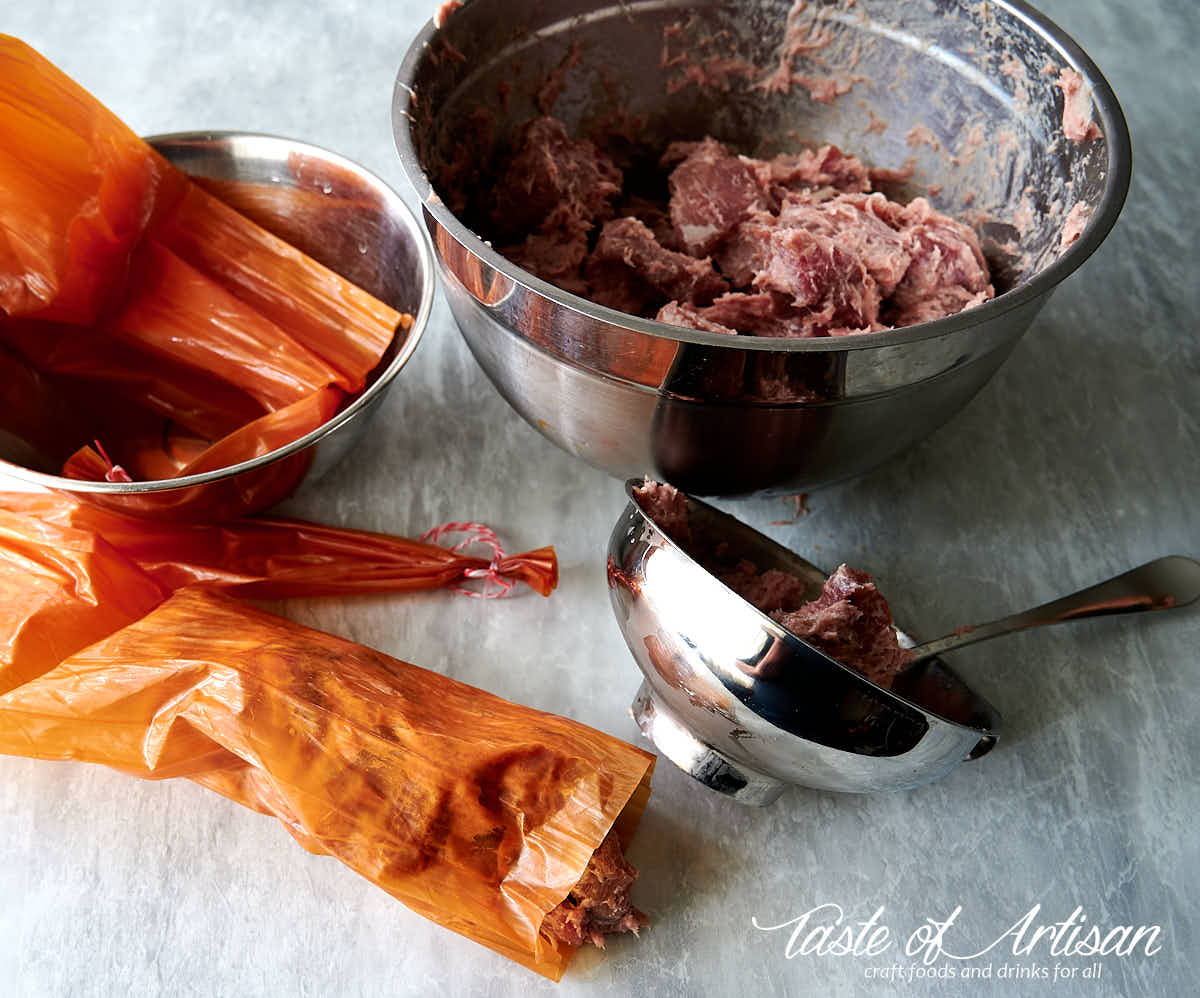
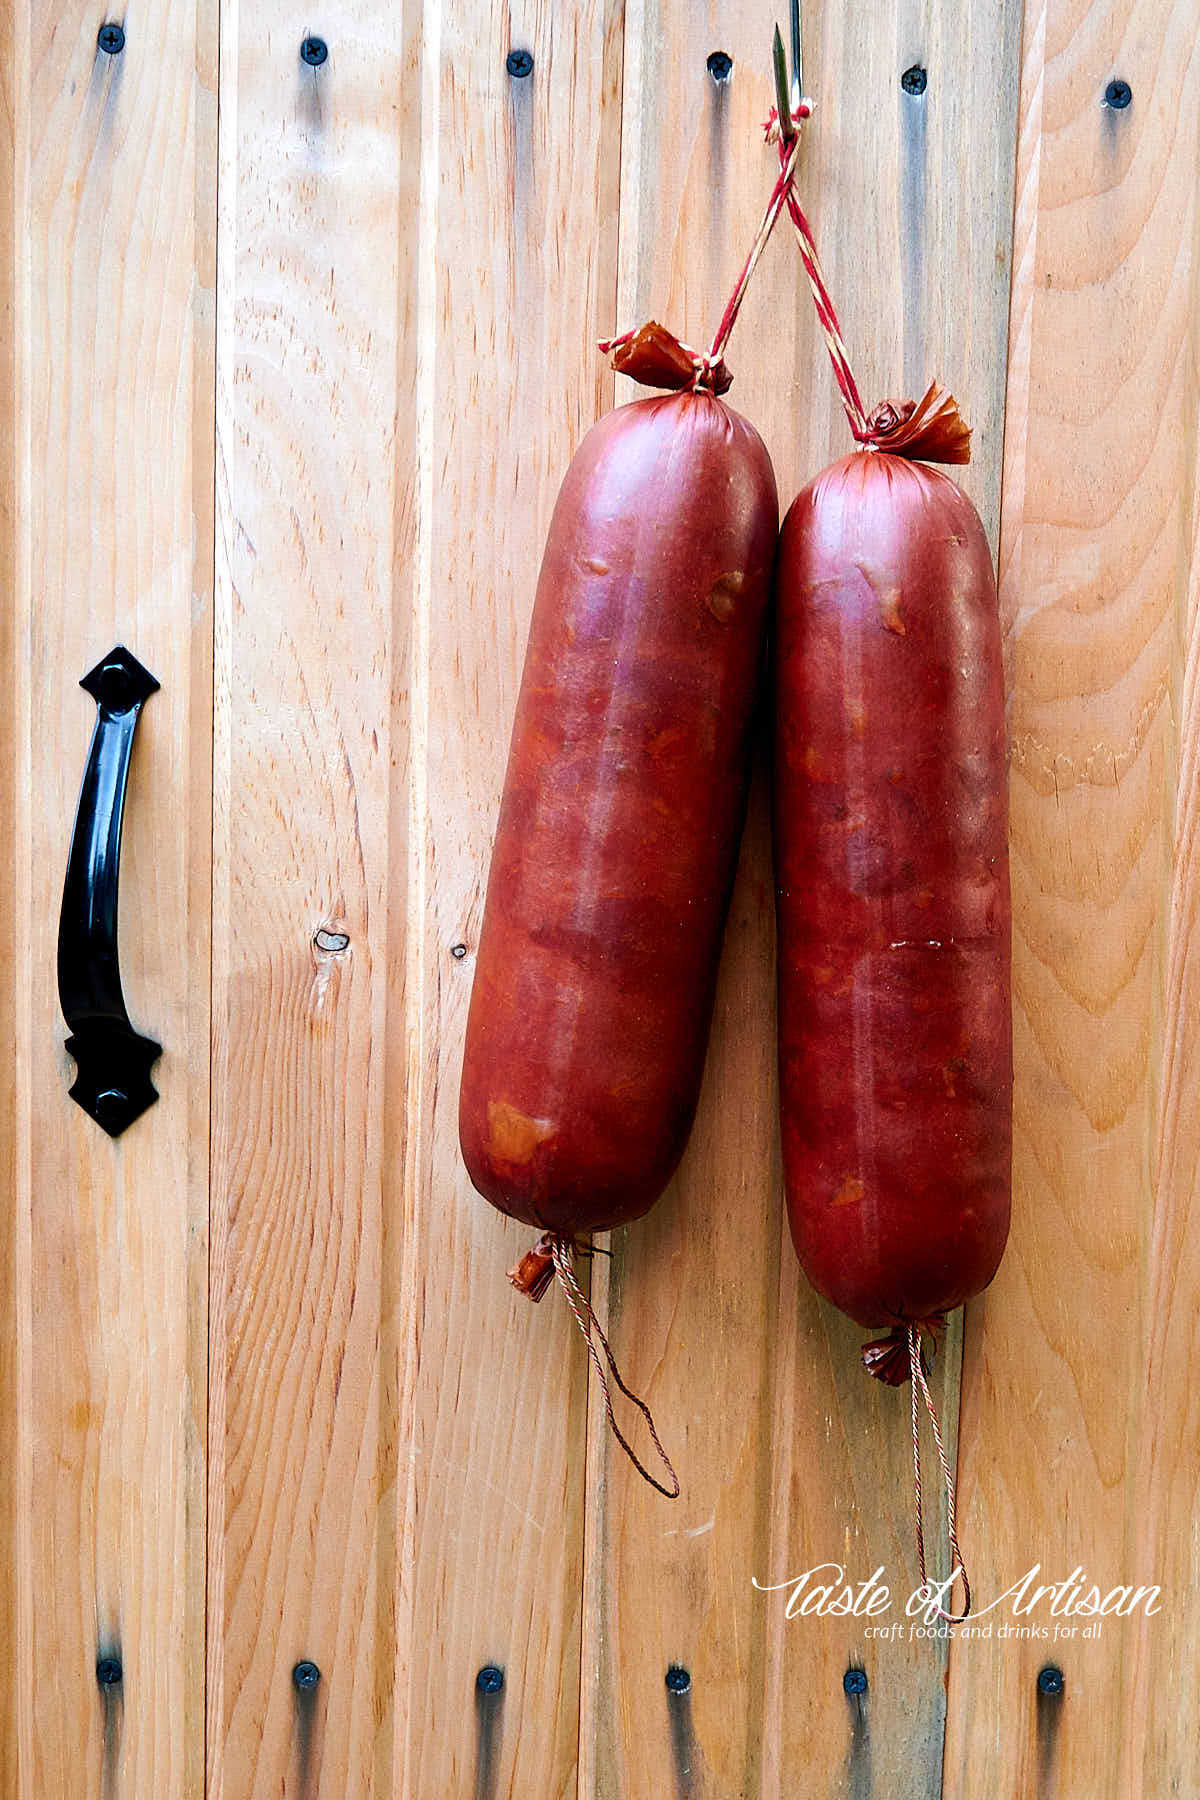
Stuffing 2-inch chunks of meat through a sausage stuffer won't work so you will need to do it manually. The good news is that the original Krakow sausage requires 3" (75mm) fibrous casings that you can easily stuff manually using a jar funnel.
Drying
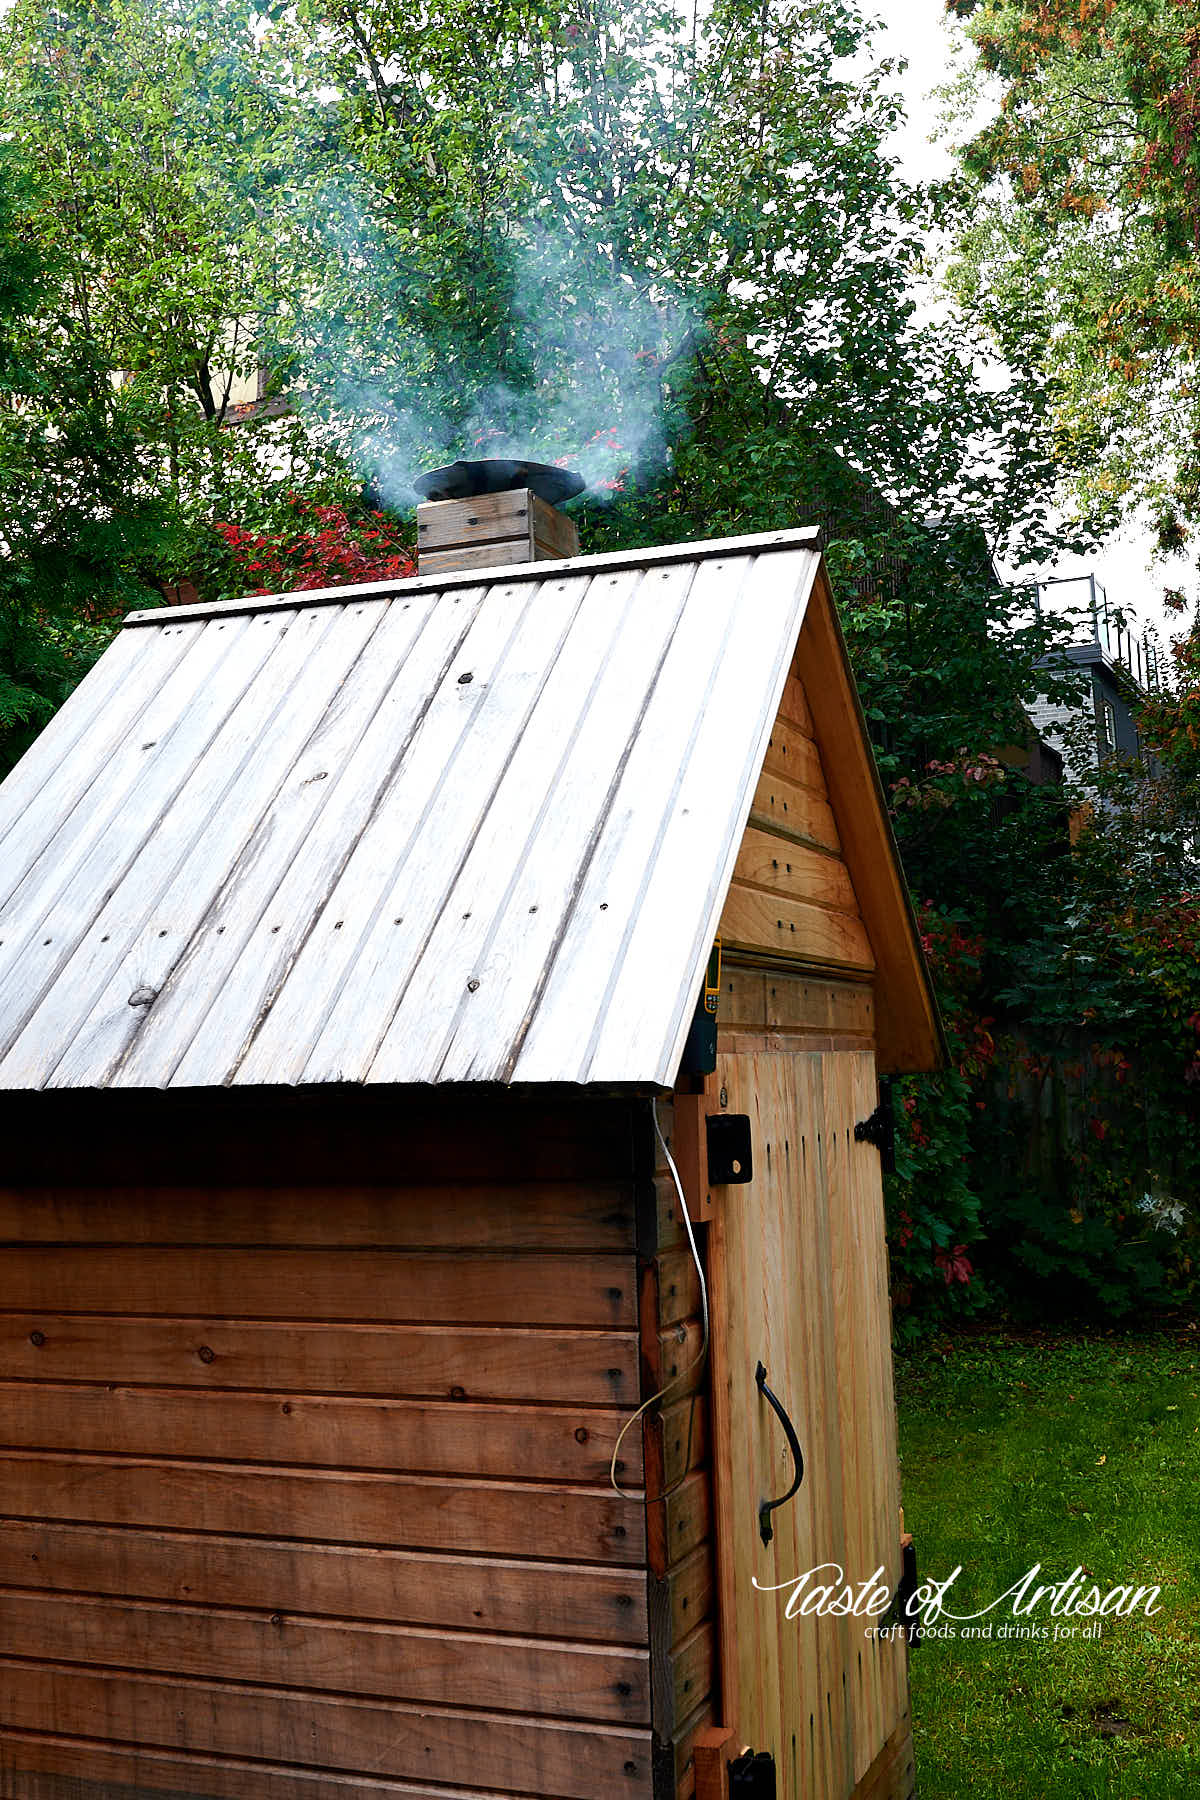
Drying takes place at room temperature in a drafty area for a few hours, then in a smokehouse or a smoker at around 115F - 130F for 20-30 minutes or until the surface is dry. It may take longer than 30 minutes and it's fine.
There is no smoke during drying. You can also dry the sausages in a fridge overnight, uncovered. This will remove some moisture but you will still need to finish drying in the smoker.
Smoking
The guidelines recommend smoking with a thick smoke for 2 1/2 hours. The temperature is, again, 115F -130F but I find that 130F to 140F range is perfectly fine too. I like this higher range better as, IMHO, I get better color this way. I find that it's also fine to go a little longer with the smoking phase if you want more color.
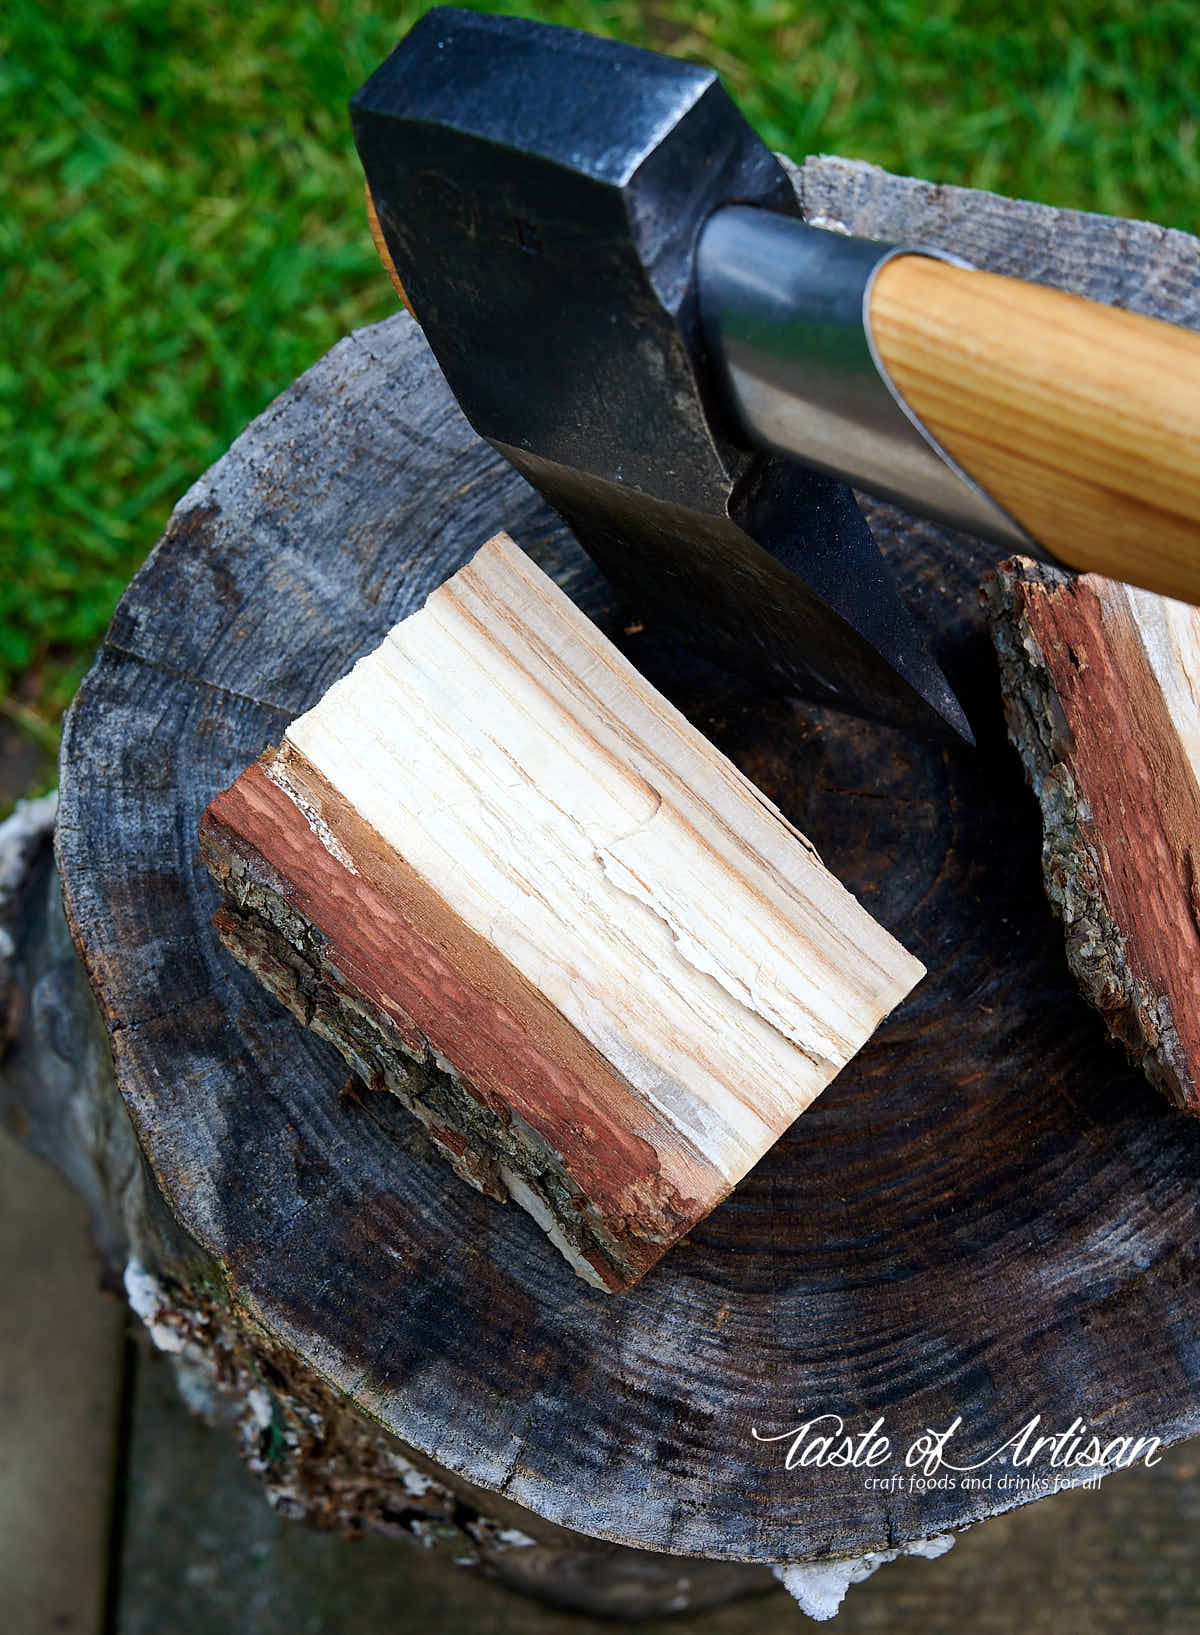
Wood selection
While the official guidelines don't specify which wood to use, king oak and queen hickory are the best.
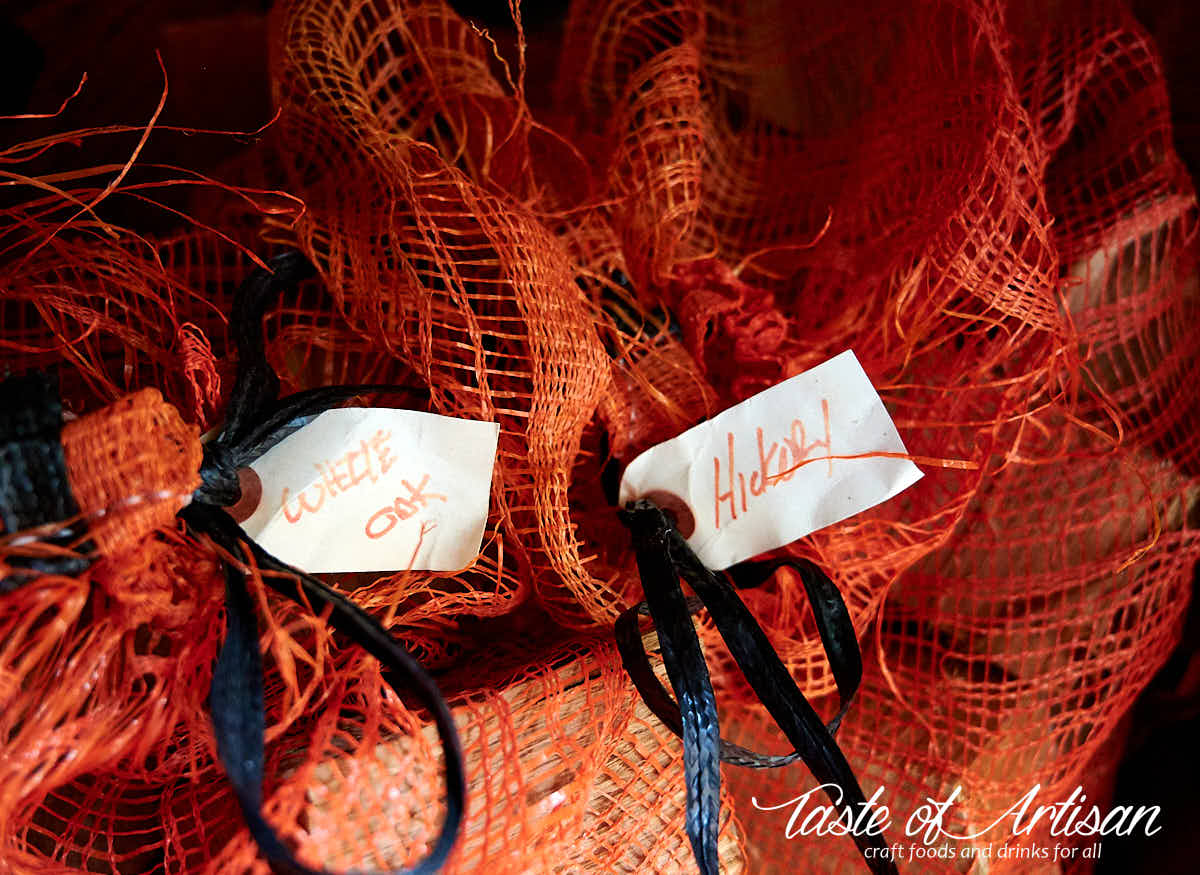
I use large wood chunks to generate smoke.
Baking
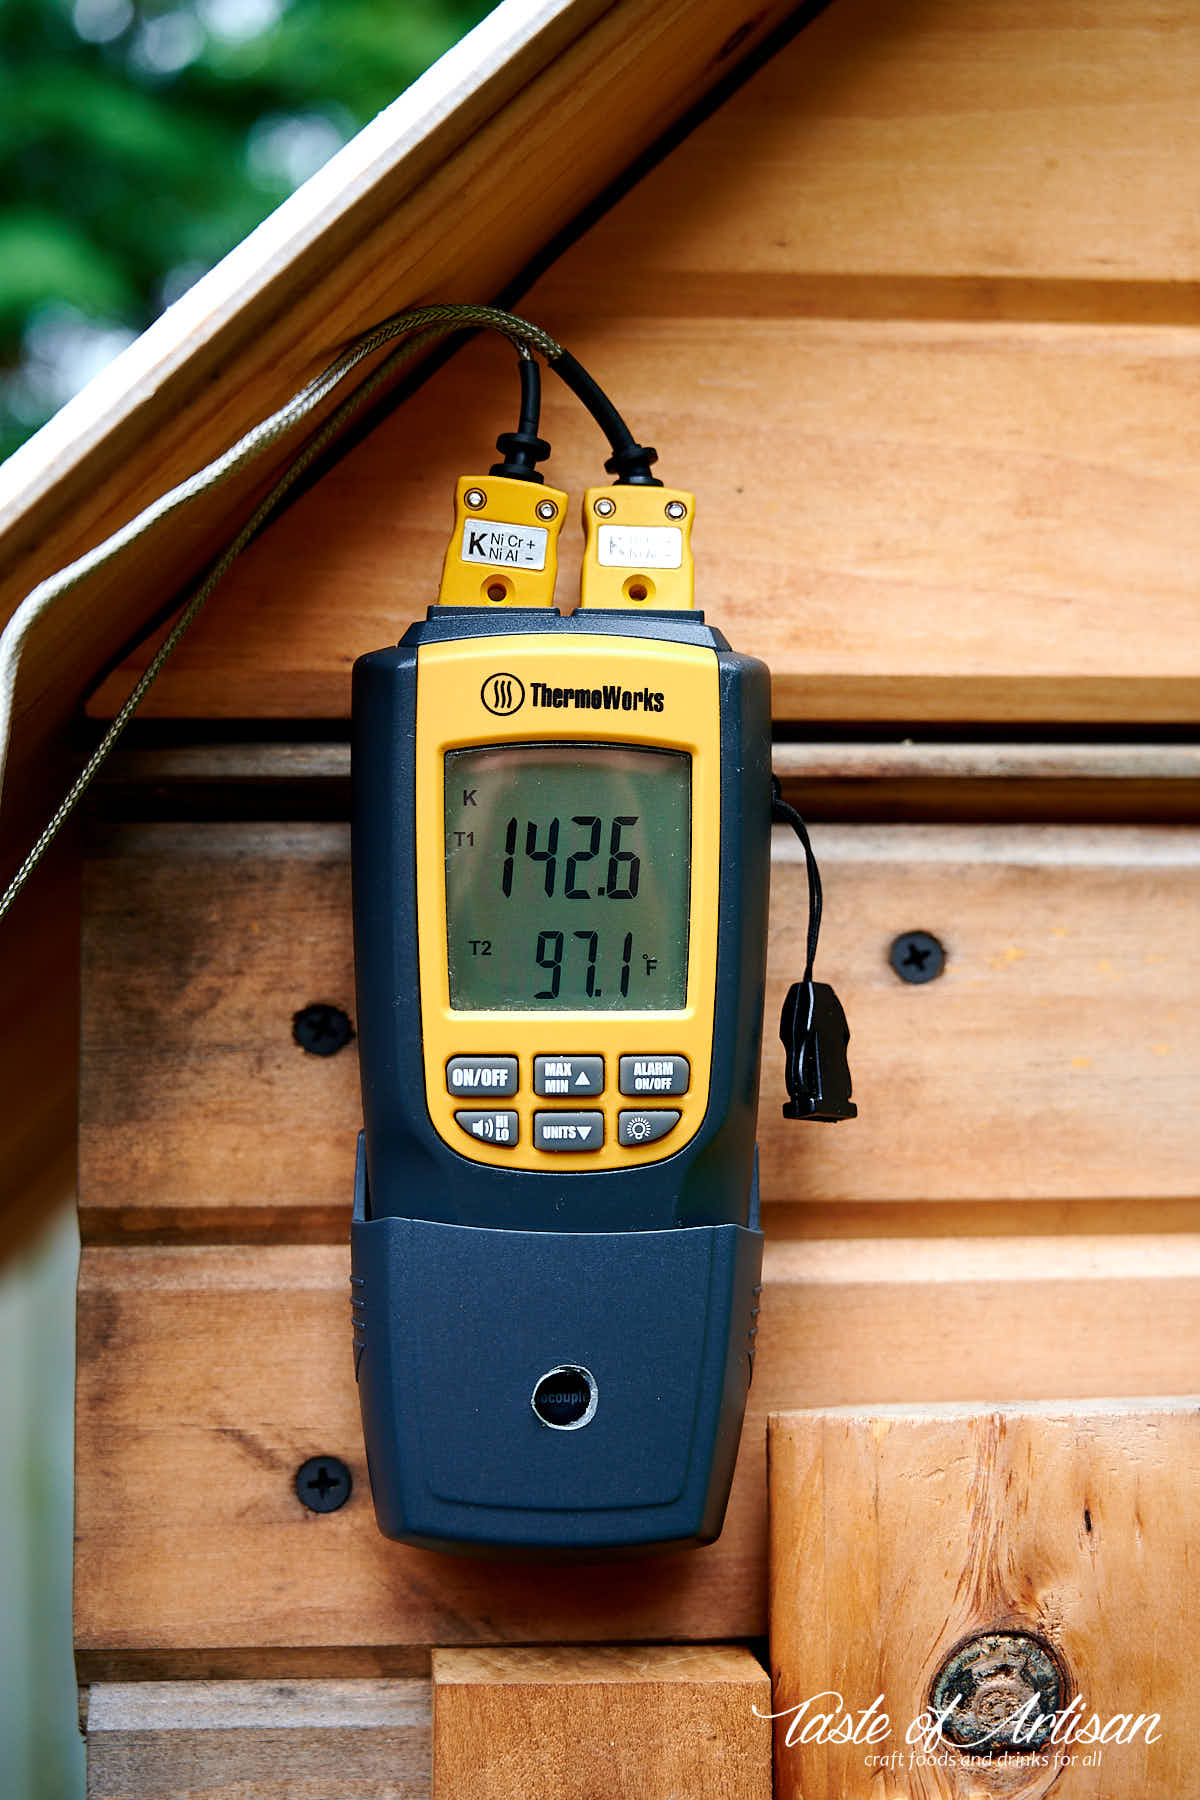
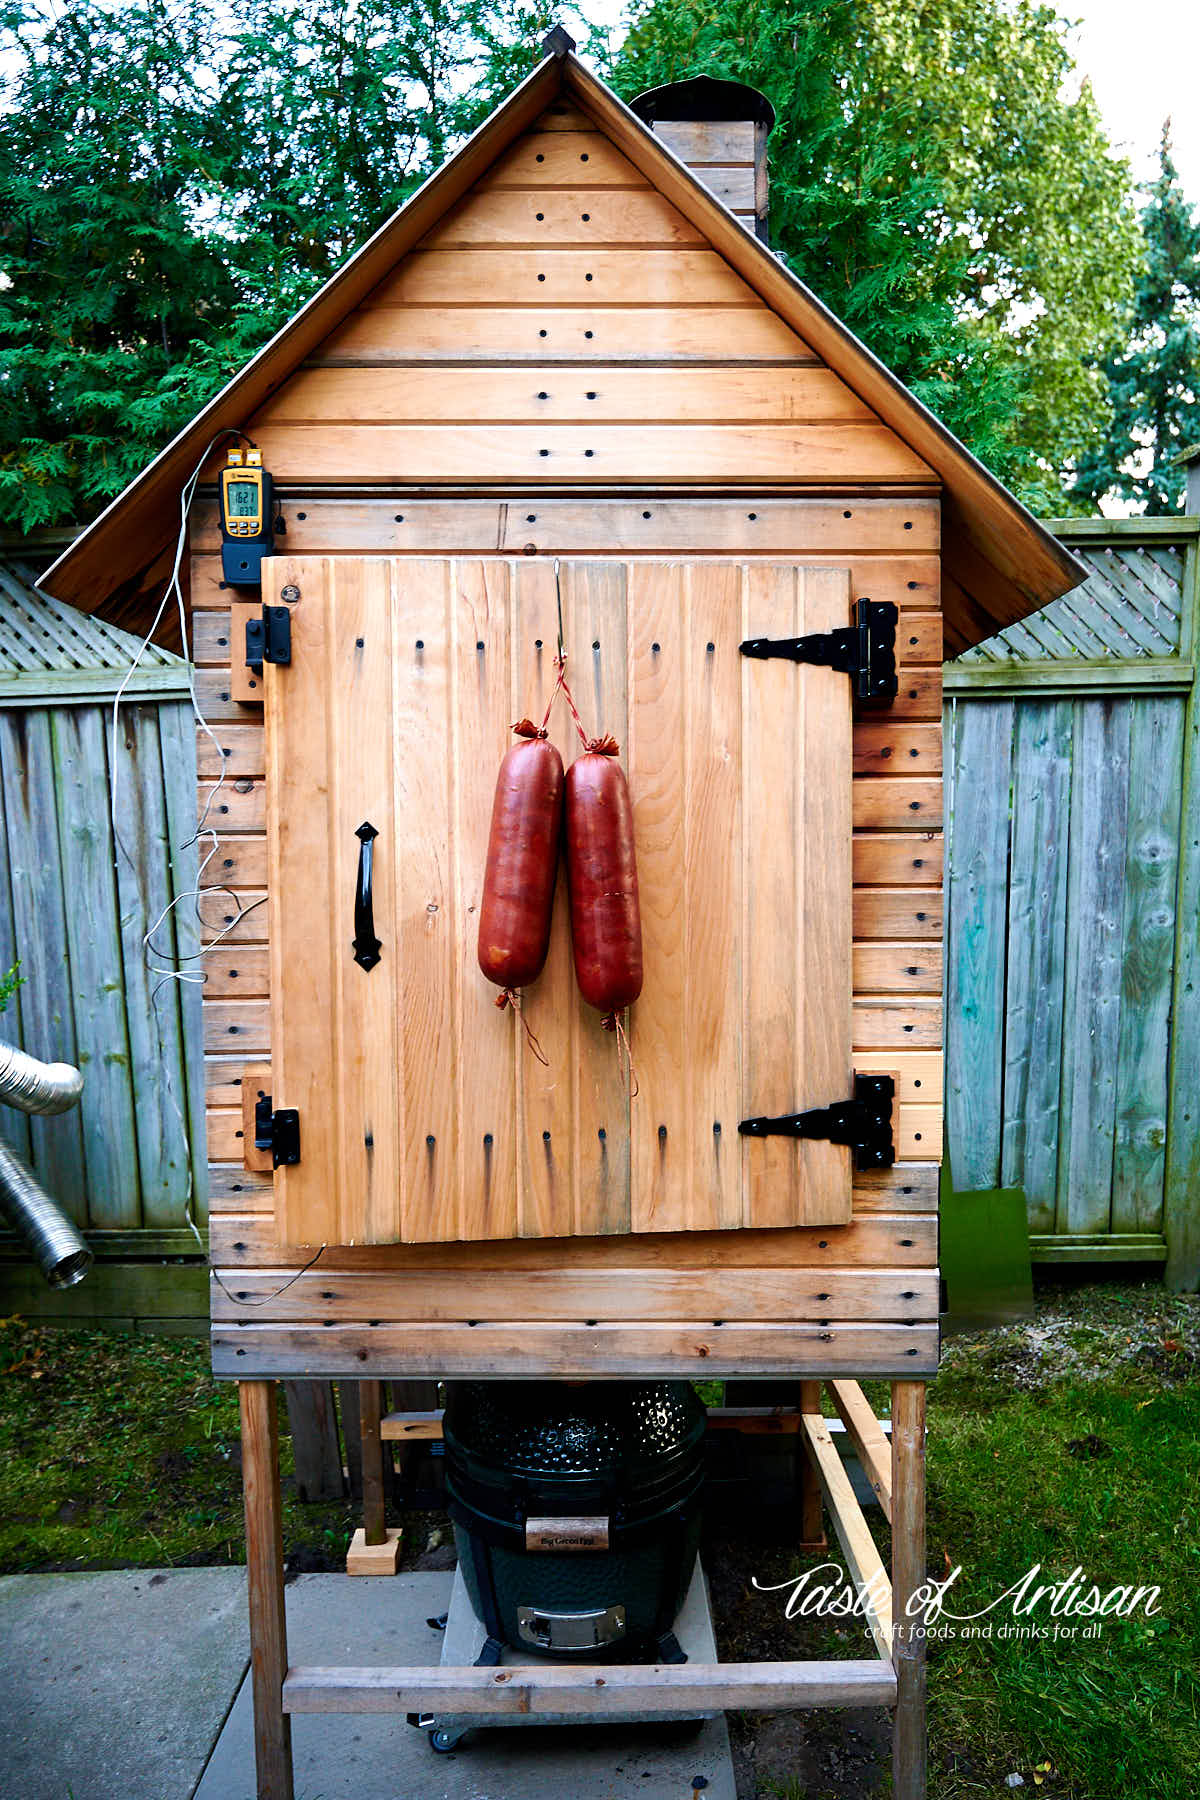
The biggest challenge for me when making smoked sausages has always been the 'baking' stage. Many kielbasa recipes I've come across, as well as the official Krakow sausage recipe, specify 20-30 minutes of baking at 165F to 195F. To get even thin sausage reach 154F internal temperature quickly seems like an almost impossible task though I've recently had good success finishing 38-40 mm thick andouille sausage in my new smokehouse in 40 minutes.
Finishing Krakow sausage in a smokehouse is even more challenging due to its thickness. My first and only attempt to do that was unsuccessful. The internal temperature climbed from 97F to 149F and got stuck. It took 3 hours to get there. I kept it at around 195F for 20 minutes but the internal temperature not only didn't go up but started to drop. The dreaded stall! At around 150F, meat water loss accelerates, cooling down the surface. It can take hours to get over it.
I finished baking in the oven at 195F convection and it took literally 5-6 minutes to reach 154F internal. However, convection dries out the skin so I'd recommend baking at 175F without convection for about an hour or so for best results.
Another method is to poach or sous vide this sausage at 161F-167F for 55-75 minutes until you reach the internal temp 154F-158F.
Drying and storing
Krakow sausage, once baked, is ready to eat doesn't require any additional cooking. Cool it down to 64F and refrigerate.

Drying is an option. It makes a more intensely flavored kielbasa that will keep longer. Dry at 55F - 60F and 75% - 80% Rh until 35% weight loss is obtained.
Krakow Sausage Recipe (Kielbasa Krakowska Krajana)
Ingredients
- 2250 g lean pork 5 lbs (100% lean)
- 250 g pork 1/2 lb (no more than 25% fat)
- 36 g salt about 2 Tbsp (see notes)
- 6 g Cure #1 about 1 1/4 level tsp
- 3 g black pepper about 1½ tsp, ground
- 1 g nutmeg about 1/2 tsp, level
- 4 g sugar about 1 tsp, level
Instructions
- Cut the meat into 2" pieces, place in a large bowl, mix with the salt and the Cure #1. Cover and refrigerate for 48 hours.
- Separate out class III pork and grind it through a 1/8" (3 mm) plate. Then emulsify in a food processor or a bowl cutter if you own one, adding up to 25% - 30% icy water or ice to keep the meat cold. Mix in the spices.
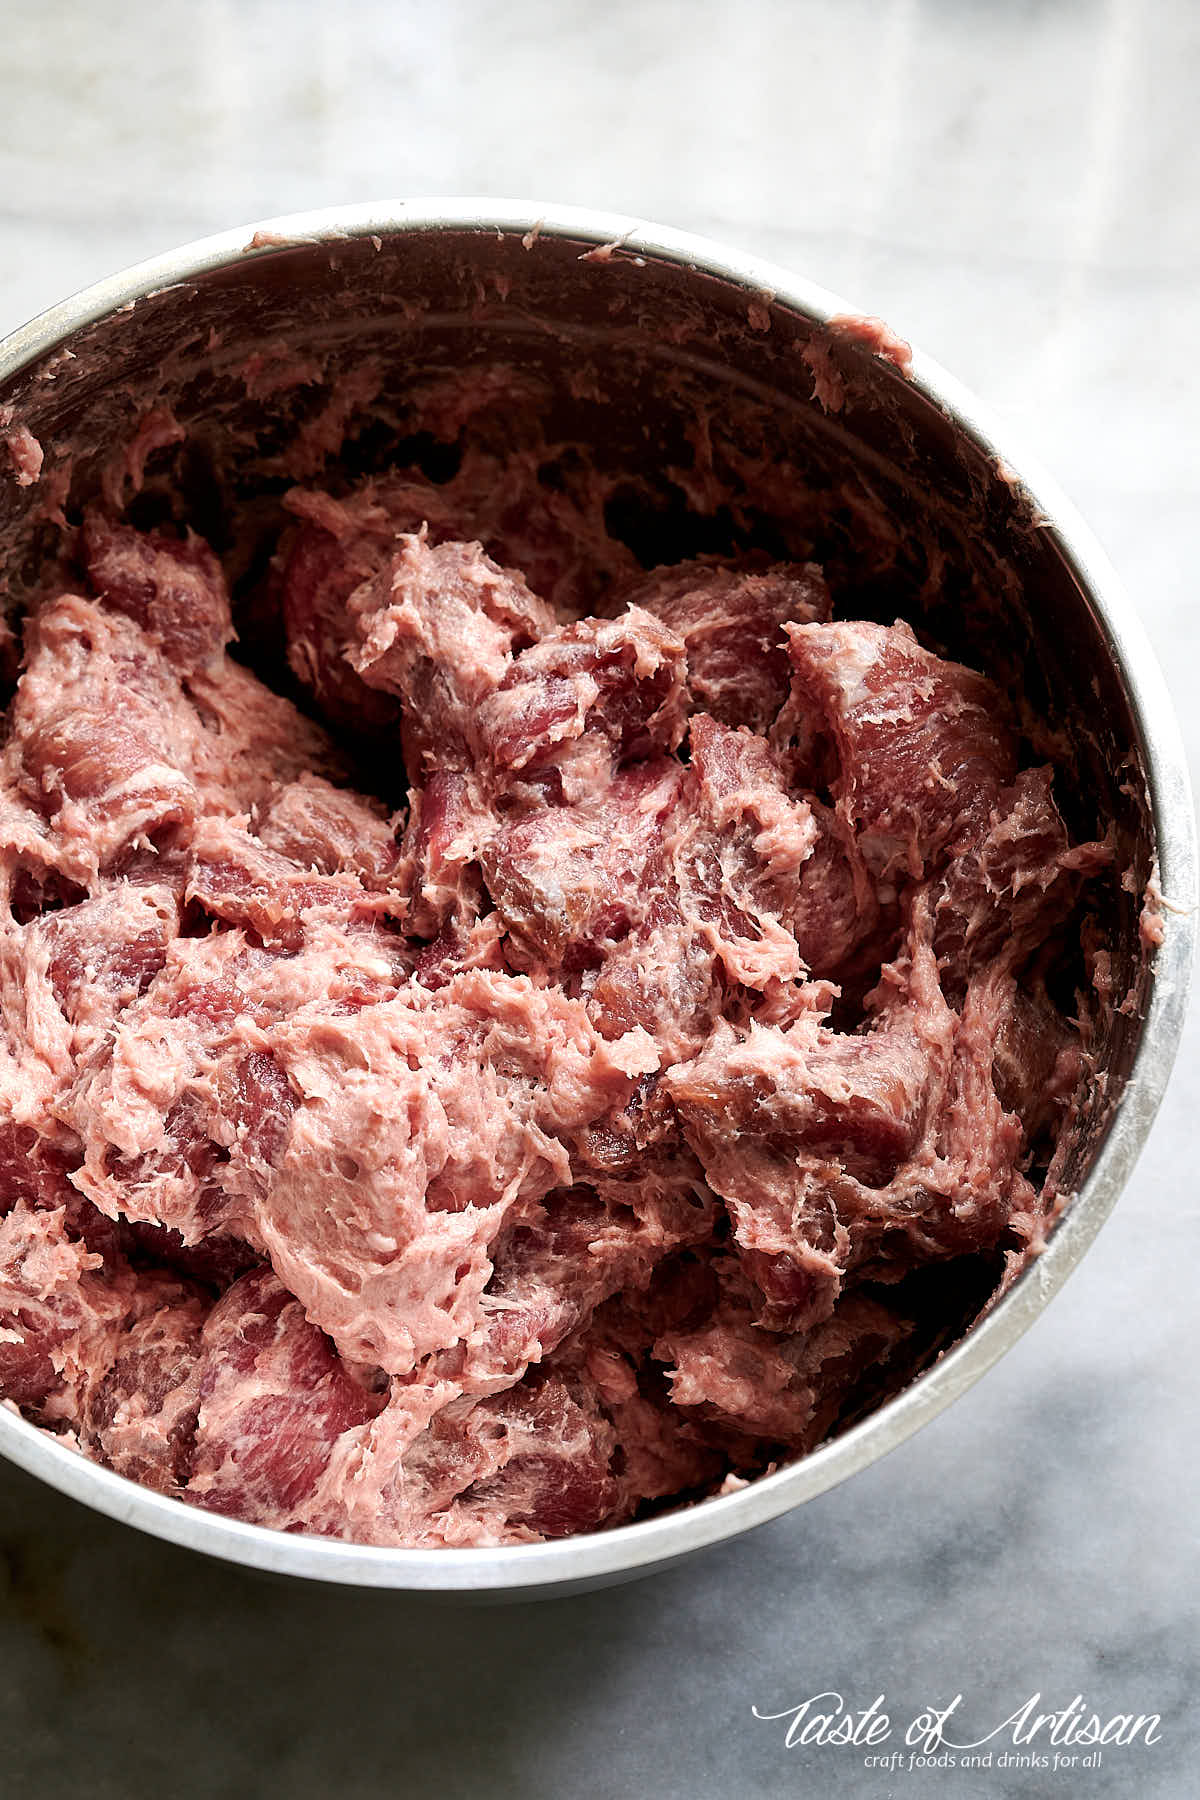
- In a separate bowl, mix class I pork until it becomes gluey. Add the emulsified pork with spices and mix everything together.
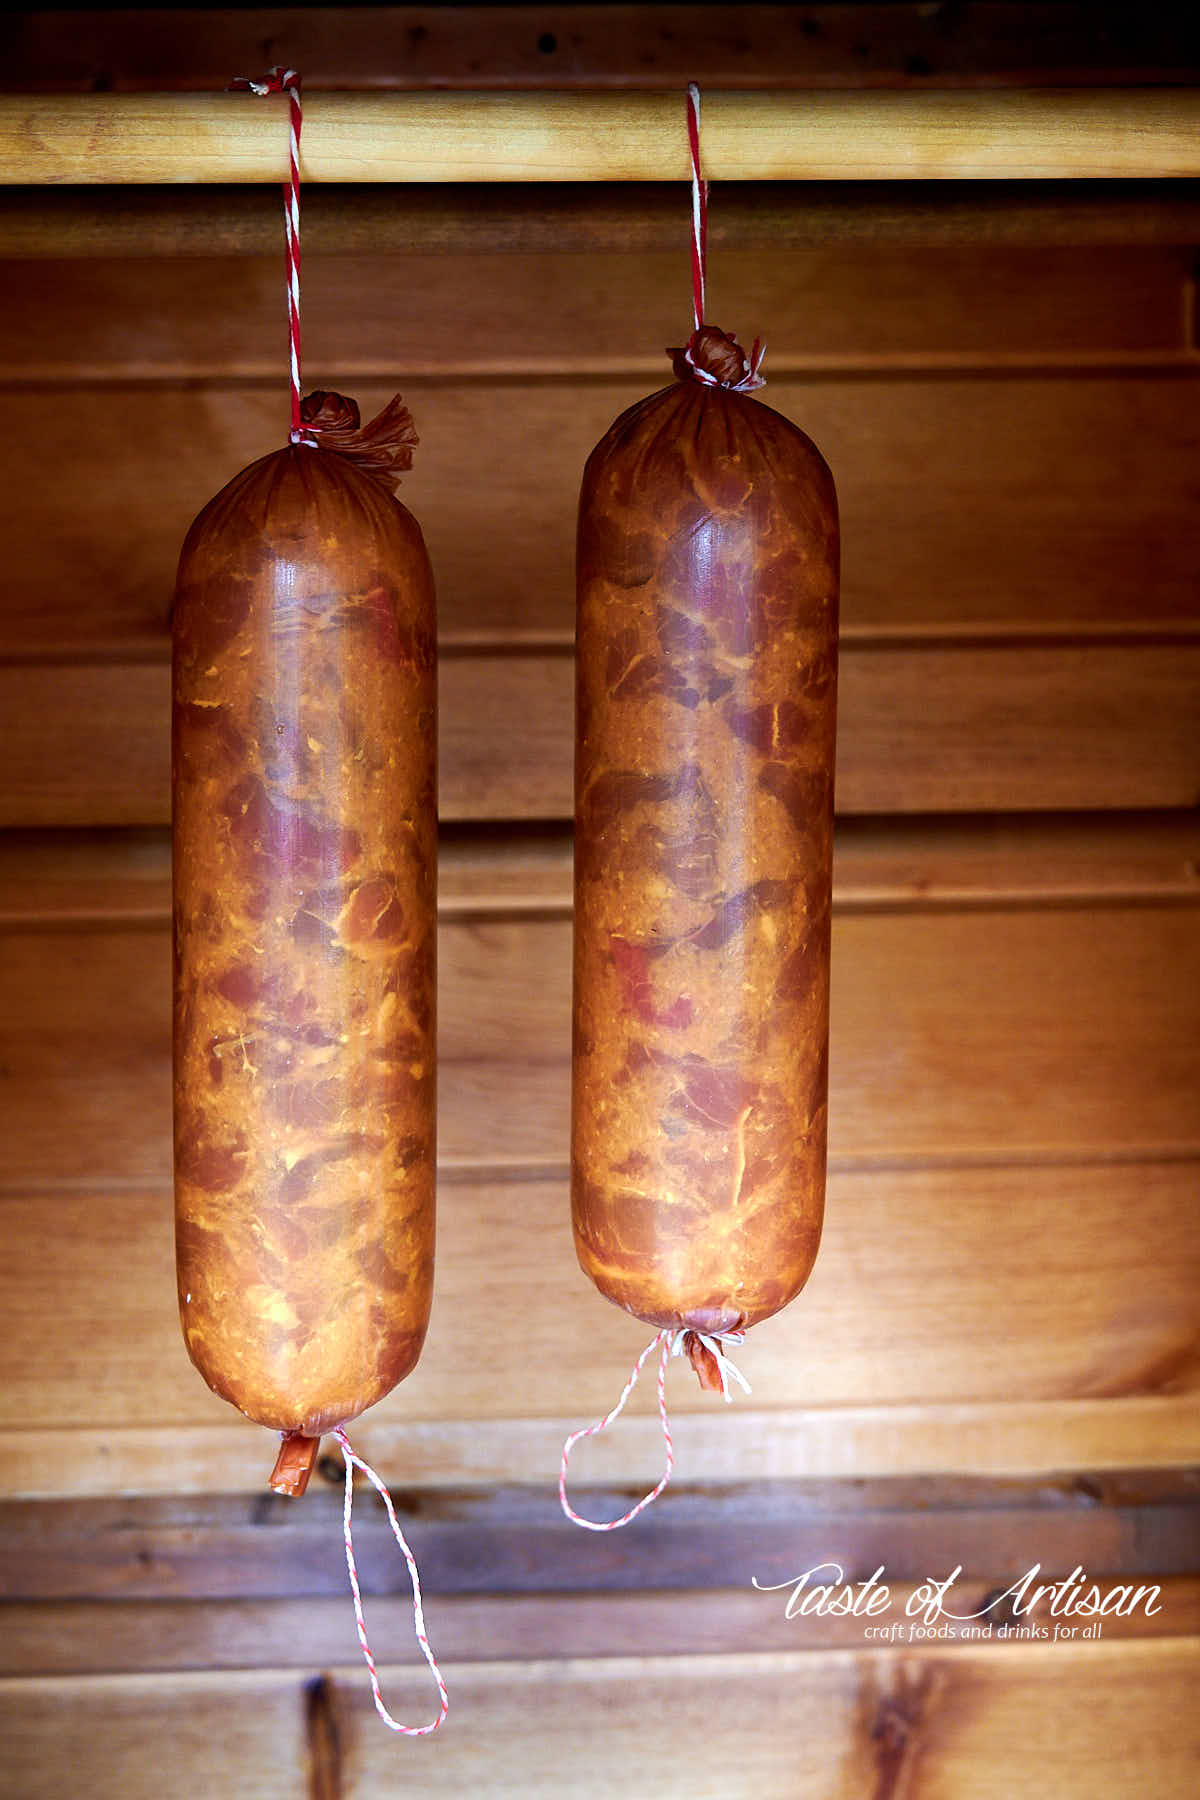
- Stuff the meat into 3" (75 mm) synthetic fibrous casings using a funnel. Stuff the casings firmly and tie with a butcher's twine on both ends. Prick any visible air pockets with a needle.
- Hang the sausages in a drafty area and dry for about 4 hours.
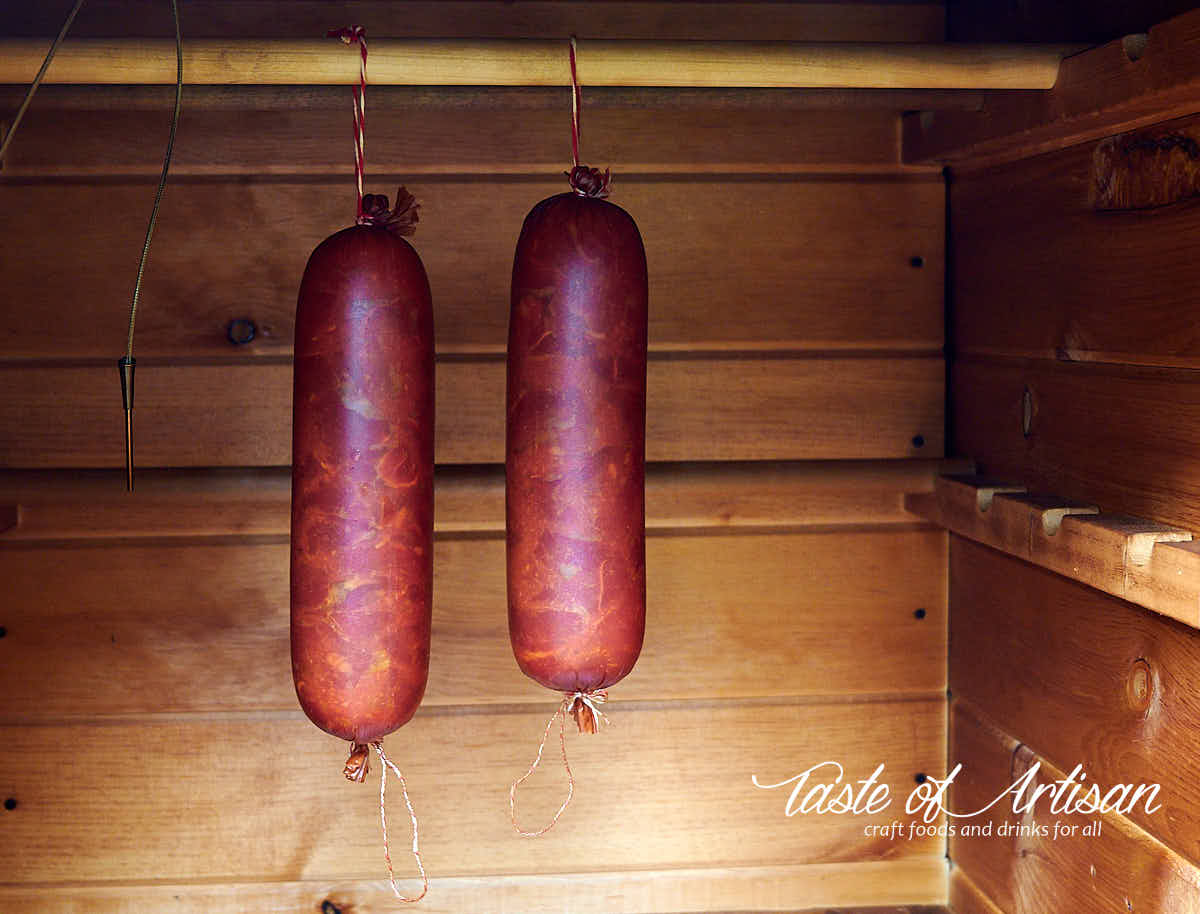
- Transfer to the smoker and further dry without smoke at around 115F - 130F for 20 minutes.
- Smoke with a thick smoke for 2 1/2 hours at around 130F - 140F.
- Bake with a thin smoke at around 167F - 194F for 20 minutes, or until the internal temperature reaches 154F-158F. This step is much easier to accomplish in a oven or a warm water bath, see the notes below.
- Chill to 64F and refrigerate.

Tadeo Zurc says
Excelente explicado.
Trataremos de hacerlo como está escrito y explicado.
Consulta, el Aroma de la Salchicha Cracovia es solo del ahumado y las pocas especias que lleva, agradeceré ese info.
Muchas gracias
Victor @ Taste of Artisan says
You are very welcome. Good luck and enjoy!
María celis says
Muchísimas gracias. Se ven super deliciosas. Y su explicación magistral . Las quiero hacer pero se me dañó la nevera . Tan pronto la arreglen las haré para mí hijito de 12 años ....gracias .. ya le contaré cómo me quedaron....chao
Victor @ Taste of Artisan says
Fantastic. Good luck fixing your fridge and do let me know how it turns out.
Keith Murdock says
I made this recipe this week and just finished smoking the sausages. Excellent!
Victor @ Taste of Artisan says
Enjoy!
Ivan says
Per recipe when i had put black pepper and nutmeg in emulsion it bacame very dark and when cooked was totaly unatractive to eye , yours is not like that as it looks like there is no trace of black pepper and nutmeg ? why ?
Victor @ Taste of Artisan says
Good question. I have no idea. I must have been something else that caused the darkening.
Terry D McIlvain says
Quite possibly temperature of the emulsion. I noticed this also. Started running processor shorter times(no more than 1 min) and chilling it in freezer between runs. It takes longer, but it works for us.
Victor @ Taste of Artisan says
Good point. I've never experienced this myself so no clue, but it makes sense. Thanks for pointing that out, Terry.
Andiràs says
Bom dia.
Receita, detalhada, bem explicada, cabe agora fazermos, e nós deliciarmos.
Obrigado
Andiràs
Victor @ Taste of Artisan says
Thank you, Andiras. Enjoy!
Terry Mc says
WOW! We started making this in October of '23. Since then I have made 12-15 batches of 6# to 15# each. It is my most requested sausage. Follow the directions, and you too will get the same reactions. The ONLY change I have made is in putting my food processor bowl in the freezer with the binding mixture in it between processing times. I take it down to where it is almost freezing each time. Not having the extra moisture from ice cubes REALLY helps this sausage dry and smoke without stalling.
Thank You a thousand times over. Fantastic recipe.
Victor @ Taste of Artisan says
You are very welcome, Terry. Thank you for your feedback and the kind words. Enjoy!
Bob says
the class 3 meat , recipe says 1/2 lb , should you also add cure to this meat ?
Victor @ Taste of Artisan says
Yes, you need to add cure to all of the meat.
Mary says
how many days is good to eat
Victor @ Taste of Artisan says
This sausage will keep fresh in the fridge for a couple of weeks. If you dry it as I described in the post, it will keep in the fridge longer, up to 1-2 months. For longer storage you can always vacuum seal and freeze.
wayne tomaszewski says
Made all your other Polish here, which are fantastic, and now going to go after the Krakowska. Out of curiosity, since they are three different types of lean meat to choose from, (ham, loin, butt), in which order would you place each one in making this? I seen in the comments you used butt here. Loin would be easiest to use, but how much flavor would be lost going to a whiter meat than the red of ham or butt? Plus, how would the finished sausage look with loin compared to say ham? Here in the midwest, stores run packer trimmed loins on sale, but I'm scared that the loin would look too "white" in the finished product and lack the flavor. Any input would be appreciated. And, once again, thanks for running your site and answering all of our questions here.
Victor @ Taste of Artisan says
Hi Wayne, I agree, loin meat will look light in color and, IMHO, have less flavor as it's too lean. Fat is what gives meat flavor and mouthfeel. While I think pork loin will work just fine, I do think you may notice an improvement in flavor/mouthfeel when using pork butt or ham.
rusty says
I just found your website a couple hours ago or so. I been readin through several of your sausage recipes. I'm truly gonna enjoy your articles and recipes. I am looking forward to receiving your news letter emails as well.
I'll be buildin several of the sausage recipes very soon.
Thank you. I think you are doing a very good job here. Carry on soldier. You sure got my vote.
Victor @ Taste of Artisan says
Glad to hear that. Good luck, Rusty!
Steven A. Zerr says
This is excellent sausage. It is easy to cure the meat and mix the binder. This is my third batch and I have not figured out an easy way to stuff my 4” sausage casings.
I hand fill and gravity pack and stuff down with a large round spoon handle. Then squeeze down and repack. Then tie off tight. Let dry overnight in the fridge.
Smoke and cook. Slice and repack in vacuum seal bags.
Best sandwich meat going. All homemade.
Victor @ Taste of Artisan says
Hi Steven, glad to hear it. Nothing beats a sandwich made with homemade sausage and bread. You are making your own bread, aren't you? If not, you should!!! Take a look at my bread recipes.
I have figured out the stuffing problem. I should update the post. I tenderize the chunks (cut into 1-2" pieces) using my stand mixer, then stuff using a sausage stuffer fitted with the largest stufffing tube which I believe is 1" diameter. Works like a charm. Take a look at my Andouille recipe, I described the method there.
Matthew Gander says
So finally gave this a try. Terrible fail. I put the sausage on the smoker for three hours which brought the internal temp to 105. I opted to take it off and put it in the oven at 175. To get it to 145 alone took nearly 4 hours and I've dried out the sausage significantly. I didn't want to run it past 145 (so dry already) so I'm not sure if it's safe to eat at this point (if I even wanted to). From the outside in it's quite dry and there's a dry ring on the outside of the sausage making it considerably tough. Please show me the errors of my ways! 🙂 I'd like to not give up on this tasty project.
Victor @ Taste of Artisan says
Hey Matt, finishing sausages in the oven is usually the last resort for me. The last time I used this method was when I was testing making the original commercial recipe for the famous Doctor's Sausage. It worked quite OK though. The trick that I used was to add a pan with hot water underneath the sausage. I'd put it right on the bottom, provided your oven is bottom-heating, that way it will continue steaming. I think I baked it at 185F and it took 2 hours to finish the 55mm diameter sausages and 2 hours and 40 minutes for the large ( 105mm?) natural casing sausages. I had to add boiling water every 30 minutes.
A lot of Polish recipes, this Krakowska recipe including, do not mention humidity in their ovens but I think it's a huge factor. The same goes for smokers. There is no way you can finish a typical 28mm-32mm sausage in the smoker in 20 minutes as they recommend in their commercial recipes. It would take me hours when I tried. One time I tried adding steam and was able to finish in about 60 minutes. But it's more hassle than I care for, so I always poach thicker smoked sausages. To preserve smokines and color, I vac seal them or put them in Ziploc bags. But even if you do it straight in the water, it's will retain a lot of color and smokiness. The benefit of don't it this way is softer skin.
I wouldn't consume your sausage as is, though if it's dried well enough it should be OK, but never mind that... poach it at 176F for 30 minutes, get the internal temp to 154-158F, chill, refrigerate, then slice and enjoy. Poach without any bags, it will soften up the skin. I think it will be quite good. That's what I'd do. Don't give up, I am sure you will do much better next time. It takes some practice is all.
J Basinski says
Victor, this recipe is awesome. I made 2 chubs last year for Christmas for my dad and he said, "this is awesome. Guess I don't need to go buy it anymore."
So, long story short I think it's now my go to Christmas gift for him.
I poached it last year, but I was curious - is there any need to wrap the chubs before poaching? Since they are synthetic, fibrous casings I don't think it would matter either way, but figured I'd check.
Thanks for the awesome recipe/details/step-by-step Victor!!!
Victor @ Taste of Artisan says
You are very welcome, J. Happy to hear it. If you liked Krakowska, you must try the Lisiecka kielbasa. You will love it. I do.
As far as poaching, well, you don't need to wrap or anything. I've made it both ways, and I baked it in the oven, it tasted great each time but there were subtle differences. I'd say you go with what works best for you and fits your preferred workflow. Happy smoking!
Tyson says
Do you have a plan of your smokehouse that you built.
Victor @ Taste of Artisan says
I have a post on this. Check it out.
Darin Dalida says
Huge fan of krakowska. It was a staple for my family and my wife's family for Christmas and Easter...and Kramarczuk's in Minneapolis was the place to get it. It has long been a dream of mine to make some...and after making summer sausage (from this site/Stanley M.) I had the confidence to give it a go.
The end product was ugly (lost of craters due to my own errors) - but man! If the taste and texture wasn't bang on. I used loin and a bit of picnic roast. I also used a jar funnel. I think where I went wrong is the "mix until gluey" part. I don't think I did it sufficiently...so the chunks held their form more than they should. (Again, my fault!)
Great recipe. Totally nailed the style...which I was very familiar with. I will absolutely make this again!
Victor @ Taste of Artisan says
LOL... made at home with love can't be ugly, it's all beauty. It takes some practice. Hey, if you like Krakowska, you have to try Kielbasa Lisiecka. It's so worth making!
Charlie Foley Sr says
I make my own hams from pork loin, but have been looking for a recipe for cut in chunks ham. This looks like it will fill the bill very well. My wife is Polish so she will definitely be on board to test this our
Victor @ Taste of Artisan says
You won't be unhappy with this one. It's really good. I'd also recommend Lisiecka kielbasa, it's similar and very good.
Luís Osmar says
Fiz está receita e gostei muito, ficou excelente.
Valeu a pena ter tentado, a minha ficou bem parecida com a foto postada.
Muito obrigado por compartilhar a receita.
Victor @ Taste of Artisan says
Luis, I am glad you liked the recipe and the sausage came out like in the picture. I love hearing that. Enjoy!
Henry says
We made this last year and have just finished stuffing this year's batch. Great recipe! We also did your Milano salami last year, and absolutely love your Baguette recipe, it is a weekly staple in our house. thank you for your wonderful recipes.
Victor @ Taste of Artisan says
You are very welcome, Henry. Enjoy!
Bob says
Definitely making this over the next couple of weeks! Have you gotten any feedback about using a sous vide process for Step 8 (after the original smoke) to bring the internal temp to 154-158?
Victor @ Taste of Artisan says
Bob, that's pretty easy - poach/sous vide at 161-167F (72-75C) for 55-75 minutes until you reach the internal temp 154-158F (68-70C).
Stasia says
Can you add/ mix the emulsified fat & spices to the cut up pork and refrigerate for another 24 hour to meld the flavours more?
Going to try your recipe.
Stasia
Victor @ Taste of Artisan says
I don't see any problem with that. It's a good idea.
Ігор says
Клас!
Bill Milewski says
Is there a reason you decided to not add beef to the recipe? Since you are basing it on the original found in the Polish Sausages book?
Victor @ Taste of Artisan says
Krakowska Krajana does not have beef in it. Krakowska trwala and ordinary Krakowska do indeed include beef, albeit quite little, about 5-10%.
John Baldridge says
Just finished my second 10# batch. Used apple and hickory mix to smoke. Stayed under 1701F until 151 interior temp. A great sausage. Thank you for your recipes and directions. Looking forward to doing more of your recipes1
Victor @ Taste of Artisan says
Glad to hear that, John. Happy smoking!
Zara Qadermazi says
[email protected]
Hi I'm from kurdistan I want making my own cold it ,sausage,kielbasa,, healthy and delicious please help thanks very much
Victor @ Taste of Artisan says
Hi Zara, what specifically would you like to know? How can I help?
John Baldridge says
Just made this wonderful kielbasa recipe, it is great, easy to make and even better to eat. Ready to start on other of your fine recipes. Thank you for your site.
Victor @ Taste of Artisan says
Hi John, glad to hear that you liked the recipe. This sausage is outstanding. I like its leanness. Lisiecka kielbasa on my site is very similar and is outstanding. Kabanos is very good too, my kids love it more than any other sausage. I make it thin, in sheep or 21mm collagen casings or in regular 28-32mm hog casings. All the sausage recipes here are my favorite ones. Enjoy!
Steve Denvir says
Hey Victor, when you talk about drying this sausage, I assume you mean from a raw state, as opposed to drying after it’s been smoked and cooked.
I’ve got 4 going it to the new smoker tomorrow and was wondering.
Btw, have you run up against a charcoal shortage? Can’t find any around here. I have just enough for the smoke tomorrow, and that’s it.
Steve
Victor @ Taste of Artisan says
Hey Steve, sorry for the delay with my response, been very busy lately. Drying can take place before and after smoking. Before smoking, you want to dry out the surface to ensure proper smoking. You don't want to smoke wet/sweaty sausage. After the sausage has been smoked and brought to the right internal temp, you can further dry it for a week or so. Take a look at my kabanos recipe, I have some pictures of dried kabanos sausage there.
I ran out of charcoal a week ago, stopped by a local BBQ store and got three bags of Kamado Joe charcoal. Large stores were indeed wiped out.
Gene says
I made this recipe yesterday
I followed the directions to the letter
Yet when I cut into it after it was refrigerated over night, I had large pockets of water and the emulsified filler meat and water separated
delicious just not pleasing to the eye...it does taste like it's missing something, doesn't have that Polish zing to it
any idea why this happened
Victor @ Taste of Artisan says
Hi Gene, large pockets filled with water makes me think that the meat was not mixed well enough, not stuffed tightly enough, or cooked at too high a temperature... any or a combination of those. I don't know how much sausage making experience you have but it may take a few tries to get sausage right, like with anything else. As far as the zing goes, there are hundreds of Polish recipes, you may like some and not so much others. That's been my experience. What is sold as Polish kielbasa in America is often adapted to local tastes and may not be very close to authentic Polish kielbasa, many foods are adjusted as a matter of fact. I try different recipes, then make a list of what I like and make those on a regular basis. If you didn't like this, try Lisiecka on my website, Kabanos, Swojska... garlic... those are very good sausages, you may like those.
GERALD KRAWCZYK SR says
Your recipe has nutrition information but does not indicate serving size. What is the correct portion size for the data shown?
Victor @ Taste of Artisan says
About 80 grams.
Matthew Gander says
Hey Victor,
Thinking of giving this a go but I still have the same problem smoking at low temps. Would I be able to get away with 175 degrees? How would I have to change the recipe if it's even possible?
Thanks a lot,
Matt
Victor @ Taste of Artisan says
Hey Matt, this is a very lean sausage so cooking at 175F may dry it out a litte. 175F isn't too bad though. Adding fat is an option but it will change the character. I wouldn't change the composition and try smoking at 175F with heavy smoke for 1.5, 2 hours tops, then poach. Should work, but test with a small batch first.
Jimmy says
this sure sounds good, now how about the plans for the smokehouse.
Victor @ Taste of Artisan says
I posted many details here:
https://eggheadforum.com/discussion/1221799/my-smokehouse-laid-a-green-egg
Steve Denvir says
I forgot to ask, what do you use for the lean pork? Loin?
And I have serious smokehouse envy.
Steve
Victor @ Taste of Artisan says
What you see on the pictures is all pork butt but it's a pain in the butt (ha-ha) to harvest lean pieces from. Ham/leg is the best/easiest for Krakowska I find. Loin will work too but it's the leanest of all cuts and more expensive.
That smokehouse took me well over a year to finish and to get to work, on and off of course, lot's of frustration and 3 major re-designs until I got it to work right. But now I am in heaven. Love the results I am getting out of it immensely. Haven't done any cold smoking in it but it's imminent - cold smoked salmon, my wife's favorite food.
Steve Denvir says
So I probably want to up the percentage of fattier pork.
S
Victor @ Taste of Artisan says
I wouldn't if I wanted to stay true to the original recipe. I would smoke at no higher than 130F to minimize water loss. Otherwise, slightly increasing fat % is not a bad idea.
Steve Denvir says
Victor, you’re a bad person 🙂
Now I’ve got another version of kielbasa I have to make. And I’m just getting my “cheese cave” into shape after a 3 day course in Cheesemaking in Vermont last weekend.
It’s a good thing I’m somewhat retired 🙂
Steve
Victor @ Taste of Artisan says
😉 Cheese making course? That sounds like something I would love to do too. Hope now you can make buffalo milk mozzarella with ease. Do share tips and tricks you learned.
Sara says
Thanks for this recipe. But I have some problems. What is the meaning of " sign?
You wrote: Cut the meat into 2" pieces and also wrote: 1/8" (3mm). Please guide me about this sign.
Victor @ Taste of Artisan says
Inches. 2" means two inches (5 centimetres).