There is no secret recipe for the best home-cured bacon. It's all about the meat. Go buy the best, the freshest pork belly, sprinkle some salt and seasonings on it, vacuum seal and refrigerate. Two-three weeks later, you will have the best bacon you've ever had.
Bacon curing methods
There are three methods of curing bacon: pumping, dry curing, and immersion curing.
Commercial bacon producers use pumping as it's the cheapest and the fastest method. Bacon is injected with a curing liquid and is rested for 6 to 24 hours before being heated and/or smoked. The injected liquid also adds weight to bacon, but it impacts the texture and taste.
Immersion curing is very similar to pumping, except bacon is left to cure in liquid for 2-3 days, then hung to dry. This method is much slower than pumping, so rarely anyone uses it nowadays.
Dry curing is the method where salt, Cure #1, and spices are applied to pork belly pieces. The meat is then left to cure. This method, while the most time-consuming, produces the tastiest bacon which has a deeper, more robust flavor profile. This is the best method for curing bacon at home.
Basic dry curing mix
The biggest challenge that I experienced when attempting my first cured bacon was deciding on the amount of salt to use. You want enough salt for bacon to cure properly and be safe to eat. But you also don't want it to be overly salty. After trying a dozen of recipes from trusted sources I settled on Hector Kent's formula from his Dry-Curing Pork: Make Your Own Salami, Pancetta, Coppa, Prosciutto, and More book. It uses 2.5% salt, which is a very reasonable amount. On top, it adds 2% maple syrup which adds the sweetness that makes the bacon taste even less salty. Overall, I found these proportions very good for my taste, except that I bumped the maple syrup to 2.5%. I think many will find the combination of salt and maple syrup very tasty. Actually, after some additional testing, I found that doubling the amount of maple syrup makes even tastier bacon.
By weighing out salt as a percentage of pork belly's weight, unlike by covering bacon with salt and sugar liberally as some recipes recommend, you will ensure that you will never over-salt your bacon and that you won't have to rinse off the curing mix at the end of curing.
Rinsing bacon at the end of curing is bad for two reasons: you will be re-introducing water back whereas you should be getting rid of it, and whatever seasonings you add to the curing mix will all wash away. If there are too many seasonings for your taste, simply scrape some off with a knife but no washing.
Additional Seasonings
While salt alone is enough to cure bacon, you can add sugar or other sweeteners like maple syrup to balance out the harshness of the salt. You may also add black pepper, powdered garlic, onion, cayenne pepper, or red pepper flakes. Some recipes I've seen add bay leaf, thyme, crushed juniper berries, black pepper, nutmeg, and other spices. The variations here are limitless.
Use of nitrites to cure bacon
Given how much conflicting and incorrect information is floating out there on the Internet about the use of nitrites and nitrates, I had to do some thorough research on this topic.
As was mentioned above, nitrates (Cure #2) are not allowed for curing bacon. Nitrates are suitable for curing meats and sausages over long periods of time, many weeks or months. They include salami, pancetta, soppressata, speck, guanciale, etc.
Nitrites (Cure #1) are permitted but the amount of added sodium nitrite cannot exceed 200 parts per million (ppm). What does it mean, really? It means that you may add 1.45 grams or 0.05 ounces of Cure #1 per pound of pork belly (source: Home Production of Quality Meats and Sausages). That's about 1/3 teaspoon.
Do you need to use nitrite to cure bacon?
No, if you intend on keeping the bacon below 40F and cook it at above 200F. This includes pan-frying, baking, smoking at, say, 225F, etc.
Yes, if you plan on keeping it in a temperature range between 40F and 140F (also know as 'danger zone') for longer than 3 hours. For example, if you plan to cold smoke (below 80F) or low heat (130F-140F) smoke the bacon.
That said, Cure #1 also improves bacon's color and flavor. Fried bacon that was cured with salt only, will have a greyish color, while the one cured with Cure #1 will have the reddish color that we are very familiar with. Personally, I always use Cure #1.
The meat
The fresher the meat, the better the bacon will be. Leaner bacon is always better in my book but harder to find. Asian stores seem to always have leaner, meatier pork belly slabs at great prices.
If possible, use pasture-raised heritage pork. Heritage pork has richer color and better flavor than bacon made with commodity pork.
Making bacon from Berkshire pork was an eye-opener for me. The most apparent difference was in the texture. It's not as stringy as store-bought bacon and is less chewy. Bacon made with Berkshire pork had a kind of brittle texture that practically began to disintegrate and melt away as soon as you put it in your mouth.
Uncooked fat was pure white, dry and firm, as opposed to soft, slightly mushy, and wet on the store-bought one.
There was more fat in heritage pork than I would have liked, but the cooked fatty part was tasty. Very tasty. I baked the bacon and served with eggs and sourdough biscuits. It was outstanding.

I purchased the pork belly from Murray’s Farm, a local farm that raises happy heritage piggies. You may want to check out pig farms in your area, it's amazing what kind of goodies you can find there. It's worth it!
I am anxious to taste the guanciale and pancetta that I made from the same pig.
Bacon dry-curing process
Bacon curing process itself is extremely easy as well. There is no need to control temperature or humidity, so no need for a dedicated dry curing chamber. Simply use a regular fridge, as long as it has enough space.
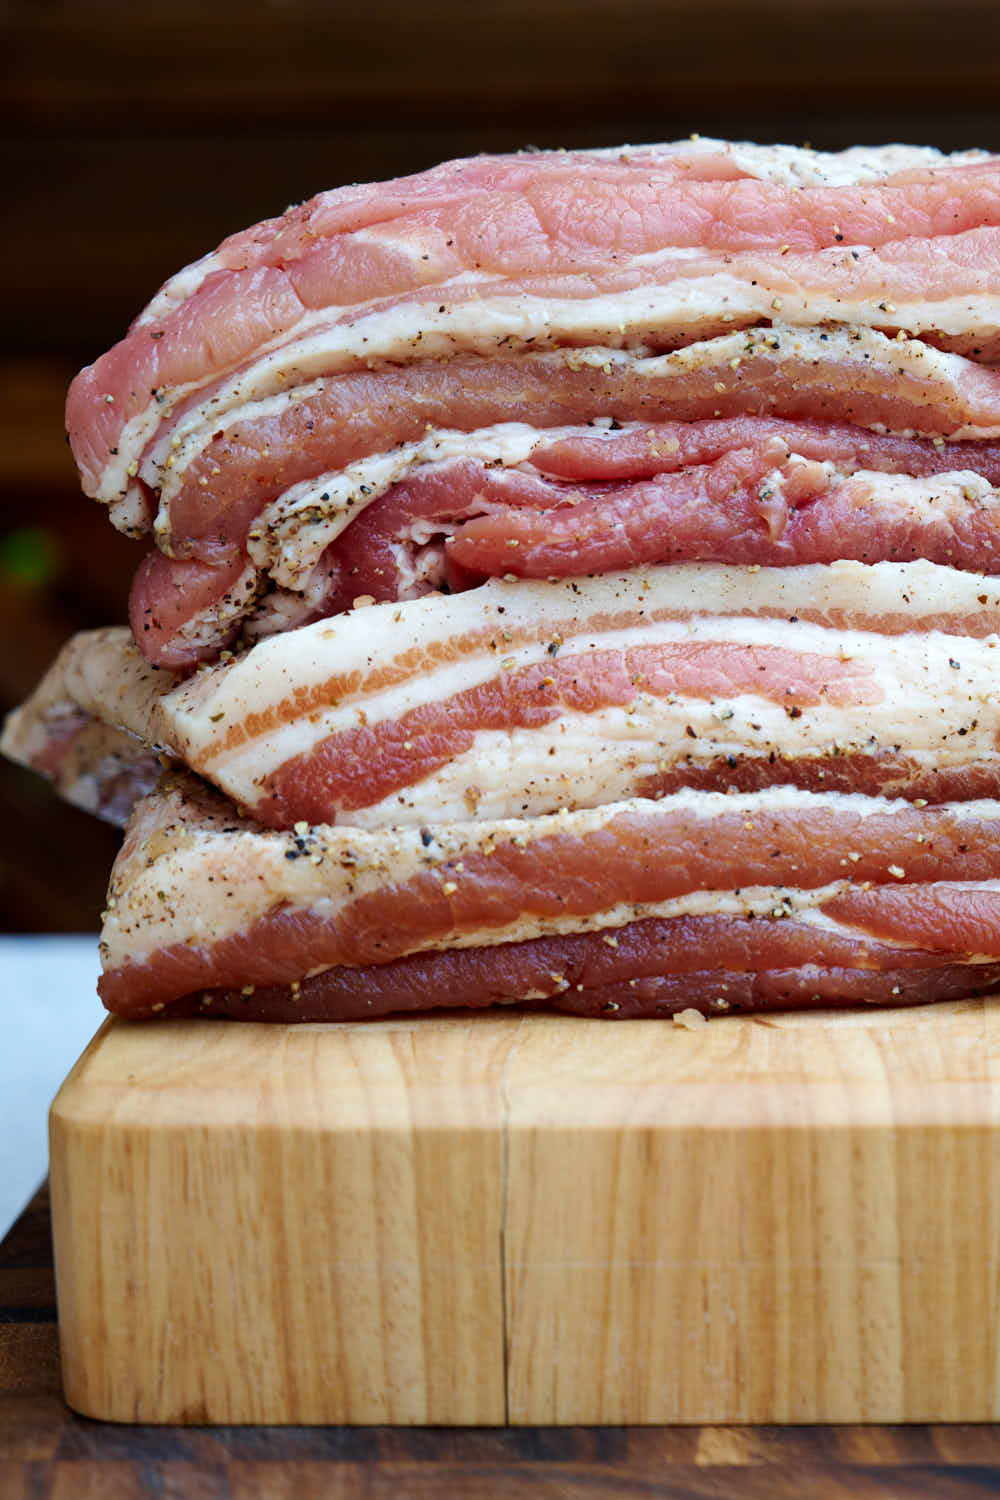
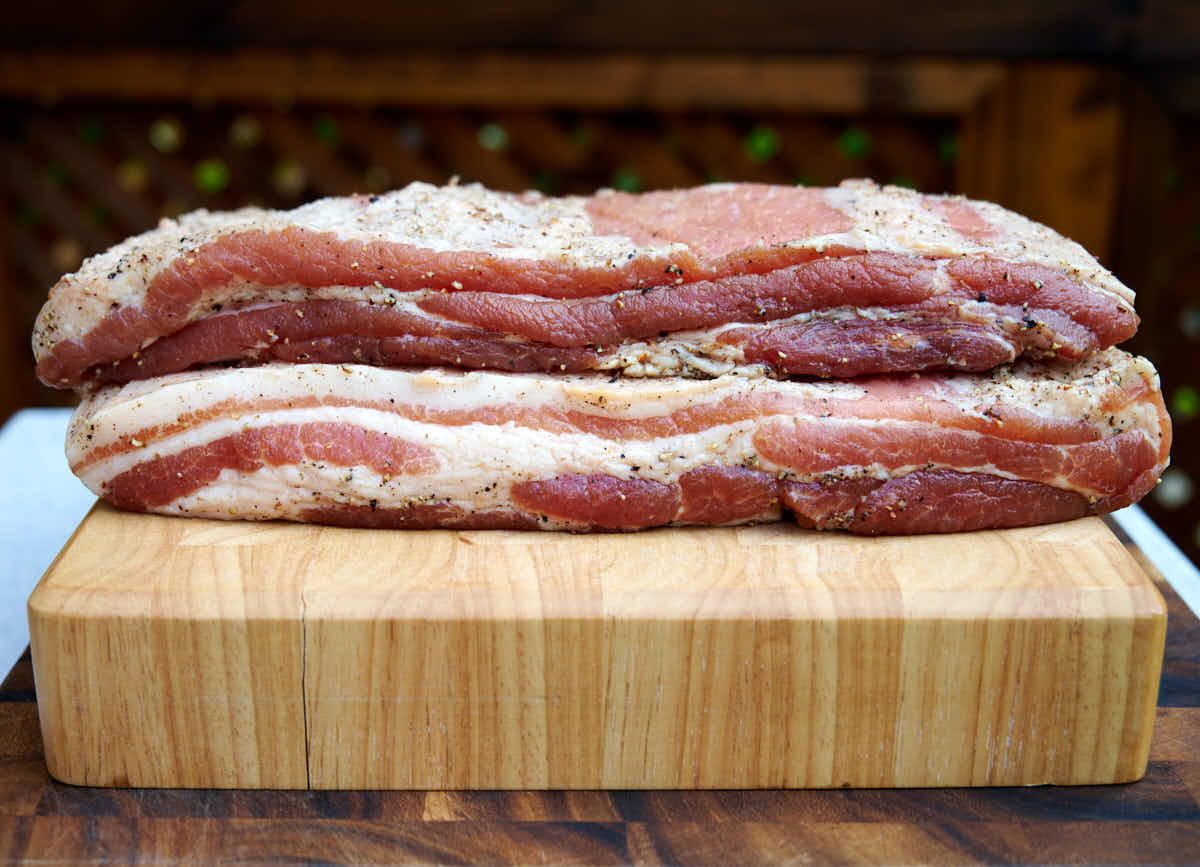
- Start with cutting a pork belly into manageable pieces. I cut mine into 8" x 8" squares and/or 8-inch long rectangles. This way I get the standard length bacon slices. Feel free to make them longer or shorter, to satisfy your needs and preferences.
- Apply the dry cure mix evenly on all sides of each pork belly piece. I like to measure out the amount of rub per piece to make sure each one gets the right amount of salt and other ingredients.
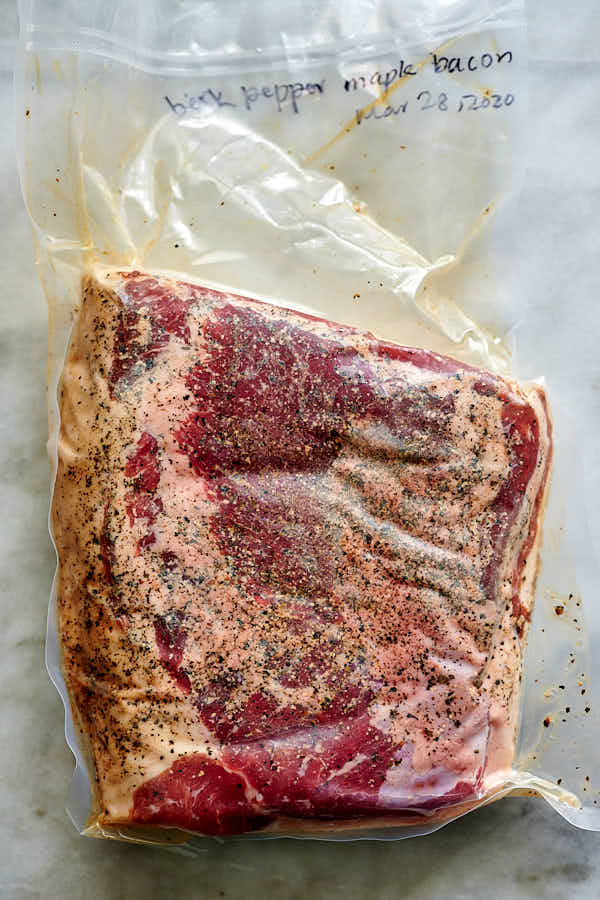
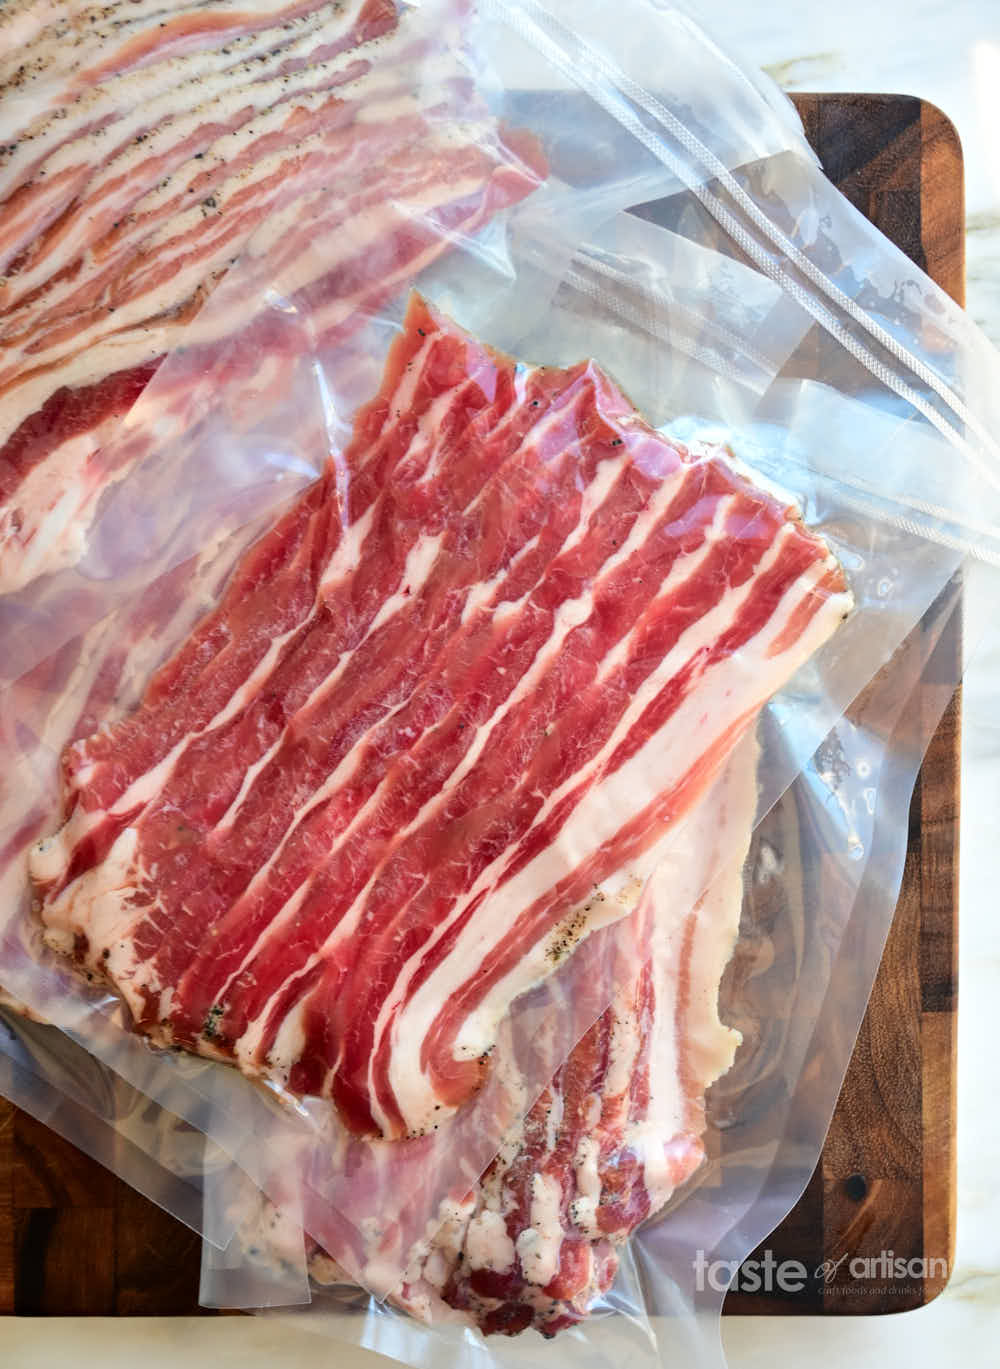
- Place the belly pieces in individual Ziploc bags and refrigerate them for at the very least 7 days and up to 14 days for regular thickness pieces and up to 21 days for thicker (3" or more) bacon pieces, flipping occasionally. I personally like curing bacon a little longer to make sure that every piece of meat is cured properly. You can't really 'over-cure' bacon but keep in mind that a very long (over 3 weeks) curing time will result in slightly saltier bacon and eventually the meat will begin to spoil.
- If you have access to a vacuum sealer, go ahead and use it instead. I find that vacuum-sealed pork belly cures more evenly, and flipping becomes less critical.
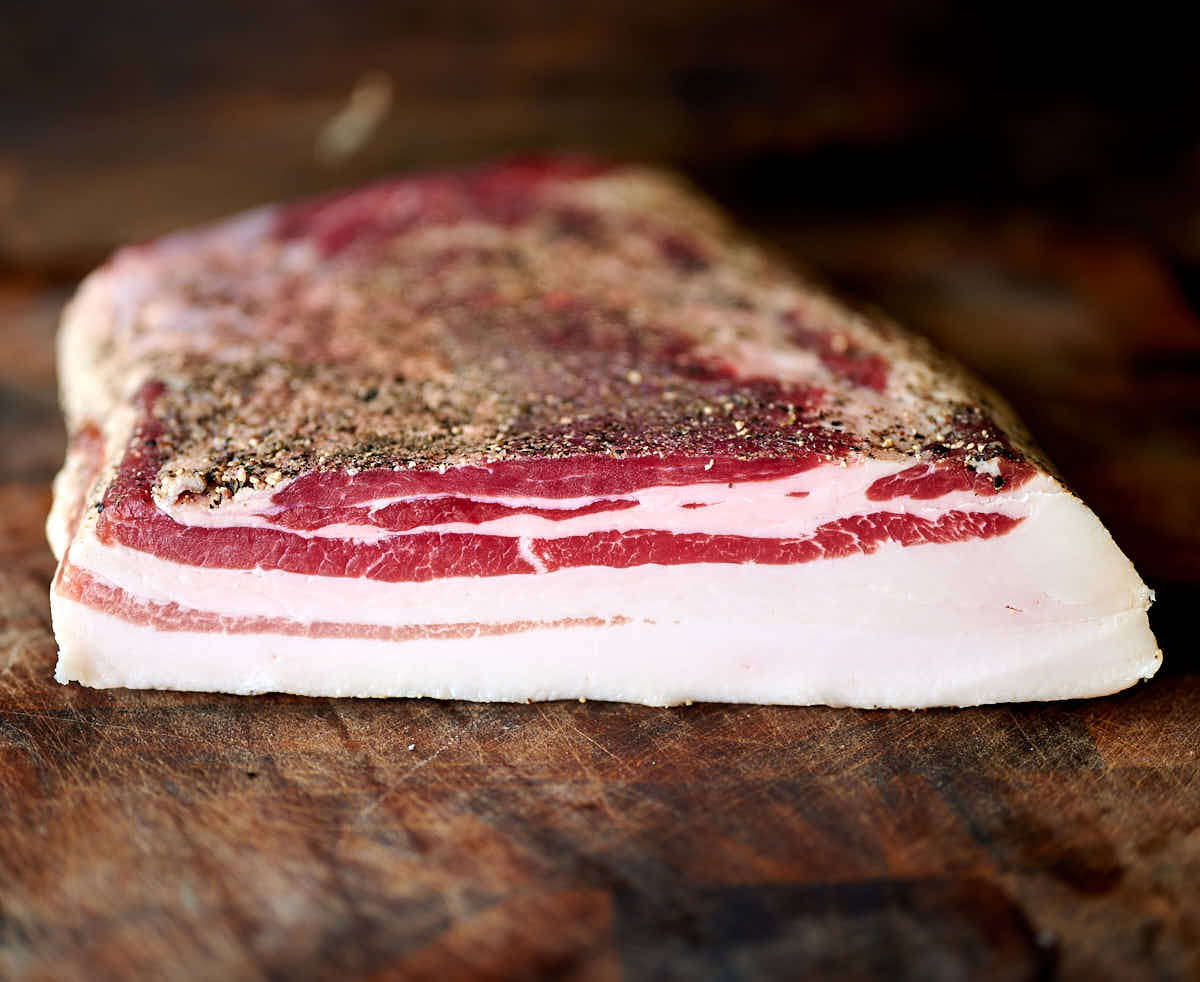
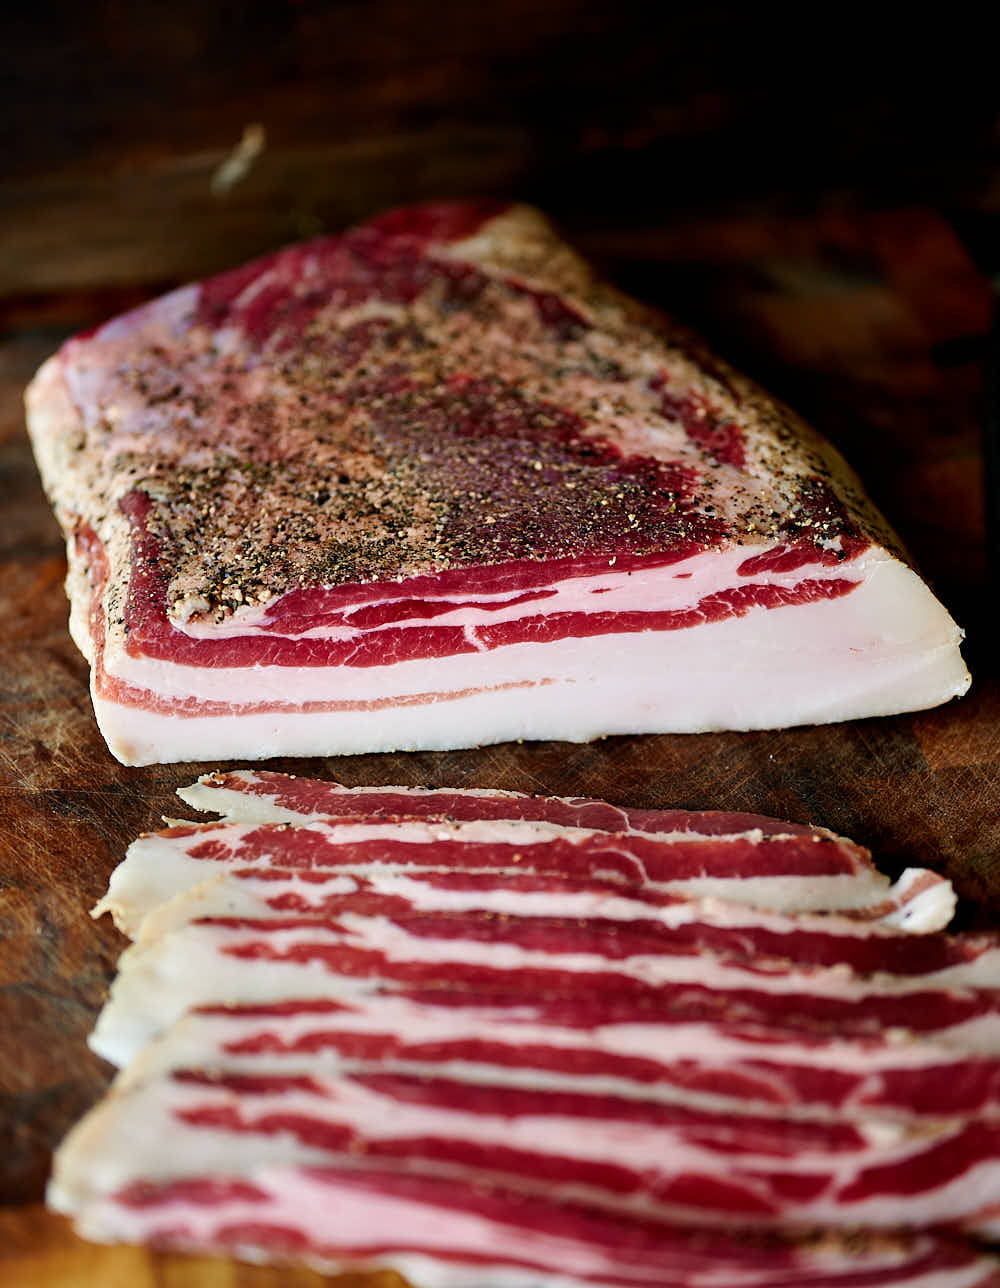
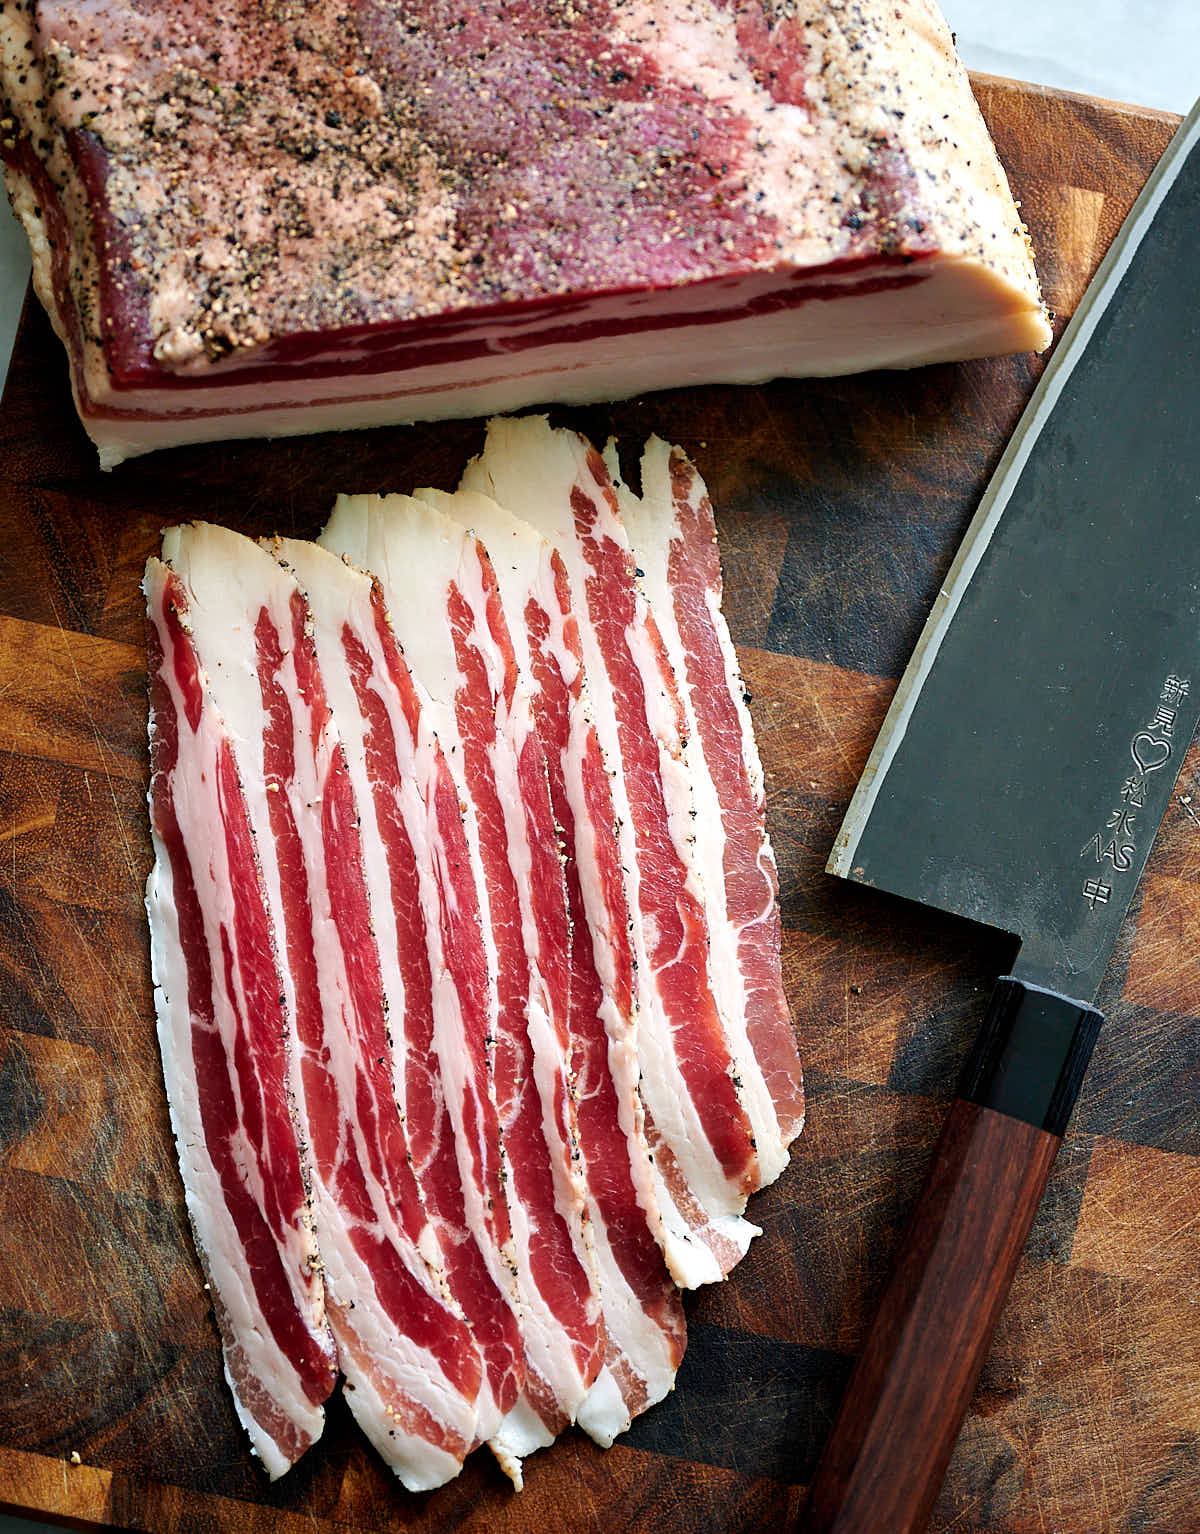
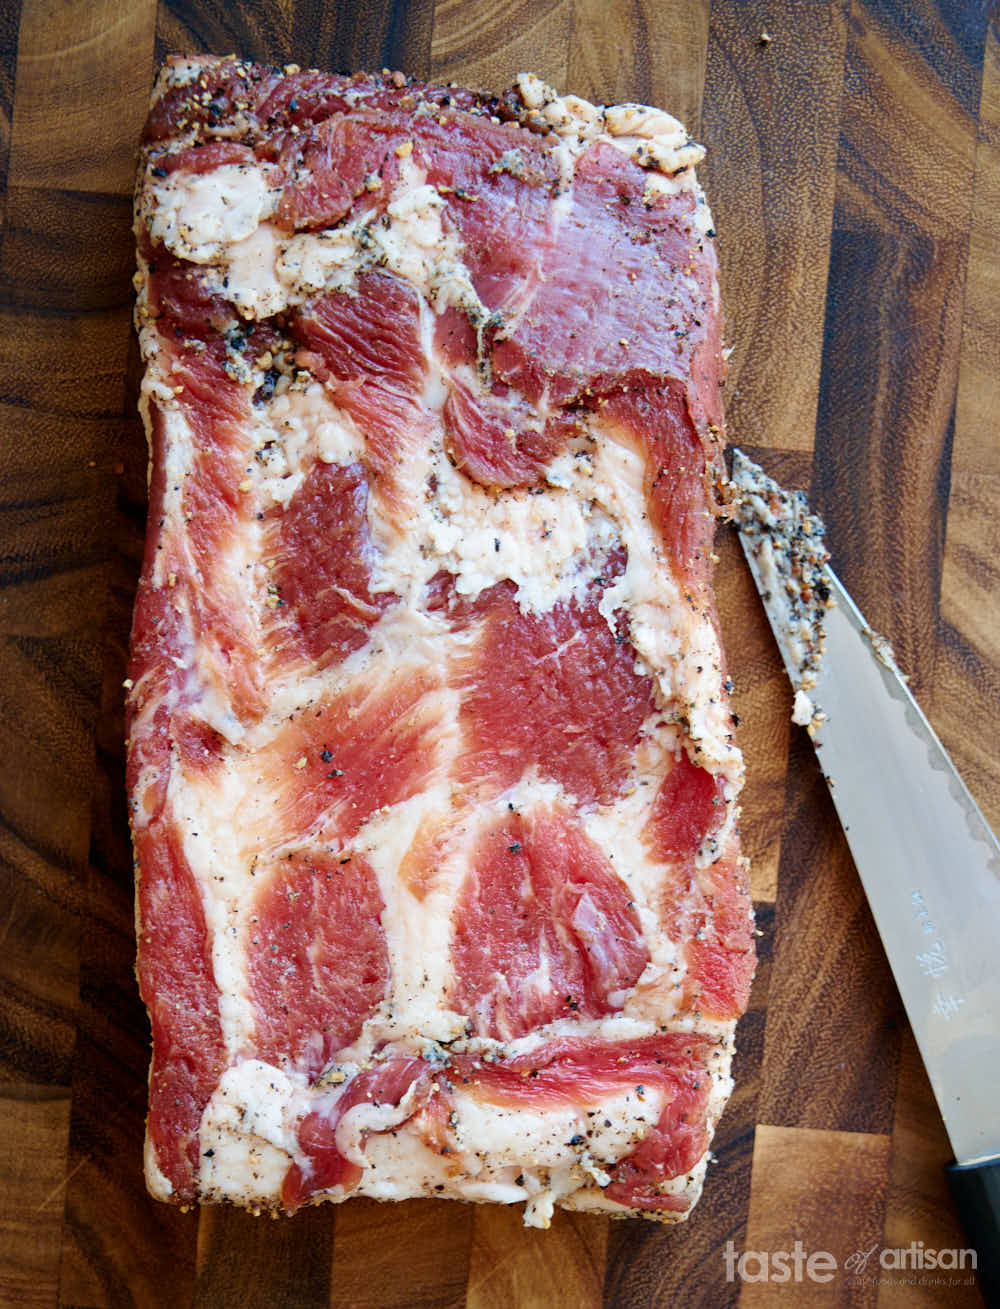
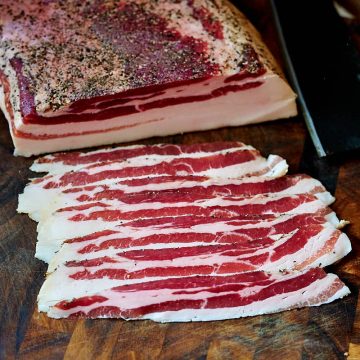
- After 14-21 days the bacon is fully cured. I never rinse bacon after curing but I like to pat bacon slabs dry with paper towels and remove some excess seasonings with the back of a knife.
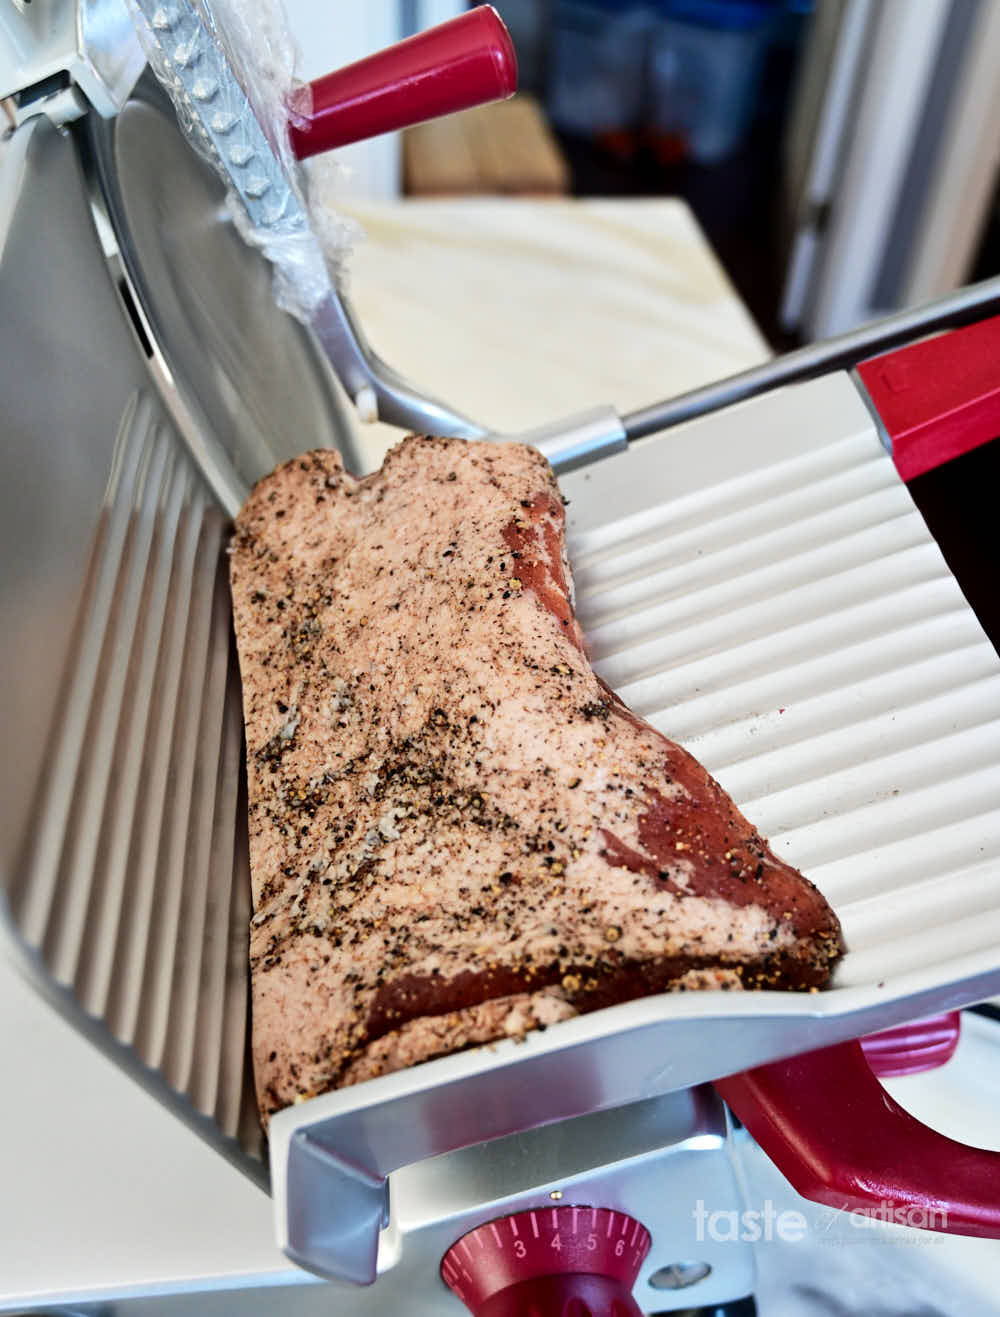
- Next, slice the bacon, cook, and enjoy. Keep in mind, that you need to try and slice the bacon equally thin. Otherwise, some slices will cook faster than the others. I highly recommend using a meat slicer for this task.
- You may also hang cured bacon to dry for a week or so, at temperatures below 40F (if not using Cure #1) or at 55F or below if using Cure #1. This will result in a richer taste and longer shelf life.
Storing home-cured bacon
Plain salt-cured bacon will keep well in a fridge for a week or so. If you used Cure #1, the shelf life will be much longer - several weeks. Even longer if dried for a week or two and vacuum-sealed right away.
However, if you don't plan on using the bacon soon, vacuum seal it, sliced or whole pieces, and freeze for up to 6 months and even longer. When ready to use, defrost in a fridge (overnight) or ice water (1-2 hours).
Cooking home-cured bacon
There are many, many ways to cook bacon but by far the best, the easiest and least messy way for me is to cook bacon in the oven.
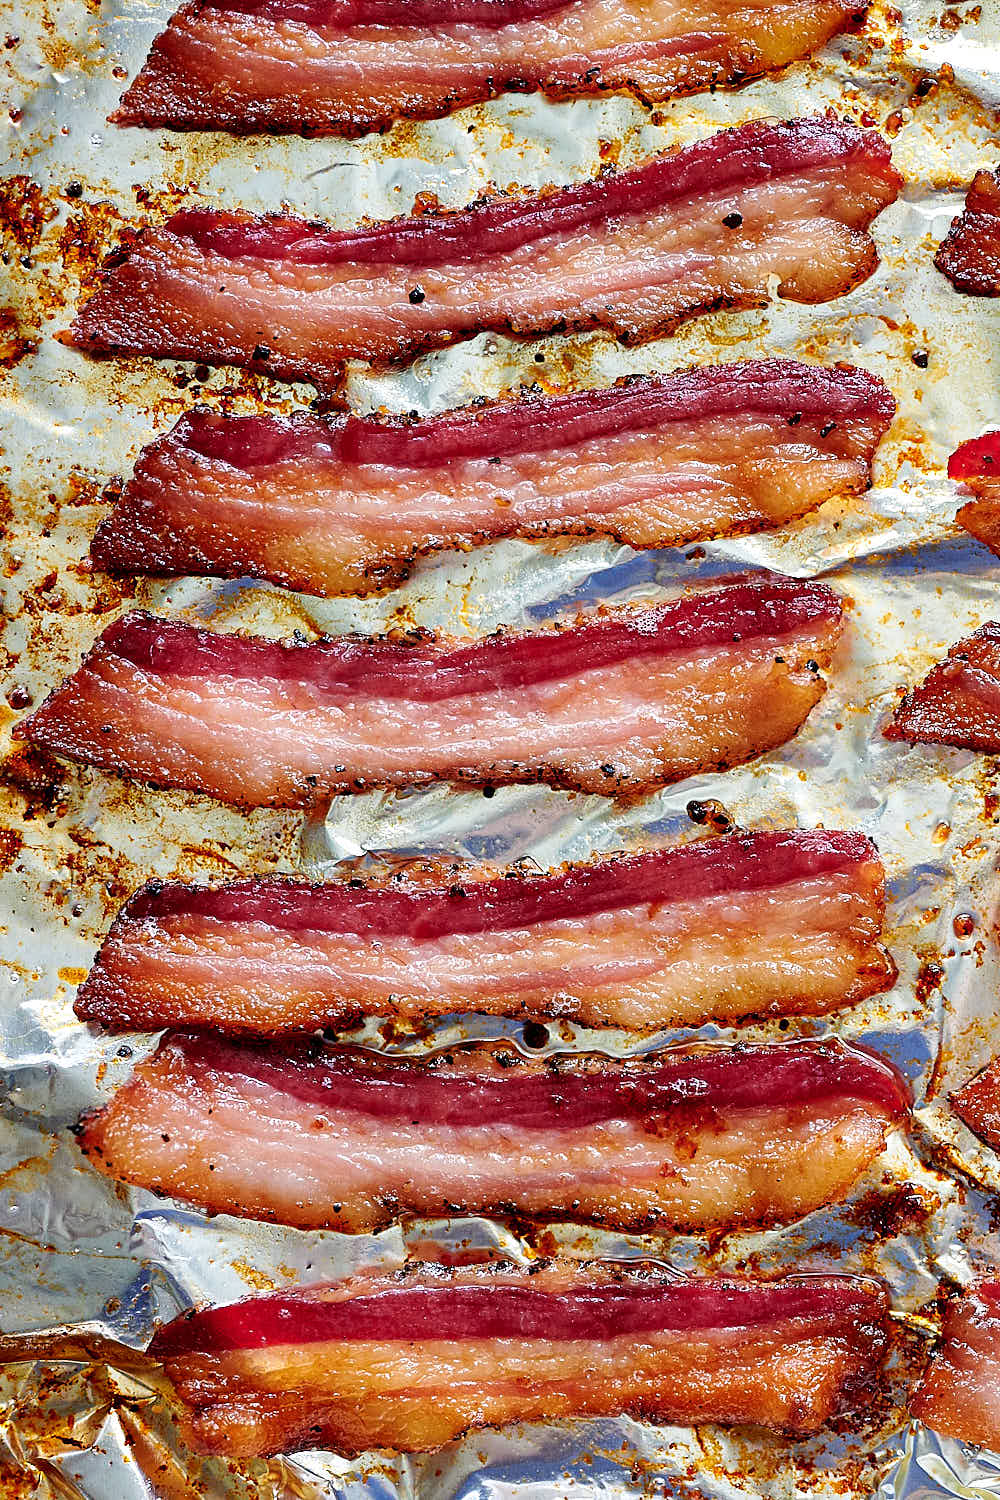
Once I've learned about this method that's the only way I cook bacon unless I cook it as part of another dish, like for example when making pan-fried Southern pork chops or Texas chili.
Ingredients
- 1000 g pork belly 2.2 lbs; skinless
- 22.5 g kosher salt 1 1/4 Tbsp
- 2.5 g Cure #1 1/2 tsp (see notes)
- 10 g black pepper coarsely ground; about 4.5 teaspoons
- 25 g maple syrup 1 Tbsp; see notes.
Instructions
- Weigh the pork belly in grams. Divide by 1000, then multiply each ingredient by that number. For example, if your belly weighs 2650 g, you need to multiply the ingredients specified above by 2.65.
- Rub the belly with maple syrup.
- Combine the salt, Cure #1, and black pepper in a small bowl.
- Apply the dry cure mix evenly on all sides of the pork belly.
- Place the pork into a Ziploc bag, or vacuum-seal, and refrigerate for at least 7 days and up to 14 days for regular thickness pieces (less than 3") and up to 21 days for thicker bacon pieces (3" or thicker), flipping occasionally.
- Remove from the bag, pat dry with paper towels, scrape off excess seasonings with the back of a knife if you desire, slice, cook and enjoy.
- You may also hang the bacon to dry for a week or so, at temperatures below 40F if not using Cure #1 or at 55F or below if using Cure #1. This will improve shelf life and intensify flavor.
- If you used Cure #1 to cure the bacon, you can smoke it at low temperatures (below 200F) to obtain smoky flavor.
Notes

Pa_bon says
Could any syrup be substituted for maple? Cane syrup is very common where I live and it is what we like. Any foreseen issues with such a substitution? Thanks.
Victor @ Taste of Artisan says
Other than not getting that maple flavor, I don't see any issues. Good luck!
Scott says
I have used your recipe as my standard for quite a while. The metric measurements make it very easy to figure out for whatever size pork belly you have. Once cured, I smoke my bacon at right around 200° with pecan wood and my own seasoning blend. The comments I get on this bacon are awesome. My family prefers to eat my bacon over the store-bought any day. Thank you.
Victor @ Taste of Artisan says
You are welcome, Scott. Glad you like my recipe and make your own bacon. We stopped buying bacon years ago as homemade is so superior to store-bought. No comparison. If you haven't yet, try making buckboard bacon, my family loves it.
Michael Clare says
I'm thinking to use a leaner cut of pork such as pork loin to make something more like what I think you call Canadian bacon in the US (I'm in the UK). Is there any reason why this recipe couldn't be adapted to that?
Victor @ Taste of Artisan says
Michael, this recipe will work just fine. I use it or very similar to it in process/spices to make dry-cured smoked pork loin as well as pork butt/pork neck (buckboard bacon). Good luck!
Maia says
This looks like the perfect recipe for me to try.
Quick question: would using unsweetened homemade applesauce instead of maple syrup be a possibility? We have so many jars of applesauce from last years harvest to use up so I wondered if it might make apple-y bacon... thanks for your time
Victor @ Taste of Artisan says
Hi Maia, I've never used or heard of anyone using applesauce for curing bacon, but I don't see any problem with doing that. The only caveat is that you would need to adjust the salt to account of the extra liquid in the applesauce.
Sheldon says
Excellent recipe, just as the other ones from your blog I've tried. Keep this going please, great job!
Victor @ Taste of Artisan says
Glad to hear it. Will do!
Steve Flake says
Hi, I like the idea about going to the metric system and also weighing all the ingredients to get a more exact amount for each product. For example, if my pork belly is 9 pounds 10 ounces, I convert this all to grams. I use these numbers when adding the salt, Prague #1, sweetness such as syrup, honey, white or brown sugar and black pepper. Salt is 2.5 grams by wt., Prague#1 is .25 grams by wt., sweetener is 2.5 grams by wt.. The pepper is a flexible number to your liking. My question is, I have read that 1% to 3% is a safe range for salt by weight. Can you give me your input.
Victor @ Taste of Artisan says
I would appreciate it if you could share your source(s) that state 1% - 3% salt is safe. I did an extensive research on this and found only Hector Kent recommending 2.5%, while others 3-4%. I normally go with S. Marianski's recommendations, which most of the time echo USDA's guidelines, but even 3% was too salty for my taste. I don't think you can as low as 1%, that's not sufficient to cure bacon unless you introduce another safety hurdle. Like, you can go as low as 1.8% for fast fermented salami, where low pH(acidity) will be that safety hurdle. Anyway, I would like to learn more about this.
Brian in NM says
Lot's of great information in this article.
While I have dabbled a bit over the last year or so on basic smoking technique and recipes I am looking at expanding into curing and smoking. My first foray will be a pork butt using an immersion cure with the equilibrium method followed with several hours on low smoke. My question pertains to the use of Prague #2 vs #1. Is #2 suitable for use in this instance? I have read that #2 is required since the meat will be in the danger zone during the smoking period. And what might the time delay be before first tasting? I understand that it takes several weeks for the nitrates to convert to nitrites and then to nitrous oxide. Thanks in advance for any advice and insights.
Brian
Victor @ Taste of Artisan says
Brian, immersion or dry, use Cure #1 for bacon. Cure #2 is suitable for making cured meats and sausages that take over 4 weeks to cure. Hope this helps.
Kim Sutton says
I have heard about curing meat in ashes does anyone know anything about this process . thanks
Victor @ Taste of Artisan says
Interesting. Never heard of it.
Ted says
Nice and don’t have to smoke it
Victor @ Taste of Artisan says
Glad you liked it, Ted. I agree, this one has so much flavor that you don't even miss smoke. I smoke it every now and again whne I have other things to smoke, but other than that I don't. I think the meat makes the biggest difference.
Mike Sayman says
Good day! I just want to give you a huge thumbs up for your great bacon recipe and the accompanying information you have here on this post. My first time making it and it turned out fantastic.
Victor @ Taste of Artisan says
Glad to hear it. Enjoy!
Lee Cook says
If I cure the slabs in a vacuum seal
Bag, then can I just put that bag directly into the freezer? I’m my mind it kinda seems silly to remove the slab from a sealed bag just to put into another sealed bag? Maybe I’m missing something …
Victor @ Taste of Artisan says
Lee, the meat will release liquid during curing; it's a good idea to remove it, along with all the extra salt. I've had some slabs sitting in the cure for months in the fridge, I forgot about them; they were okay but saltier than I Liked. If you put them in the freezer right away, the curing process will slow down, maybe even stop, so that may not be an issue. Still, I like to remove all that liquid, scrape off the excess seasonings, pat dry and reseal; it gives me a better-looking final product, less messy with all that liquid out of the way. I also now slice most if not all of my bacon before freezing as that makes it much simpler to use after defrosting.
Jeanette says
My first slab of bacon turned out great! We did not smoke it in anyway, just slice and cook. Yours is so far, the only site/recipe that says cure, slice, and enjoy!
I have a couple questions at your convenience.
1. Would adding fresh, sliced Jalapeños to the cure change the basic method of 21 day cured bacon in anyway?
2. What about the possibility of adding all or part of a Root Beer to the 21 day curing process? Worth trying Or a bad idea?
Thanks for your time!
Victor @ Taste of Artisan says
Lol, I think you missed that part, it says in my post and in the recipe "Simply slice, cook, and enjoy". 'Cook' is bolded!!! All bacon must be cooked unless it's cooked to at least 154F - 158F internal temp, like kielbasa.
Adding jalapenos should not impact curing per se, but I have no experience with adding fresh veggies to my cured products. Fresh veggies and herbs tend to spoil/rot quickly so I am always cautious about adding those. I prefer dry ones.
Adding root beer is not a bad idea but now we are talking about wet-curing and the ratios/curing time will need to be adjusted.
Jeanette says
LOL! Well of course we cooked it! Who wants raw, floppy bacon? 🤪
Thanks for the input on Jalapeños and root beer!
Victor @ Taste of Artisan says
Lol... though you know, eating raw salt-cured bacon is very common in Ukriane and Russia, maybe even other Eastern European countries. My grandpa used to make it, it's called 'salo' and I've eaten it quite a few times. The texture is different from bacon, it's firm and saltier. They slice it thinly and make sandwiches with rye bread. A long time ago it was a peasant's meal but the tradition carried on. It was and still is in some places a frequent accompaniment to vodka over there.
Rebecca says
You are making me rethink my wet cure. This would be a lot less space in the fridge. The pig gets sent off on the 28th. Few questions.
I do not have a meat slicer so I was thinking of getting the butcher to slice all the pork belly for me. Then I would assemble the slices in 3 inch bundles with string and cure that. How do you think the sliced belly would do versus whole? Any changes you think should be made? Could it still be cured as long?
Cures take out liquid, so wouldn't liquid start accumulating in the bag? Is that why it needs to be flipped?
My vacuum sealer does a tight suction (would flatten a loaf of bread) and a soft suction (wouldn't). Which should I use for this?
Victor @ Taste of Artisan says
I prefer dry-curing by far and have had great success with it. We actually got half a pig two weeks ago, here's all my bacon from it - https://tasteofartisan.com/wp-content/uploads/2022/01/Cured-Bacon-in-Fridge.jpg. Very easy to manage and, you are correct, takes much less space.
If you slice it before curing - have never done this before or heard of anyone do it but why not? - that will not change the salt/seasoning measurements. Sliced bacon will probably cure faster... 14 days should be enough... Perhaps even 10. Seven days should be the minimum. I like to make sure that all parts are cured well so I do smaller solid pieces for 14 days and larger solid pieces 21 days. Can sliced bacon be cured this long, can any bacon cure for too long? Here is what I think - I've had some solid pieces stay in the fridge vacuum sealed for 2 months before I sliced and froze them, not an issue. They did get a little saltier than usual though. I don't think you can 'overcure' bacon and it won't get way too salty if you measure out the salt/cure like in this recipe. But, of course, you don't want to keep it in the fridge for too long as it will eventually begin to spoil.
I use a chamber vacuum sealer and seal pretty tightly but with slices, I'd be inclined to say go with a softer suction otherwise it may deform the meat. Hard to say without testing and seeing for yourself. You can always try a small amount and see how it looks and decide then. Good luck!
Eric says
I was curing buckboard bacon and have 2 5-7lb pork shoulders bone removed curing. I got extremely ill after around 1.5 weeks or rotating from once side to the other every other day. Well, I forgot them in my garage refrigerator and now they have been in there nearly 3 weeks. I used #1 and kosher salt, sugar, brown sugar with black pepper, garlic powder and a few other spices and was a little worried I was a little light(barely as all was coated, just not heavy) on the Kosher salt and brown sugar. Do you think if I remove from plastic bags and no odor emits and I give a thorough rinse and hang dry for 2 days that they should still be good to smoke or have I wasted to good roasts?
Victor @ Taste of Artisan says
Eric, if it smells good, no slime, then it's a good sign. If you went light on salt/cure, it may not be enough for proper protection for long smoking time... hard to say without knowing the precise measurements. I would smoke at 200F or higher to be on the safe side, that will guarantee that it's safe to eat. If you want smoke at a lower temp (below 200F), I'd keep the smoking time below 3 hours. Chill quickly and refrigerate/freeze. I'd make sure fry those bacon slices before eating, which would kill any potential harmful bacteria and, just in case, any botulinum toxin that may be present gets destroyed when meat is held at 185F for 5 minutes or longer a I believe it gets instantly destroyed at temps close to 200F.
Aidan says
Excuse me but is all Prague powder cure number 1.
I bought some white Prague powder at a hinting store. The hyperlink to cure number 2 takes me to a goverenment website and doesn't show me cure number 2 that I can see but I am on my cell phone and the font is Absolutley tiny. Just worrying about overusing the wrong one. I've already made bacon with judt salt rubbed on every day where it was wet and turned over each day. I have a piece left that looks like proscuito after three weeks. Would I be right in thinking I can eat thst as it is, cured. Not exactly raw but without cooking. I tried a bit and se to be alive and well. Thanks for the article!
Victor @ Taste of Artisan says
Hi, it is unsafe to eat raw bacon so I wouldn't do it again. You can eat dry-cured bacon as is but dry curing involves curing (described in this post) and later drying/maturing, like guanciale or pancetta. But eating cured bacon is not safe without cooking.
For curing bacon that will be later cooked you need to use Insta Cure #1 (Prague Powder 1). When making dry-cured bacon, you need to use Insta Cure #2 (Prague Powder 2).
Hope this helps.
Martin Shalosky says
I believe you once wrote an article on wet curing buckboard bacon. It included maple syrup and the recipe for one qt of wet solution. I have used that recipe several times with wonderful results but I can’t find that article anymore.
Victor @ Taste of Artisan says
Martin, I just emailed it to you.
Andrew says
I plan on smoking my slabs of bacon. Once they have cured for the prescribed 21 days should I allow them to air dry before smoking? I have read on other sites that it is best to air dry the slabs in order to form a pellicle before smoking. What say you?
Victor @ Taste of Artisan says
Absolutely, great idea. Put them in the fridge, uncovered, on a rack over a tray or a baking sheet and let them sit there for 12-24 hours. Don't apply smoke until the bacon has warmed up as it will sweat initially. You can also let it warm up at room temp... Good luck!
Andrew says
Have you ever used dark brown sugar in lieu of maple syrup? If so, what would be the proper amount of dark brown sugar to use?
Victor @ Taste of Artisan says
Yes, I have. It provides less sweetness so you'd need more of it than maple syrup. I'd use 1 1/4 to 1 1/2 tablespoons.
Lindsay says
A great recipe. Smoked it with hickory and cherry. Turned out great. Used it make a mean carbonara.
Thanks.
Victor @ Taste of Artisan says
You are very welcome. Enjoy! We've stopped buying bacon because of this recipe;) Seriously, store-bought doesn't taste good anymore. Smoked is even better.
Lindsay says
Great recipe for making bacon!
After 21 days I smoked it with applewood and some hickory.
Made a great carbonara with this bacon.
Would definitely use this recipe again.
Horst says
Enjoyed the recipe.
Dr. Allan says
Can it then be smoked? If so how?
Victor @ Taste of Artisan says
Hello Dr. Allan, my apologies for the tardy response. There are two ways to smoke cured bacon - hot smoking and cold smoking. Hot smoking takes about 2 hours or so at 225F - 250F until the internal temperature reaches 145F. COld smoking takes 1-14 days at temps around 52F - 71F until the desired color is achieved. The absolute highest acceptable smoking temperature is 86F. You'd want to do it in winter as you can see.
matthew says
We've really enjoyed your many recipes and the details of the processes. Last year, you had another bacon recipe that was a dry rubbed type with heavy spices and also cured for 14 days. My wife and I loved that recipe but see you've removed it from this site. Is there any way of getting that recipe again?? Thank you so much and keep up the good work!
MatthewW.
Victor @ Taste of Artisan says
Hi Matthew, here is my other/old recipe. Enjoy!
1 lb pork belly
1 1/2 tsp kosher salt (9 g)
1 tsp sugar (5 g)
1/3 tsp Cure #1 (1.45 g; optional)
2 tsp garlic powder
2 tsp onion powder
1/8 tsp cayenne pepper
Combine the salt, sugar, Cure #1 (if using), garlic powder, onion powder, and cayenne pepper in a small bowl. Apply the dry cure mix evenly on all sides of the pork belly. Place the pork into a Ziploc bag, or vacuum-seal, and refrigerate for 14 days, flipping daily.
After 14 days, remove from the bag, slice, cook and enjoy.
Matthew says
Victor,
Thank you for your prompt reply and for the recipe. We much appreciate it!
Matthew
Victor @ Taste of Artisan says
You are very welcome. Enjoy!
Vic says
Do you remove the skin from the pork belly or leave it on when curing bacon?
Victor @ Taste of Artisan says
Vic, I always cure skinless. Updated the ingredient list to specify that it's skinless pork belly.
DANIEL says
Why 21 days to cure? I cure dry for 7 days and wet for 14.
Victor @ Taste of Artisan says
I don't have any objective reason for that but I do find that bacon tastes better after a longer curing time. Besides, since I am measuring out a specific amount of salt, I want to make sure that the belly cures properly all throughout. There is no risk of oversalting with this method so I can cure longer.
DANIEL says
Thank you
Paula says
I cannot believe the difference in this method versus so many others I have used. So easy yet so good. The best part was how much less salt it required. The flavor of the pork was the star. I did smoke mine after the curing time. I can’t wait to try your other recipes.
Victor @ Taste of Artisan says
Glad to hear it, Paula. Yeah, many charcuterie recipes kill the taste with too much salt. You want to make a safe product but also you want good taste. Finding that balance can be tricky sometimes.
Jessica says
Can you use Morton tender quick instead of cure #1?
Victor @ Taste of Artisan says
Yes, you can. I've seen many recipes using it, though I haven't used it.
joe says
I used the same recipe from his book cured for 7 days and smoked to 140 taste great
Victor @ Taste of Artisan says
Can't beat smoked bacon. Or any smoked meat for that matter.
David says
Cured my bacon for 4 weeks and it's awesome! Not too salty and very flavorful. I did not add any curing salt but probably will next time as I miss the characteristic pink color.
Victor @ Taste of Artisan says
Awesome! Enjoy.