If there is one salumi recipe that I've made that I couldn't be happier with, this would be this pancetta recipe. The results are exceptional. The meat is seasoned just right, without interfering with the awesome porky flavor. The fat literally melts in your mouth. Outstanding!
There are several good ways to make pancetta; this particular recipe follows the method used in the production of Pancetta Piacentina as described in its PDO (protected designation of origin) description.
In a nutshell, pork bellies are salted, seasoned and cured for a period of not less than 10 days at 37F - 41F (3C-5C). After the curing, pork bellies are scrubbed to remove excess seasonings and salt, rolled up and tied, and refrigerated for a few hours. The next step is drying where pork bellies are dried at 59F - 77F (15C - 25C) for a period of 7 days. Finally, the last step is maturation, where pork bellies are matured at 50F - 57F (10C - 14C) and 70%-90% humidity for at least 4 months.
This method is quite different from the '55F and 75% RH' that is commonly recommended in most North American charcuterie books, but I've tried it several times with excellent results. Primarily, I am seeing more consistent and predictable results, with improved, even drying and better flavor development. This is now my preferred method for making salumi.
This is my first time making rolled pancetta. Likewise, this is the first time I am experimenting with heritage pork. This particular one is of Berkshire and Gloucestershire Old Spot mix that I purchased from Murray's Farm. In my experience, home-cured meats beat most store-bought ones any time, even when made with commodity pork, but the better meat you use the better are the results. So, I am quite excited to try out this pork.
Basic rolled pancetta making process
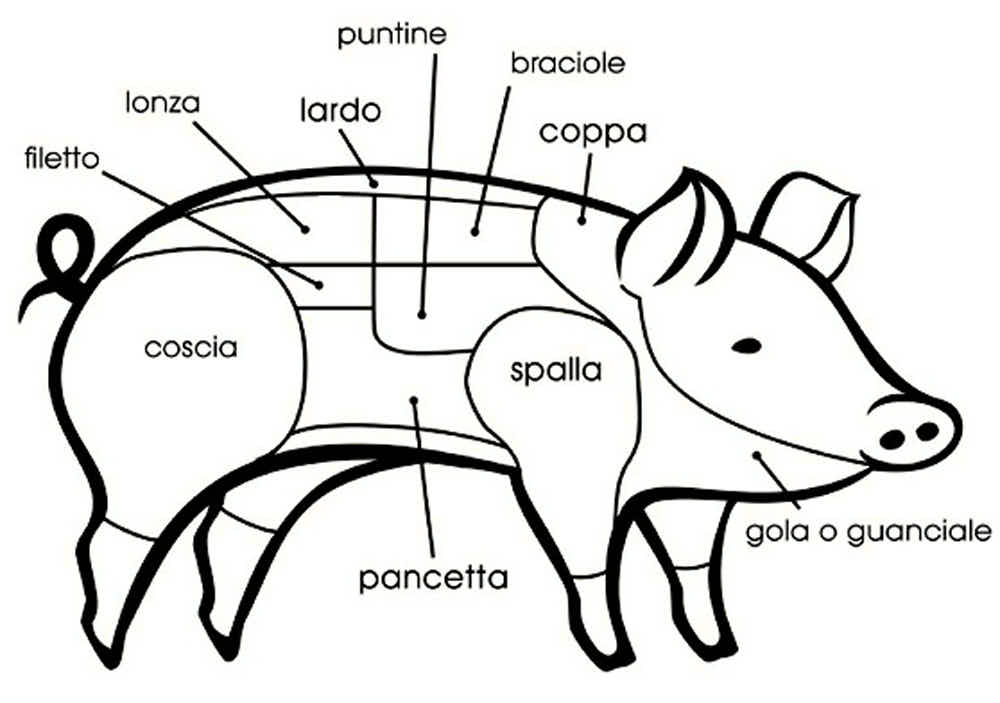
Meat selection
Pancetta is made from pork belly. Any rib bones must be removed and the skin left on.
To make great tasting pancetta, you need to start with the freshest meat you can find. If possible, use heritage pork. Heritage pork is a trend now. You can find many small farms selling meat to the public, sometimes at wholesale prices if you make a large enough order.
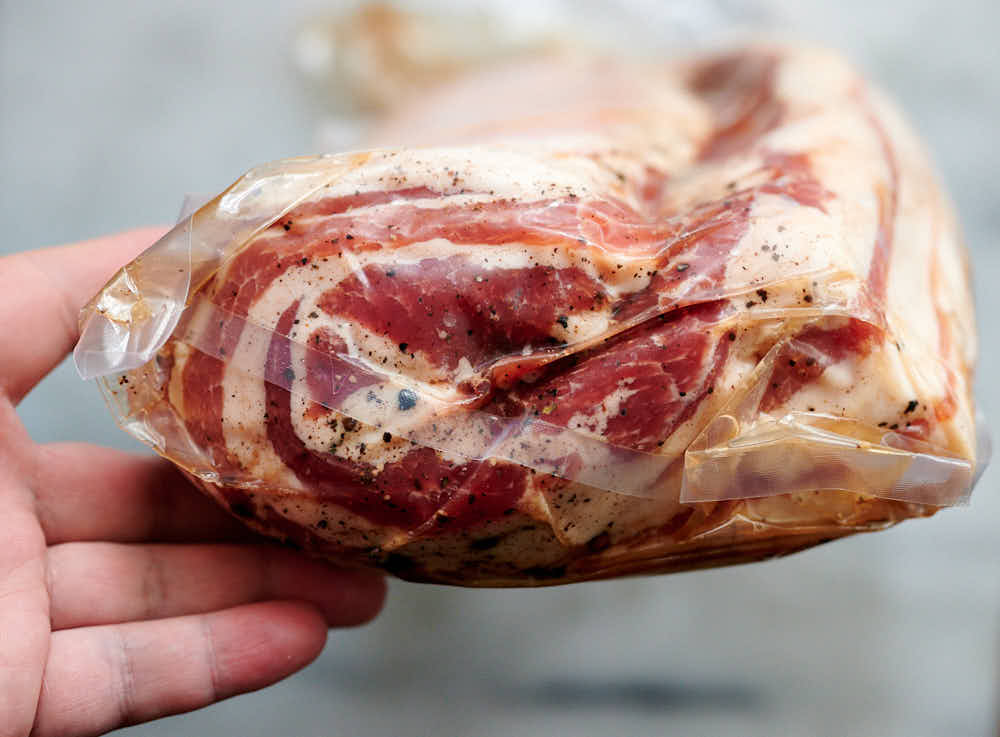
Seasoning and curing
Curing is the easiest part of the process. I applied the salt and the seasonings recommended for Piacentina Pancetta, slightly rolled a fairly large pork belly so it can fit in the largest vacuum bag I had, and sealed it. It spent 14 days in the fridge, undergoing daily flipping.
Preparing for trussing
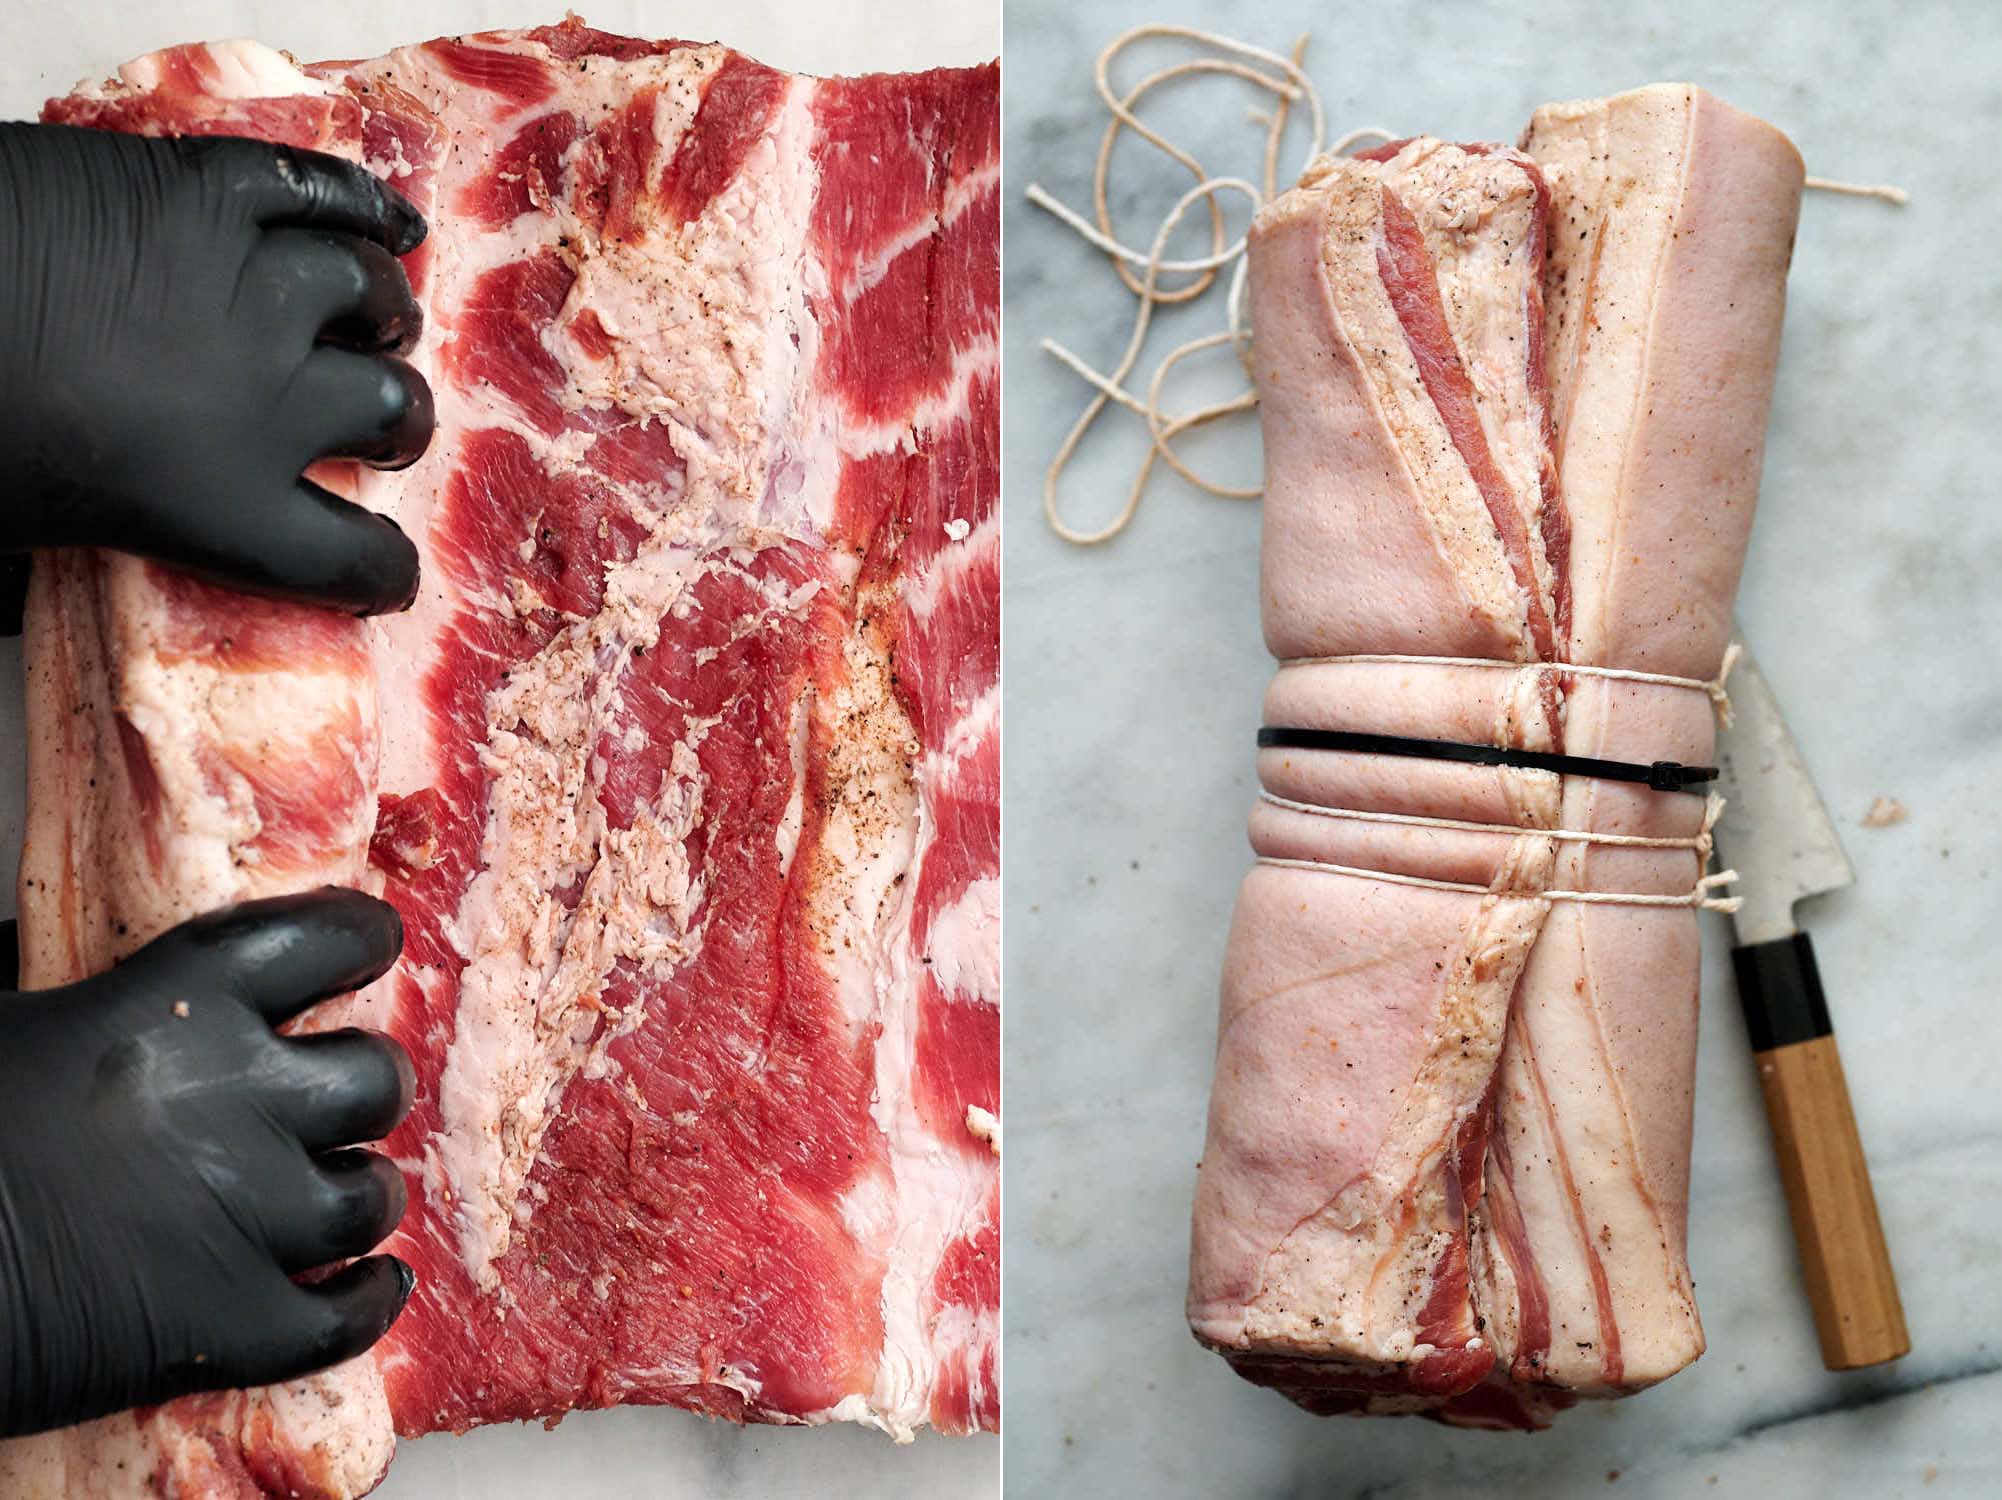
After curing, I scrubbed the surface to remove excess salt and seasonings. There is no need to wash the belly.
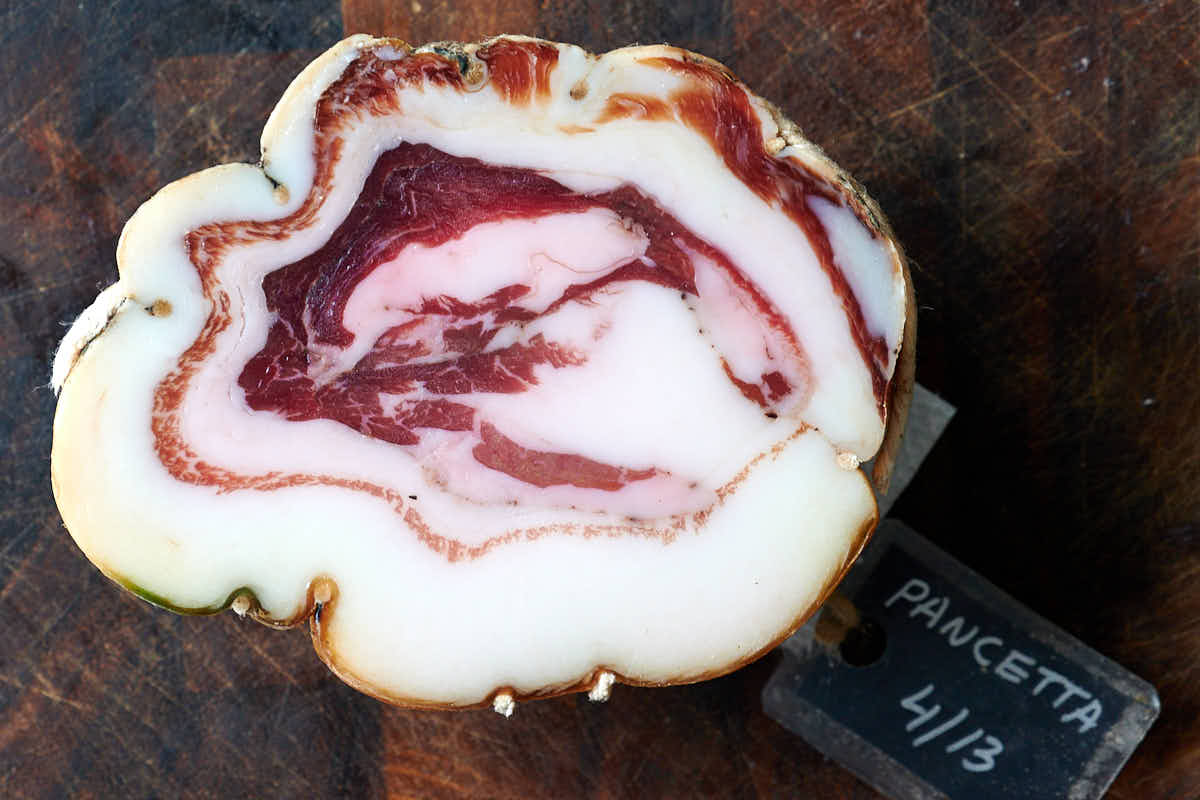
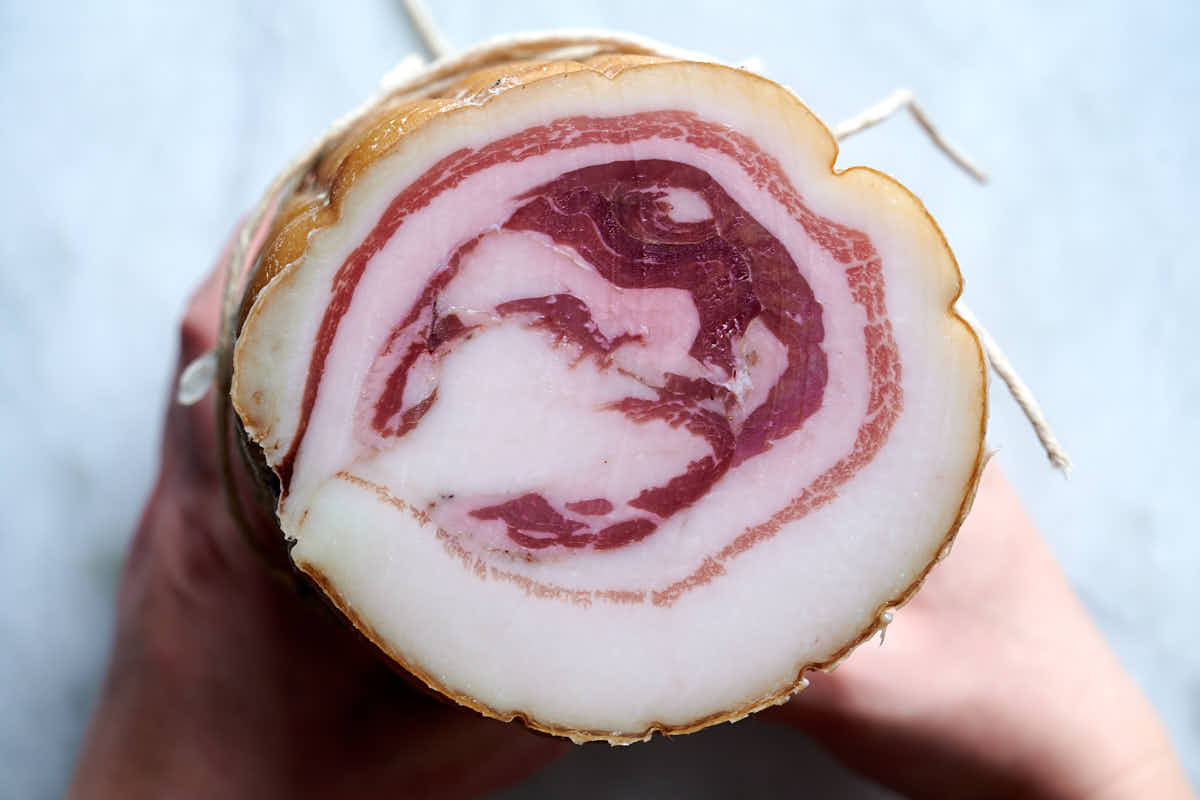
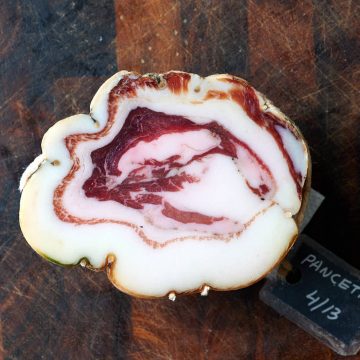
Notice the beautifully rich red color of the meat. The meat initially had a more saturated color compared to your average commodity pork and curing only made the color darker and richer.
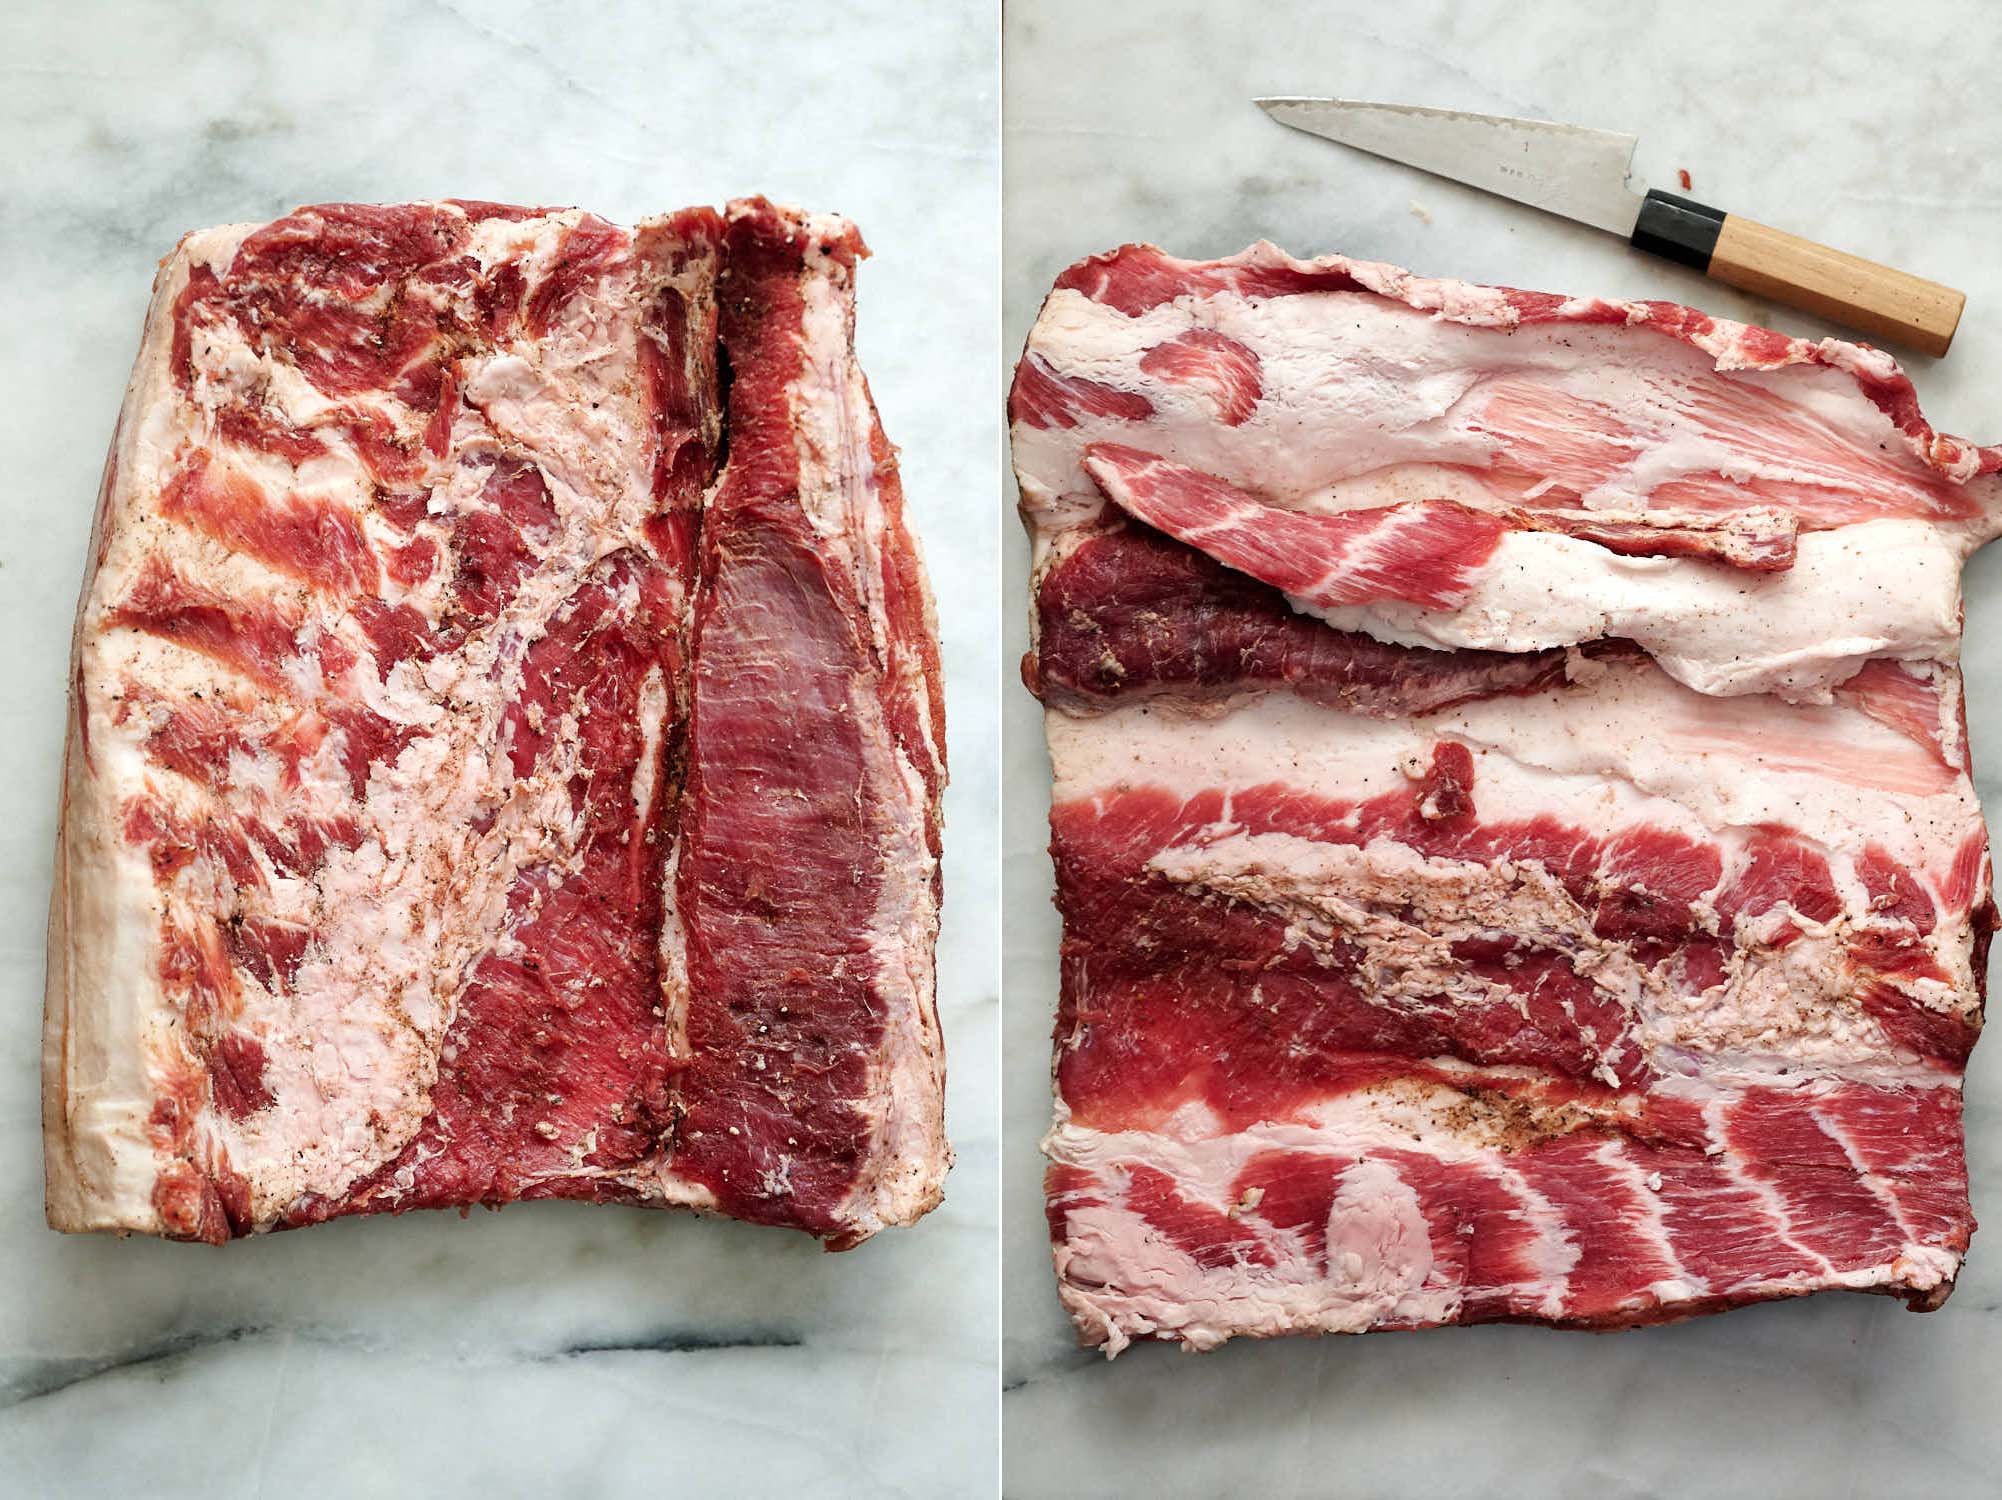
Next, I tried to roll up the belly and quickly realized that one side was too thick to bring the two sides together closely. I ended up 'butterflying' the thicker side which helped a lot.
Rolling and trussing pancetta
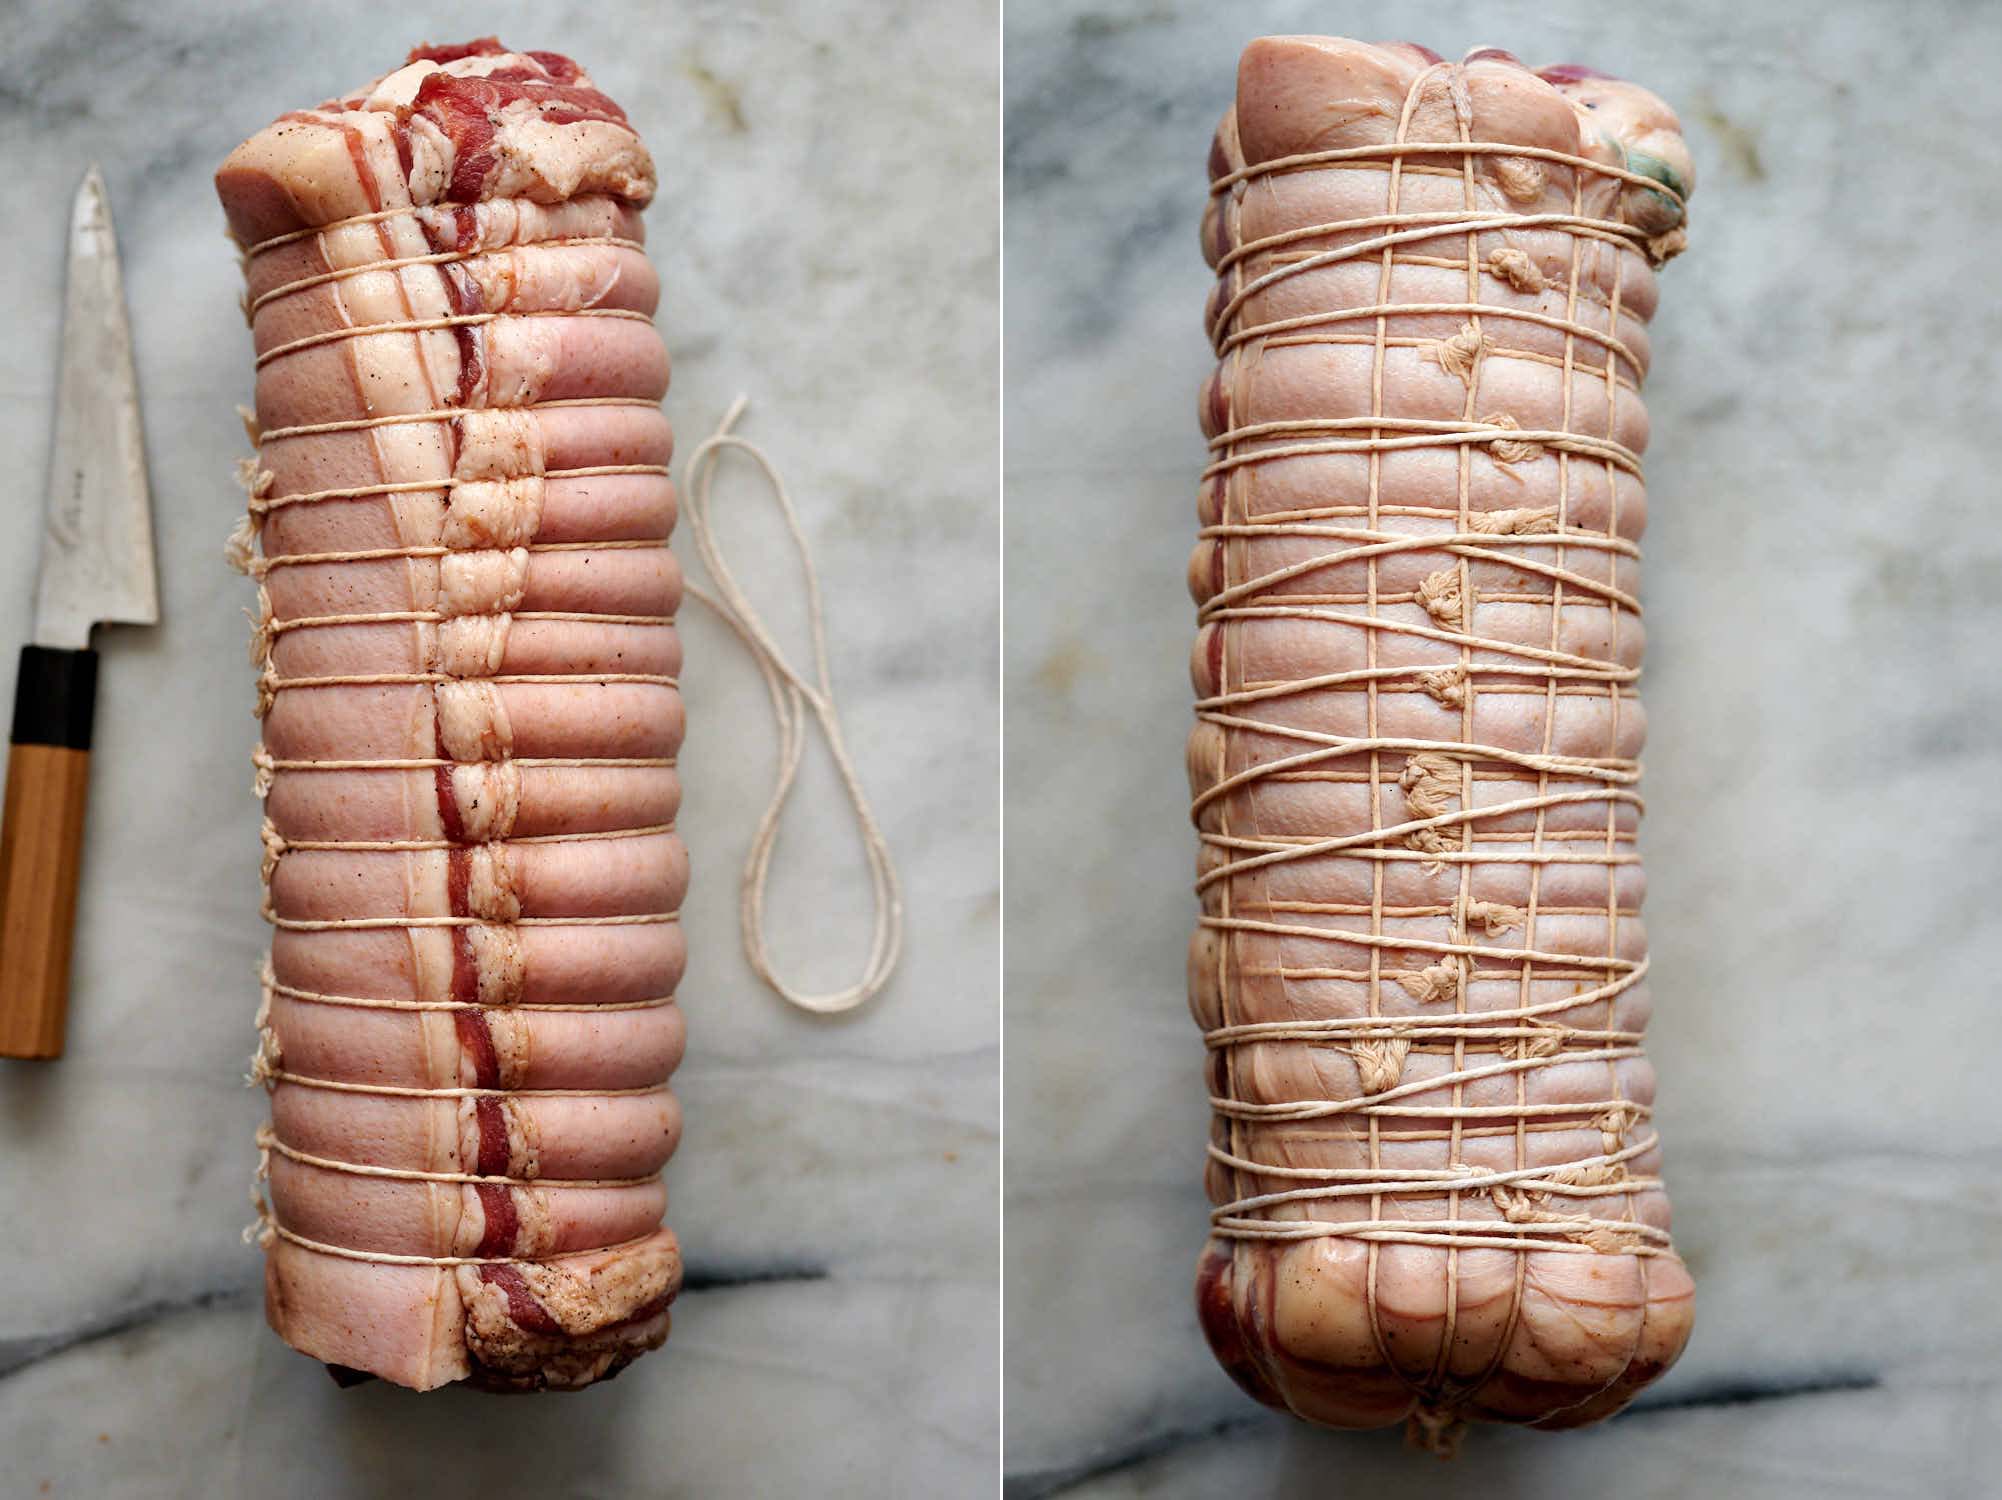
Tying turned out to be the most arduous task. I rolled up the belly and tied it with a zip tie in the middle to hold the roll together while I tied the first few butcher's knots.
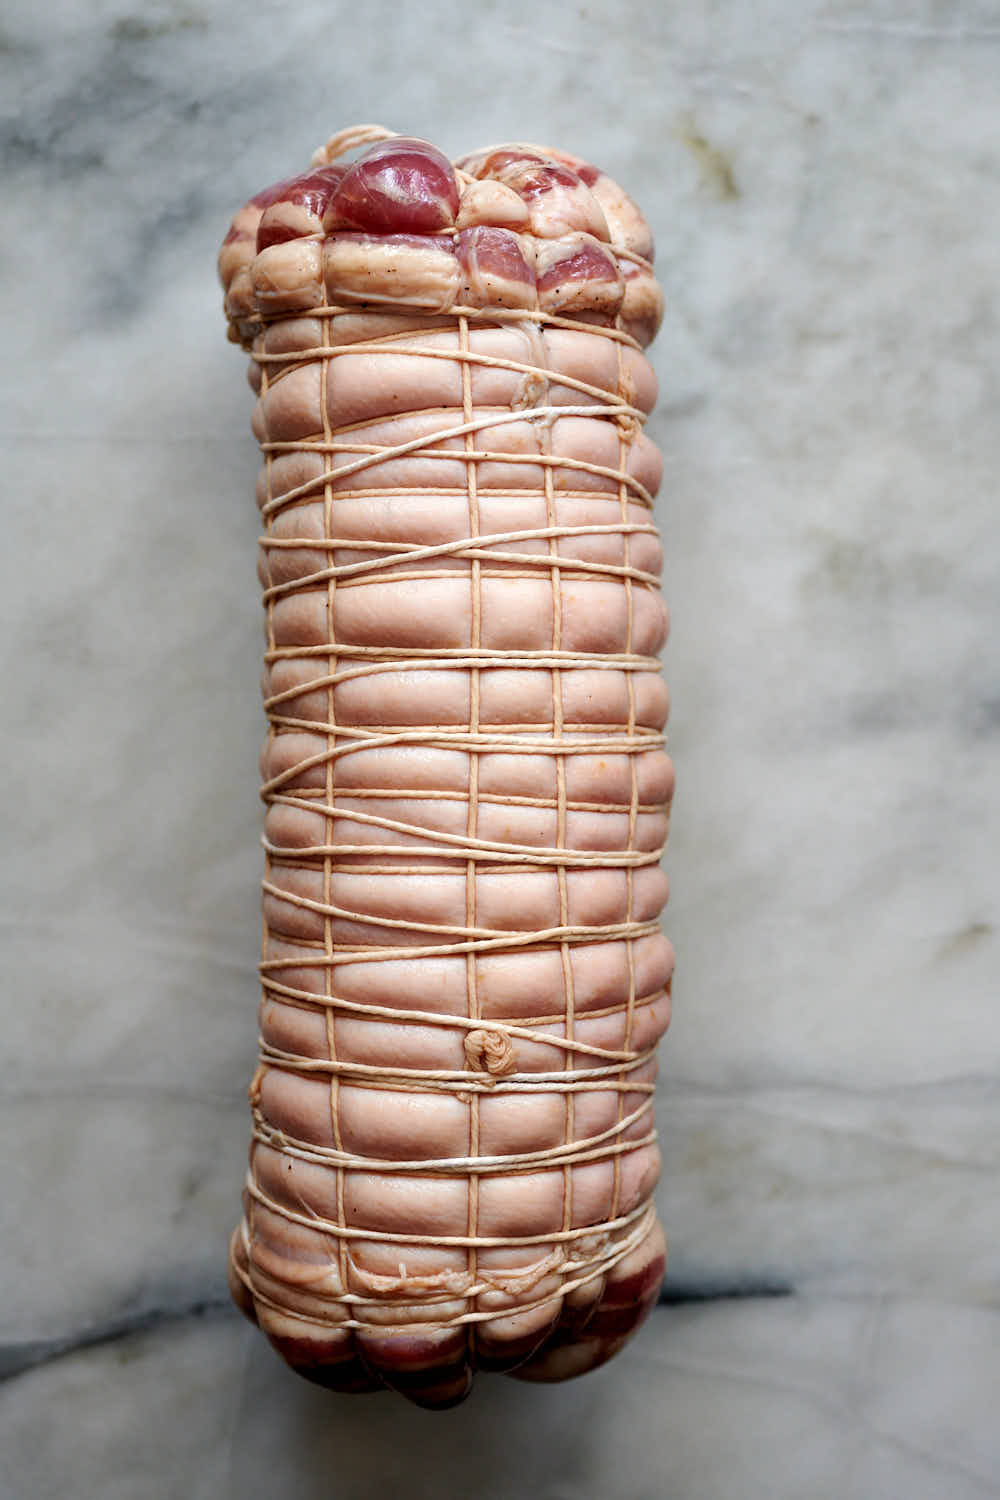
I then tied the roll across as tightly as I could to eliminate any air gaps inside. The next step was to cover the exposed parts with veil and tie the roll several times lengthwise. I then poked the areas covered with veil (sold in stores as 'salted veil') with a sterilized needle to expel any trapped air. Finally, I tied the roll across again. Final check for any air bubbles and I am done. Not the prettiest tying job but overall I am quite happy with the job I did.
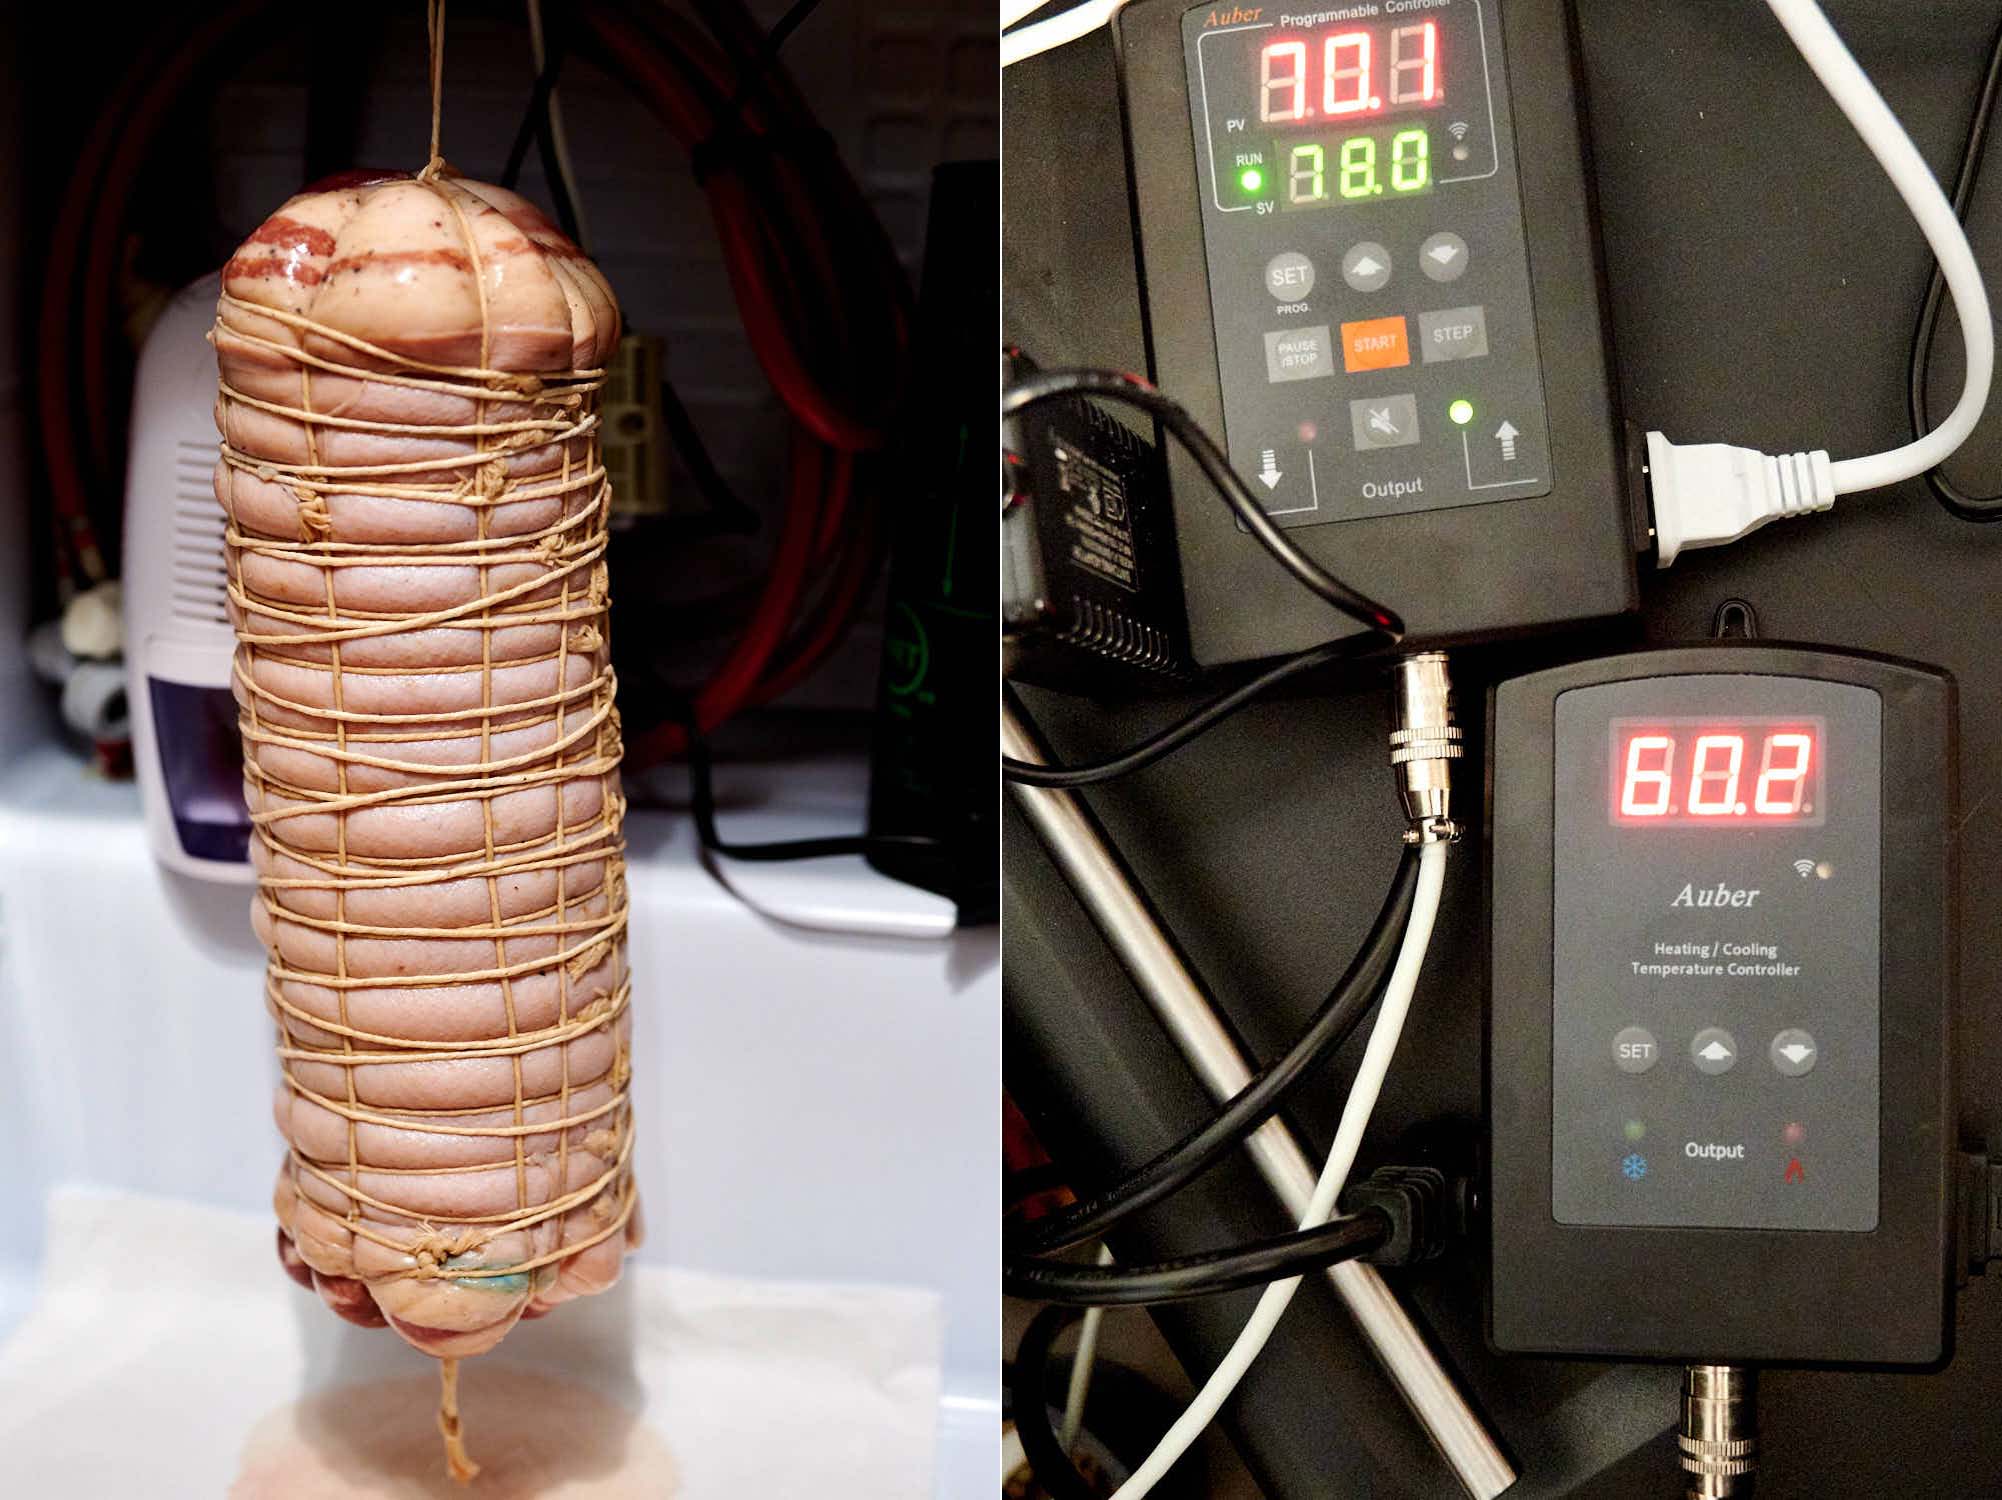
Drying
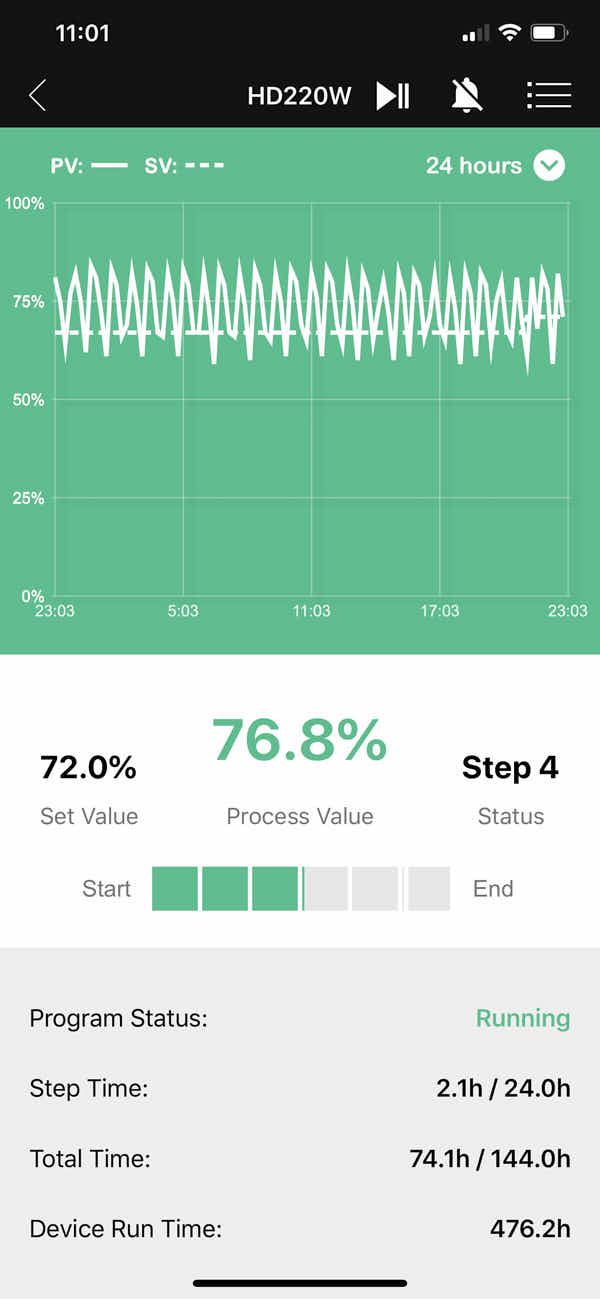
As my curing chamber is occupied at the moment, I had to improvise. I decided to use one of my DIY kegerators made from a 4.4 cubic feet Danby bar fridge equipped with an Eva Dry dehumidifier, a 10″-20″ seedling heating mat, and a mini humidifier. The humidity and temperature were controlled by Auber HD220-W humidity controller and Auber TD120-W temperature controller.
The drying schedule that I used is as follows:
| Stage | Duration | Temp | RH |
|---|---|---|---|
| Dripping | 14 hours | 77F (25C) | < 99 % |
| Drying | 17 hours | 73F (23C) | 75-85 % |
| Drying | 24 hours | 71F (22C) | 68-78 % |
| Drying | 24 hours | 68F (20C) | 65-75 % |
| Drying | 24 hours | 64F (18C) | 68-78 % |
| Drying | 24 hours | 61F (16C) | 72-82 % |
| Drying | 24 hours | 59F (15C) | 76-86 % |
The objective here is to bring the internal temperature to 77F (25C) to start lactic acid bacteria activity, then gradually drop it to where it will be slowly matured for months. During this time, the humidity will be lowered significantly to allow for a substantial water loss. Periods of low and high humidity will be alternated to prevent surface hardening.
You can follow this protocol two ways. One is to let the curing chamber run at the lowest humidity of the specified range for 2-3 hours, then half an hour at the highest value. Alternatively, you can let the humidity oscillate between the low and the high values throughout the specified duration.
Controlling humidity in a non-frost-free tiny bar fridge is extremely difficult. Practically impossible. However, regular fridge cycling caused the humidity to naturally oscillate between roughly 60% and 80%, which worked out quite well in the end.
Maturing
After this, my pancetta went into the curing chamber to mature for 4+ months. Maturing takes place at 50F - 57F (10C - 14C) and 70%-90% RH.
Weight loss progress
| Weight | Loss, g | Loss, % | |
|---|---|---|---|
| Start | 4,125 | ||
| End of Drying (7 days) | 3,865 | 260 | 6.3 % |
| 1 Month | 3,742 | 383 | 9.2 % |
| 2 Months | 3,652 | 473 | 11.5 % |
| 3 Months | 3,625 | 500 | 12.1 % |
| 4 Months | 3,571 | 554 | 13.4 % |
| 8 Months | 3,414 | 711 | 17.2 % |
Tasting notes
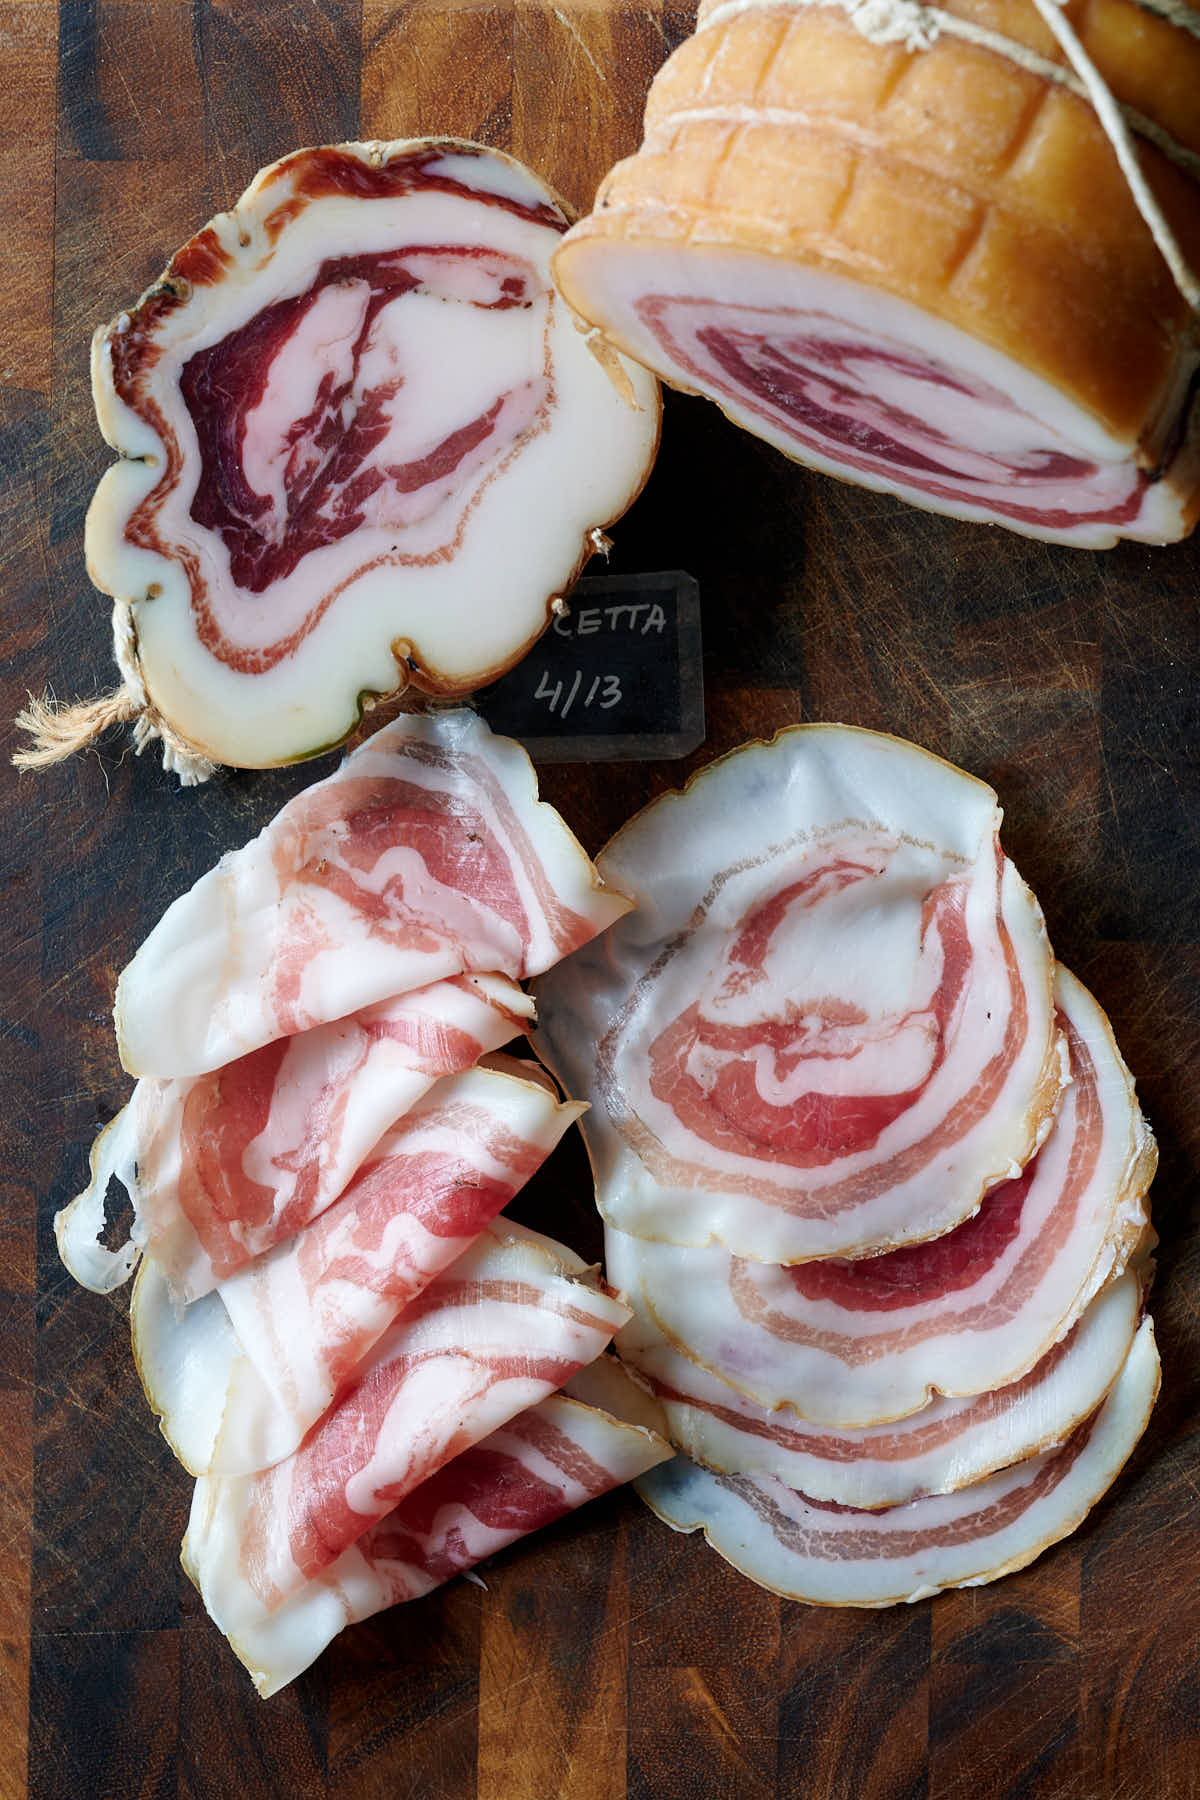
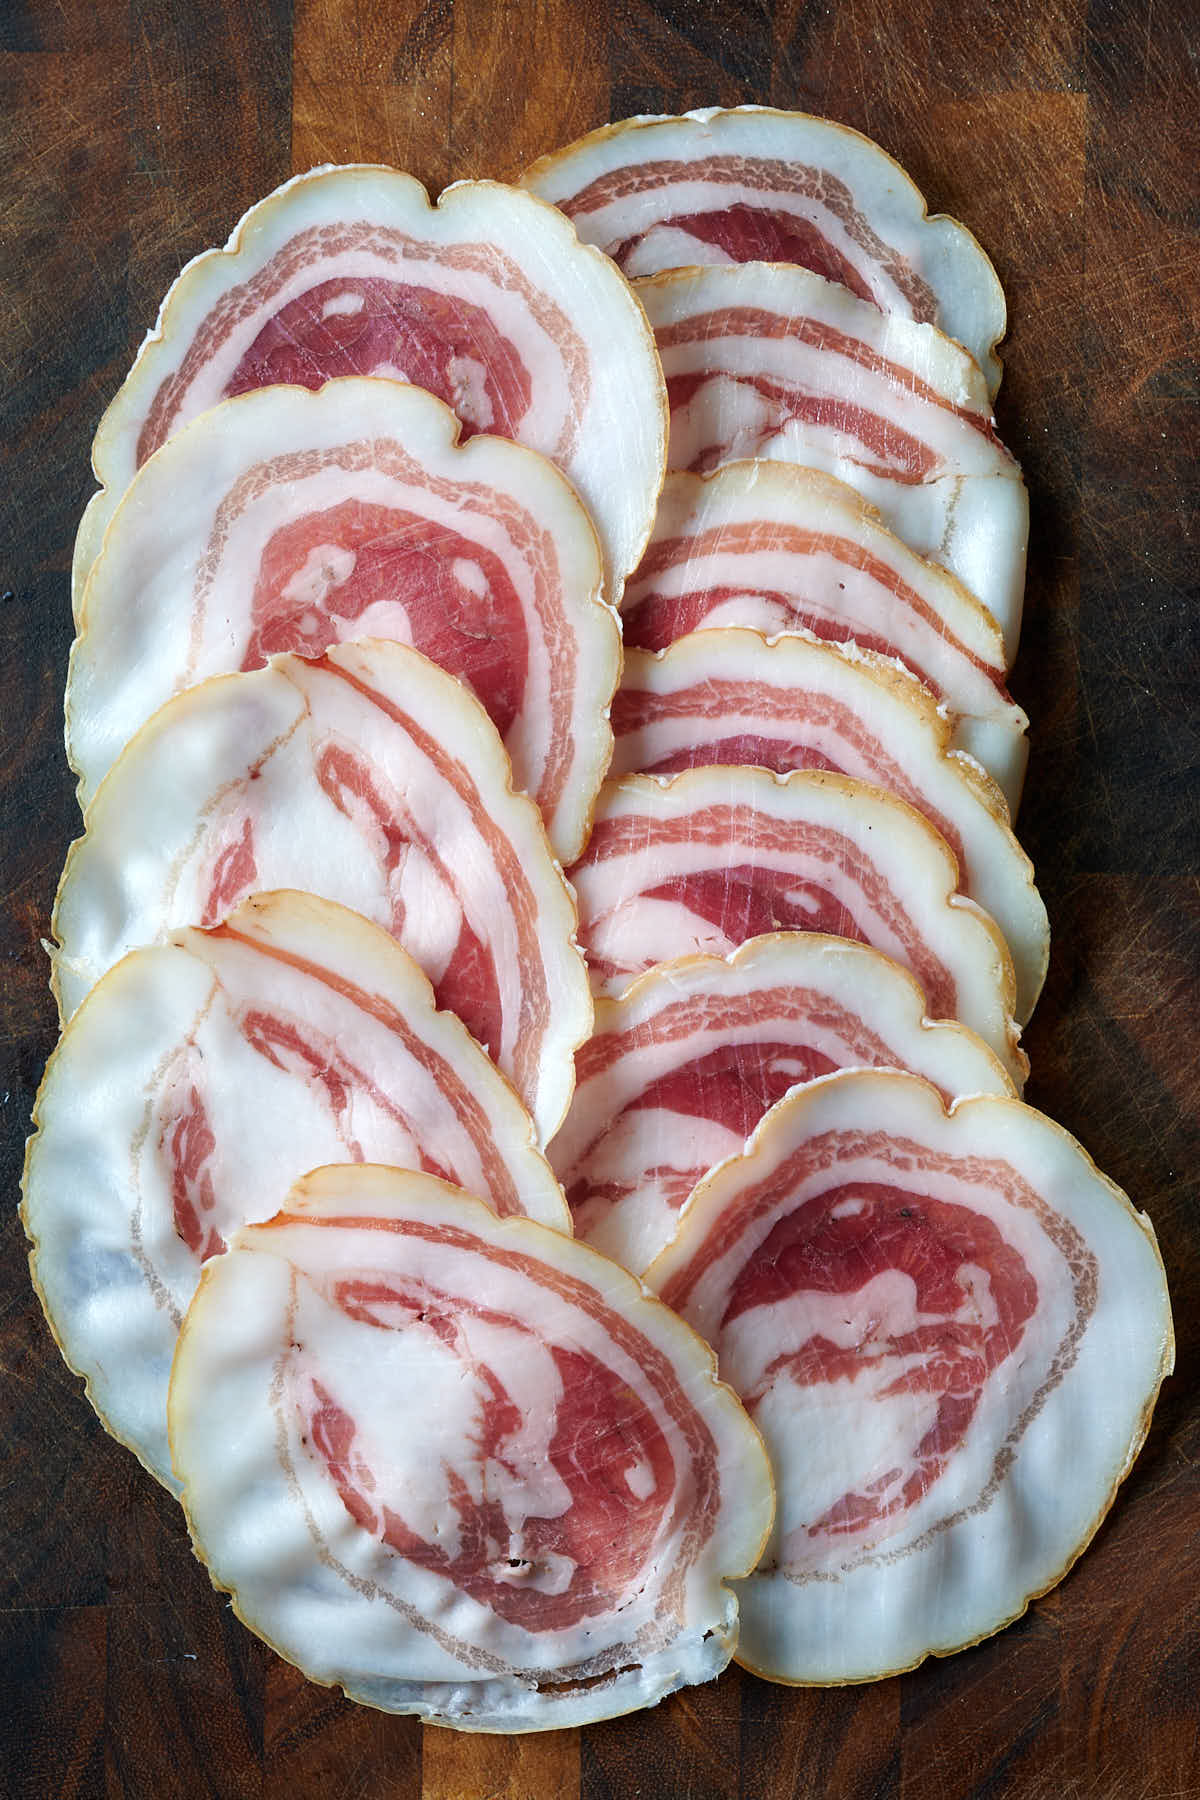
If there is one salumi product that I've ever made that I feel the proudest about, this pancetta would be a top contender. I don't know if I could make it any better tastewise. This is the best pancetta I've ever tasted and I've tried some excellent Italian imports.
It cured exceptionally well. After 8 months of maturing, the aromatics are very pleasant; milder than in the speck that I recently made and I liked that. I think I may reduce the amount of aromatic spices in the speck next time I make it. The porky flavor is exceptional. I think longer maturing really improved the flavor. The fat literally melts away as soon as it touches your tongue. We tend to use the term 'melts in your mouth' loosely sometimes but in this case, it would be 100% appropriate. You will have to slice the pancetta paper-thin though.
After 8 months in the curing chamber, my pancetta lost 17.2% of the weight. That's quite a bit lower than the typical 25% target weight loss for pancetta. I think the lower weight loss here has to do with two things - a fattier belly and the skin. Fat has a lot less water to lose than meat, while the pigskin prevents water evaporation. I am quite sure that a typical pancetta tesa (unrolled pancetta) would lose more water compared to rolled pancetta.
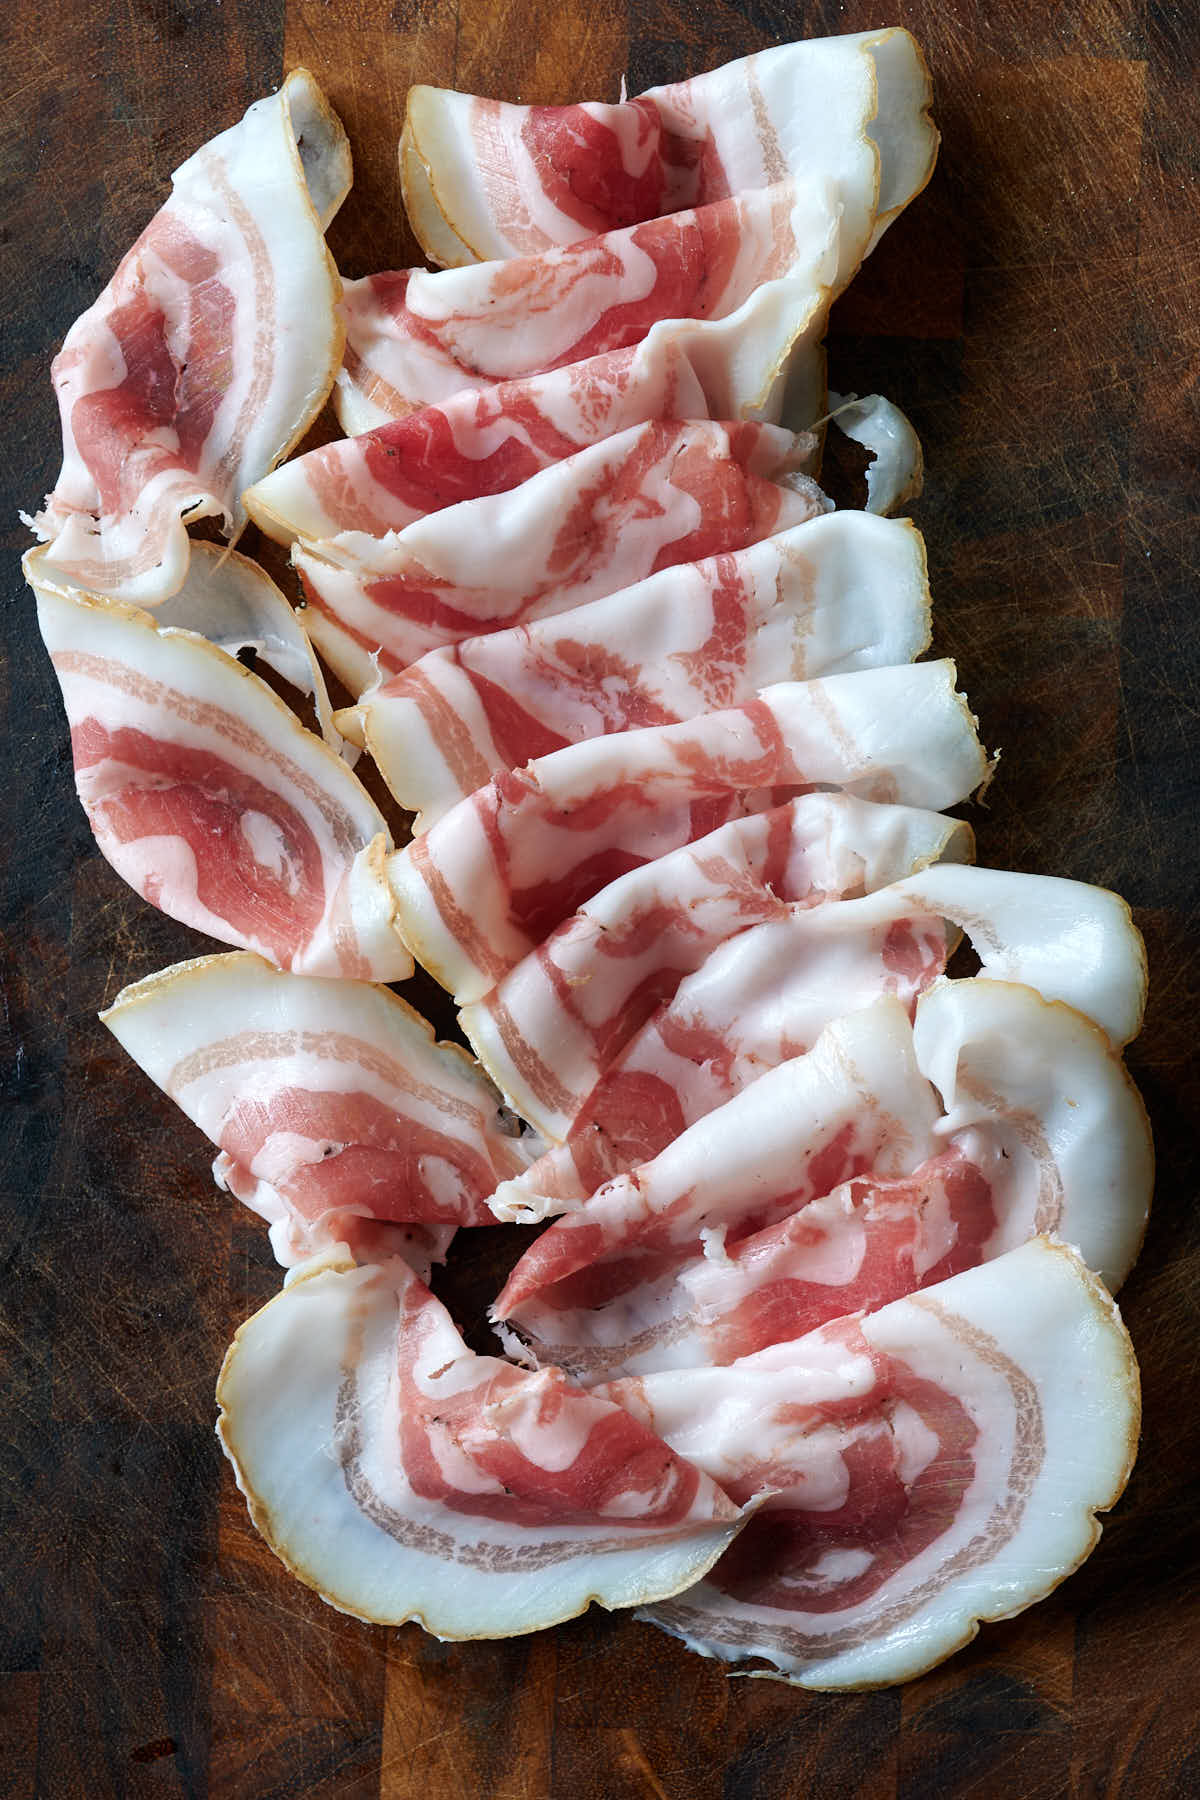
And once you do... what a delight it is to eat. With bread or without, I loved it without any reservations.
This pancetta leaves a pleasant, tangy aftertaste. I loved the acidity level so I was curious to see what it was. It measured 5.12.
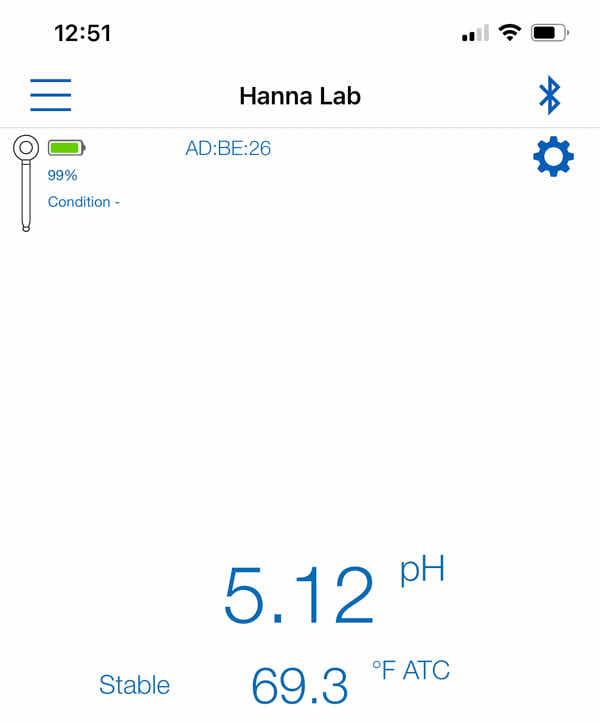
I normally prefer my salumi less acidic, as is the case with salami, but this was very pleasant. It looks like I tend to prefer higher acidity in salumi that is less salty or fattier.
The ends, covered with pig veil, faired quite well. The veil came off easily, leaving behind dark red, meat and creamy fat.
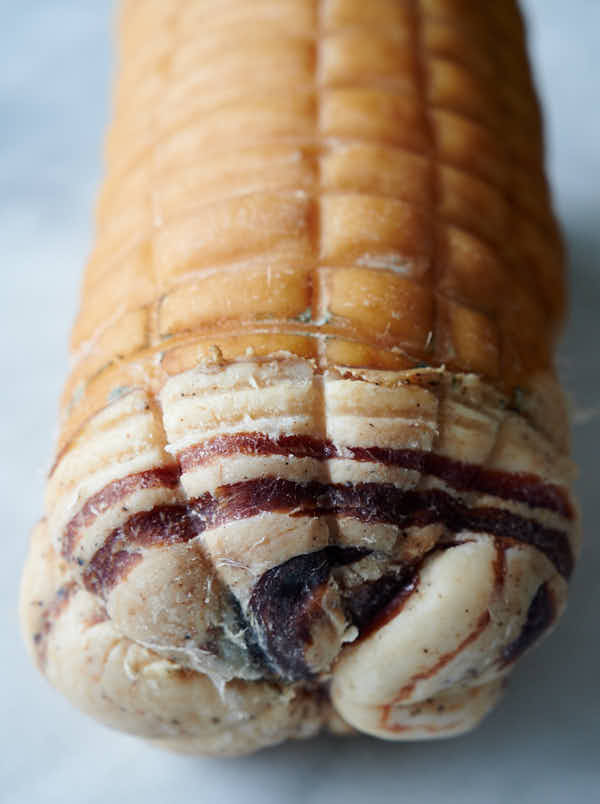
The fat near the ends of the pancetta roll, where it was not covered by pigskin, exhibited noticeable yellowing. There was no rancid smell that I could detect but visually, you can see the yellowing which is nothing more than fat oxidation.
This makes me want to cover the ends with something thicker next time, like beef bung. One thing I know for sure is that when maturing fatty salumi, like pancetta, I would advise having skin on to protect the fat from oxidation.
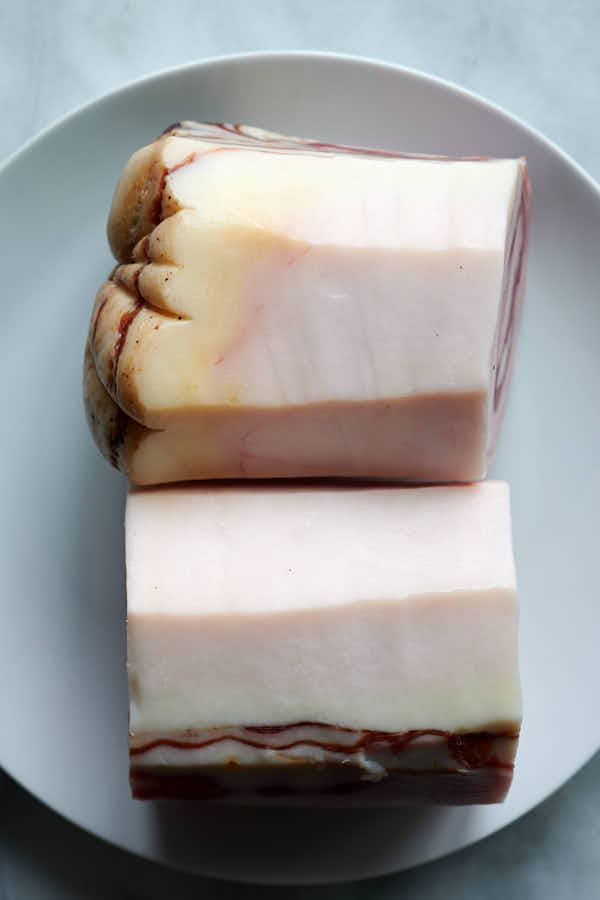
To store, I removed the skin from the remaining roll and cut it into smaller pieces. The pieces will be vacuum sealed and refrigerated.

You can just wrap the cut end with plastic and continue storing it in your maturation chamber, but if you don't want to dry the product any more, or need to use the chamber for something else, vacuum sealing and refrigeration work great in my experience.
Ingredients
- 1000 g pork belly skin on
- 27.5 g kosher salt 2.75%
- 2.5 g Cure #2 0.25%
- 15 g sugar 1.5%
- 0.5 g whole black pepper 0.05%
- 0.5 g cracked black pepper 0.05%
- 0.4 g cloves 0.04%
- 0.4 g nutmeg 0.04%
Instructions
- Weigh your pork belly in grams. Divide by 1000, then multiply each ingredient by that number. For example, if your pork belly weighs 4650 g, you need to multiply the ingredients specified above by 4.65.
- Mix the salt with the seasonings. Apply the rub evenly all over the pork belly. Transfer the pork belly to a vacuum-sealable bag and seal. You can also use a Ziploc bag.
- Refrigerate for at least 10 days at 3F7-41F (3C-5C).
- Remove the belly from the fridge and scrape off excess seasonings and salt. Roll into a roll and tie with twine, covering any exposed area with natural casings (e.g. salted veil, beef middles, etc).
- Dry at 59F - 77F (15C - 25C) and 65%-86% RH for a period of 7 days as per the drying protocol above.
- After drying, mature at 50F - 57F (10C - 14C) and 70%-90% humidity for at least 4 months.

Barney says
G’day Victor,
Could you wrap the entire pancetta in a beef bung, like you do with the Capicola?
Thank you again.
Cheers
Victor @ Taste of Artisan says
Hi Barney, yes, you can. I've seen people do it. You'd want to remove the skin first. Good luck!
Vlad says
Thank you very much for excellent professional writing!
Victor @ Taste of Artisan says
You are very welcome. Enjoy!
Gianni's says
Thanks very much 🙏🙏..
Great job...
Tim says
Victor,
I have wondered but not tried it yet. Could you cover the ends like you do with a country ham with a mixture of flour and lard. Then clean it off once the moisture loss is where you want. This would keep moisture loss only thru the skin surface area. The lard flour has worked on country hamscI have done for 18 months in an outdoor meat hanging house.
My tgought is this is a very simple thing to do for home cures and its easy to cover odd shaped surfaces like the ends of solid meat rolls etc.
Cherrs,
Tim
Victor @ Taste of Artisan says
Hi Tim,
apologies for the delayed response. I've never made pancetta using this method, but I don't see why it wouldn't work. Sounds like a good idea to me. Let me know how it turns out if go that route. Good luck!
Lorin Chak says
Hi Victor, I've only done Guanciale and Pancetta in the craft of curing. I'm making them to be cooked in pasta, and am using Cure#1. How different would the process (ferment, dry, mature) and temp/humidity settings differ from what you use? Your site has the most meticulous processes compared to other sites so I would love to see your opinion on cured meats that are meant to be cooked. Thank you!
Victor @ Taste of Artisan says
Thank you, Lorin. If you are using cure #1, you should follow the same process as making bacon. If you want to smoke it, here is the process for making to-be-cooked or ready-to-eat smoked bacon. Good luck!
Bill Martin says
Just starting this hobby, have nice flock of sheep, hogs, and lots of wild, fat venison feeding in my cornfields, alfalfa fields! Want to build a drying room ! Thanks
Victor @ Taste of Artisan says
I am so envious, Bill, in a good way;) For you, a drying room is a must. Lot's of goodies you can make in it.