Even though I have never been to Uzbekistan, I love Uzbek and other Central-Asian cuisines. There is nothing like Uzbek plov (pilaf), samsa, and other delicious dishes and goodies. Uzbek bread is what I am particularly fond of. Uzbeks eat it with just about everything. It's very versatile. Me, I've even made grilled cheese, sandwiches and burgers with it and loved the results. This bread is addictive!
There are many types of Uzbek bread, obi non is just one of them, though it's the most common bread there. Every region in Uzbekistan, if not every town, has its own style of obi non. Obi non can be super plain - made with just flour, water, yeast, and salt - or it can incorporate shortening, butter, lamb fat, meat, raisins, nuts, sesame seeds, and more.
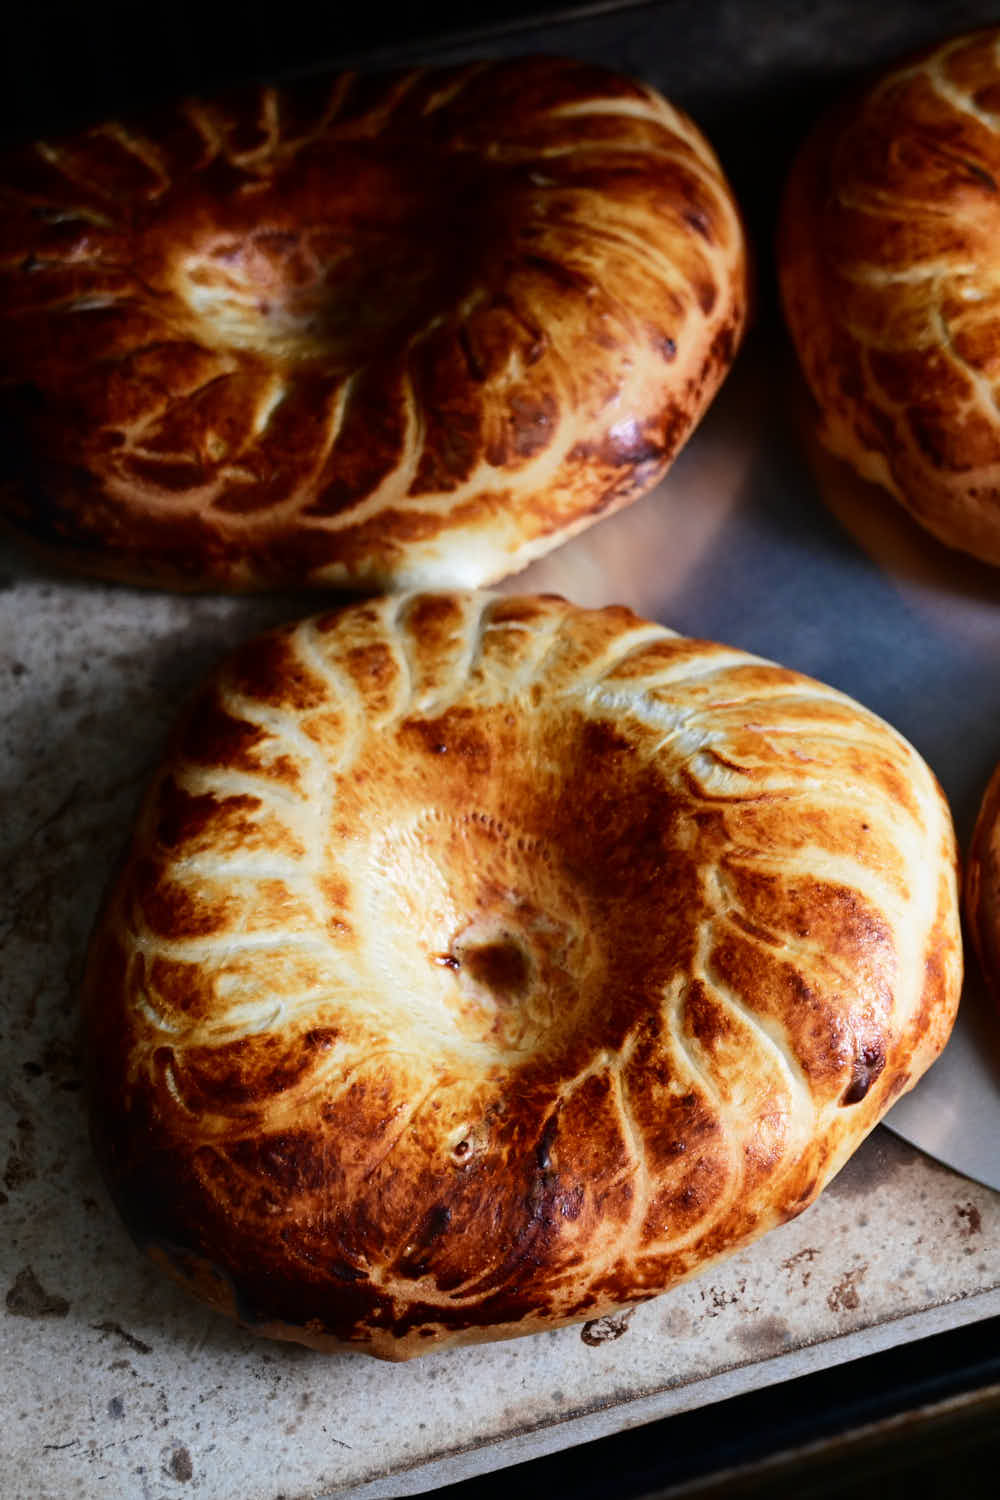
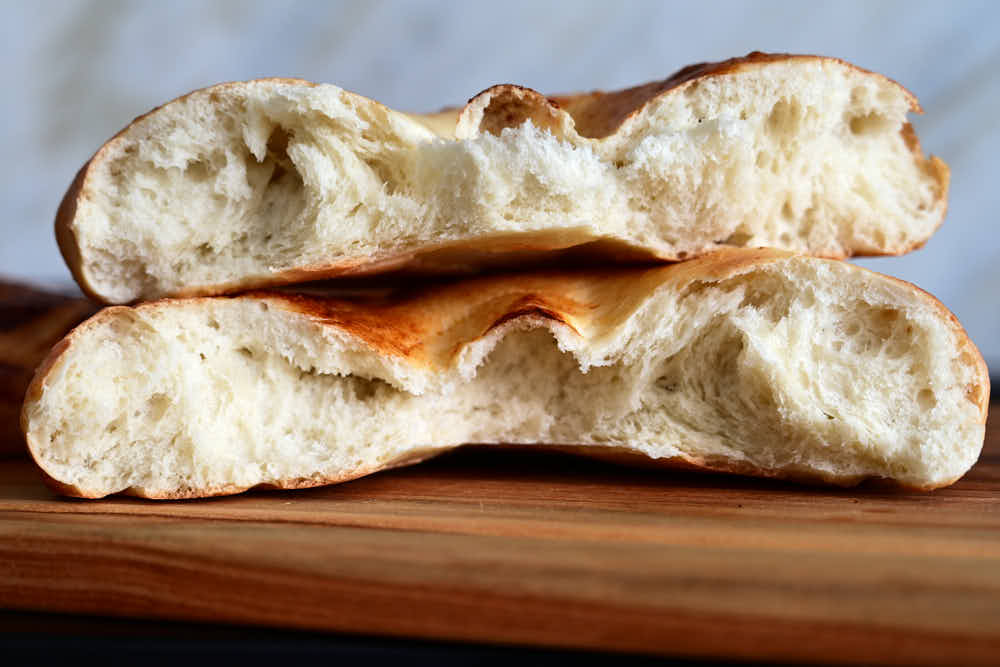
Personally, I like a particular type of obi non - plain but slightly sweet, chewy, soft but with a crispy bottom that they get after baking inside clay ovens called tandyr (tandir). I had a crazy idea to build a tandyr in my backyard but after many experiments, I am happy with the results I get from my oven.
The trick is to use a thick baking stone and use convection. Convection is the key to getting a nice color and crust similar to that of tandyr. It's about the airflow. Without it, the color and the texture of the crust are quite different from tandyr obi non.
This Uzbek bread recipe
While this Uzbek bread recipe may be different from many recipes out there, to me it's as good as it gets. I am talking about the recipe itself and the baking method. Really, I think it rivals tandyr Uzbek bread. You have to try it and be the judge. Many of you may not have experienced Uzbek bread yet, it doesn't matter, you are in for a big surprise. I have no doubt that you will love this bread.
This particular obi non recipe comes from a very small bakery in Uzbekistan. The owners were kind enough to share it but the ingredients were given per 50 kg flour bags so I had to make adjustments. At the bakery, they portion the dough at 320 grams per one obi non. I adjusted this recipe such that you get four roughly 320-gram pieces of dough. The only change I made to the original recipe is to exclude condensed milk as I like my obi non less sweet. If you so desire, you can always add back 14 grams of condensed milk to the mix.
Obi non ingredients
The ingredients in this recipe are very basic and common: flour, salt, water, yeast, and some sugar and butter. I love a touch of sweetness in my bread, that's why I add a little bit of honey to my insanely popular French Baguette recipe. This bread also has that touch of sweetness. It's hard not to like it.
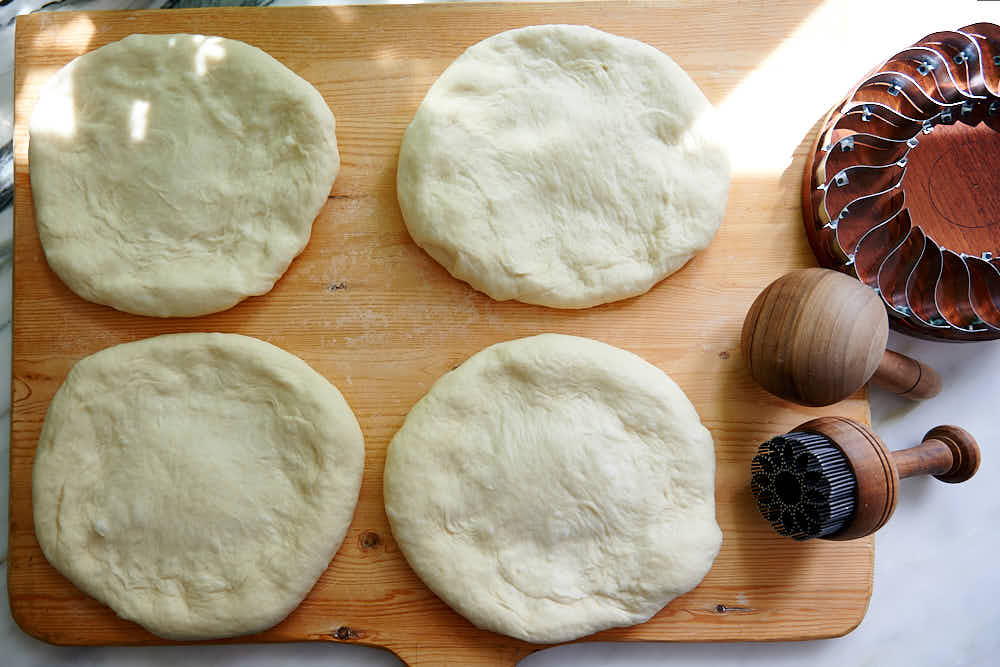
Uzbek bread stamp (chekich)
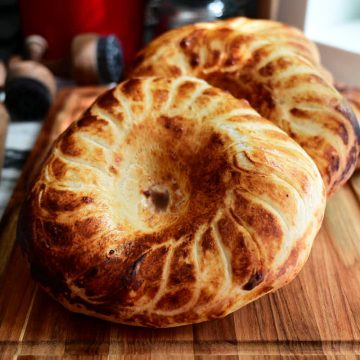
Traditionally, Uzbek bread is made by flattening the dough into a disk, then stamping the center and the outer part with various bread stamps called chekich. You can accomplish this by using a fork and a backside of a knife or many other kitchen utensils, just get creative. The idea is to give the bread decorative appeal. It may be more time-consuming and not as pretty in the end, but your Uzbek bread will taste amazing regardless.
Eventually, if you fall in love with this bread like I did, you can get yourself a set of authentic Uzbek bread stamps from Etsy. Gotta love Etsy for allowing us to support artisan masters across the world and enjoy their unique creations. My particular set can be purchased from Artsy Uzbek on Etsy. I am not affiliated with them but this is where I got my Uzbek bread-making set and I like its quality a lot.
Baking Uzbek bread
Baking Uzbek bread at home can be a big challenge if you are after that traditional taste and texture. Traditionally, obi non is baked in a hot clay oven called tandyr or tandir.
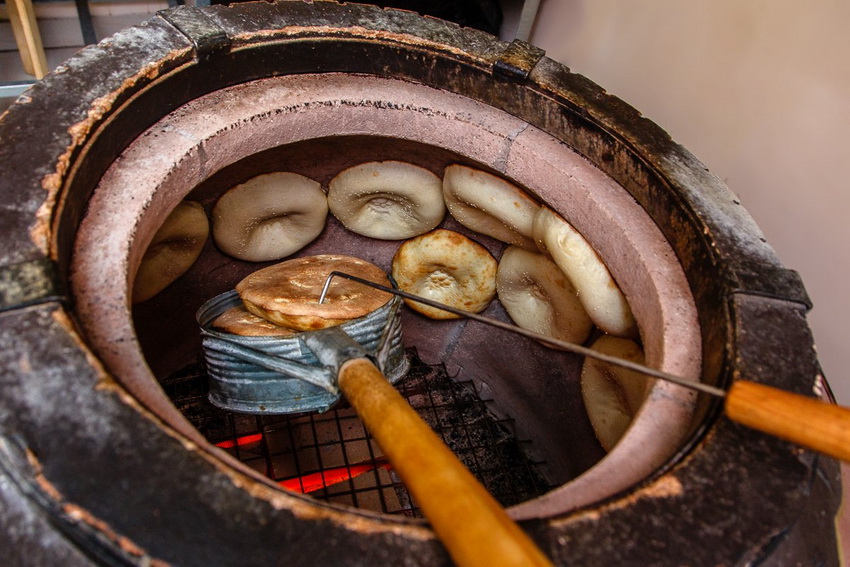
The airflow, the temperature, the thermal capacity of the clay walls all come to play to produce bread that is hard to replicate.
After trying obi non baked in a tandyr multiple times, I was all set on trying to replicate that taste at home. I have to say, I was able to come pretty close. Maybe even.... better? All you need is a thick baking stone and an oven with convection. I bake this bread in my gas oven and it comes out fantastic. I've never tried baking Uzbek bread in an electric oven but it should be very similar as long as you bake with the convection on.
Ingredients
For the dough
- 800 g all-purpose flour
- 432 g water room temp
- 3 g instant yeast
- 10 g white sugar
- 13 g kosher salt or sea salt
- 32 g butter melted
For the wash
- 3 Tbsp dry milk
- 2 Tbsp water or as needed
Instructions
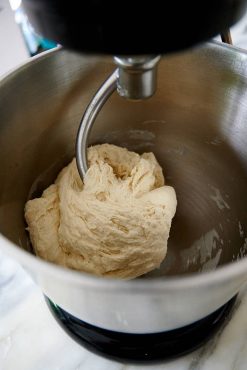
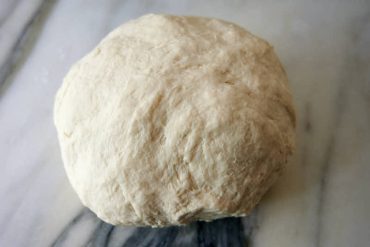
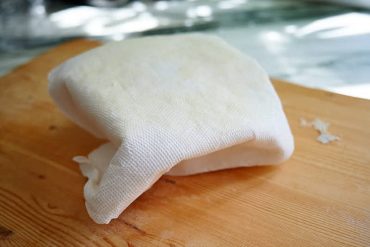
- Add the flour and the rest of the dough ingredients to the bowl of a stand mixer. Mix on low speed for about 5 minutes. The dough should come together in a ball. The dough should be fairly stiff.
- Shape the dough into a ball, place it into a large mixing bowl, cover with a damp towel or a piece of plastic and ferment at room temperature for 4-5 hours, or until it increases about 2.5-3 times in volume.
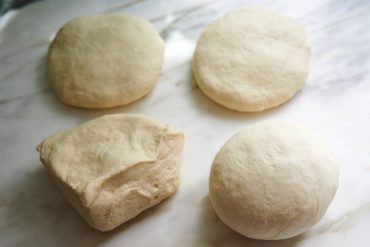
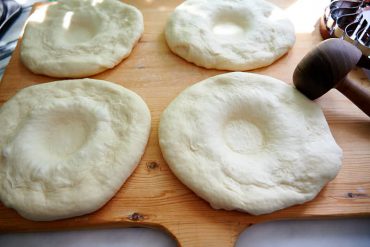
- Divide the dough into 4 equal pieces, shape each piece into a ball, press down to flatten into round disks, cover and proof for 30-40 minutes.
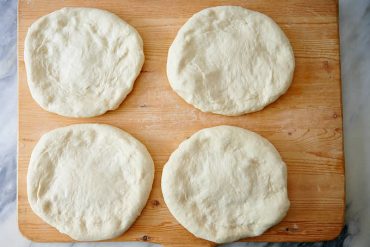
- After the proofing is done, stretch each disk more, to about 8 inches, making the centers thinner than the outer parts.
- You can also make the center thinner using an Uzbek bread press.
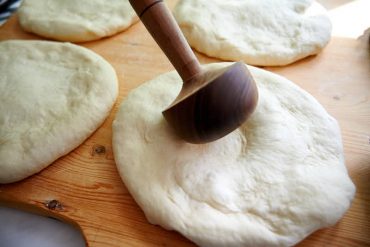
- You may use something similarly shaped, like the back of a glass, to flatten the centers.
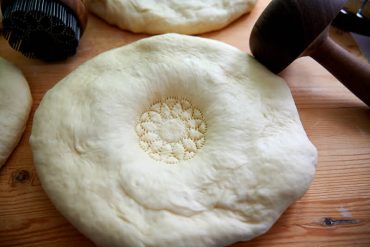
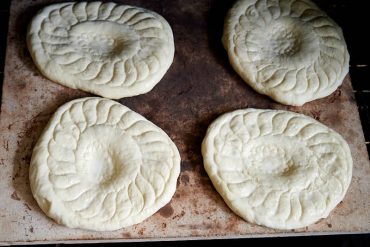
- Using a chekich, stamp the center of the disk to add a pattern.
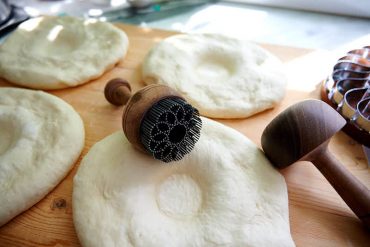
- You can use a fork to add the pattern if you don't have chekich. Prickling the center with a chekich or a fork will also prevent the center from puffing up during baking.
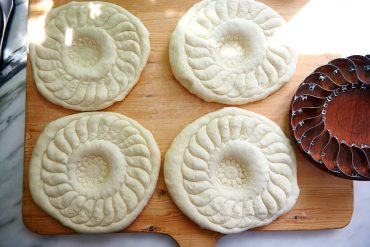
- Using a larger bread stamp, stamp the outer parts of the dough disks. You can use the back of a knife to add a similar pattern. Gently lift each disk from both sides to make sure there is no sticking. It will make it much easier to load the disks into the oven. It's also best to use a wooden work surface to minimize sticking. If not, lightly dust the surface with flour.
- Prepare the milk wash by whisking the powdered milk with water. Brush with the milk wash. Optionally, sprinkle with sesame seeds.

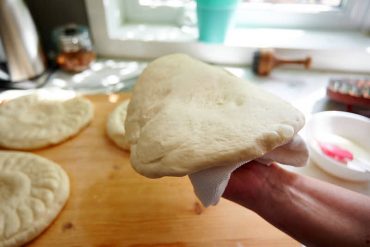
- Grab a bunch of paper towels and fold as shown in the picture; this will be your 'loading pillow'. It's a crude version of what Uzbek bakers use to load bread in tandyrs, but it works great.
- Gently put the pillow on top of each disk of the dough, pick one side of the disk and flip the dough onto the pillow as shown in the picture. The brushed part of the dough will be facing the pillow.
- Then flip back onto the pre-heated baking stone.
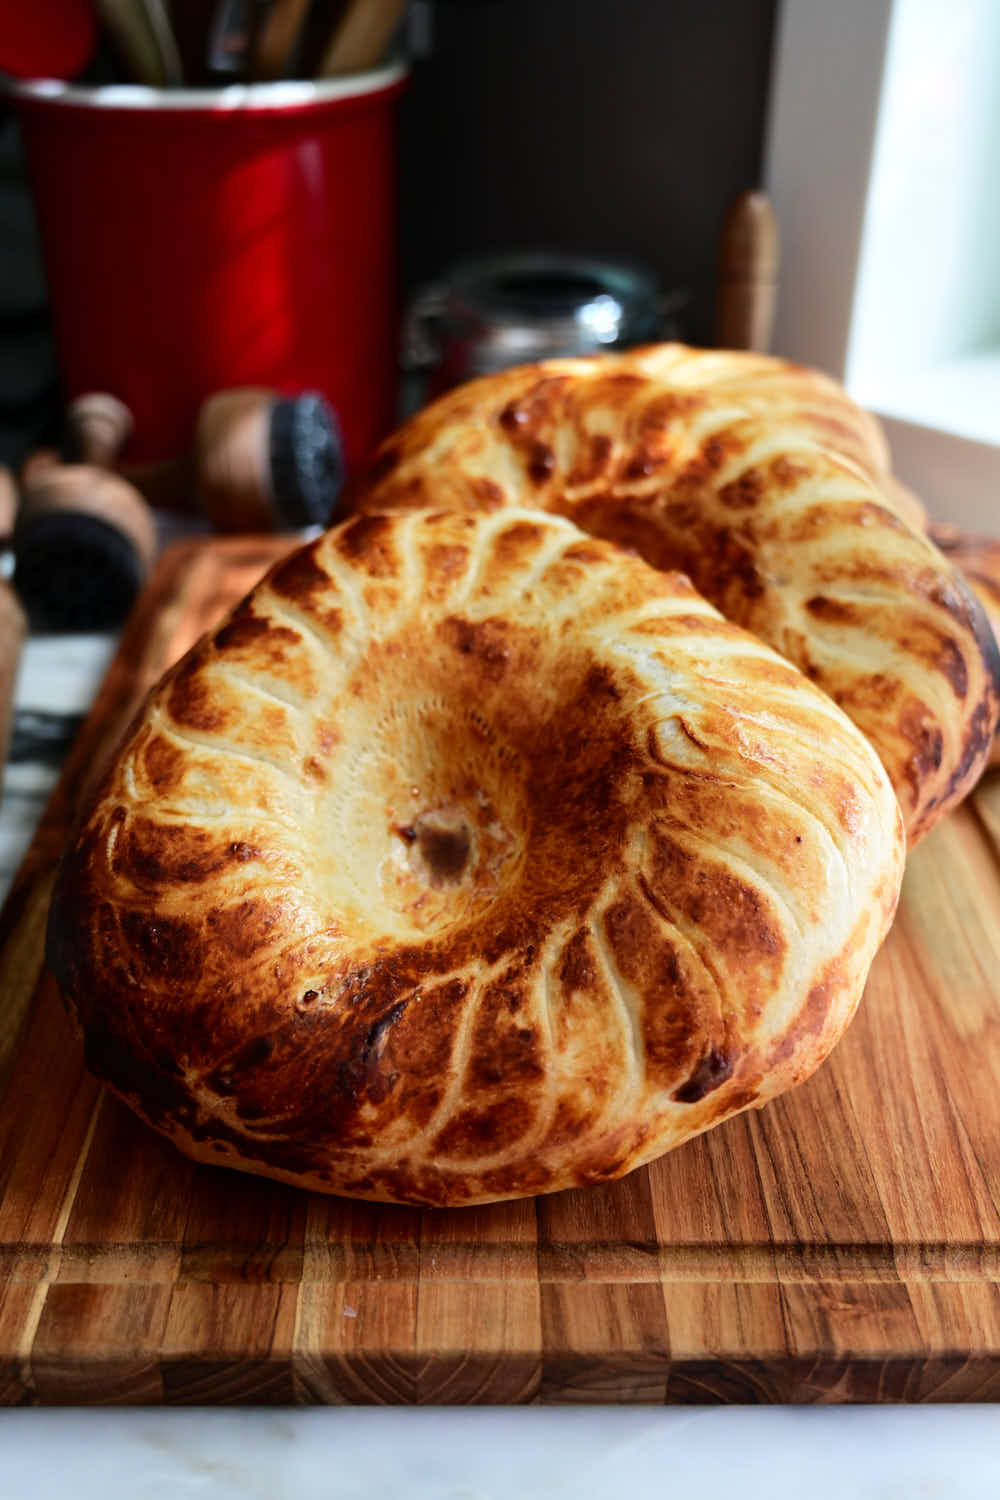
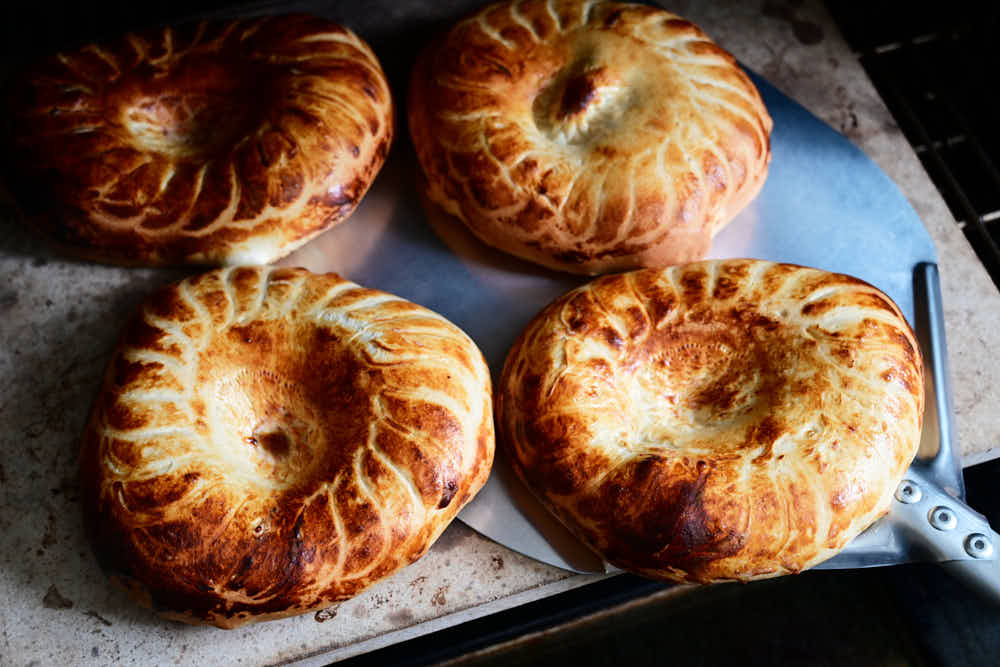
- Bake at 425F with convection for 10-12 minutes, or until the bread is golden brown, as shown in the picture. Enjoy hot from the oven or cooled down to room temperature. The bread will stay fresh for 2-3 days.


Livia says
This was a satisfying to make recipe and the result is tasty. Unfortunately, my bread got stuck to the “pillow” and the shape was doomed when landing on the baking stone. 😩 The second one was a little better… But I used a damp towel.
Victor @ Taste of Artisan says
Practice makes perfect. The paper towels worked great for me, but you can use whatever works. Sticking was probably because your wash may have turned out thicker than mine, or the layer of the wash was thinner and it started to dry faster and became sticky quicker. Many variables. But as you make these more, you learn/develop/perfect the technique and it becomes quick and effortless. Happy baking.
Cheryl Holbert says
Hello, I am completely fascinated with the bread and would love to try making it. Do you know where I can obtain the stamps? Thank you much!
Victor @ Taste of Artisan says
Oh yeah! Wait till you make it once or twice, then you start making other breads, like enriched Uzbek bread, stuffed with meat, onions, etc. It's a rabbit hole 🙂
You can buy the stamps on Etsy. I bought mine from ArtsyUzbek out of NY - https://www.etsy.com/ca/shop/ArtsyUzbek?ref=yr_purchases, but, I just checked, they don't seem to be selling right now. I checked eBay and saw a few for sale shipped from Uzbekistan. Good luck!
Chef CarrieAnn says
Hello again...one more question....I've been looking for a recipe for the Tashkent bread, which is supposed to be lighter and fluffier? Is that correct? And do you have a recipe for that? I found one online that was not authentic or reliable. Thank you again!
Victor @ Taste of Artisan says
I am not sure about this one. Let me take a look at what I have and I will get back to your if I find it.
Chef CarrieAnn says
Hi, I'm a Personal Chef and avid baker. I'm anxious to try the Uzbek breads, as I bake various International breads...they fascinate me!
One of my ovens is a convection, and I do have 1 heavy pizza stone. I'm wondering if the other breads could be baked in the convection oven at the same time, in cast iron skillets or Dutch ovens without the lids? This would allow me to do multiple breads at once...
Victor @ Taste of Artisan says
I think you should be able too without much difficulty. Make sure the breads are positioned such that the is no overcrowding and there is a good airflow and they should be good.
S.umar says
Hi. The breads look delicious. I had a question tho. How can we revive the Uzbek bread when it becomes hard and dry? Is there any way to kind of soften it again.
Thanks
Victor @ Taste of Artisan says
There are many ways. You need heat and moisture. You can microwave the bread (10-15 seconds at a time) with a bowl of water until soft. You can also wrap it in slightly damp paper towels, then wrap in foil, and bake in the oven at 350F for 2-3 minutes or so. I've seen people also review hard and dry bread in a steamer. Good luck.
Shaheen says
Thanks for the recipe
Victor @ Taste of Artisan says
You are very welcome. Enjoy!
Bron says
I finally got around to making the Tashkent bread loaves with your exact recipe and they were a great success. I bought the chekich stamp on line and it certainly gave an authentic look to the bread! I made the dough one day and did the 5 hour prove in a wooden madea which my husband made; refrigerated it with final prove and shape, bake, first thing next morning. Baked on stone. 235dC.
I was going to post a photo here but not sure where to do that.
Cheers
https://tasteofartisan.com/wp-content/uploads/2023/10/uzbek-bread.jpg
Victor @ Taste of Artisan says
Happy to hear it. This is one of our favorite breads. No, we don't make it every day and eat it with just about everything, as they do in Uzbekistan - I'd love to 🙂 - but we make it quite often. Absolutely agree on the use of checkich, we eat with out eyes firts and foremost. Hey, I think the bread even tastes better this way- the thin center and the puffier edges, there is something magical happens here.
I'd love to see your photo(s). I emailed you - send them to me and I will attach to your comments. Unfortunately, WordPress doesn't allow readers to attach pictures themselves.
Victor @ Taste of Artisan says
Hi Bron, I uploaded your photo and added the link to you comment. Your obi non looks really good. Perfect! Thanks for sharing.
Benni says
What a great job! My mouth is watering 🙂
Morgan says
Hello, I’m trying to make this recipe and the dough is really crumbly. What did I do wrong?
Victor @ Taste of Artisan says
The dough in this recipe, and many other Uzbek doughs - e.g. samsa, cheburek, etc. - is relatively stiff but should not be crumbly. If I understand the problem correctly, your dough needs more water. Either you made a mistake weighing some ingredients somewhere - happens to the best of us - or your flour is too dry, happens as well. I would bet that either water or flour were not weighed correctly as I've made this recipe with various flours and it's been pretty bulletproof for me. I would just add more water little by little until the dough nicely comes together in a ball. Good luck.
Morgan says
How thick does the stone have to be? Because I have a pizza stone but it’s pretty thin. Also how do you proof things correctly? I need help on where to put the dough and what temp it’s needs to be. I really appreciate that you posted this recipe. Thanks!
Victor @ Taste of Artisan says
Morgan, I've been baking bread for close to 15 years and the biggest thing I've realized over time is that the best bread is made when the recipe/process follows you/your environment and not the other way around. My rule of thumb is this: fermentation - 2x - 2.5x volume increase, proofing - 30% - 50% volume increase. That's what I need to see. How I get there will and should vary. I proof most of my bread at room temp that stays around 68-70F all year round. If I want to increase fermentation, I use warmer - 85F - water. If I want to retard fermentation, I use cold water and/or retard in the fridge. Some people put their dough in the oven with the pilot light on to speed up fermentation, that works too though I prefer to use warmer water, it works fine in my kitchen. If you have a very cold kitchen, the oven way is better. Im this recipe, I always ferment at room temp 68F - 70F for 5 hours. If I want to expedite the process, sometimes I must make this bread faster, I use warm water and/or add more yeast. This will be at the expense of better flavor development but you can shave an hour or two from the entire process.
The stone, I tink yours will work fine, just don't overload it. I used thin pizza stones in the past, went through 4-5 of them as bake often, experiment and tend to crack them all the time. Now they sell thicker, heavy duty baking stones, those will hold up better. Personally, I went to a local pottery supply store and got a custom cut kiln shelf. It's big enough for a decent size baguette. 3/4 inch thick. Been using it for many years, had spills but it never cracked. Very happy with it. A thick baking stone gives bread a better oven spring too. There is a definite quality of bread improvement when using a thicker stone, better crust. With obi non, this is less of an issue compared to say baguettes or sourdough bread. Happy baking!
Morgan says
Thanks so much!! I really appreciate it!! Also with storage, can I leave it out without it getting stale? It last for 2-3 days right?
Victor @ Taste of Artisan says
Morgan, I fidn that this bread is best eaten the same day, especially hot out of the oven. That said, let it cool down completely, then wrap tightly in plastic and it will remain fresh for a couple of days.
Morgan says
Hello again. Final question, I live at a very high altitude compared to other U.S. states and the bread may have a hard time rising. What can I do to make accommodations for this?
Victor @ Taste of Artisan says
Morgan, I have no idea. I am pretty much at sea level and naver had to deal with elevation issues. A quick google search tells me that doigh at higher elevations rises faster and needs more water. I'd experiment and see what works, that's the best way. In general, if the dough is having a hard time rising, increase water temp, increase ambient temp, and/or increase the amount of yeast. These are your options. Time is another 'ingredient', the longer the dough ferments the more it rises but that's not an option if the dough doesn't want to rise. Good luck!
Umida says
Hi there, I am from Uzbekistan, I am really surprised by how you mastered this skill. Well done ! I appreciate that you love and respect our national product 😊👍👍👍
Victor @ Taste of Artisan says
Hi Umida, thank you for the kind words. I am a huge fan of Uzbek food. Uzbek samsa, plov, manty, narin, cheburek - I make those quite often. My family iz crazy about samsa and narin. I wish more people here got familiar with Central Asian food, it's delicious.
Jeanette says
Personally I would form the discs of bread on parchment and then just slice the parchment into the oven...much easier than flipping.
Victor @ Taste of Artisan says
That'll work but I just want to be as authentic as possible... I enjoy the process as much as I do the bread itself.
Phil says
I tried this recipe, but the bread didn’t rise hardly at all. I followed the directions. It seemed like there wasn’t enough yeast?
Victor @ Taste of Artisan says
Phil, I've made this recipe many times and it works, the last time was a week ago, it's not the recipe or the amount of yeast. I suspect that it's the comment that someone left earlier about there not being enough yeast that makes you doubt the recipe but trust me, the amount of yeast here has absolutely nothing to do with this. I've been baking bread at least 3 times a week for the past 10-12 years so I am pretty certain about this.
The problem with bread dough not rising is typically related to bad yeast (old, not enough viable yeast cells, damaged by improper storage, etc.), cold temperature, and insufficient time. Some bakers say that time and temperature are two additional 'ingredients' of bread. That is very important to understand. A certain amount of yeast with a certain amount of dough will take a certain amount of time to ferment the dough (make it rise) at a certain temperature. Decrease the temperature and fermentation time will increase. Increase the temperature and fermentation time will expedite. Increase the amount of viable yeast cells and fermentation will take a shorter time. I hope this makes sense.
Now, do we want fermentation (rising) to be quick or slow? If you make a quick bread where you don't care about the flavor of the bread or it will be flavored by mix-ins or add-ons, like cinnamon rolls, sure, you can ferment it quickly by adding more yeast, say 9-10 grams per typical batch of dough. However, if you want fermentation to slow down a little, take 5 hours instead of 1 hour to 1.5 hours, you add less yeast. This will allow the dough to develop more flavor. Bakers often 'cold retard' fermentation (and proofing) by placing the dough in a fridge overnight and up to 48 hours just to slow it down so that the dough becomes more flavorful.
Now, back to your challenge. Make sure your yeast is good and active. Are you using traditional yeast or instant? Sometimes it's easy to confuse them, both are in the shape of granules and naming can be sometimes confusing. Traditional has fewer viable cells and needs to be activated first (warm water, a pinch of sugar, until you see good frothing on top). Instant can be mixed in but it has to be good too. Make sure it's fresh and is stored properly (in a Ziploc bag in a freezer). I've had my share of problems with yeast and most were related to my mistakes. If your yeast is not very fresh (not enough viable cells), increasing the amount may help. But I would start with fresh yeast and store it properly, that way can eliminate this as a problem. I highly recommend SAF yeast as it works really well. Someone recently left a comment on my 'No-Knead Bread' page about how they got a much better oven spring just by switching to SAF yeast.
Fermentation temperature - make sure the place where the dough is fermenting is about 68-72F. Place a towel under the bowl, the counter, like granite, maybe too cold.
Make sure that the water is not too cold either as that will prolong fermentation time. Vice versa, if you want the dough to ferment faster, use warm water - say 85F.
Hope this helps. Happy baking!
Bron says
I make a lot of bread and yeast products. I am querying the amount of dry yeast in the recipe - 3g doesn't seem right for 800g flour.
I made a UzbekTashkent shaped bread a few weeks ago using a Fougasse dough. Worked really well and wish to try your recipe. Cheers.
Victor @ Taste of Artisan says
It's perfectly right, no doubt about it.
Moboy says
Looks wonderful!
Will attempt it sometime.
Thanks for your wonderful recipes.
Victor @ Taste of Artisan says
You are very welcome. Enjoy!
gina says
wondering about using a pizza stone and cooking in a gas BBQ any thoughts?
Victor @ Taste of Artisan says
Gina, without trying I can't be certain about what kind of results you can get from it. A pizza stone is a must, the thicker the better. Another important factor is good airflow. Without it, the crust won't form properly and will be soft and pale. You may still get a good obi non that will taste great but may look different. I'd say go ahead and give it a try and then you can see if you need to make some adjustments to make it work perfectly. If you need my help, let me know... take some pictures along the way.
gina lovejoy says
thank you going to try soon Its just too hot turn turn the oven on
Victor @ Taste of Artisan says
You are welcome. I hear you, it's been really hot in many places these days...
Patricia says
What are the advantages of using powdered milk + water VS using liquid whole milk?
Victor @ Taste of Artisan says
I don't know exactly but from my experience, the wash made with powdered milk can be made, and should be, much thicker and have an almost buttermilk consistency. This seems to really improve the browning and the color.
Patricia says
ThankYou, I’ll give it a go!
Victor @ Taste of Artisan says
Good luck!
Margaret says
A quick question...if I don't have a convection oven is the Uzbek bread impossible?
I have made and thoroughly enjoyed so many of your recipes...thank you!
Margaret
Victor @ Taste of Artisan says
Margaret, you are very welcome, thank you for the kind words. Obi Non is traditionally baked in tandyr clay ovens without any convection, so I am sure it will work just fine. I like cooking this bread with convection only because I get a darker/richer color, but that's not a requirement for this bread. Good luck and stay tuned for more bread recipes, I've been planning on a adding a few more of my favorites.
Brian says
Another awesome-looking bread! Keep up the good work!
Victor @ Taste of Artisan says
Thanks. Will do.