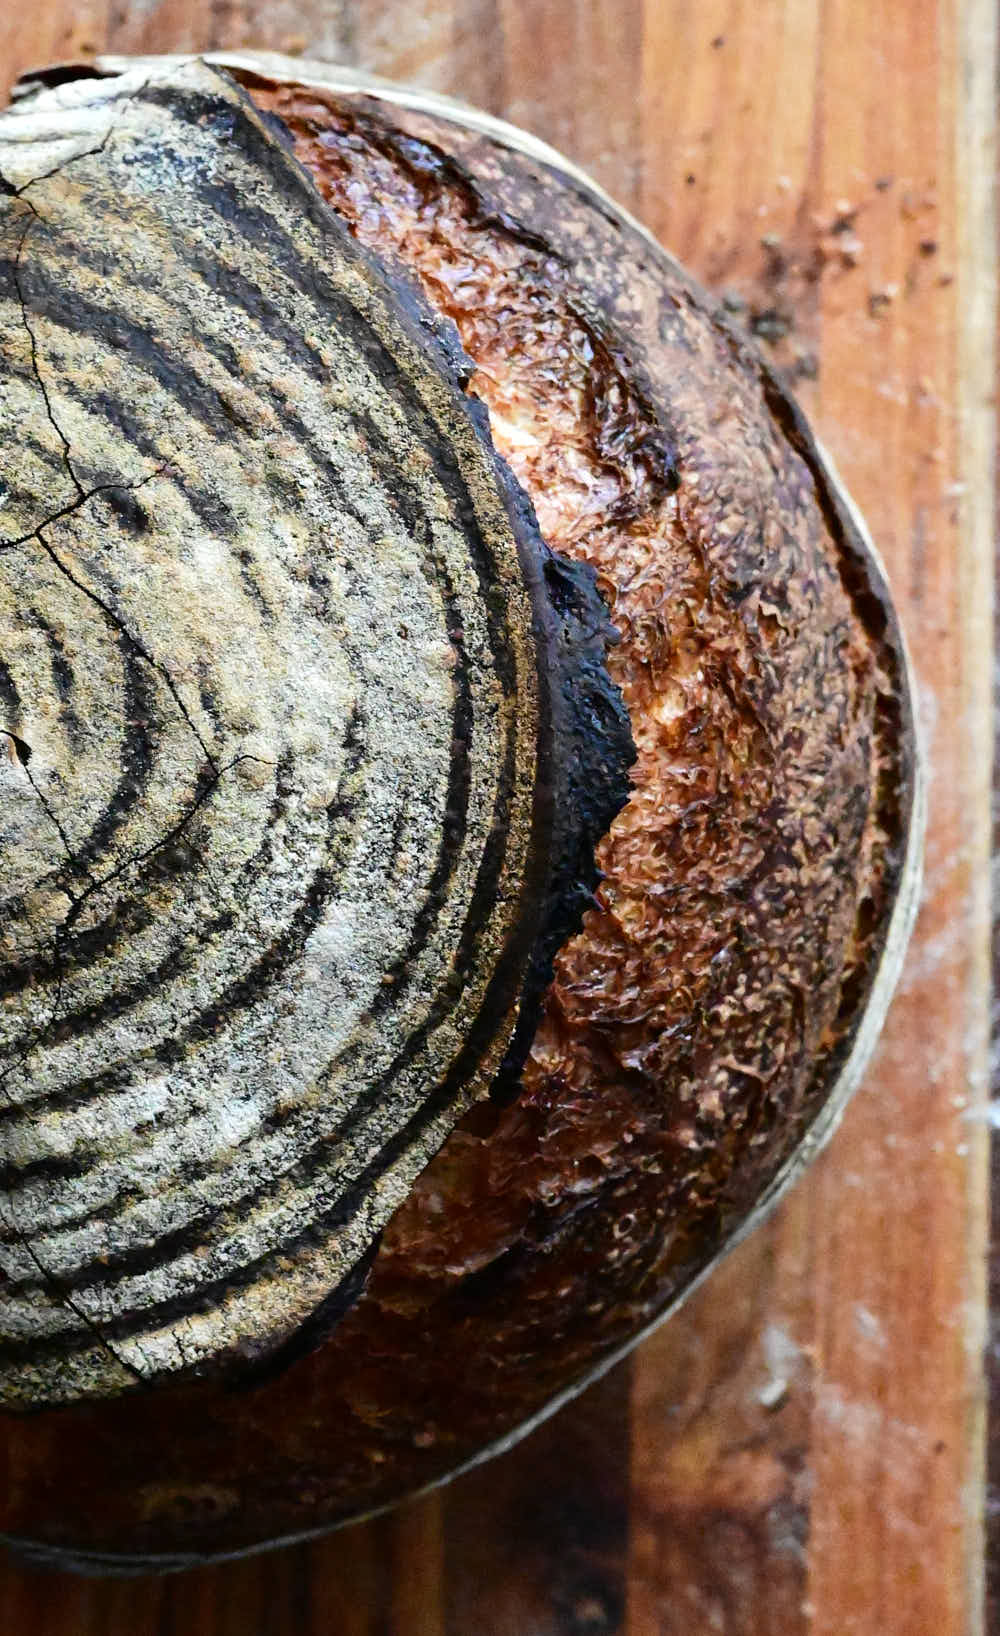
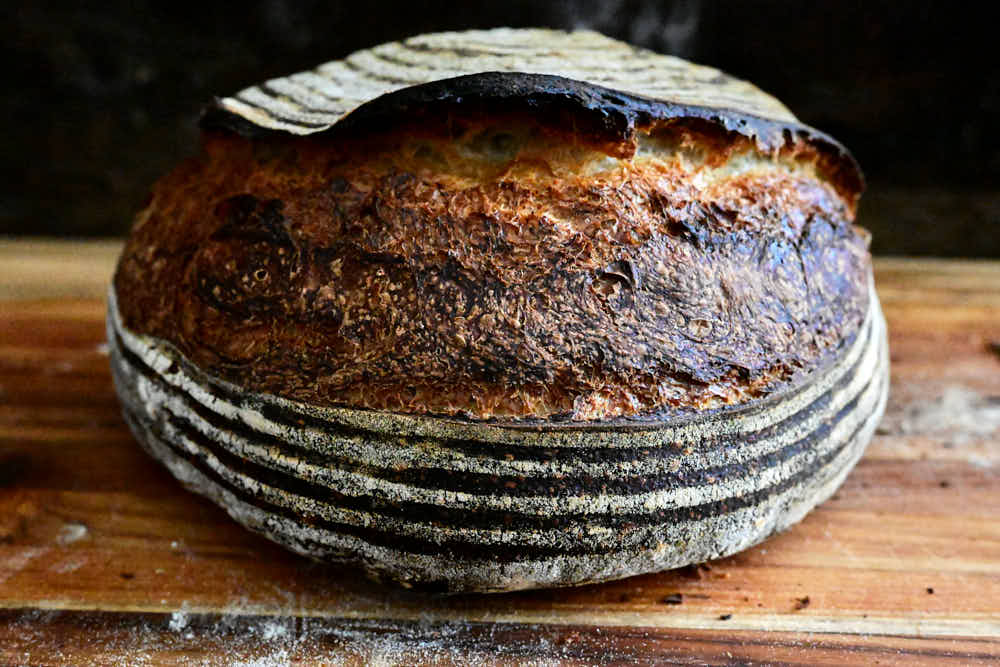
There is one trick to making sourdough bread insanely tasty and flavorful, mimicking the way it used to be baked in wood-fired ovens. It is the dark, slightly charred crust. I achieve it by baking my bread with the oven door cracked-open for 25 minutes. It makes a huge difference. My grandparents had a wood-fired oven in which they baked bread from time to time. I loved the taste of that bread, but more so, I loved the crust. It was dark, crunchy, thick and chewy, with dark chocolate flavor and a slightly bitter taste.
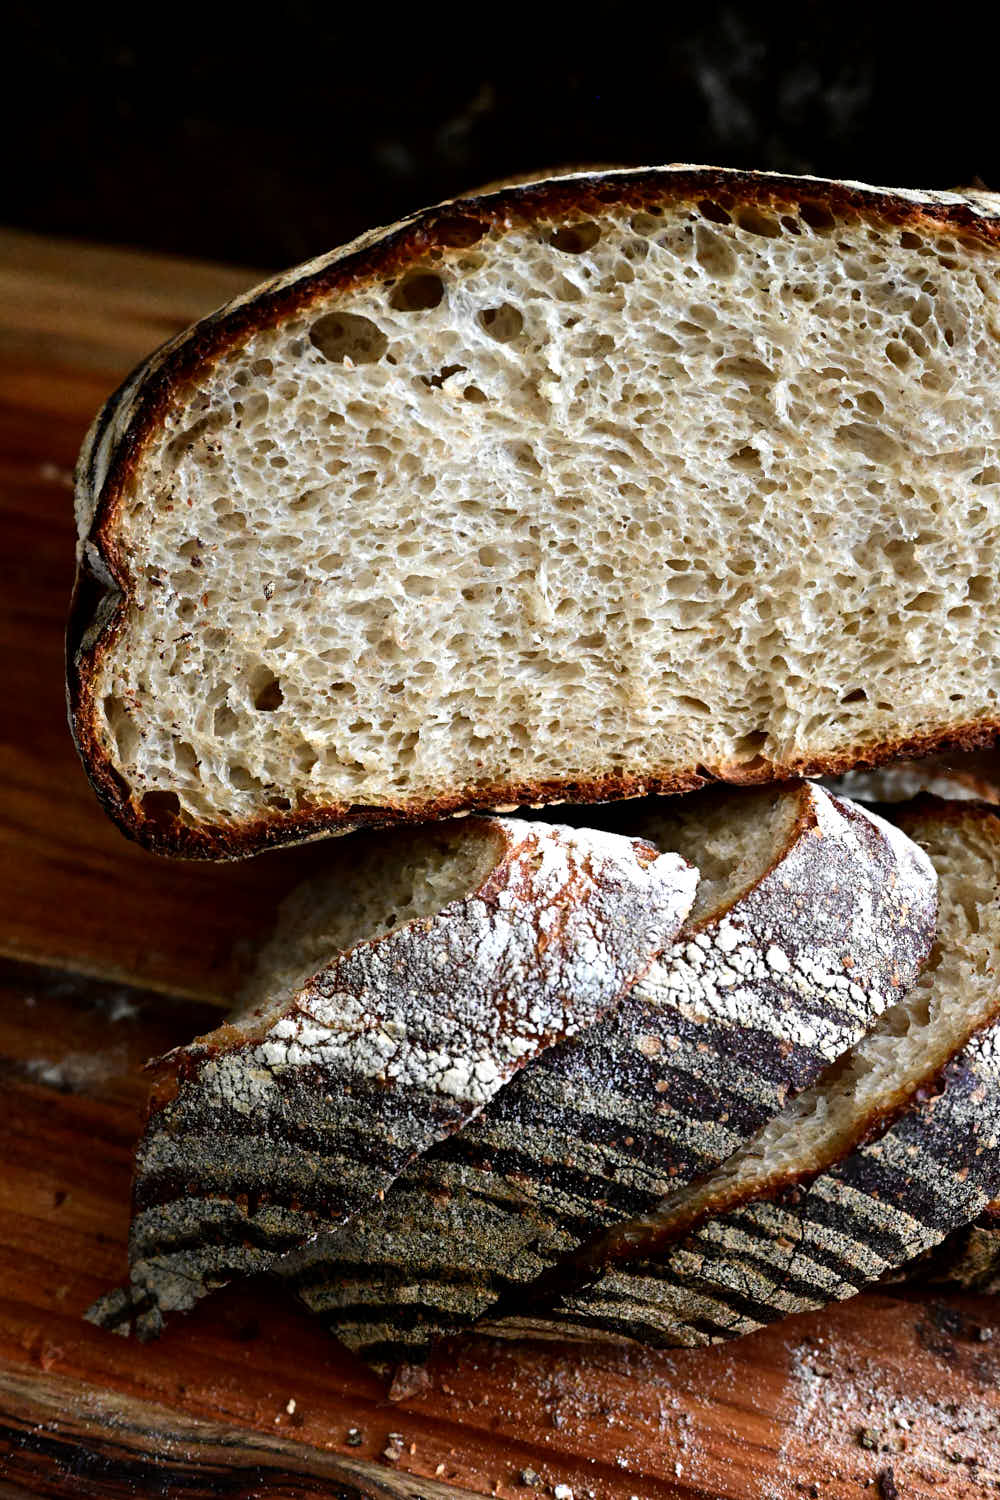
The contrast created between this crust and the soft, slightly sweet crumb is mind-blowing. There was so much flavor in that bread that I would just break pieces off and eat it like that. Ok, maybe I'd add a little butter, but nothing else. This kind of bread is a meal on its own.
Another trick to making your bread irresistibly good is to add a sweetener. Sure, you can make great sourdough bread with just flour, water, sourdough starter and salt, but if you add just a little bit of honey, your bread will be transformed.
I add honey to my French baguettes and people rave about them. They taste insanely good! Who cares if a traditional French baguette has no sugar or honey in it? If it tastes good then I will be adding it.
And guess what, a bit of honey makes sourdough bread light years better too. It's like adding some sugar to dark chocolate. Now you have the slight sweetness contrast the bitter chocolate notes. This creates so much drama and excitement that you'll want to savor every bite. And if you substitute in a little bit of rye flour, the bread will be even better. That's another trick I use to make really tasty bread. Rye flour adds a lot of flavor and a touch of sweetness.
How to make rustic sourdough bread
Since this is one of the breads that I make quite often, I keep things very simple. This helps me easily integrate bread-making into my daily routine, making it a trivial extension of anything else I do. There is no fuss or stress about it.
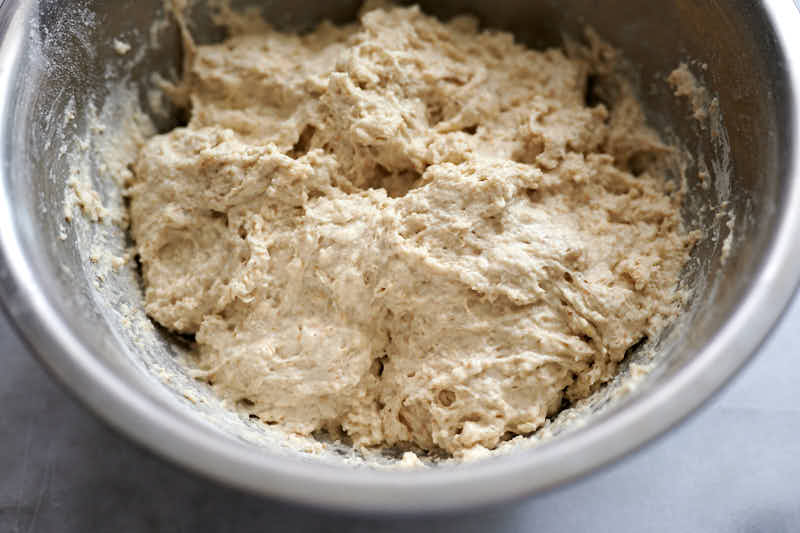
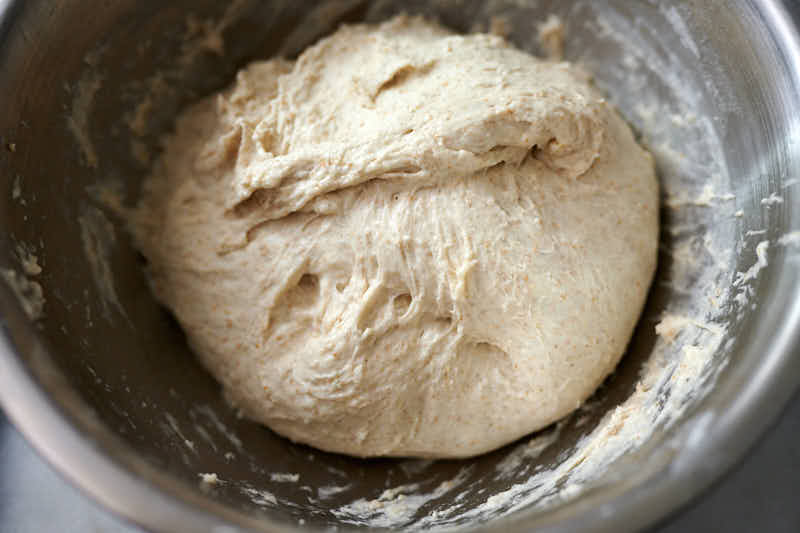
Step 1 - mixing dough
Mix all of the ingredients together in a bowl. That's it. No need to autolyze, add salt later or do any other fancy stuff. Just mix and let the flour hydrate for one hour.
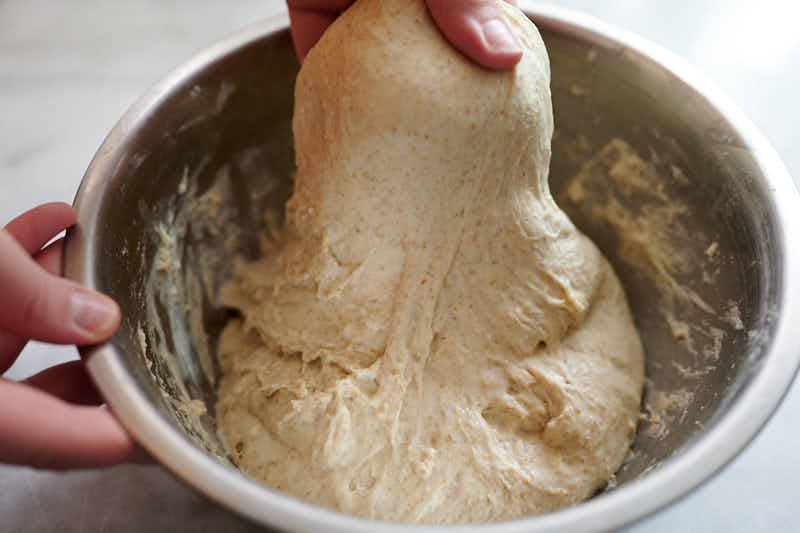
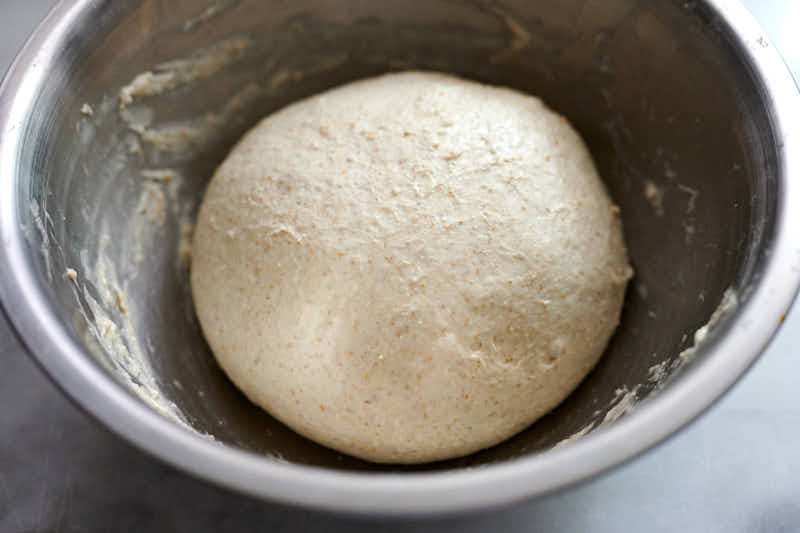
Step 2 - stretch and folds
After one hour passes, start performing stretch and folds. This helps the dough develop gluten and become strong. Strong dough means bigger holes, airy crumb and explosive oven spring. Each stretch and fold is where you will pull each of the four corners of the dough up, stretching the dough, then fold it onto itself. After all four corners are done, lift the dough up, gather the corners and flip upside down. Then repeat the process 2 more times every 30 minutes. If you forget and do it a bit later, that's totally fine.

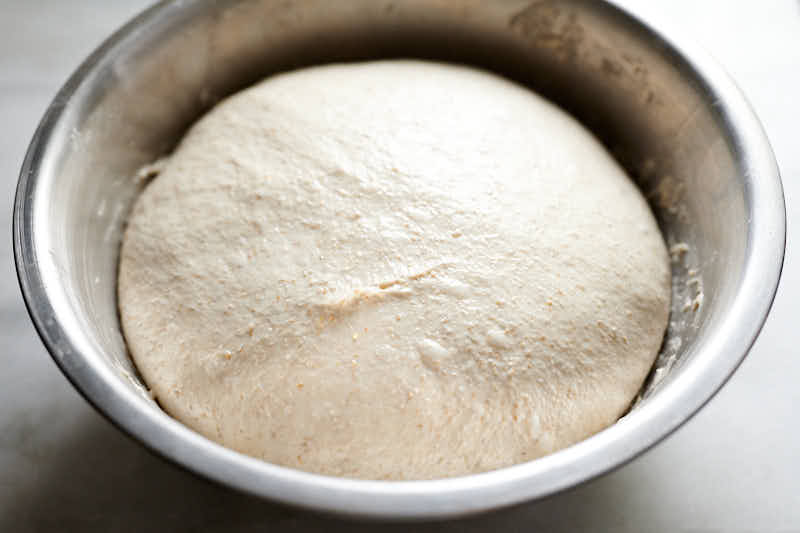
Step 3 - bulk fermentation
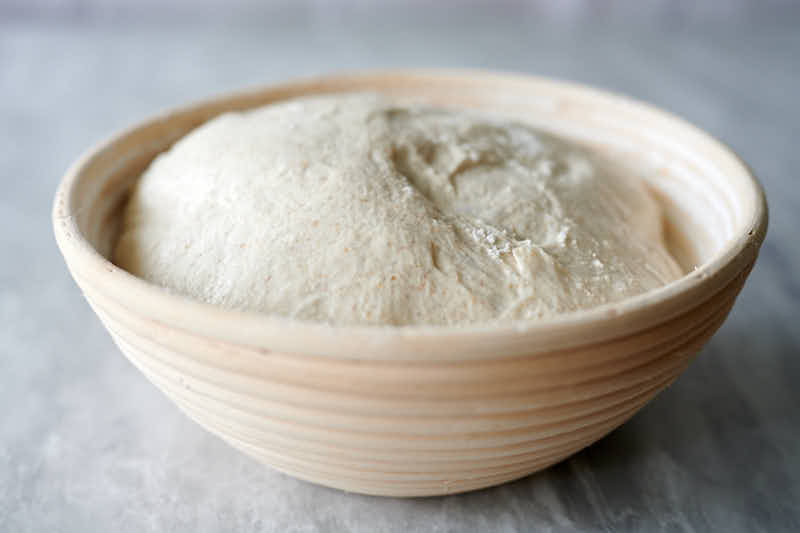
After you've done three sets of stretch and folds, shape the dough in a ball, put in the bowl seam-side down, and let sit at room temperature for as long as it needs to double in volume. This usually takes about 2-4 hours, depending on the room temperature. If you want to expedite the process, stick it in the oven and turn the light on.
Step 4 - shaping the dough
Turn the dough onto a lightly floured surface. Fold the corners as would an envelope, making sure they overlap. Bring the seams together and pinch. Flip and let rest for 20 minutes. After 20 minutes have passed, flip the dough again, gather the corners and bring them over each other, pinching the seams. Transfer the dough, seam side up, into a generously floured 9-inch proofing basket. Use rice flour to dust the basket to prevent sticking.
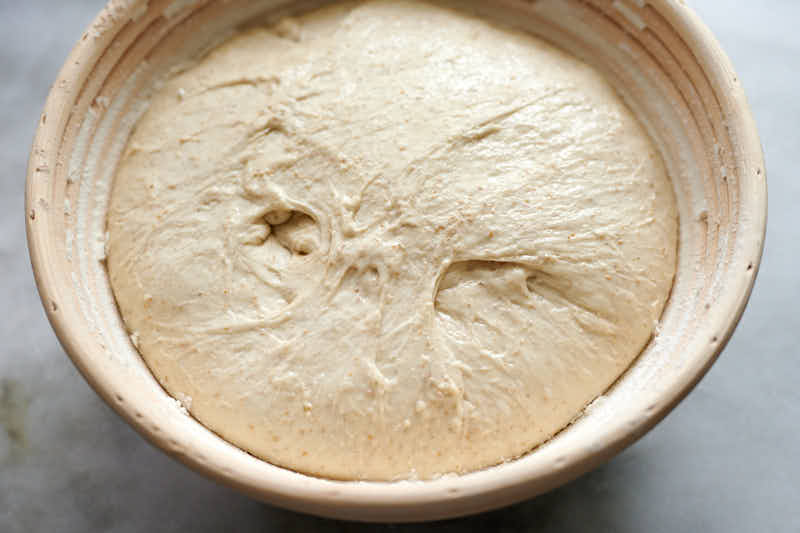
Step 5 - proofing
Cover and proof for 2-4 hours, depending on room temperature until the dough has increased in volume by about 40%-50%.
Step 6 - cold retarding
Place in the dough in the fridge and refrigerate for 12-16 hours. This will help the dough develop really good flavors.
Step 7 - preheating the oven
Preheat oven to 500F.
Step 8 - scoring and baking bread
Once the oven is preheated, turn the dough over onto a piece of parchment paper place over a pizza shovel.
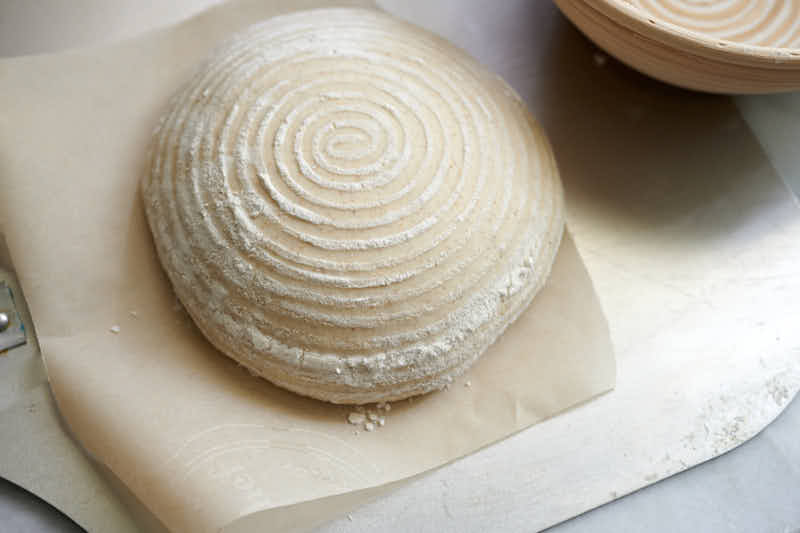
Using a bread lame or a blade/knife, make a score to allow bread spring up in the oven.

load the bread in, drop the temperature to 485F and bake with steam for 25 minutes. My favorite way to bake this bread is in a bread cloche, but you can also use a cast-iron combo cooker or bake on a baking stone with a water pan to create steam. When using a bread cloche or a combo cooker, there is no need to steam the oven.
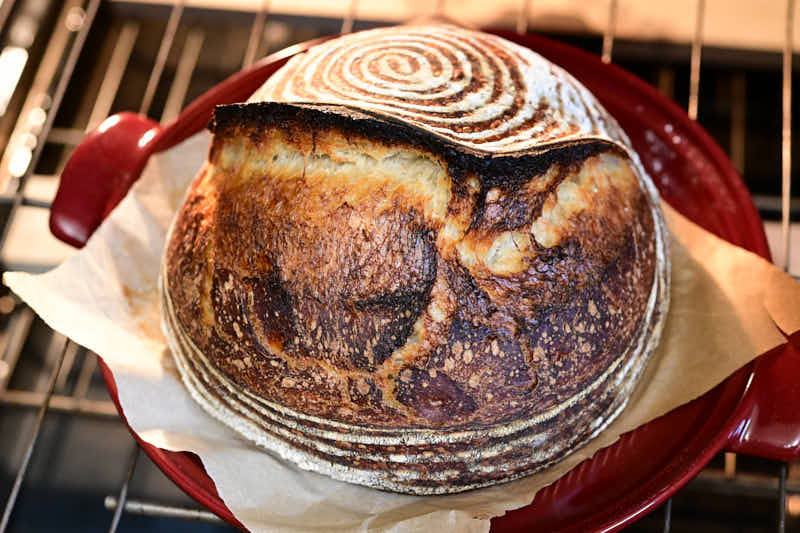
After that, drop the temperature to 450F and bake for another 25-30 minutes without steam. I keep the oven door cracked-open during the second part of the baking, the helps to dry out the crust and darken it.
Enjoy!

Ingredients
- 350 g bread flour or all-purpose flour; or 300 g AP and 50 g high gluten (type 00) flour
- 50 g rye flour
- 270 g water room temperature
- 200 g sourdough starter use active, mature sourdough starter that has about tripled in volume after feeding
- 25 g honey
- 10 g kosher salt or sea salt
Instructions
- In a large bowl, dissolve sourdough starter and honey in water, add the rest of the ingredients and mix, squeezing the dough between fingers. Cover and let rest for one hour.
- After one hour passes, perform three stretch and folds every 30 minutes or so.
- After you've done three sets of stretch and folds, let the dough ferment at room temperature for as long as it needs to double in volume, about 2-4 hours. To expedite the process, stick the dough in the oven and turn the light on.
- Turn the dough onto a lightly floured surface. Fold the corners as would an envelope, making sure they overlap. Bring the seams together and pinch together. Flip and let rest for 20 minutes.
- After 20 minutes have passed, flip the dough again - it will now be smooth side down and seam side up. Bring the corners together, overlapping each other, and pinch. Transfer the dough, seam side up, into a proofing basket generously floured with rice flour.
- Proof for 2-4 hours, depending on room temperature, until the dough has increased in volume by about 40%-50%.
- Place in the dough in the fridge and refrigerate for 12-16 hours.
- Preheat oven to 500F. Once the oven is preheated, turn the dough onto a piece of parchment paper and make a score using a bread lame or a serrated knife.
- Load the bread in, with the parchment paper, drop the temperature to 485F and bake with steam for 25 minutes. Then bake for another 25-30 minutes without steam at 450F, keeping oven door cracked-open (using a wooden spatula).
- Remove bread from the oven and let rest for one hour before slicing.

Divina says
How do achieve that deep dark color? Just bake it longer?
Victor @ Taste of Artisan says
You could. But you could also do the second half at 475-485F. I forgot to drop the temp a couple of times and the bread came out very dark, but still very good and the crust was very good.
Anatolii says
This was by far the most delicious loaf out of all I tried so far from the library of sourdough breads in here! Absolutely addictive taste!
It was fairly easy to do after I had tried other sourdough bread recipes.
I am already making levain for the next loaf!
Thank you very much Victor for the detailed recipe!
Victor @ Taste of Artisan says
You are very welcome, Anatolii. Glad you liked my bread. You should also try my dark rye bread, I have a feeling that you will like it too. I am sure you are familiar with Borodinsky bread; this one is my version of it, less sweet, and simpler to make but just as good.
Anatolii says
OMG! Thank you for pointing out to it! I LOVE Borodinsky bread! This is my next bread now. Will report back when done.
I see it is a bit more complex in preparation, so hopefully having some experience now I would get this one right.
Victor @ Taste of Artisan says
It's actually easier that it looks. My teenage daughter made it several times already and thought it was fairly easy to make. Good luck!
Joani says
I am soooo delighted to have stumbled upon this site! I have my first loaf in the oven and can’t wait to see how it turns out. Lots of great tips on here. Thank you!
Victor @ Taste of Artisan says
You are very welcome. Enjoy!
Marea says
I am just learning about levain. Saw your whole wheat recipe using a levain. Could I use 200grams of a levain instead of straight starter using this recipe? Can you help me understand the benefits or difference of using a levain vs straight starter in recipes? Does it aid in whole grains and lighten heavier breads?
Victor @ Taste of Artisan says
My experience is that if the starter is at peak strenth and the flour mix between the bread dough and what you feed your starter is similar, it will perform optimally. Benefits of building a levain is to build strength, accustom yeast strains in the starter to a new flour mix, build acidity in the bread. Straight sourdough starter rill result in a mildly acidic bread. Hope this helps.
David Farris says
Just made this recipe for the first time and it is delicious! A couple observations I’m hoping you can help me dissect:
1. Crust is pretty thick
2. Really tight but super soft crumb - no large holes
3. The loaf was too big for my Dutch oven so I baked on a stone and tried a couple more steam options - still couldn’t get that ear to pop
4. Reached 208 degrees about 10 minutes into the second half of the bake so I pulled it.
All info and advice appreciated!
Victor @ Taste of Artisan says
Congratulations! Glad you liked it.
Thick crust is what I like about this bread but you can certainly change that. Drop the baking temp to 450F/425F and you will get a much thinner crust. When I want a really thin crust, I bake at 425/400F. Baking may need to be a little longer but the crust will be very thin.
Large holes depend on many things - hydration, fermentation, proofing, yeast strength, how gentle you are handling your dough, etc. Tight dough makes me think insufficient fermentation. Look for at least a 2x increase in volume during fermentation and a 50% increase during proofing. That should help with getting a nice ear.
208F 10 minutes into the second half means your temp is too high. Looks like your oven bakes way hotter than mine. Definitely try baking at a lower temp. That should help with most of the other issues you described. Let me know how it goes. Happy baking!
LF says
Hi,
Great tips! I’m not new to the bread baking as have been doing it for 7y but still need to “improve” to get to the perfection! I’ve had to amend some bits- mainly around a sourdough starter as I have my own which is about 7y old. I feed it twice a week (24h before baking) and use only 40gr. Otherwise followed the other steps - loved the idea about door open, agree makes a huge difference- positive one !!!
Victor @ Taste of Artisan says
Thanks for the feedback, LF. Happy baking!
Jane Daughenbaugh says
Thought I'd update you, Victor. I followed your suggestions and reduced the amount of water a bit and lowered the proofing temperature. The results were much better! Thanks so much.
Victor @ Taste of Artisan says
You are very welcome, Jane. Glad it helped. Try my other recipes, pampushki, yeast rolls, challah, Uzbek bread, cinnamon rolls, WW sourdough, rye... all of those are my favorites and they are delicious.
Jane Daughenbaugh says
Well, those pictures look familiar! Thanks again, Victor.
Victor @ Taste of Artisan says
No problem. Yes, I posted those some time ago in response to someone's question.
Jane Daughenbaugh says
Thanks for your input and suggestions, Victor. I'll start using some of the tips and see if I can figure out which one resolves it. One last question for you. Is over-proofing the dough related to proofing it too long or can it also occur if the temperature is too warm? Again, many thanks. You've always got such helpful input.
Victor @ Taste of Artisan says
No problem, Jane. Proofing is a function of time and temperature. So, yes, you can over-proof by having the dough sit in a too warm place for a little too long. Here is an example of one of my over-proofed sourdough breads:
https://tasteofartisan.com/wp-content/uploads/2019/10/sourdough-bread.jpg
Take a look at my Basic Artisan Sourdough Bread post, perhaps you will find the details helpful.
Jane Daughenbaugh says
Hi, Victor. I have a problem with some of my sourdough loaves that I'm hoping you can help. When I make a round loaf and bake in my cloche, it spreads out so the loaf is only 2-3 inches high at the center. How can I get is so the dough holds its shape better. This doesn't happen with the longer loaves, but that's likely because there's more support to help hold the shape. The breads taste good. It's just that I can get a fuller, taller round loaf. Appreciate any tips you can offer.
Thanks,
Jane
Victor @ Taste of Artisan says
Hi Jane, it's quite interesting. I've noticed that my sourdough bread has a better oven spring when baking in a cloche, take a look at this sourdough bread recipe, I posted some pictures there. Flat bread that doesn't rise but tastes very well is usually the result of over-proofing, excessive hydration or incorrect scoring. If your proofing and hydration is fine, then I'd look into scoring. If you score bread too deep or too close to the sides, it will have a heck of a time springing up. So, try scoring so that you leave about 1 - 1.5 inches from the sides and about 1/2" inch deep, no more. That should help. If it still spreads out too much, drop the hydration until you see good results. Then slowly work your way back up. Sometimes it's about some practice. Also, how do you load your bread into the cloches? My results have improved significantly once I started turning the dough over from proofing baskets straight onto the cloches. A quick score, close and bake. Perfect results. Before, I'd turn the dough over onto a piece of parchment paper, score, then transfer into the cloche. Doing it that way I always noticed more of the spreading and flatter final product. Hope this helps.
Bonnie Sorensen says
I plan on baking my bread in a cast iron dutch oven, most of my recipes say to put the dutch oven in the oven when the oven is preheating. Is that the case with this recipe or should the dough go into a cold dutch oven?
Victor @ Taste of Artisan says
Yes, that's the case with this recipe as well, the dough goes into a preheated Dutch oven. I have a flaxseed bread recipe on the blog here that goes in a cold oven if you are interested.
Neila Smith-Dorfman says
This bread is fabulous! Comes out looking just like the website photos, with that dark, caramel-colored crust, wonderful complex flavor with just a touch of sweetness! Thank you for sharing the recipe.
Victor @ Taste of Artisan says
You are very welcome and happy baking!
Scott says
Made this recipe for the second time today (my second sourdough loaf ever) and I am pretty thrilled with how it came out. The first time I made it the crust was a little dark for me so I modified the second bake phase to have the oven closed for the first 10 mins and then open it up for the last 15. I think it is perfect for my tastes like this! Thanks for the recipe, love the site and have been making my way through a lot of the recipes that you have posted!
https://i.imgur.com/wOIm1A2.jpg
https://i.imgur.com/qtOM5fq.jpg
Victor @ Taste of Artisan says
Hi Scott, your bread looks very good. Glad my post helped.
Don Agren says
Made the rustic sourdough bread today, added 50 grams ww flour for bread flour, baked in a Dutch oven. Turned out great!
Victor @ Taste of Artisan says
Awesome! Glad to hear it.
Judy says
Thanks for your thoughts about the levain Victor!! It really IS a great loaf of bread!
🙂 Judy
Judy says
Hi again Victor,
Thanks for the update about the rye flour ... I used dark rye too because it was the only kind I could find.
Another question: Is there a reason you're using 200 grams of levain for such a small loaf? When I used it it felt like too much starter. The loaf came out good but I'm curious as to the rationale since usually the percentage of levain is much smaller.
🙂 Judy
Victor @ Taste of Artisan says
Several reasons for that, Judy. First, this is about the amount of my daily starter and just don't want to throw anything away, secondly, it adds a perfect amount of flavor adn acidity... finally, this is enough to ferment the dough in that time frame. Of course, there are thousands of ways to make a good loaf of bread. You could build the levain to get more flavor/tang, you could use less starter and increase fermentation time or bump up the fermentation temp. I just find that this works for me without much effort so hence this recipe. I experiment a lot though, so this is just one of my favorte breads.
mike says
Maybe a silly question - does the bread backed in a cloche or combo cooker stay covered for the first 25 min then uncovered for the following 25-30?
Thank you for making this site, it is awesome!
Victor @ Taste of Artisan says
Hi Mike, it's a perfectly legit question if you haven't done this before. Yes, keep it covered for the first 20-25 min then finish uncovered. The reason for that is that when baking covered, there the moisture from the dough will generate steam that will stay inside the cooking vessel, preventing the dough from forming a crust and enabling it to puff up (oven spring). Once the expansion of the dough is done, bake uncovered to form and brown the crust. If baking uncovered (on a stone), you need to use a steam generator such as pan filled with hot water or another mechanism.
REBECCA says
Can I skip the rye and just add ap flour?
Victor @ Taste of Artisan says
Yes, substitute rye for AP with no further changes. I like rye flour for it adds flavor a hint of sweetness but you definitely sub it.
Judy says
What kind of flour do you use in your starter?
And do you use light or dark rye in the recipe?
Can't wait to try it - thanks!
Victor @ Taste of Artisan says
Hi Judy, I use dark rye flour. As for the starter, I use my daily sourdough starter without any modifications. I will be posting my San Francisco sourdough recipe soon, I highly recommend it.
Judy says
Hi Victor,
This looks amazing and I can't wait to try it!
Two questions: Do you use dark rye or light rye flour? And what flour do you use in your starter for this loaf!
I'll report after I make it!
Many thanks in advance 🙂 Judy
Victor @ Taste of Artisan says
The flour in the starter is a mix of AP and WW flour. You can see more details in the sourdough starter post.
Jane Daughenbaugh says
Excellent recipe. Had tried a different recipe for sourdough bread, but it just didn't have the flavor, chewiness or airy holes that I think of with sourdough. Thanks for sharing your tips!
Victor @ Taste of Artisan says
Happy to hear it, Jane. I have more really good recipes coming, been testing several new recipes and some are really good so be sure to subscribe to get the latest recipes.
P.S. Lovely looking bread. I like the airy texture and beautiful holes. Thanks for emailing me those pictures.
Jane Daughenbaugh says
One thing I will do differently next time I make this bread is to close the oven door a tad more at the final stage of baking. That should make it brown a bit darker.
Victor @ Taste of Artisan says
That's a good trick, I've noticed that too, that bread browns better close to the oven door. Another trick I use is after steaming, I drop the temperature to about 425F and bake with the door cracked-open for about 35-50 minutes. This allows the moisture escape very easily which makes bread brown much better. This also creates a thinner, crispier crust. I can get the bread really dark this way too if I want to, to bring out dark chocolate, slightly bitter flavor. Love it.
Jane Daughenbaugh says
Sure thing, Victor. And thanks for the additional tips on getting a darker crust! Be well. Jane
Dawn09 says
I am going to try your rustic sourdough recipe. If I use my Dutch oven what is the temperature and how long to bake.
Victor @ Taste of Artisan says
Cast iron gets hotter so I recommend about 450F for 20-25 min with the lid on and 25-35 min at 425F. It's been a while since I baked in a cast iron combo cooker so I can't recall the exact timing and temps but what I mentioned above should work.
Keith says
This is an amazing sourdough recipe, and from my experience practice makes perfect. I usually use a baking stone at the final stage. Recently I have had to find a substitute for a banneton as I had loaned mine to a friend. Owing to the current corona virus situation I have been unable to get it back! So, I have come up with an alternative. I cut down an off cut of a rain gutter I had in the shed, lined it with parchment type paper, and placed the the dough in it at the final proofing stage. It really holds its shape, and overcomes the need to tip out the dough from a banneton. You simply use the gutter as a peel - sliding the dough and baking sheet directly on to the baking stone.
>
>
>
Victor @ Taste of Artisan says
Hi Keith, thank you for sharing this very creative way to proof and load bread in the oven. Removing the dough from the basket is one of those challenging steps where if the dough sticks, you may end up with a deformed loaf. Something to consider though is that sometimes huge bubbles tend to build up at the top of the dough by the end of proofing and flipping dough effectively removes them. There is also more tension on the bottom side of the dough which helps achieve a more dramatic oven spring during baking. That said, there is no right or wrong way to bake bread as long as it tastes great and you can make it easily without fuss and frustration. Thanks for sharing your method and the pictures, Keith. Happy baking!