This no-knead sourdough bread is made with pure levain, bread flour, water, and salt. It's a great bread for everyday baking if you like white bread, with a lot of flavor and very mild acidity.
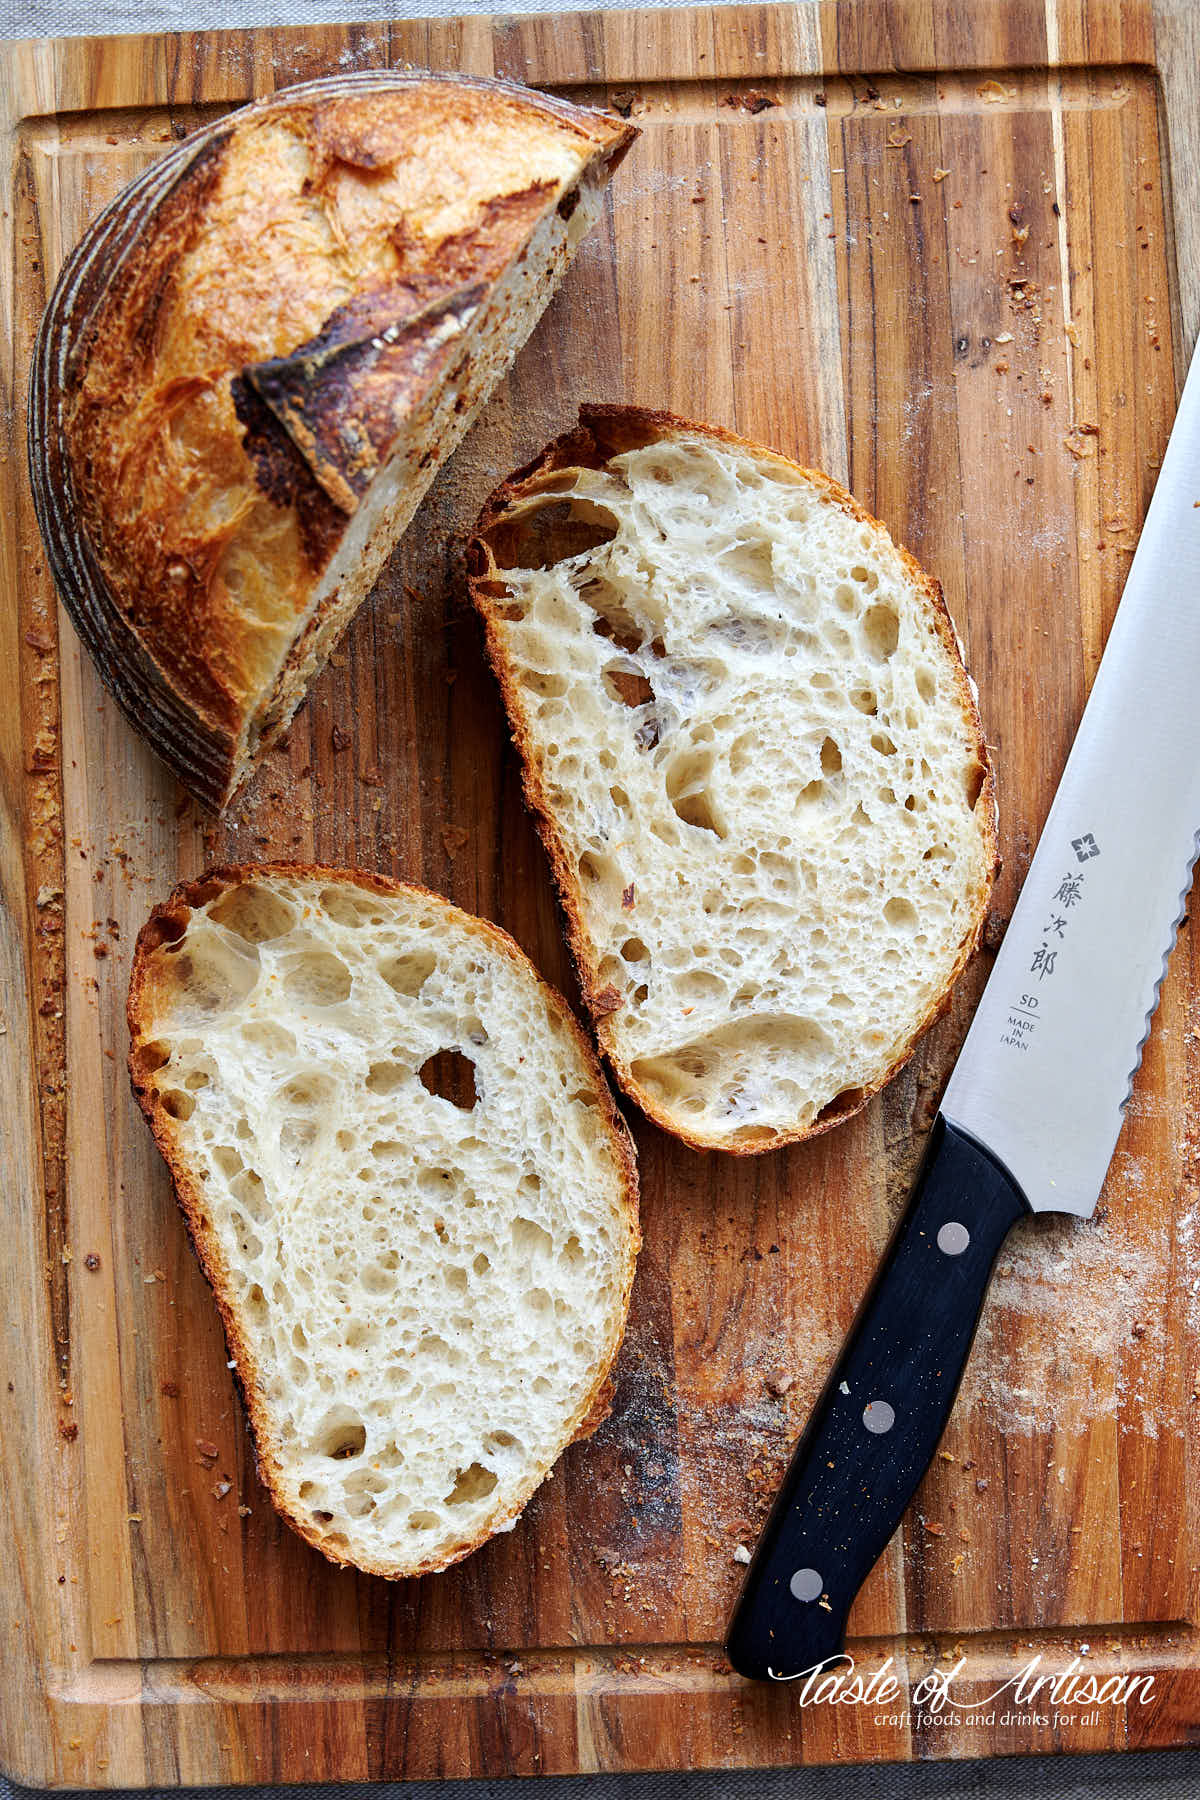
Bread made with pure levain, or sourdough, is not identical to bread made with baker's yeast, or a mix of levain and baker's yeast. Pure sourdough breads are typically rustic, denser, with bigger holes and a thicker, chewier crust. When baked to a darker crust, dark chocolate flavors will develop and permeate the crumb. Pure sourdough breads also have a pronounced acidic taste, where the degree of acidity varies depending on the amount of levain used, its age, fermentation time and temperature, and other factors.
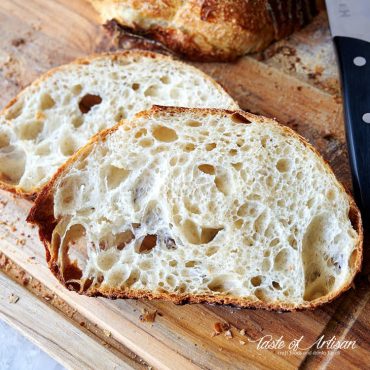
This particular bread features a very light, open crumb, similar to white breads made with baker's yeast, and very mild acidity.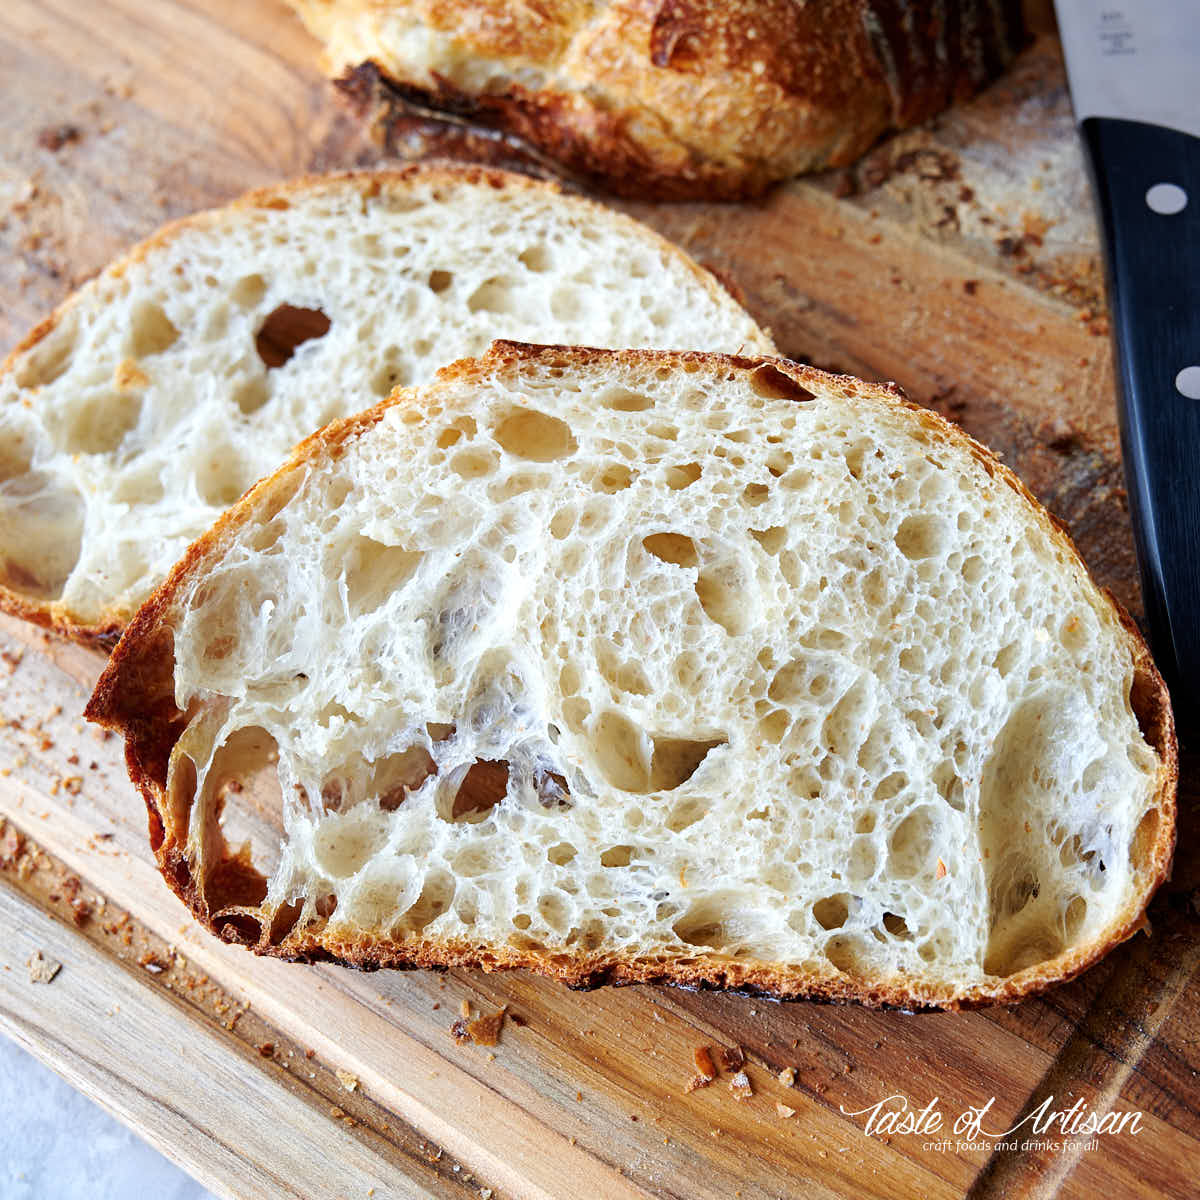
This is primarily because in this recipe I use double the amount of levain I typically use to make sourdough bread. This expedites fermentation and results in less acidity. I also use a fairly young, very active sourdough starter, about 8-10 hours after feeding. It has minimal acidity built up in it and is so active that the bread finishes bulk fermentation in about 3-4 hours and gets an outstanding oven spring.
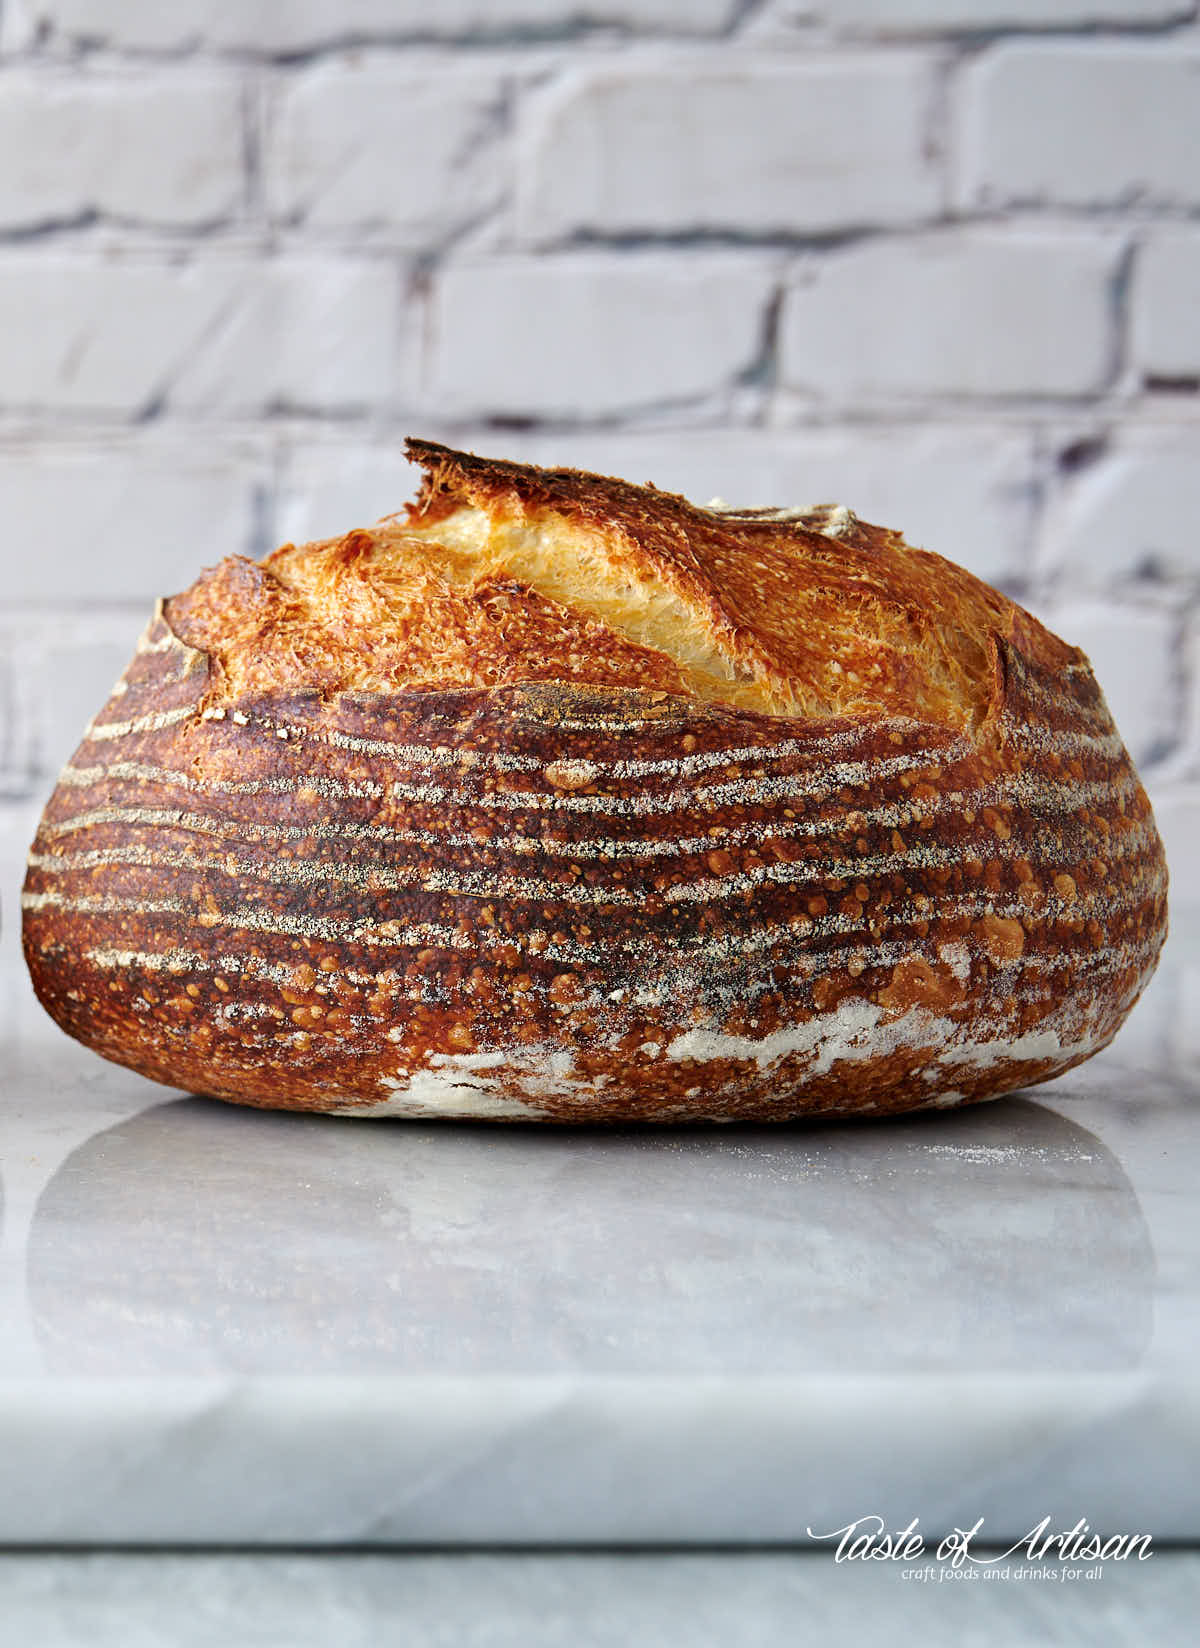
Baking the bread
There are usually 3 ways you can bake bread in a home oven. That's assuming that you don't own one of those fancy ovens with steaming and other cool functions, like proofing. Those are:
- Baking on a baking stone with a water pan, as described my previous posts, advanced no-knead bread and artisan sourdough bread.
- Baking in a cast iron combo cooker, popularized by Chad Robertson in his Tartine Bread book.
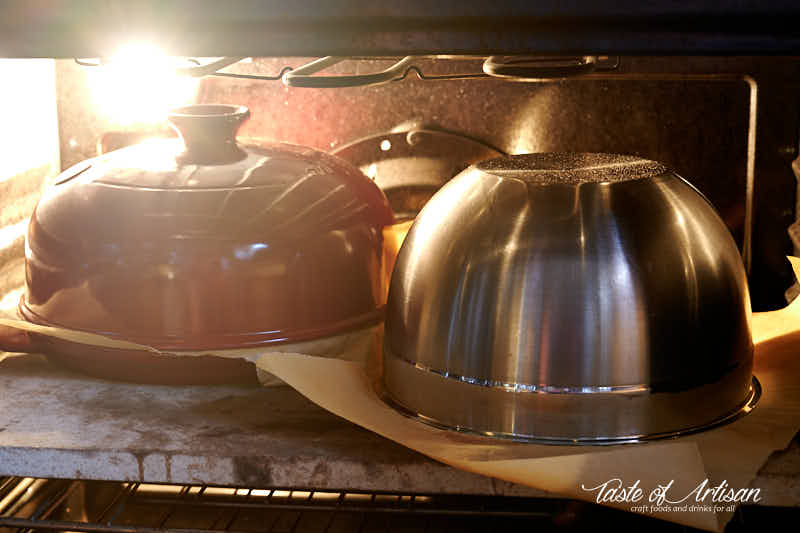
- Using a cloche.
Lately, I've been experimenting with a fourth method, using a (un-preheated) stainless steel bowl and a baking stone. The results have been quite good. Baked this way, the crust comes out relatively pale and not as thick, but this is a great option for those who don't own a cloche or a combo cooker, or don't want to mess with a water pan. The oven spring with this method is quite good too.
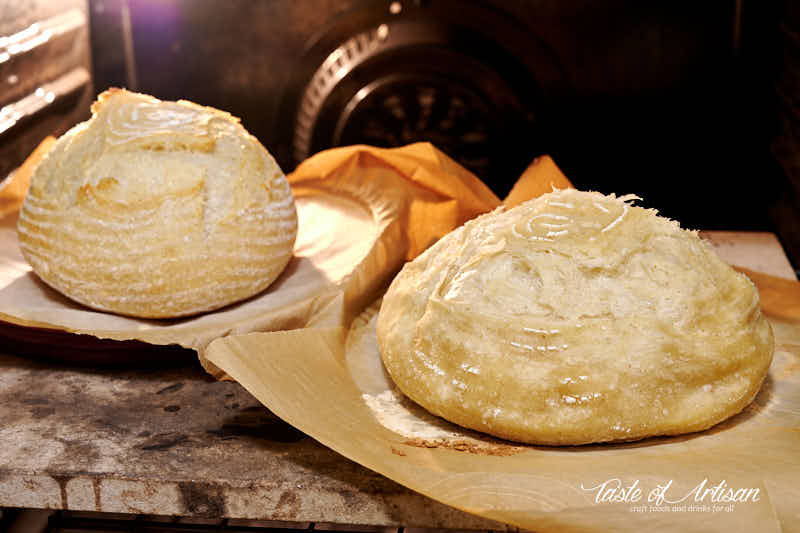
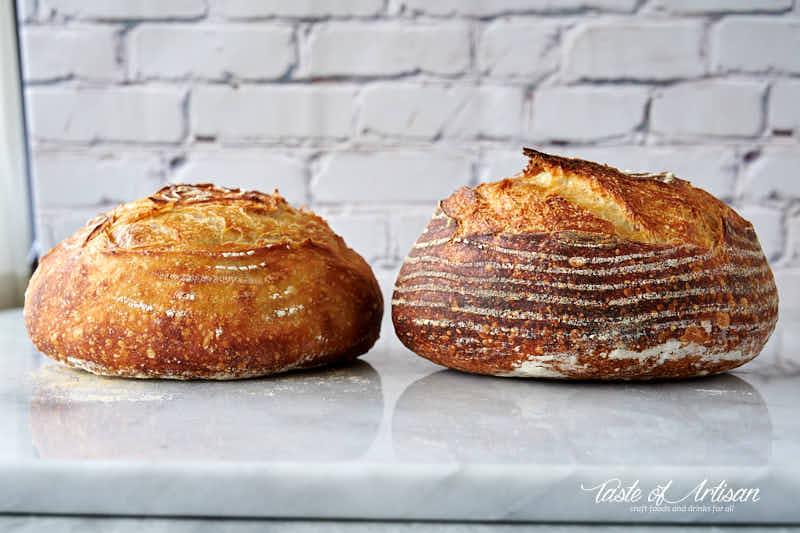
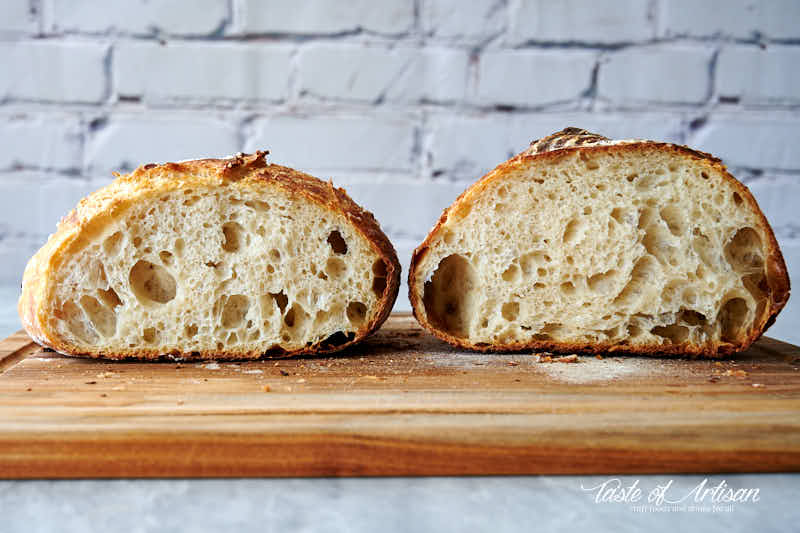
Bread Formulations
Levain Formula
Feed an active starter twice every 12 hours using the formula below. The starter will be ready for use 8-10 hours after the second feeding. It should increase about 2-3 times in volume.
| WEIGHT | INGREDIENT |
|---|---|
| 80 g | Bread Flour |
| 20 g | Whole Wheat Flour |
| 30 g | Sourdough Starter |
| 100 g | Water (90F-95F) |
Final Dough Formula
| WEIGHT | INGREDIENT | BAKER’S PERCENTAGE |
|---|---|---|
| 600 g | Bread Flour | 100 % |
| 420 g | Water | 70 % |
| 200 g | Levain | 33.33 % |
| 12 g | Kosher Salt | 2 % |
Overall Formula
| WEIGHT | INGREDIENT | BAKER’S PERCENTAGE |
|---|---|---|
| 680 g | Bread Flour | 97.14 % |
| 20 g | Whole Wheat Flour | 2.86 % |
| 520 g | Water | 74.3 % |
| 12 g | Kosher Salt | 1.71 % |
Variations
Try mixing in a cup each of chopped walnuts and quartered dried figs when you shape the dough. It makes an outstanding accompaniment for a morning coffee.
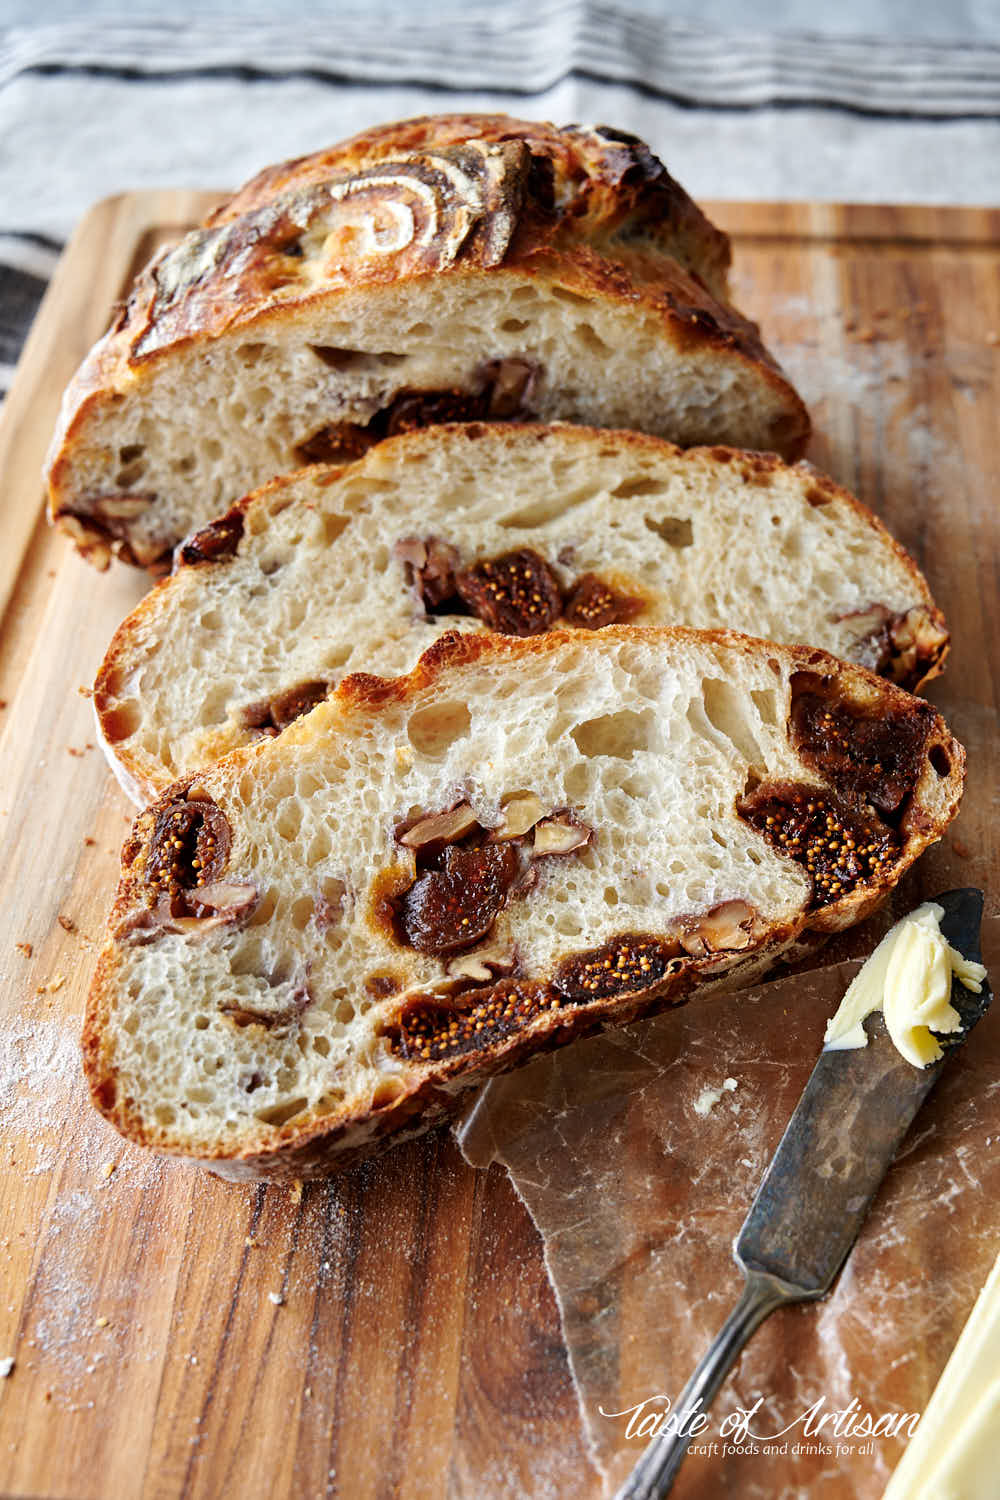
Before shaping, gently stretch the dough into a rectangle, spread the mix-ins and roll into a ball. Then proof, seam side down, and bake as you would regular bread. 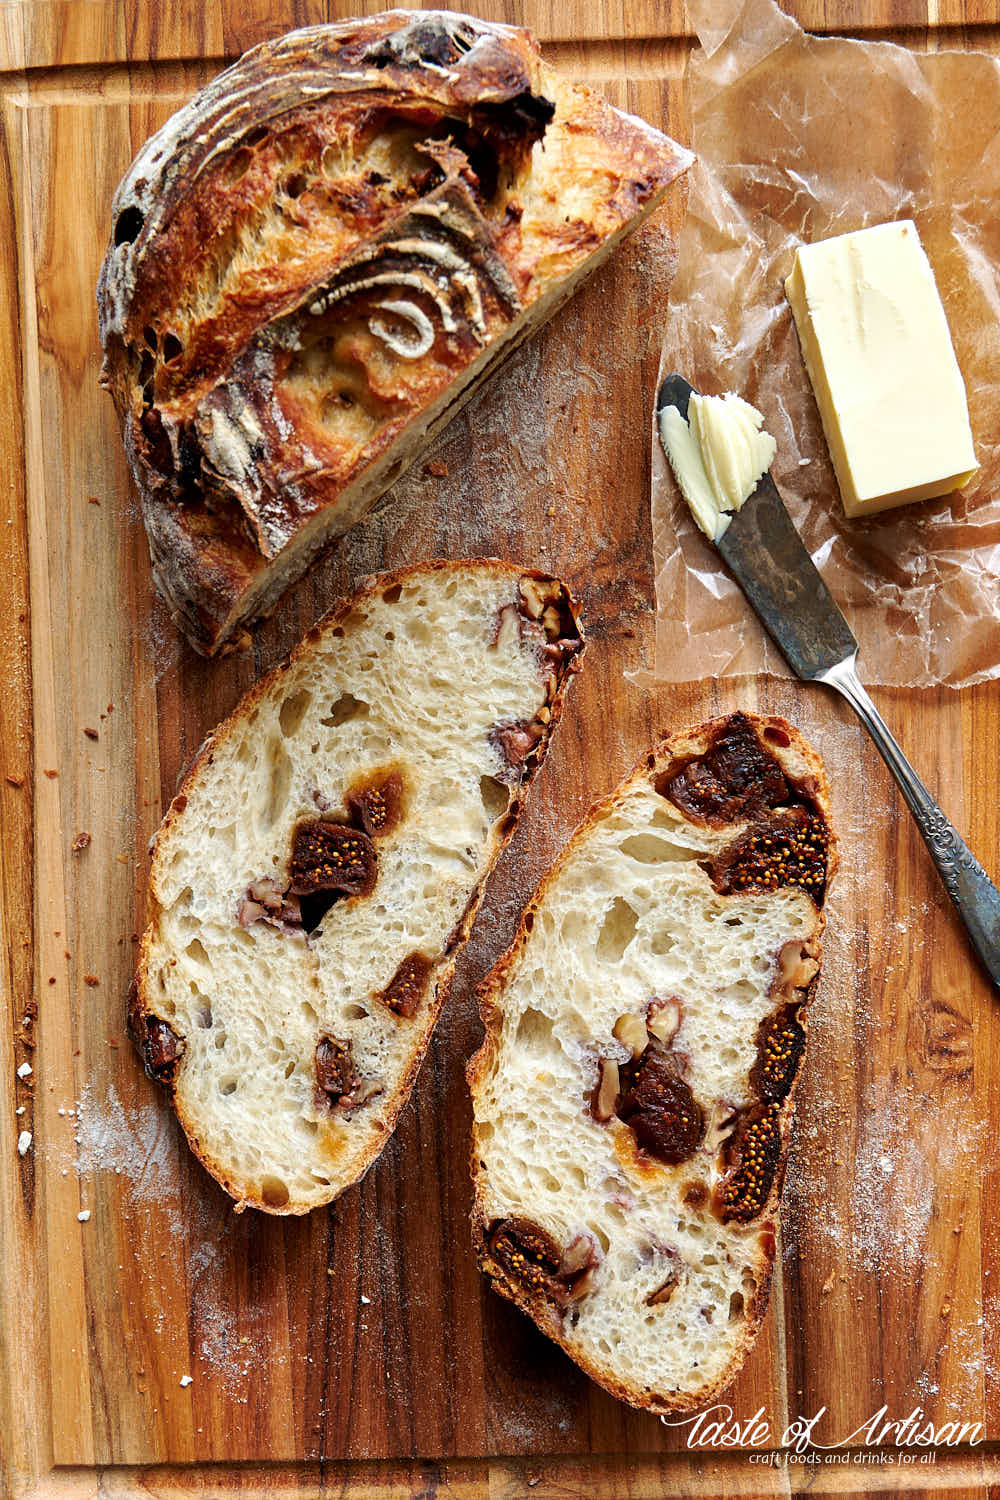
Ingredients
- 600 g bread flour I use King Arthur Special (Bread) flour
- 420 g water around 90F - 95F
- 200 g levain (see levain formula and feeding schedule above)
- 12 g kosher salt
Instructions
The night before baking, around 6:00 PM
- In a large bowl, dissolve the levain in water. Add the flour and the salt, and mix the ingredients together. Cover and let rest for 30 minutes to 1 hour.
Around 6:30 - 7:00 PM
- Perform a set of stretch and folds. Cover and let rest.
Around 7:30 - 8:00 PM
- Perform an additional set of stretch and folds. Cover and let rest.
Around 8:30 - 9:00 PM
- Perform the final third set of stretch and folds. Cover and let rest.
Around 10:30 - 11:00 PM
- Depending on your ambient temperature, the dough should increase by almost double in size by around 10:30 PM - 11:00 PM. When it does, divide the dough into two equal pieces. Shape into balls and place, seam side down, in proofing baskets. Cover and refrigerate overnight. Make sure that your fridge doesn't run too cold.
The next day, around 7:00 AM
- Take the dough out of the fridge and let sit at room temperature for 2 hours. Meanwhile, preheat the oven to 500F.
- When ready to bake, prepare two pieces of parchment paper, turn the dough over on parchment sheets, score and load in the oven.
- Drop the temperature to 450F and bake with steam for 20 minutes. Next, bake without steam for 30 minutes.
- Remove bread from the oven. Cool on a cooling rack for an hour before slicing.
Nutrition
This recipe was updated on December 21, 2019


Stephanie C says
Hi! I made this recipe for the first time recently and we really enjoyed it. I originally thought it was for one loaf. So that’s how I baked it. Will I get better crumb results doing two loaves? It actually had a decent crumb but not quite as open as your photos. Which looked great! I use your Pan loaf Sandwich recipe all the time but have converted to doing it with starter only and no yeast. Although it’s not quite as fluffy but still good.
Victor @ Taste of Artisan says
Hi Stephanie, I don't think splitting a large loaf into two smaller ones will necessarily help get a more open crumb. Open crumb depends on the flour, proper fermentation and proofing, hydration, just to name a few. Try fermenting until you get a good 2.5x volume increase, and a 30-50% volume increase during proofing. That should give you a very nice, open crumb. Using starter only can also be quite tricky. It's easier to get a nice open crumb with the addition of commercial yeast. Don't be afraid to experiment and change things up. You may discover some really cool things. Hope this helps.
Anatolii says
Well, I did my first one and it was insanely delicious! Two loaves I got were gone in a day! The taste, the smell, the crust texture, the puffy hollowed wet-feeling inside were absolute pleasure to enjoy!
I noticed that, similarly to one of the comments below, after 2hr post-cold retarding the dough was so puffed-up that scoring was causing it to collapse in the area where it was cut (I used bread lame), which eventually resulted in the smaller holes inside the bread in that part of it which was scored. I wish I could upload a photo here to show this, but it becomes so evident on the loaf cross sectional cut that the inside holes are pretty big across the section, but in the quartile where I attempted to score it the holes are noticeably smaller.
Unlike the baguettes, where dough is a bit more tougher and easier to score, which results in a nice opening during baking, for this bread it was very sensible to any scoring and resulted in a relative collapse rather than opening.
Also I noticed now that my over seems to heat up too much. After 20min at 230C (450F) with water in, the loaves look exactly like on your photos. So when I take water out and wait another 10 min (not even 30 min), the loaves becoming pretty dark, so I take them out otherwise they'll turn into black charcoal! Next time I'll try to reduce temp 5-10C down.
I'll keep experimenting until, hopefully, I'll get it right!
Victor @ Taste of Artisan says
I am very happy about your success, Anatolii. Great job! There is nothing like a loaf of freshly-baked, homemade sourdough bread.
About dough collapsing, I would try two things - 1- proof a little less, or 2- use a shap knife or a lame, and score in a very swift, decisive motion.
Yeah, different ovens bake differently, you kind of have to pay attention and make slight adjustments to accommodate it. I also constatnly experiment and discover new things for myself. The same doigh baked at different temps will taste/feel differently. I bake my sourfdough bread from 475F (initial stage) to 400F adn finish anywhre from 450F to 350F. They all taste great but have different texture. So many ways to make and bake a good loaf of bread. Happy baking!
Megan says
Do you have to store it in the fridge? This is my second time using your recipe. The first one turned out good, but I pulled my bread out too soon so it was unbaked, but still good. For the life of me I don't remember if I stored it in the fridge. I don't think I did. I'm just wondering if it is a necessary step? Thank you!
Victor @ Taste of Artisan says
Hi Megan, one thing you can do to tell if the bread is done is check the internal temperature. It's done when the temps is in the 200F - 210F range.
The fridge part, known as cold retarding, isn't necessary but it does improve the flavor and sometimes makes things more convenient for the baker. Say, you are ending up proofing later in the evening and don't want to tbake late at night, so you can cold retard the proofing part and bake in the morning. Hope this helps. Happy baking!
Katie Johnson says
I’ve been making your (amazing annd delicious) advanced no knead for several years, and recently got a sourdough starter, so I thought I’d try this version! It’s so amazing! I’ve had a sourdough starter in the past, but I never ended up with a bread with a light and crispy crust like this. Thanks for the great recipes.
Victor @ Taste of Artisan says
You are very welcome, Katie. Enjoy! And please subscribe as more recipes are coming.
Tom says
Like your website! I'm a little confused about your levain for sourdough though.
On the second feeding do you take 30g of that starter and add flour and water or do add the flour and water to the whole thing?
Thanks,
Tom
Victor @ Taste of Artisan says
Tom, you take only the 30g of the old starter and add flour and water, just as you would feed your regular starter. I recommend this method because many of my readers are new to baking with sourdough and it can be very tricky. Feeding your starter the way I described results in a very strong levain/starter that will work very well. If you feed your starter regularly and it's strong, you don't need to do this. Good luck.
Patti says
I made this once before but only made the levain and when it was active I used it, It was fine but now I want to do this properly, My question if you don't mind, is after I have made the levain and I am feeding it 12 hours later, do I discard or just add the same amount to what I have. I'm not sure discarding will result in 200 g for the recipe.
Thank you,
Patti
Victor @ Taste of Artisan says
Hi Patti, I recommend feeding the starter twice before using it because I know this makes a very strong starter that will work 100%. People often have bad results because their sourdough starter is not strong enough. If you know your starter is strong you can use it straight away without the double feeding. If you do the double feeding as I recommended, yes, discard the old starter or use it to make something, like sourdough cinnamon rolls.
Patti says
Thank you. Yes, I understand about the levain and a strong starter and feeding it twice. I always planned to do that. But still, I am a little uncertain. So I make the levain using 30 g of my mother starter. yes, I get that. 12 hours later my mother starter is out of the picture and I take the levain that I started approx. 12 hrs before, and discard from that all but 30g? Then add the flours and water? Will this give me enough? A final 200 g of levain for the recipe? Sorry for being obtuse.
Victor @ Taste of Artisan says
No worries. Yes, your understanding is correct and yes, the final 200g will be enough. Works for me.
Anatolii says
Can I do it this way:
1. 30g mother starter + 50g flour + 50 water
2. 12hr later: add 50g flour + 50g water
3. 8-10hr later: starter is ready (It should increase about 2-3 times in volume)
Total: 200g (30g of mother starter is not considered / becomes CO2)
Same 2 feedings, but no discards.
Victor @ Taste of Artisan says
What you are describing is the typical levain build up. Sure, you can do it. This will give you a more acidic flavor. I think I may have misunderstood your original question. Normally, a starter/levain is maintained by daily feedings and excess is removed after each feeding - a discard. It sounds to me like you want to make your bread once and not maintain your starter daily. There are many ways to do this, it all boils down to what you personal preference is. Good luck!
Anatolii says
Thank you for the reply, Victor!
Having your website at hand, I am on a mission to make all sourdough breads you posted recipes of and make them every week! 😉
I figured how to handle starter (feeding, discarding, fridge vs room storage) - ordered SF Wharf Sourdough Starter and they had a guide on how to work with it.
I use discard for pancakes. I didn't see a pancake recipe on your website, so had to look it up. I am sure with your recipe, Victor, pancakes would be much better that what I make now 😉
I did this time per your recipe: 30g(S) + 100g(F) +100g(W) and saw 3x increase in volume after 12hr! **Does it mean it is strong enough for baking?**
Anyway, I discarded it, leaving only 30g(S), then +100g(F) + 100g(W). After 8-10hr will start the sourdough per recipe.
Being an engineer, I am curious on differences in achieving final result and ultimately understanding why the original recipe calls for a particular way. So, next time, will do 30g(S) + 100g(F) +100g(W) single time, provided it grows 3x in volume. Then will do: 30g(S) + 50g(F) +50g(W), 12hr later +50g(F) +50g(W).
Thank you, Victor, for all you do and share with us!
Victor @ Taste of Artisan says
You are very welcome. Good to hear it, Anatolii. Right on!
Yeah, that sounds like a pretty strong starter.
Sourdough starter is a living organism and many factors affect its performance - water temperature, ambient temeperature, what flour mix you feed it, the initial stgrength of the starter before feeding, the dominant yeast strains, etc. You kind of have to watch it closely, take notes, experiemnt and figure out what works for you in your environment. I tried for a couple of years to be scientific about it, follow all the proper steps but never could I get my starter to work or live long enough and bread made with it was bad. I then started to experiment and found what my starter liked and I give it what it needs.
Sometimes one feeding every 24 hours is strong enough to have perfect leavening, sometimes you need to feed it twice, every 12 hours, to get good enough strength. Try to experiment and just go with what works for you. Good luck!
Renata says
Could I use all purpose flour?
Victor @ Taste of Artisan says
Yes, I often use AP flour to make bread and it works well.
Amber says
I just fed my starter and Am in the waiting period. A few questions:
1. If I don’t have proofing baskets can I proof in bowls?
2. I don’t have cast iron.. will Dutch ovens work? I do have
Thanks in advance for the advice!
Victor @ Taste of Artisan says
Amber, we all started there - with no right tools - but it's not a problem. Yes, you can proof in bowls. I used to do that too, I'd line them with cotton kitchen towels and dust with some rice flour, worked like a charm.
A Dutch oven will work too. Same thing, just a different shape. But your bread will be fine. Just an observation, I stopped baking in CI because it gets too hot and burns the bottoms. Clay cloches are far better, I have two and use them most of the time. Well worth the investment if you bake often. But CI will do the job. A lot of people like baking in it, so it's not that bad;) Maybe I am just a little picky.
Joan says
Hi Victor, thank you your perfect instructions. You are my go to for sourdough recipes. I have a question, if I don’t keep the dough in the fridge overnight, how long approx until it is properly proofed and ready to bake?
Victor @ Taste of Artisan says
Hi Joan, glad to hear it. Proofing time will depend on several factors such as dough temp, ambient temp, and fermentation strength. I'd say, normally it will take about 1-2 hours. I look for a 30-50% increase in volume, that's my main cue. I hope this helps. Good luck!
Patti says
So I finally got around to making the no knead sourdough bread and everything went just as it should’ve or so I think. My biggest problem was with scoring the bread. I used a serrated knife and I thought I went deep enough but clearly I did something wrong because it didn’t show up. That said the bread and the crust were amazingly good. I took a little bite and then I took another bite and I made a sandwich then I had some more. Couldn’t stop!
I had a lot of dough stuck on the bowl that I made it in and did the stretches and folds in. I don’t know if that’s expected. I use a ceramic bowl so I’m not sure if a different material works better. So tomorrow I’ll share some of the bread with a few friends and have some more myself. Thanks again Victor.
Victor @ Taste of Artisan says
You are very welcome, Patti and congratulations on your success. Your bread looks awesome, way better than my first sourdough loaves.
Dough sticking to the bowl should not be happening as the dough should be getting quite strong. Perhaps it's your flour, try a higher gluten flour. Also, try doing a few more stretch and folds during each iteration to strengthen the dough more. There will be a lot of sticking initially but after 2nd S&F the dough should be coming off the walls of the bowl. Help it with your hand too, sort of scoop one corner with your hand, sliding it along the wall of the bowl, stretch and fold onto itself. I use stainless steel bowls by the way.
You can try lowering the hydration, it should help with sticking and scoring, and the bread will look cooler with those ears and such but the crumb will be a little different. Not bad, just different. I recommend that you experiment and feel the difference.
Scoring takes some practice. It's hard to teach it, but do it a dozen times, try different ways, depth... and you will get it how you want it.
Patti says
Many thanks. I will try a stainless steel bowl I have money. And I will try scooping it off the sides although I will say I did try but I’ll try again! And I use King Arthur bread flour and King Arthur Red flower.
Now I’m determined to try again and do better!
Patti says
I am going to attempt this bread this weekend but have a few questions. I haven't seen this addressed so sorry if it has been, but if I have an oven that can be regular heat or convection, which is preferable?
Also, I asked this before but I still don't understand. I made your whole wheat sourdough and it turned out great but that's because your recipes are forgiving, not because I did it right. Your levain formula, I don't understand. I take my active starter and make another starter? In another jar? And feed the new starter but I still am not clear on how to feed the new one with discard etc. And how does this make the end result different from just using an original active sorry. This totally confuses me.
Victor @ Taste of Artisan says
Hi Patti,
I bake bread without convection unless it's a specialized recipe like the Uzbek bread that I posted recently.
Good questions about the starter. Yes, you can use your starter and may very well get excellent results. But not everyone will have their starter strong enough or at it's peak performance to be mixed into the final dough to produced optimal fermentation. That's the reason I suggest that you feed your starter as per the specified schedule to make sure that it's strong and at its optimal strength. That's all. If your starter is regularly fed and is strong, skip that step.
You don't feed the starter with the discard. You discard all but 30 grams of the starter to which you add more flour and water. The discarded old sourdough starter can be thrown away or used to make other baked goodies.
Patti says
Thank you Victor. But since your starter has wheat flour in it, would the outcome not be different if I used my own starter? And what is it about you recipe that makes it stronger? Just the ratio of water, flour, and starter?
Victor @ Taste of Artisan says
Well, it's not that it's stronger than yours... it may very well not be. But, you may have it on a once-a-day feeding schedule, that sourdough starter won't be as active as the one that you feed on a 12-hour schedule. That's where a little bit of WW flour helps as it makes the starter more active, also the warmer water makes it more active. Finally, the starter will be at its prime exactly at about 8-10 hours after the second feeding. This way I can almost guarantee that you will have excellent results.
If you use your own starter, it may not be as active. It may be not at its optimal strength. I know nothing about it and if you have poor fermentation with you, well I can't even help... that's the kind of thinking I had behind it. This advice is primarily for novice bakers or those new to sourdough. It helps. A few of my friends had issues and this helped them a lot. As I had said, you can skip this step if you desire.
Karen says
Following your schedule, do you continue to feed the levain while it is sitting for two days? I've begun this recipe, but didn't do anything to the levain. I halved the recipe in case this is a major fail on my part. Should have asked before I started. Thanks for your help.
Karen
Victor @ Taste of Artisan says
Hi Karen, I feed the starter every day or twice a day depending on my baking schedule.
Stu says
I think Karen is confused by the same part as me. Are you saying to feed your mother starter twice, then take 30g of that starter to make a 200g levain? If so, how long do you leave the levein before dissolving in the bowl of water? 10-12 hours?
Victor @ Taste of Artisan says
Hi Stu, in this recipe, I suggest taking your starter and feeding it using the levain formula once, discarding all but 30 grams of the levain and feeding it again using the formula that I provided. Once the levain is active, 8-10 hours later, use it to mix the final dough. I hope this makes sense.
Jenny Ellis says
Hi Victor
Can you please provide the times for baking in a cast iron? How long should it be covered vs uncovered. Thank you
Victor @ Taste of Artisan says
Hi Jenny, cast iron can get quite hot so I recommend about 450F for 20-25 min with the lid on and 25-35 min at 425F with the lid off, depending on the size of the bread. It’s been a while since I baked in a cast iron combo cooker so I can’t recall the exact timing and temps but what I mentioned above should work.
Joan says
hi, can i leave my dough in the fridge 24 hours before baking?
Victor @ Taste of Artisan says
Yes. Take a look at my French Baguette recipe. Follow the same approach just keep the dough in the fridge for 24 hours in stead of overnight.
Pablo says
Hi Victor,
Thanks for your recipe! I've now baked this twice (yesterday and today, using half measures for a single loaf each time). I love the taste and the crunchiness of the crust, however my loaf only rises about 1/2 - 2/3 of how it looks like on your pictures. I'm trying to figure out what I'm doing wrong. I used my sourdough starter without the two feedings per day (just once per day) and used it about 14 hours after the last feeding. It was really active and strong. I followed the rest of the recipe step by step but using normal white flour instead of bread flour. Perhaps I needed to leave it bulk fermenting a little longer? My kitchen is around 20degrees celsius so the dough might take longer to increase in size. When I finally wanted to bake the loaf after overnight proofing in fridge (around 8h) and subsequently at room temp (around 2,5 h), the dough was sticking quite heavily to the cloth, which resulted in slight damage to the upper part and, I assume, released precious fermentation gases. It looked a bit flat before going into the dutch oven. Also didn't manage to score the dough properly since my knife didn't cut through it properly. Maybe this also impedes the oven spring?
Sorry for the essay, and thanks for your time to read this!
Kind regards,
Victor @ Taste of Artisan says
Hi Pablo,
welcome to my blog. Fermentation, proofing, scoring, handling and a few other things will definitely impact the oven spring. It's hard to say which step affected the oven spring without knowing all details, but the mishap with removing the dough from the basket seems to be the culprit. Dough sticking after overnight retarding is a common problem but you can fix it three ways - lower hydration or dusting baskets with more flour, covering the dough surface with sesame seeds (basic artisan sourdough) or retarding fermentation phase, then shaping and proofing in a basket at room temperature. I will email you, send me a picture, perhaps that will tell me more about what could have gone wrong.
Lori says
This is an excellent formula. The loaf came out beautiful!! I love how pillowy the dough is and our son who doesn’t care for sourdough liked it!! Thank you for sharing🤗 I’m making and giving as gifts!
Victor @ Taste of Artisan says
Glad to hear it, Lori. I've been baking and giving bread to friends and neighbours for the past several weeks. They appreciate it a lot. Mix in some seeds, or put some seeds on top to make it look and taste even better. Happy baking.
Mark says
This no-knead sourdough is a game changer. Have made it last weekend, with a rye starter, and it was a huge success. Will try making it as a focaccia next time. Thank you for a great recipe))
Victor @ Taste of Artisan says
You are very welcome.
Sandy says
Hello. This recipe sounds perfect for me since my husband does not like a pure sour dough bread. I am wondering about how long the levain should rest prior to using in the final dough? Thanks!
Victor @ Taste of Artisan says
Hi Sandy. I use my starter after about 10-12 hours after feeding in this recipe. If the kitchen is warm, it will be ready after 8-10 hours.