The secret to perfect Neapolitan pizza dough lies in proper dough hydration, proper fermentation, and proper proofing. We tend to give a lot of attention to the bread-making process, worrying about autolyzing, fermentation, retarding, and proofing, but not nearly as much attention to pizza dough. This is a mistake as pizza dough is not unlike bread dough. Neapolitan pizza dough consists of the same four ingredients - flour, water, yeast, and salt. If you treat them right, they will reward you in a big way. This pizza dough is absolutely delightful.

What is Neapolitan Pizza Dough?
Neapolitan pizza is pizza that was made according to the rules of the Associazione Verace Pizza Napoletana, which means it cannot contain oil or sugar. Essentially, Neapolitan pizza dough is pizza dough made with just flour, water, yeast, and salt.
Pizza Dough Hydration
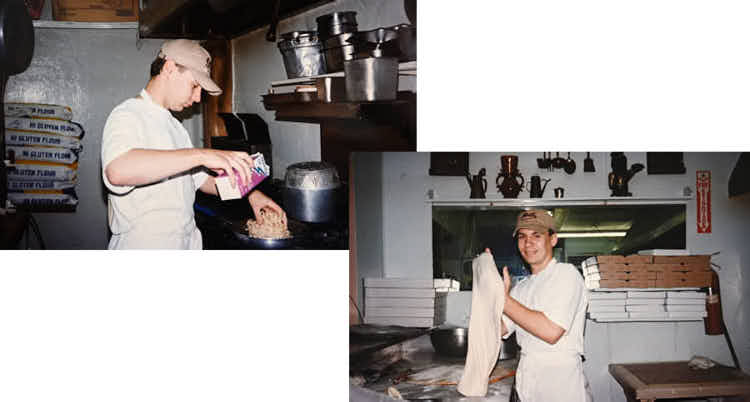
Back in the day when I used to work at a small Italian restaurant, I was taught to make pizza dough such that it is slightly tacky to touch. We never really measured ingredients and did a lot by feel/taste, so I have no idea what hydration that dough was but it made a darn good pizza. I would estimate it had about 63% - 65% hydration.
Marco Quintili of the famous 'iQuintili Pizza & Food' restaurant in Tor Bella Monaca, a suburb of Rome, shared his Neapolitan pizza dough recipe with La Cucina Italiana magazine. It's very simple - for every kilo of Type 0 flour, he adds 600 ml of water, 2 grams of yeast, and 25 grams of salt. This makes the dough 60% hydration.
In another edition of the same magazine, Matteo Aloe of Berberè Pizzeria, shared his recipe for the classic Neapolitan pizza dough - 500g Type 1 flour, 350g water, 4 grams of fresh yeast, and 10 grams of salt. This puts dough hydration at whole 70%.
So, which one is right? Well, there is no strictly right or wrong here. Every baker has their own style. Just like there are hundreds of ways to make a tasty French baguette with just the same four ingredients - flour, water, salt, and yeast. You pick your hydration based on your own taste and level of comfort when handling the dough. The point here is to pick a hydration level that YOU are going to be comfortable working with. That will give YOU the best results. Of course, you don't want the dough to be too stiff or too lax as it won't make a good pizza.
I've tried various hydration levels and for now, I settled on 68% hydration. Dough with this hydration gives me the best open crumb, stretchability, and ease of handling.
Flour type for Neapolitan Pizza
Most of us have been programmed to think that the 'RIGHT' flour for pizza is the Italian Type 00 flour. Not so fast. As you can see from the dough recipe examples above, at least some Italian pizza masters use other flour types like Type 0 and Type 1. We are talking flours from highly refined, finely ground to more coarsely ground, whole grain flour. Again, there is no right or wrong here. You pick what flour YOU like and what's readily available to you.
I, personally, am a big fan of King Arthur unbleached all-purpose flour when it comes to making Neapolitan pizza. I tried Italian type 00, 0, and 1 and tried pastry flour, all-purpose bread, whole-grain bread, and all-purpose flours. For my taste, all-purpose flour produces the best results, and it's readily available and relatively reasonably priced.
By the way, unbleached all-purpose flour is the closest to the Italian Type 00 flour according to Peter Rheinhart's American Pie book dedicated to pizza.
Mixing the Dough, Stretch & Folds, and Fermentation
Just like when making bread dough, if you want a beautiful open crumb with big holes, you should avoid using a stand mixer which will ruin the texture and result in a grocery-store-bread-like crumbly texture with tiny holes. Instead, mix the dough by hand, it only takes a minute.
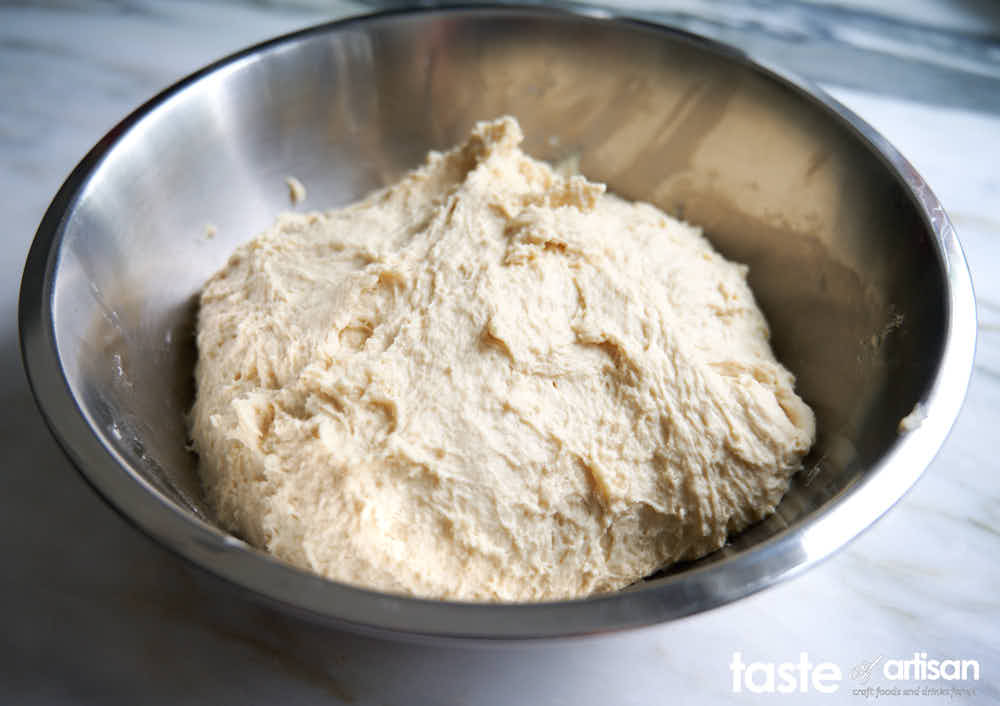
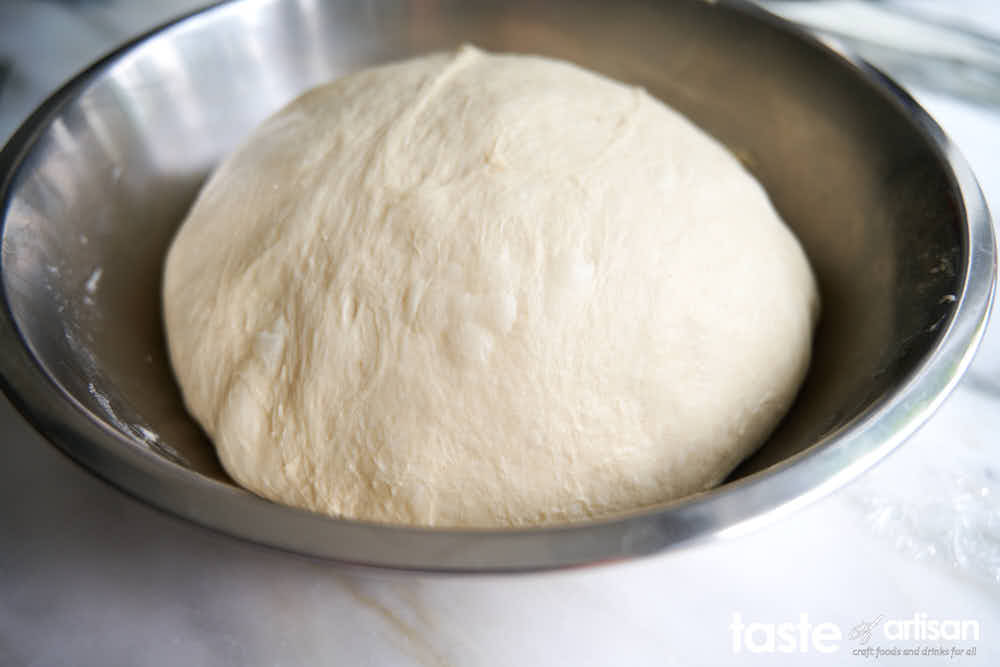
After mixing, I let the dough rest for 15 minutes and proceed with the usual stretch and folds - I go into detail on how to do stretch and folds in my Artisan Sourdough Bread post. This is done to let the dough develop strength. For this dough, I space stretch and folds about 15 minutes apart. Initially, the dough will be quite sticky. However, after you are done with stretch and folds, it will come nicely into a ball.
Fermentation
By the time you are done with stretch and folds, you will notice some blistering on the surface of the pizza dough.
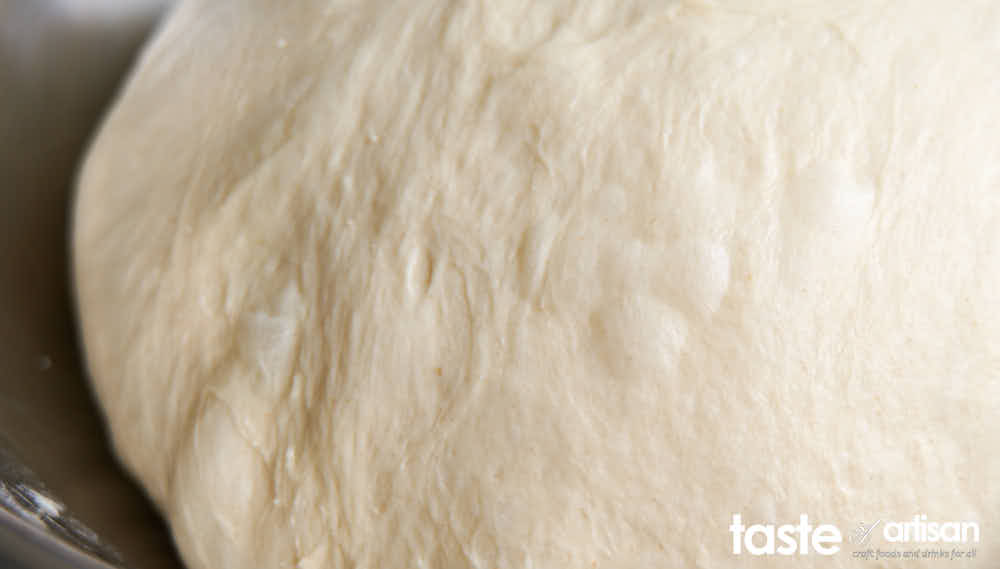
This is very important as it indicates that the fermentation process has begun. If not, it may not ferment properly after you put the dough into a cold refrigerator. All in all, there should be an hour between mixing the ingredients and putting the dough in the fridge.
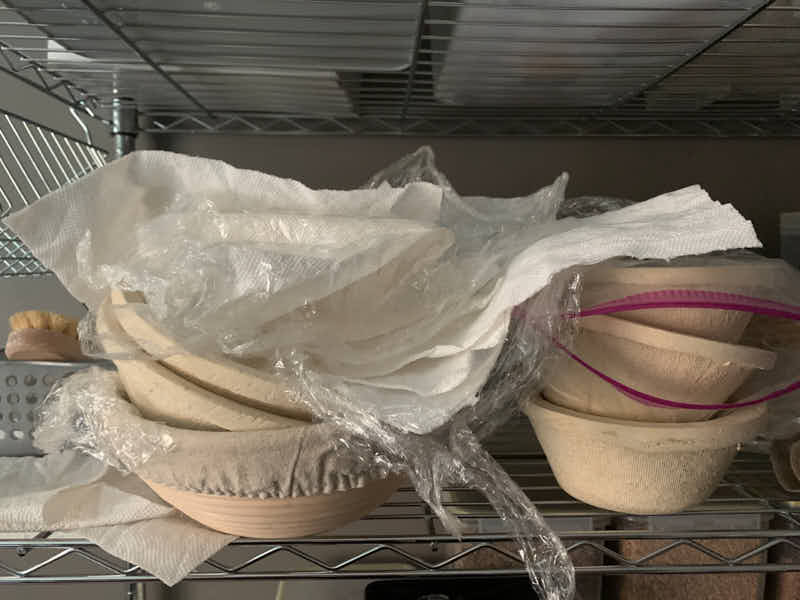
The rest of the fermentation takes place in the fridge over the next 24 hours. This process is called 'cold retarding'. During cold retarding the dough will develop amazing complex flavors. So, cover the bowl with the dough and let it sit in the fridge for 24 hours. A piece of paper towel under plastic wrap will prevent sticking. I use a heavy duty plastic wrap that doesn't tear easily and I reuse it for months to make pizza, bread and other dough.

In 24 hours, when you take the pizza out of the fridge, it should have doubled or almost doubled in size.
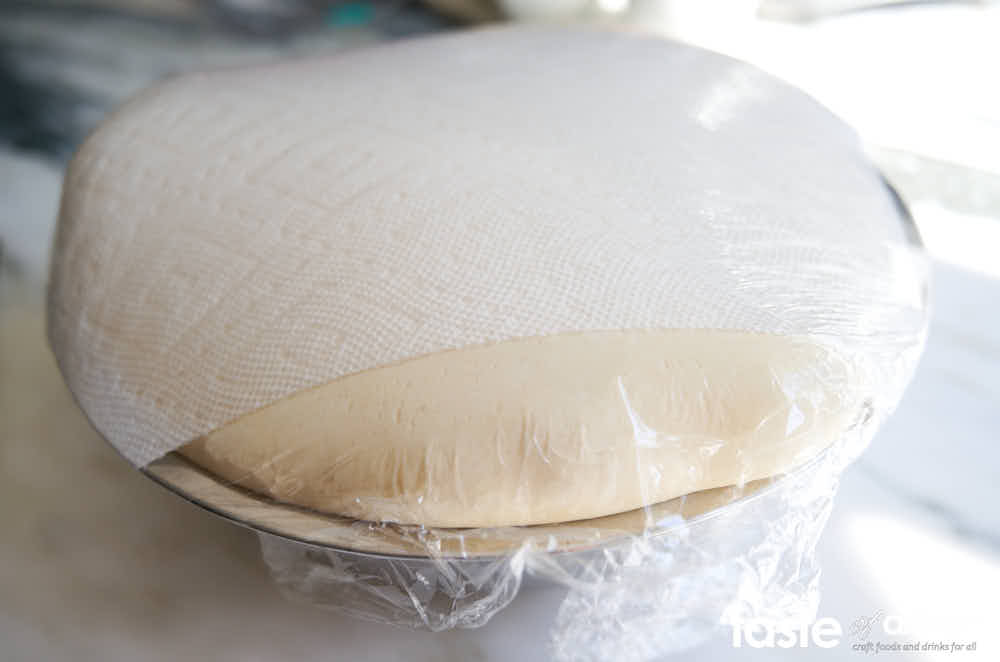
If not, your pizza dough is underfermented and needs to spend some out at room temp to get to that level.
Shaping and Proofing
Twenty-four hours later and two hours before making your pizza, take the dough out of the fridge. Divide into individual pieces.

Then shape them into balls.
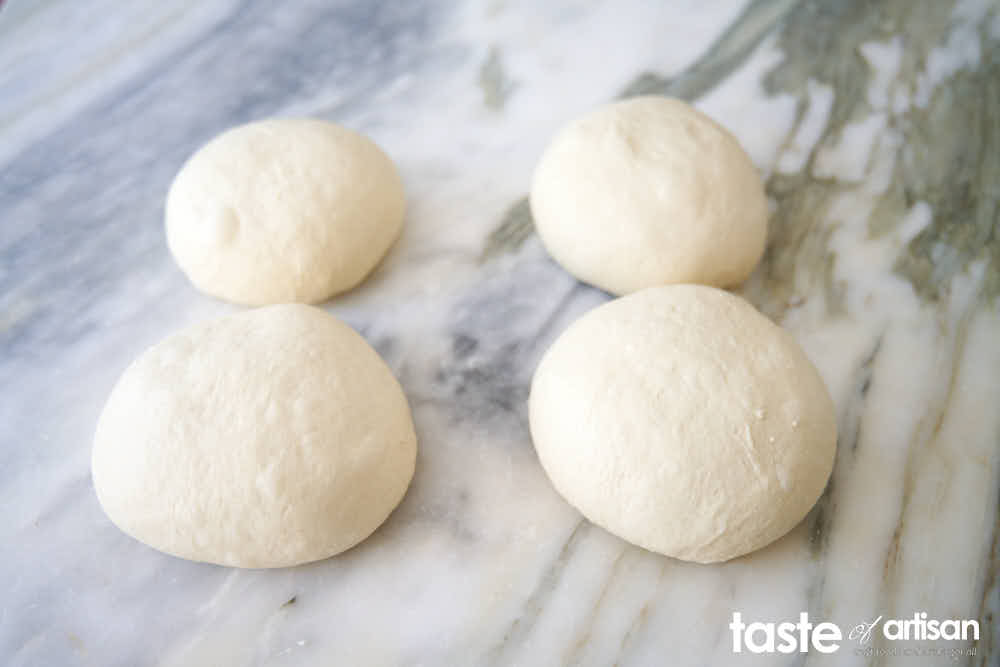
Cover and let proof at room temperature for two hours. The pizza ball should increase in size by about 50%, just like bread.
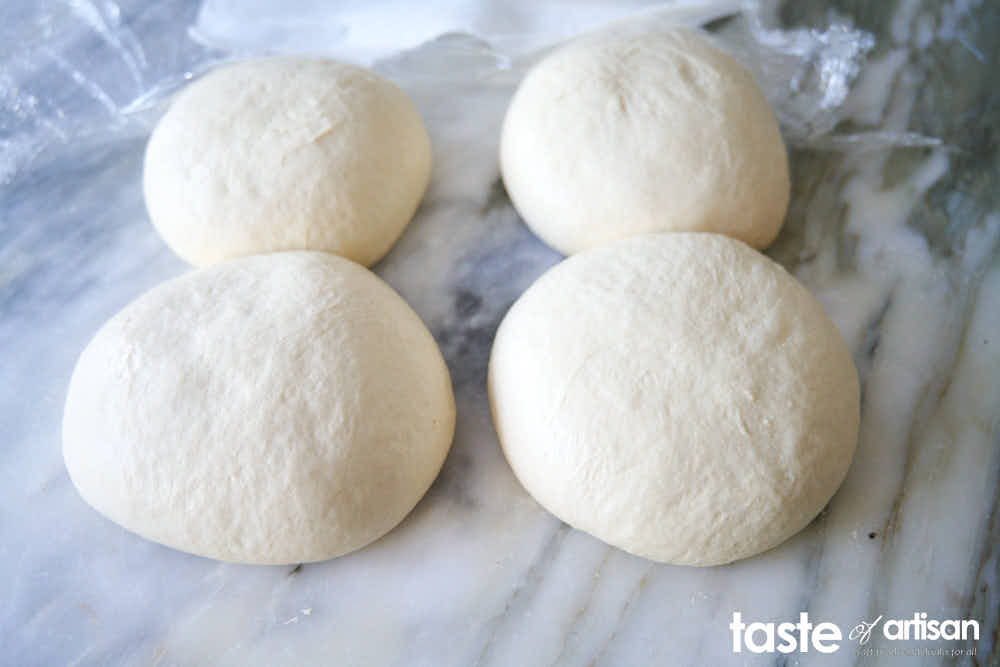
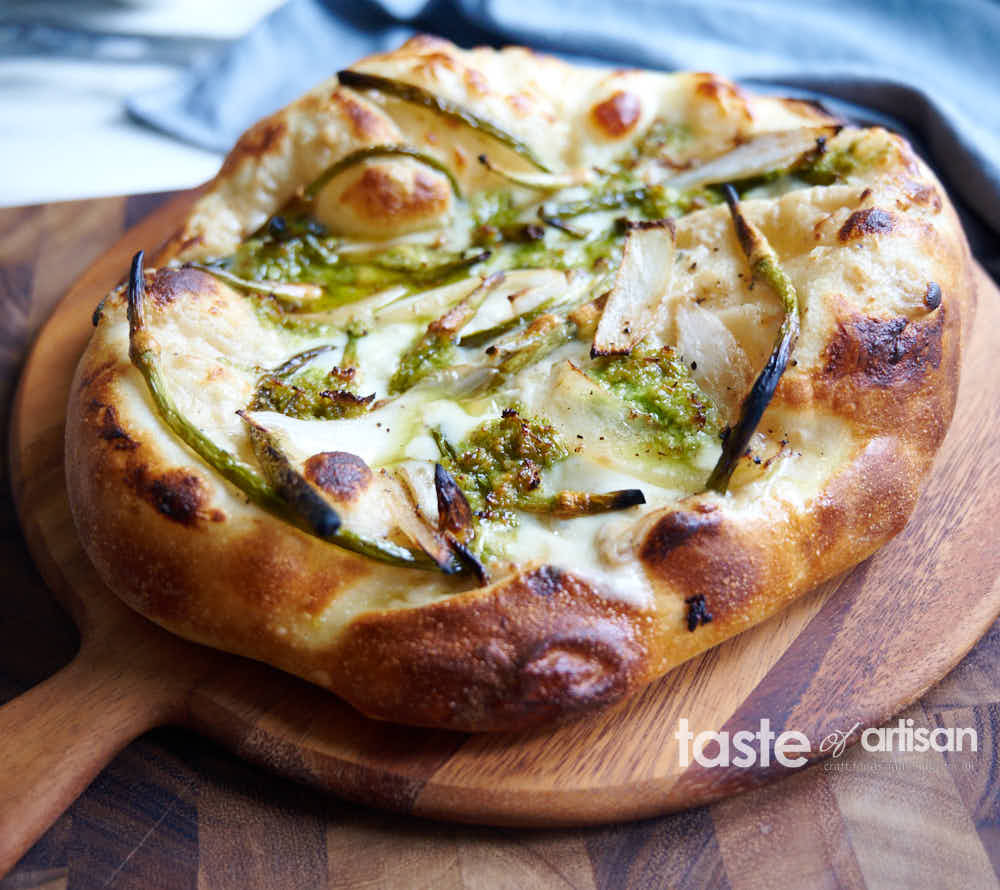
After two hours of proofing, your Neapolitan pizza dough is ready for stretching, topping with pizza toppings, and baking.
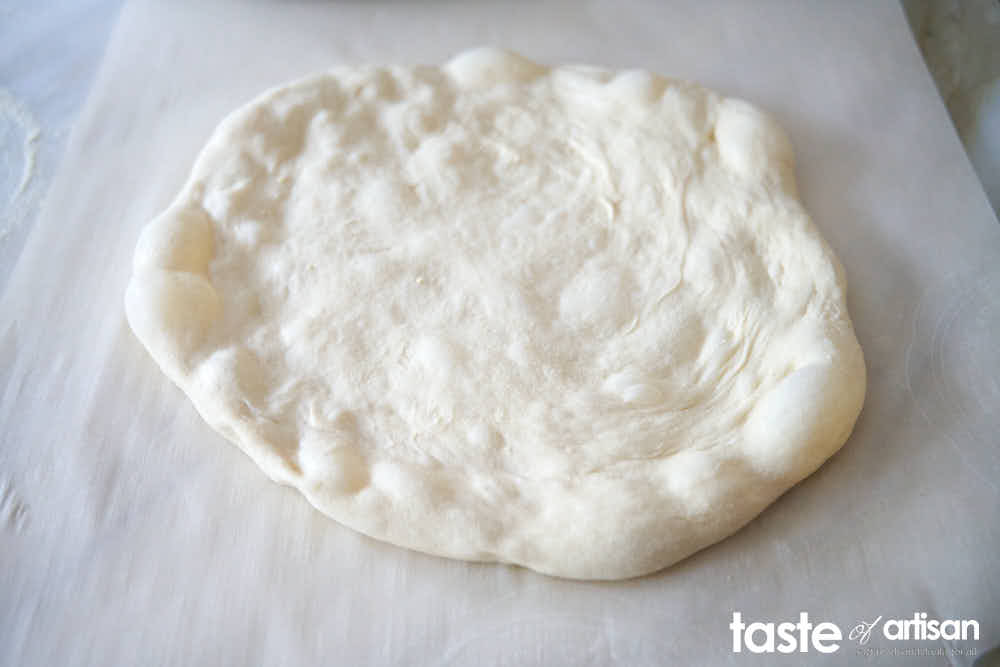
Don't forget to prickle the dough with a dough docker roller after stretching to prevent it from puffing up in the oven. Do that inside only, don't poke the bubbles on the edges.
Storing pizza dough
If making pizza dough in advance, shape the dough into balls, package, and freeze. Then defrost overnight in the fridge, take out of the fridge, and proof for two hours at room temperature.
If you don’t use all the dough balls, you can chill them in the fridge for later use. Just make sure to use it within 24 hours.
Neapolitan Pizza Dough Recipe
Ingredients
- 1000 g all-purpose flour King Arthur brand recommended
- 680 ml water at 85F
- 3 g instant yeast (SAF Gold recommended)
- 16 g kosher salt
Instructions
- Add water to a large bowl. Add flour, then yeast on one side of the flour and salt on the other, making sure the two don't touch each other before you start mixing. Mix by hand, squeezing the dough between your fingers, until a sticky homogeneous mass is formed. Cover the bowl with plastic wrap and let rest for 15 minutes.
- After 15 minutes, perform a set of stretch and folds, then another one after 15 minutes, and another one 15 minutes later. Cover the bowl with a piece of paper towel, then plastic wrap, and refrigerate for 24 hours.
- Remove the dough from the fridge and turn it over onto a work surface. Cut into 4, 6, or 8 equal pieces, depending on if you want to make large, medium, or small pizzas.
- Shape the dough pieces into balls, cover, and let proof at room temperature for two hours before stretching and making pizza.
- Unused dough may be refrigerated for up to another 24 hours.
Nutrition

Joseph says
I make your baguette recipe once a week and now thanks to this pizza recipe we have started a weekly pizza Friday tradition. Thank you.
What diameter to you consider to be large, medium, and small? The first time I made it, I stretched it out too much(I think) to 15 inches. It definitely didn’t come out looking like a Neapolitan but was still delicious and no one left a crumb.
Victor @ Taste of Artisan says
Glad to hear it, Joseph. About the size, I've never actually measured the diameter. I just eyeball them and stretch to the point where it feels right. One day I may do some measurements and post them here.
joe says
can I use the same amount of "00" flour?
Victor @ Taste of Artisan says
Yes, that will work.
Deb says
Hi! Is it possible to use your baguette recipe also for this pizza dough? I have baguette dough in the fridge and really want to make a pizza! I can see that the recipe is similar apart from the water percentage…. Thanks in advance!
Victor @ Taste of Artisan says
As you pointed out, hydration level differs, but you can still use it to make pizza.
David D. says
Do you have recommended baking instructions for the Neapolitan crust recipe? I just started the first series of stretch&fold, so any tips for how to set temperature and baking times tomorrow would be much appreciated!!!
Thank you in advance!!!
David
Victor @ Taste of Artisan says
Hello David, a little too late, but still, here is what I do. Perhaps you can try next time. I've tried so many methods and this one is the only one I've been using for the past few years. I dust the dough with a little bit of semolina flour to prevent sticking, then stretch it and plop it on a piece of parchment paper. Then assemble and transfer to the oven, with the parchment paper, and bake in my gas oven preheated to 500F on a thick baking stone which is preheated with the oven. I bake with convection. It takes about 10-11 minutes to get a nice crispy crust. My family loves pizza baked this way. Hope this helps. Good luck!
CHEF GUY says
I sent YOUR WEBSITE TO ME, MAKING PIZZA, AND TO MY FRIEND Eileen We LOVE IT. THANKS FOR TEACHING THE WORLD HOW TO COOK. XOXO
Victor @ Taste of Artisan says
So glad to hear it! I love it when my recipes help others make great tasting food. Enjoy!!!
P.J. says
I have made this multiple times. It's a great recipe (so is the one for baguettes).
My well-used Silpat is a big help with the stretches and folds. I scrape the dough out of the bowl onto the Silpat with a metal soup spoon. I then use the back of the spoon to spread the dough out. Then I fold the Silpat in half. The thus-folded dough sticks together and peels easily off the Silpat.
With the spoon, form a ball with the dough and drop it seam side down back into the bowl until the next stretch and fold. This can be done without getting any sticky dough on your hands.
I use my microwave as a proofing draw, putting the bowl of dough into it along with a pint of hot water. The microwave becomes humid enough that the dough doesn't dry out between stretches and folds -- no need to cover the dough. Microwave the water on high for 1 minute prior to each 15 minute resting period to maintain heat and humidity (it's winter as I write this; if it were warmer and more humid I might be able to just leave the dough out on the counter).
Enjoy!
Victor @ Taste of Artisan says
Thanks for the tips P.J. Sounds you got the process down to the finest bit. This just shows again that there so many ways to make god bread or good pizza dough. It's amazing! Thanks for sharing.
Ellie says
Hi Victor!
Love your baguette recipe and so excited to try this. Just wondering if instead of keeping dough in bowl in the fridge I can use the deep trays that have clip on lids? Thanks
Ellie
Victor @ Taste of Artisan says
Hi Ellie, that should work. Good luck!
P.J. says
Thanks, Victor! I switched from Aldi's flour to your recommended King Arthur. I like the end result better, but it does make a stickier dough and pealing it off the Silpat is a little harder. A rubber spatula is a better tool for the job than the soup spoon I suggested earlier.
P.J.
Victor @ Taste of Artisan says
Yeah, the flour can make a big difference sometimes. You could decrease hydration by a couple of percentage points or use more flour for dusting. I like using 100% semolina flour for dusting. Enjoy!
Neal says
Does the King Arthur bread flour make a good pizza?
Victor @ Taste of Artisan says
I use KA AP flour most of the time as that's what I always have on hand at home and it makes excellent pizza dough fwiw. Bread flour is a good option too.
Alison says
For years I have been trying to find the perfect pizza dough recipe and at last I have found it, absolutely amazing. Have tried many things from your site, love the baguettes and sourdough English Muffins - make them both weekly, burger buns and brioche buns also beautiful - I’m working my way through your recipes, really want to try the Tartine Croissants, they look a bit intimidating but will have a go.
Thank you Victor for your amazing recipes.
Victor @ Taste of Artisan says
Hi Alison, you are very welcome. I am very happy to hear it. You should also try my focaccia. I often make it to share with friends as part of breakfast and they go crazy about it. Enjoy!
Jake says
Absolutely simple and very straightforward process. Really enjoyed the pizza.
Victor @ Taste of Artisan says
Enjoy!
Abby says
Wow! This might be one of the best pizza recipes that I tried. I loved the texture and the rich flavor of the crumb and the crust was excellent. I will be making this again for sure. Thanks for sharing.
Victor @ Taste of Artisan says
You are welcome. Enjoy!
wayne tomaszewski says
Well, we meet on this side of the food spectrum. Imagine my amazement finding your pizza dough recipe while searching for recipes. I bought the kids one of the outdoor pizza ovens for Xmas, and then finding your recipe for the dough is all they'll need to make a great pizza. After learning so much from your sausage recipes, I have no doubt that they'll love this crust. Once again thanks again for all your posts and ideas. Hoping you and yours have a Merry Christmas and a Happy New Year, and I'll be anxiously waiting for more sausage recipes coming next year.
Victor @ Taste of Artisan says
🙂 I am glad you found it, Wayne, because I think it's one of the best pizza dough recipes out there, difintely the best I've made/tried. Fantastic flavor and a very nice, open crumb. And it's pretty fool-proof. Enjoy!
Mike says
Hello once again Victor, Out of curiosity why do you suggest using SAF Gold yeast as opposed to regular SAF Instant? I thought the Gold was only used in sweet dough formulations.
Victor @ Taste of Artisan says
Hi Mike! You are correct, the Gold one is for enriched/sweet dough but I've been using both for many years and it seems to me like SAF Gold just performs better for me. I have no scientific explanation for this, I did not do any extensive testing with detailed notes, just my purely subjective opinion based on my casual observations.
Mike says
Thanks, I have a bag of Gold SAF and being you tried it out with no ill effects that's good enough for me. I'll try it out. Have a "Merry Xmas/Happy New Year!"
Victor @ Taste of Artisan says
Good luck! Merry Christmas and Happy Upcoming New Year! Good times!
Mike says
Hi, I want to try to make this recipe and I'm wondering if I can make it using half of the listed ingredients as it makes too much dough for us. We are 2 people and would prefer a lesser quantity of dough. I normally make 12-14 inch pizzas anywhere from 2-4, 250-300 gram balls, baking no more than 2 pies and if I should make 4 I'll freeze 2 of them. Thanks. By the way, love the French bread recipe!
Victor @ Taste of Artisan says
Mike, yes, you can make half the recipe. Just cut the ingredients in half. Glad you liked the French bread. Enjoy!
Margaret says
This is the third of your bread recipes I've made and they have all been amazing.
My one question, however, is about stretching the pizza dough. I did let it proof for two hours after the 24 hour refrigeration but it was really hard to get the pizza as large as I would have preferred. Any suggestions?
Thanks for the wonderful recipes.
m.
Victor @ Taste of Artisan says
Margaret, I will need more information to be able to help. Did you divide the total dough into 4 pices? How large were you able to get it? The dough should be very soft and airy and can stretch into a very large pizza if you do it carefully, without ripping. If the dough is hard to stretch, I am thinking it may have been underfermented.
ΓΕΩΡΓΙΟΣ ΚΟΝΤΟΣ says
😀😀😀😀😀😀😀Bravo!!!!!
Victor @ Taste of Artisan says
Thank you! Enjoy!!!
Kathy says
The baguettes were beyond fabulous so trying the pizza dough this time. 🤞🏻. Thanks so much for posting these recipes.
Bon Appetit!
Victor @ Taste of Artisan says
You are very welcome. Glad you liked them. Enjoy!
deborah Ann steeples says
Absolutely love your baguette recipe!
Victor @ Taste of Artisan says
Enjoy!!!
Michele says
delicious and perfect recipe! Thank you! It was exactly what I was looking for!
Victor @ Taste of Artisan says
Glad to hear it. Enjoy!
Katie B says
After making your French baguette recipe, I knew I had to try this one. I have made it twice so far and both times were a hit. The first time I baked them in cast iron in the oven. The second time I made it on a grill. I prepared the dough the evening before leaving for a trip and it stayed in a cooler all day until time to divide it into fours. Every one said the dough was delicious! Already thinking about what toppings I will try next time.
Victor @ Taste of Artisan says
Enjoy!
Brian J Ashe says
nice
Victor @ Taste of Artisan says
Enjoy!
MN says
This is the best pizza dough I’ve made! It takes some planning but is worth it. In particular, I love the texture - crisp and chewy. Thanks Victor for sharing the recipe!
Victor @ Taste of Artisan says
You are very welcome, enjoy! Yes, it does take some planning but it's worth it. But you only need to remember to mix the dough a day ahead, the rest is easy. I will be posting my focaccia recipe in the next few days... if you like focaccia, you have to try my recipe, I have a feeling you will love it too.
Jacob says
Hi Victor,
Making your pizza dough right this minute to have for Valentine's tomorrow. Unfortunately the mixing step went a little awry; Followed the instructions as written but ended up with a big bowl of dry flour 'flakes,' i.e. no consistent mass of dough. Kept adding water until it cohered at least, but it feels like a very dense (and still somewhat dry) lump. Any advice? The only thing I can think of is that I royally misread my scale as I was measuring out the water, but I don't /think/ that's the problem.
Thanks for any advice!
Victor @ Taste of Artisan says
Oh boy... the good news is that it's actually easily fixable if you know what consistency you are looking for. Keep mixing by hand while adding water little by little, until the dough becomes soft and a sticky. Look at the picture in my post, that's how it should look. It will strengthen after stretch and folds and become tacky to touch, but not sticky, but that's later in the process. I think there was a mis-calculation somewhere because if you weigh your ingredients it shouldn't be like that. This does happen a lot when measuring out in cups and spoons though. Good luck!
Victor @ Taste of Artisan says
I emailed you, send me some pictures to take a look at, it will be easier for me to advise.
Paolo says
Do you have a recipe to use sourdough discard for pizza dough. I’ve been having fun with that lately. Ty for your time.
Victor @ Taste of Artisan says
I ll post one soon. Stay tuned.
Sheelagh says
Having read your recipes for French baguette and now pizza I cannot wait to try them out in our community wood fired pizza oven. This is a new and exciting experience for me and just goes to show you are never too old to learn something new! Will keep you informed on the results.
Victor @ Taste of Artisan says
Sheelagh, I would love to hear hot they turn out. Good luck!
Paolo says
I don’t see your focaccia recipe on this site, do you have a link for it? Thank you.
Victor @ Taste of Artisan says
Paolo, I will have to post it. Will try to do it in the near future.
John Togno says
Hi
I haven’t tried your method yet but will next time I do pizza
The cold fermentation method I have used with success is in my curing cabinet - controlled temperatures in the 10-15C range with 80% humidity for at least 24 hours
Also, enjoy doing your charcuterie recipes, they work very well
Regards
John
Victor @ Taste of Artisan says
Thank you for the kind words, John. Interesting idea; I've never thought of using my curing chamber for bread fermentation. Good luck with the pizza!
Best,
Victor
Andrew Appleby says
I've made your pizza dough and am enjoying your site. Love making bread but unfortunately I'm on a diet. I'm treating myself to a pizza tonight and have the dough ready in the fridge from last night. I halved the recipe as there is only two of us, so if i divided up into 3 am i correct in calculating the calories per pizza would be 607cals (ie 607 calories per pizza in original recipe)
Thanks in advance Andy
Victor @ Taste of Artisan says
Hi Andrew, good to have you reading my blog and happy to hear that you find it useful. Yes, you are correct, half the recipe divided into three portion would yield 607 calories per portion/indivial pizza.
Best,
Victor
Paolo says
This is another one of your recipe’s that has transformed my cooking/baking game to the next level. I have made this twice and everyone loved it, myself included. Thanks you.
Victor @ Taste of Artisan says
You are very welcome, Paolo. Enjoy! You need to try my focaccia;) I have a feeling you will like it too.
Rocco says
Hello victor, would love to try your focaccia, but no recipe on the blog... or am I just hard of seeing?
Thanks! Recipes have been great so far (baguettes and pizza dough)
Victor @ Taste of Artisan says
Hi Rocco, will try go post it in the near future. Glad you like my recipes. Enjoy!
Melissa St-Onge says
Can we use regurlar table salt?
Victor @ Taste of Artisan says
Yes, table salt will work.
Sarah Solorz says
My husband and i were absolutely ecstatic to try your pizza dough recipe and it did not disappoint. We have not had better results in many years of trying to make a great tasting pizza. Thanks very much for sharing!
Victor @ Taste of Artisan says
You are welcome. Enjoy!
Neal says
I didn’t see any blisters on top of the dough. Is this a issue? I guess I’ll know tomorrow when I make the pizzas.
I have been using a stand mixer in my attempts at pizza dough and the the crust doesn’t have the air pockets in the edge. I hope your fold method will produce better results.
Victor @ Taste of Artisan says
Blisters tell you that fermentation is active. You may not always see them but you should smell lactic acid yeast activity. I like to make sure that fermentation started before putting dough in the fridge. Otherwise it may not ferment properly.
Neal says
Pizza turned very good. I let it ferment 24 hours. Dough was a lot more sticky than I’m used to. Perhaps another six hours in the refrigerator would improve the handling or I might back off slightly on the water amount. I did weigh all the ingredients on a scale. Definitely going to try it again. Your bread recipes look very good.
Victor @ Taste of Artisan says
Good to hear it. Enjoy!
Drop hydration by 2% next time. Sometimes flour is very fresh and has higher water content. Sometimes ambient humidity is very high, which affects the dough. It's also about comfort level. I work with much higher hydration levels so 68% for me is very low, but it comes with practice. Some people start low and go higher as they get used to it. Love the texture and openness of high hydration dough.
Keith says
Hey Victor
I tried your pizza dough recipe, a few days later than planned, and the result was excellent. My wife said it was the best pizza dough I have ever produced, and I have to agree with her. Over the years I have tried lots of recipes, with both good and not so good results. I think the reason yours is superior is due to stretching and folding, and cold retarding. This significantly produces a better texture and superb taste.
I used supermarket white bread flour (13.4g protein), scaled down your quantities to 200g flour etc keeping to a 68% hydration. I strictly kept to your timings, but upon reflection I should have left the final proofing stage to 2 1/2 hours owing to a cooler kitchen temperature.
I appreciate not everyone has the time to spare to use the stretch and fold method, but if they have, it is well worth the time and effort!
Best wishes
Keith
Victor @ Taste of Artisan says
Thank you for the detailed review, Keith. Happy to hear that you liked my pizza recipe. Proofing stage will depend on the ambient temperature and may require less or more time. When I see a 50% volume increase, that's when I know the dough is ready to go. If not, I let it proof a little longer or put in a warmer place. Enjoy!
Joseph A. Redd says
Thank you so much for your work in putting this on the web. I have been making pizzas for years and I now in the 24 hour of the process of your recipe. I have learned a lot here. I also make baguette bread and I have printed that recipe also, and will use it when my other loaf is finished. I usually make it about every week and a half. I can't wait to try it. I do use KA flour and have used other different type of flours.
I have a gas SS grill that is 15" diameter. (Lowe's Perfect Flame that I have kept going for years by refurbished it.) This grill works great for my pizzas and breads. I have an elevated Super Stone in the grill with old pizza pans and 3 bricks. This elevates the pizza in the cover and gives the pizza top a good browning. The Super Stone rest on a 15" pizza pan. I also covered the vent holes with SS strap and AL covers. It really works wonderful for one of my favorite meals. //...
Victor @ Taste of Artisan says
You are vrey welcome, Joseph. Sounds like a cool setup for making pizza. I'd like to see some pictures of it. Enjoy!
Syma Cervone says
I am from Rome, and have a wood burning oven. The dough you make is for a conventional home oven? Because a wood burning oven requires a flour for high temperatures. Ex: CAPUTO BLUE.
I use the ANPN recipe for wood burning ovens.
You say to poke the bubbles on the dough, but that is characteristic on pizza napoletana . Ti form the cornicione.
Victor @ Taste of Artisan says
Hey Syma, thank you for chiming in. I don't have a wood fired oven so I've never tested my recipe in one. I have tried it in my Ooni oven with success but it doesn't burn as hot as a wood fired oven.
I wonder what makes this flour more high temperature (900F) tolerant than a standard Type 00/0/1 flour and if it isn't just a marketing trick. Anyway, you can easily substitute the flour in my recipe for the one that you mentioned, the dough making process will not change.
Yes, I poke the bubbles inside the pizza circle but not on the raised edges. Yes, I want to keep the eddges bubbly but I don't want big bubbles puffing up in the middle of the pizza and messing up the toppings, I've had that happen and it wasn't pretty;)
Ciao!
Keith Tapscott says
Hey Victor
Pizza Dough
As always, an excellent recipe, so detailed and so helpful. I have tried lots of Pizza dough recipes - from biga preferments to various combinations of flour, including semolina, but consider this one to be potentially the best. I think that the stretch and fold technique definitely produces better results. It's worth the effort. Guess what I'm going to do later today ....
One small criticism, if I may. Please avoid using single use plastic ie cling film. Much better for the environment to use a shower cap. I find that if treated carefully, one cap will last for at least a year, in spite of being used 3 or 4 times a week.
Best wishes
Keith
Victor @ Taste of Artisan says
Thank you for the kind words, Keith. Happy to hear that you liked my recipe.
Your criticism is well-understood but these are not single use. Every piece of paper towel and cling film - I have 4 sets of them is being reused over and over again when making pizza, bread, rolls, etc. I think I've only replaced two sets once a few months ago and that was because my daughter accidentaly threw them away after making bread. I remember your recommendation from a few years back;), I tried a shower cap but it doesn't quite fit all the bowls (small and quite large) and rectangular pans that I use so I went back to plastic. I use a commercial heavy duty one, it's hard to rip and it lasts for a very long time.
Keith Tapscott says
Morning Victor
Thank you for your reply. It's great to learn you do not use single use cling film/plastic wrap. My mistake; my apologies. I wonder if others have presumed it was single use? Perhaps a reference regarding this would help.
Best wishes
Keith
Victor @ Taste of Artisan says
Hi Keith, you bring a good point. I will make it clear in this and in other posts.
Paolo says
Looking forward to trying. Ever since I discovered your stretch and fold technique I have tried it on everything from pizza dough to brioche.. I have not however let it rest in fridge overnight so very curious to see results, Ty again.
Victor @ Taste of Artisan says
You are very welcome, Paolo. If you haven't tried overnight cold retarding, then you haven't tried my French Baguette recipe. I highly recommend it. I like cold retarding... more flavor, improved dough consistency if you will, convenince - prep the night before and take out, proof and bake when ready... more flexiblity. You can cold retard from 12 to 48 hours. Happy baking!
Bee says
What temp to bake and time?
Victor @ Taste of Artisan says
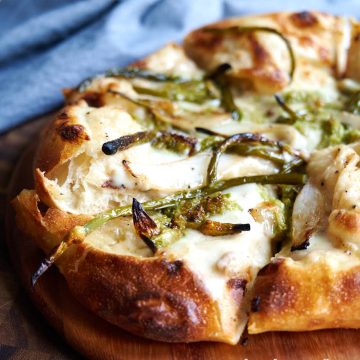
That really depends on your oven. In my gas oven, I bake at 500F with a fan on a 3/4" stone preheated for 1 hour, for 8-10 minutes. That's how I baked the garlic scape pesto pizza that you see in the pictures. I really like the results. In my Ooni pizza oven that bakes much hotter (don't know exact temp, will have to measure some day), I bake for about 1.5 minutes.
Steve Denvir says
Your timing is impeccable. We have a Forno Bravo wood-fired pizza/bread oven sitting in the driveway as I write, just waiting for it’s foundation to be finished.
Looking forward to learning to cook with wood fire and retained heat.
Victor @ Taste of Artisan says
Steve, I am jelous;) A wood-fired oven is my dream... hopefully one day I will have it in my backyard. My grandparents had a big wood-fired oven, I still remember the taste of bread coming out of it... unbelievable. Also got to try a lot of bread baked in wood-fired ovens when I lived in Germany... there is nothing like it. Good luck with your new oven, I am sure you will have a lot of fun with it.