Capicola is one of the simpler salumi to make - you don't need to grind the meat, worry about keeping the fat cold and many other little details like when you make salami or sopressata. However, the outer parts of solid meat muscles tend to dry out in the curing chamber faster than they do with salami. That's been my experience, anyway. For a while, I've struggled with making my capicola dry evenly from side to side, without harder outer parts and soft, sometimes poorly dried centers. This is a common problem for many home salumi makers.
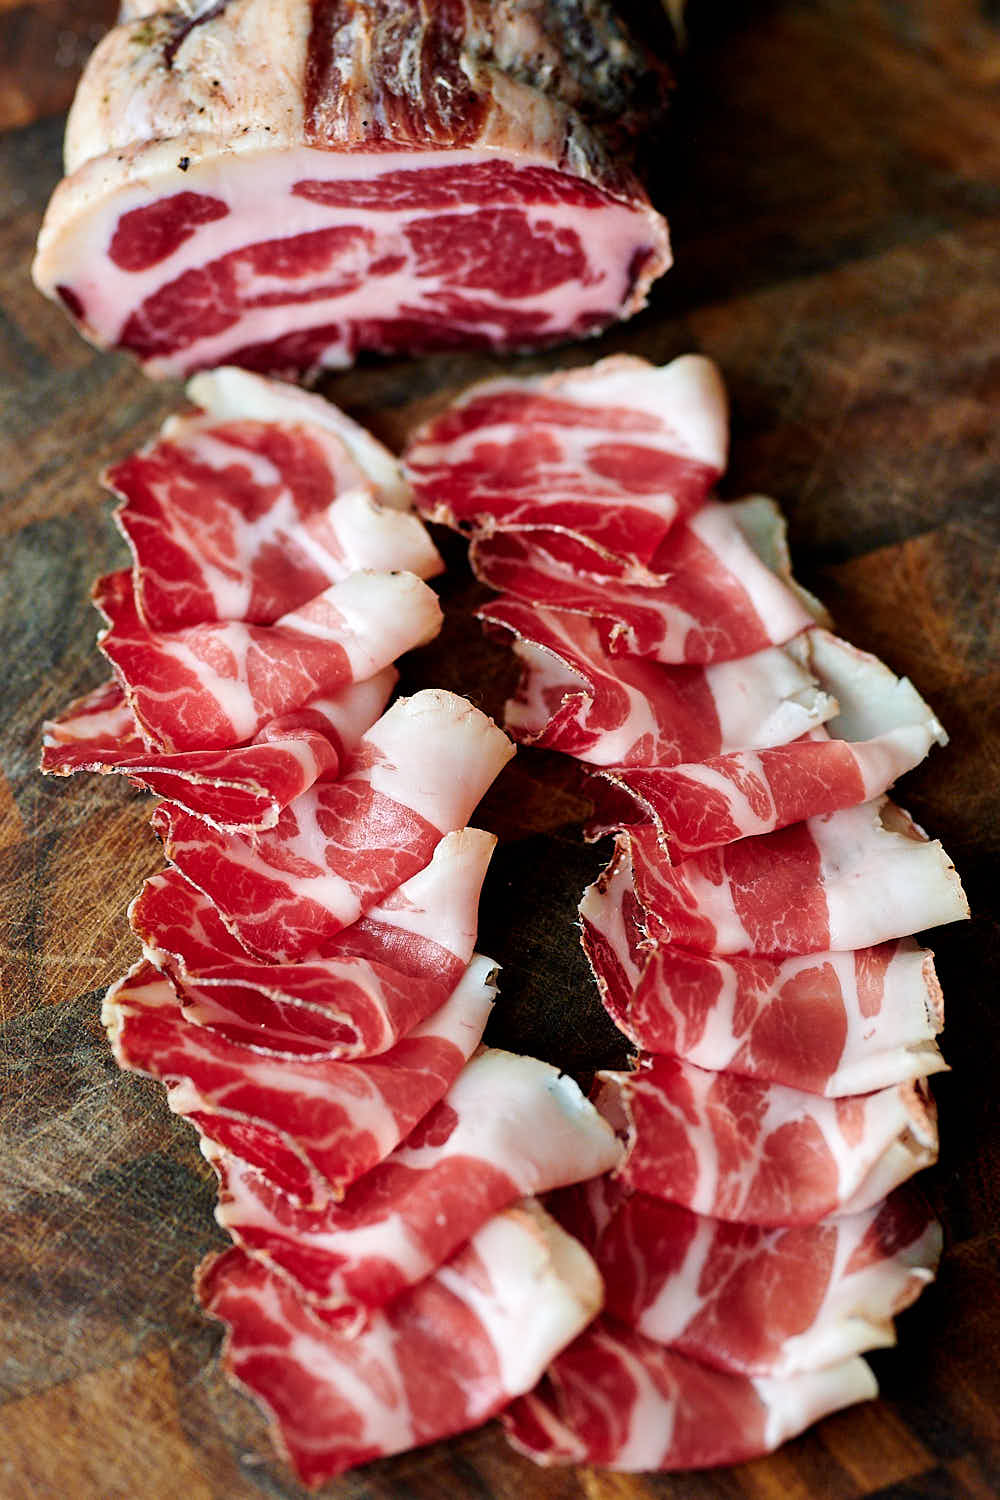
The typical solution is to vacuum seal capicola and refrigerate it for a couple of weeks. The meat will undergo a period of 'equalization' where the remaining moisture inside it will get distributed more evenly. While this seems to kind of work, this isn't necessarily the most optimal way of making capicola at home.
The poorly dried center may harbor spoilage bacteria, which during equalization may get propagated to other parts of the meat. Uneven drying over time may also result in off-flavours, poor overall flavor development and other little nuances that will impact the final product's taste, aroma and appearance.
A better approach to dry curing capicola
I've been researching various sources and testing new techniques to help me make a better capicola in my DIY curing chamber. The solution was suggested by the approach used by many Italian salumi makers. It consists of three stages that can be translated as:
- fermentation (also called dripping),
- drying, and
- maturation.
The key difference in this approach is the period of intensive drying, which lasts about a week.
During fermentation, we raise the temperature of the meat to the optimal level where beneficial microorganisms begin to develop. Dripping is another term Italian salumi makers use to describe this cycle as this is when water is leaving meat so rapidly that it's literally dripping down.
During the drying period we remove a substantial amount of water in a controlled way. The meat is subjected to fairly low levels of humidity, which are alternated with higher humidity, and it loses a substantial amount of liquid. The alternating low and high humidity prevents the surface from drying out; it allows the meat to 'breathe'. After drying, capicola goes into a curing chamber to mature at fairly high humidity, where it will spend several months, losing some more weight, and developing an exceptional flavor.
I've made several batches of salami using this method (or a variation of it) with great results. It substantially reduces case hardening, results in more even drying and facilitates a noticeably better flavor development. I would say those were some of the best batches I'd ever made. I am now using this method to make capicola.
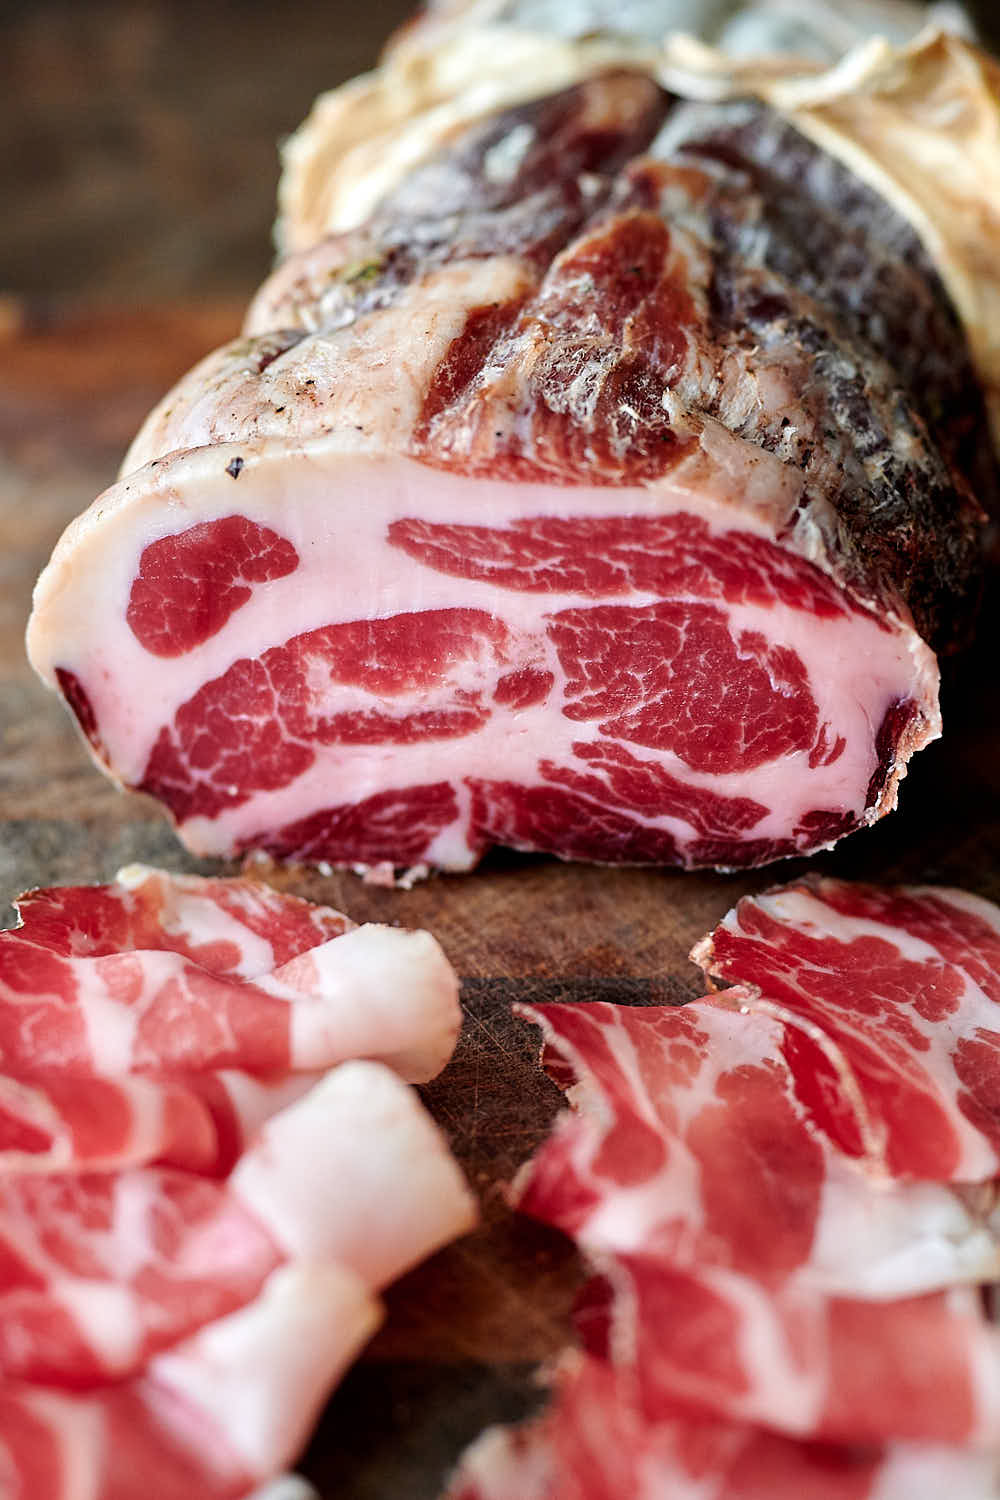
Basic capicola making process
This capicola recipe takes after the famous Italian Coppa Piacentina, described on Salumi Consortium's website. It follows all the main guidelines, including the seasonings and the environmental parameters to the extent that they can be replicated at home.
Meat selection
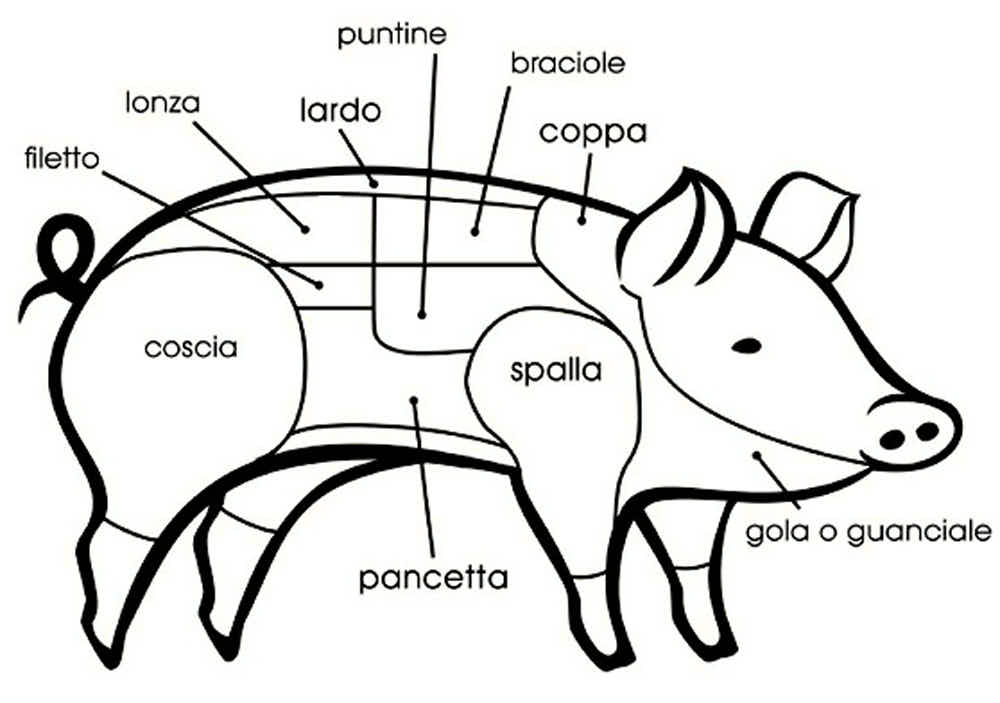
Capicola is made from coppa. Coppa is a muscle of the pork right behind the back of the head, at the top of the shoulder. You may also know it as 'money muscle'. It's the part of the Boston butt closer to the pig's back and opposite the side where shoulder blade bone would be.
To make a great tasting capicola you need to start with the freshest meat you can find. If possible, use heritage pork. Heritage pork is a trend now. You can find many small farms selling meat to the public, sometimes at wholesale prices if you make a large enough order. In this batch, I am experimenting with heritage pork. This particular one is of Berkshire and Gloucestershire Old Spot mix that I purchased from Murray's Farm.
Seasoning and curing
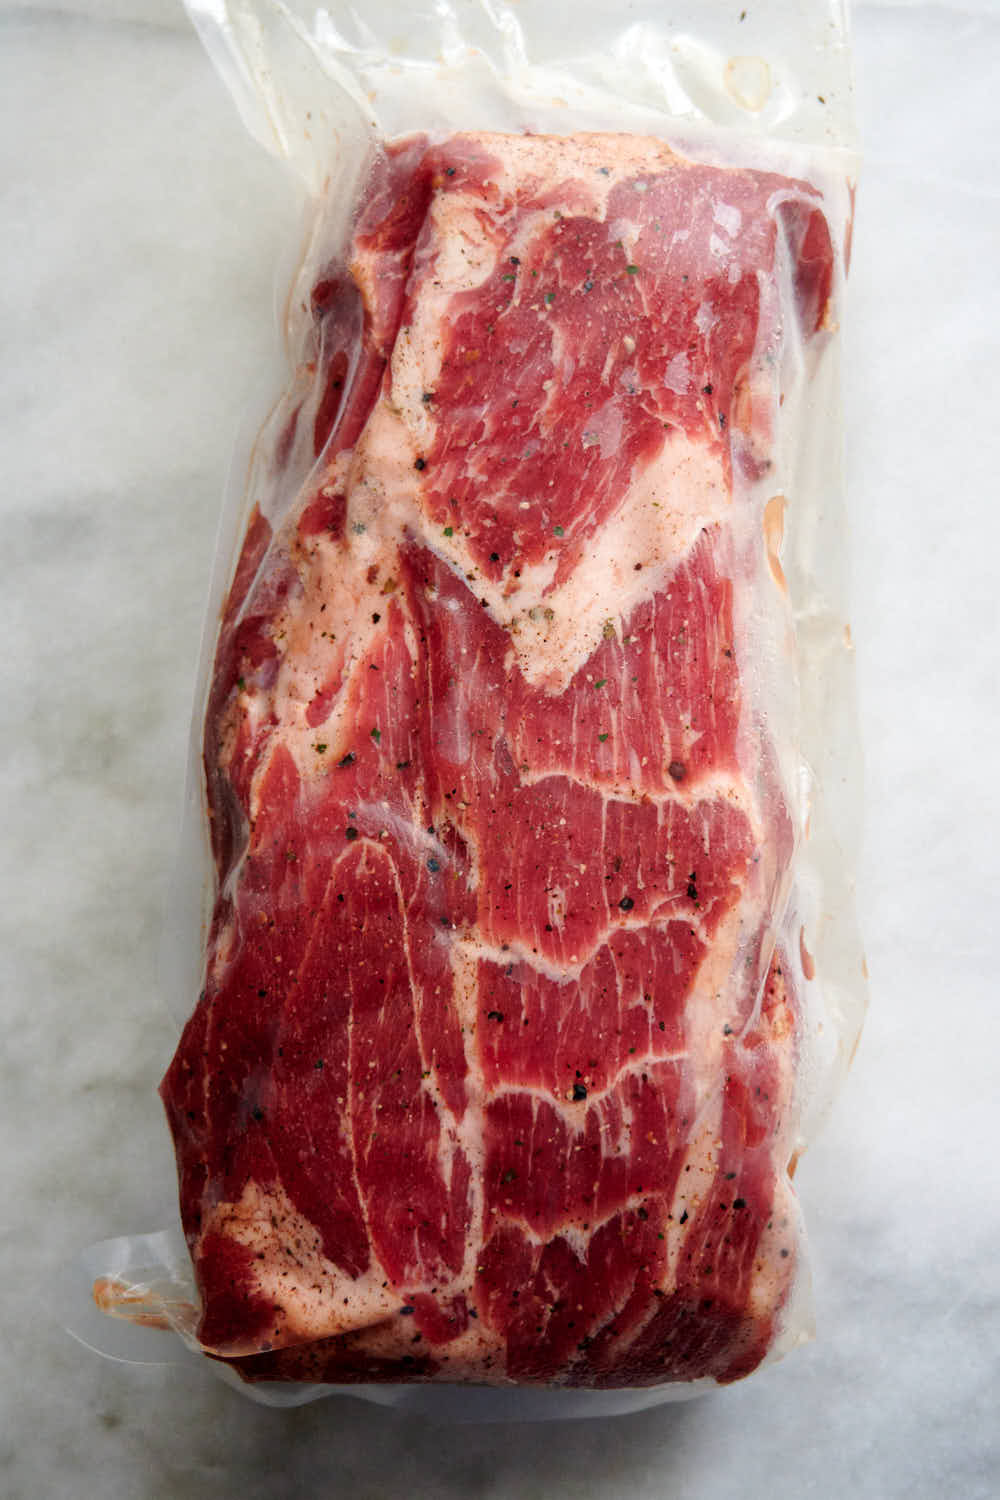
I started off by trimming, salting, seasoning and vacuum sealing my cuppa, then curing it for seven days in a fridge. I find that the most convenient and predictable way for me to season capicola is to weigh the ingredients in grams. This way, the meat receives the exact amount of salt and spices, and there is no way to overseason it.
Casing and trussing
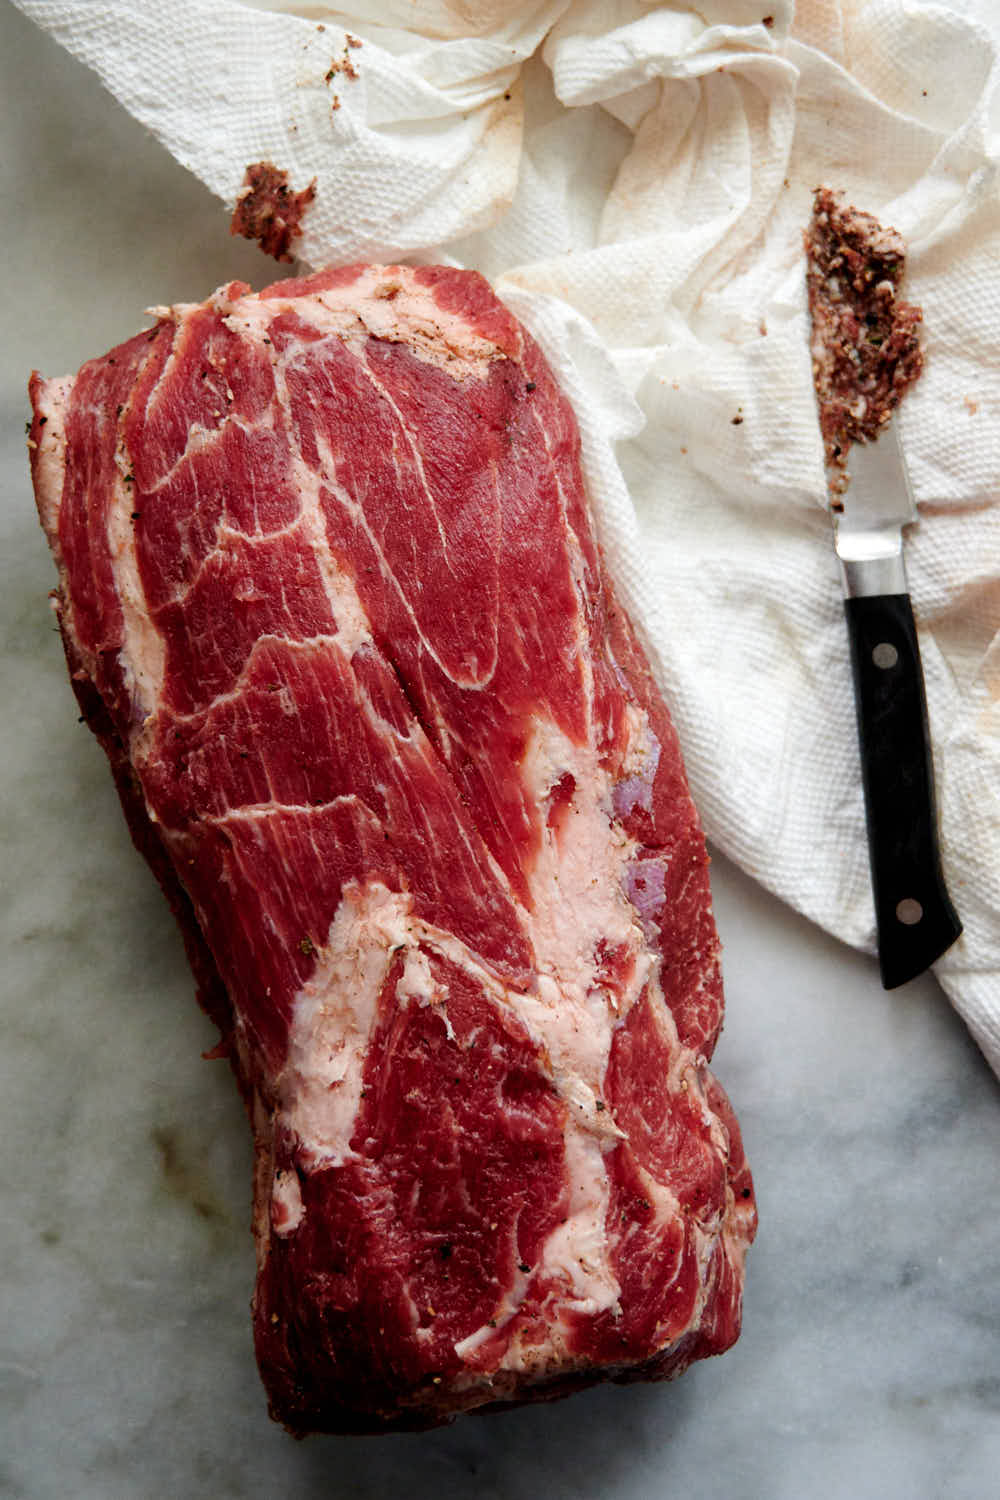
After curing, I removed the meat from the fridge and scraped off any excess salt and seasonings. There is no need to rinse it with water or wine, though many recipes instruct to do so. Note the ruby-red color of the pork after curing. Even before curing, the meat was noticeably darker than commodity pork meat. I have a feeling that this coppa will be quite amazing. Will it taste much better than the one made with regular pork? Time will tell.
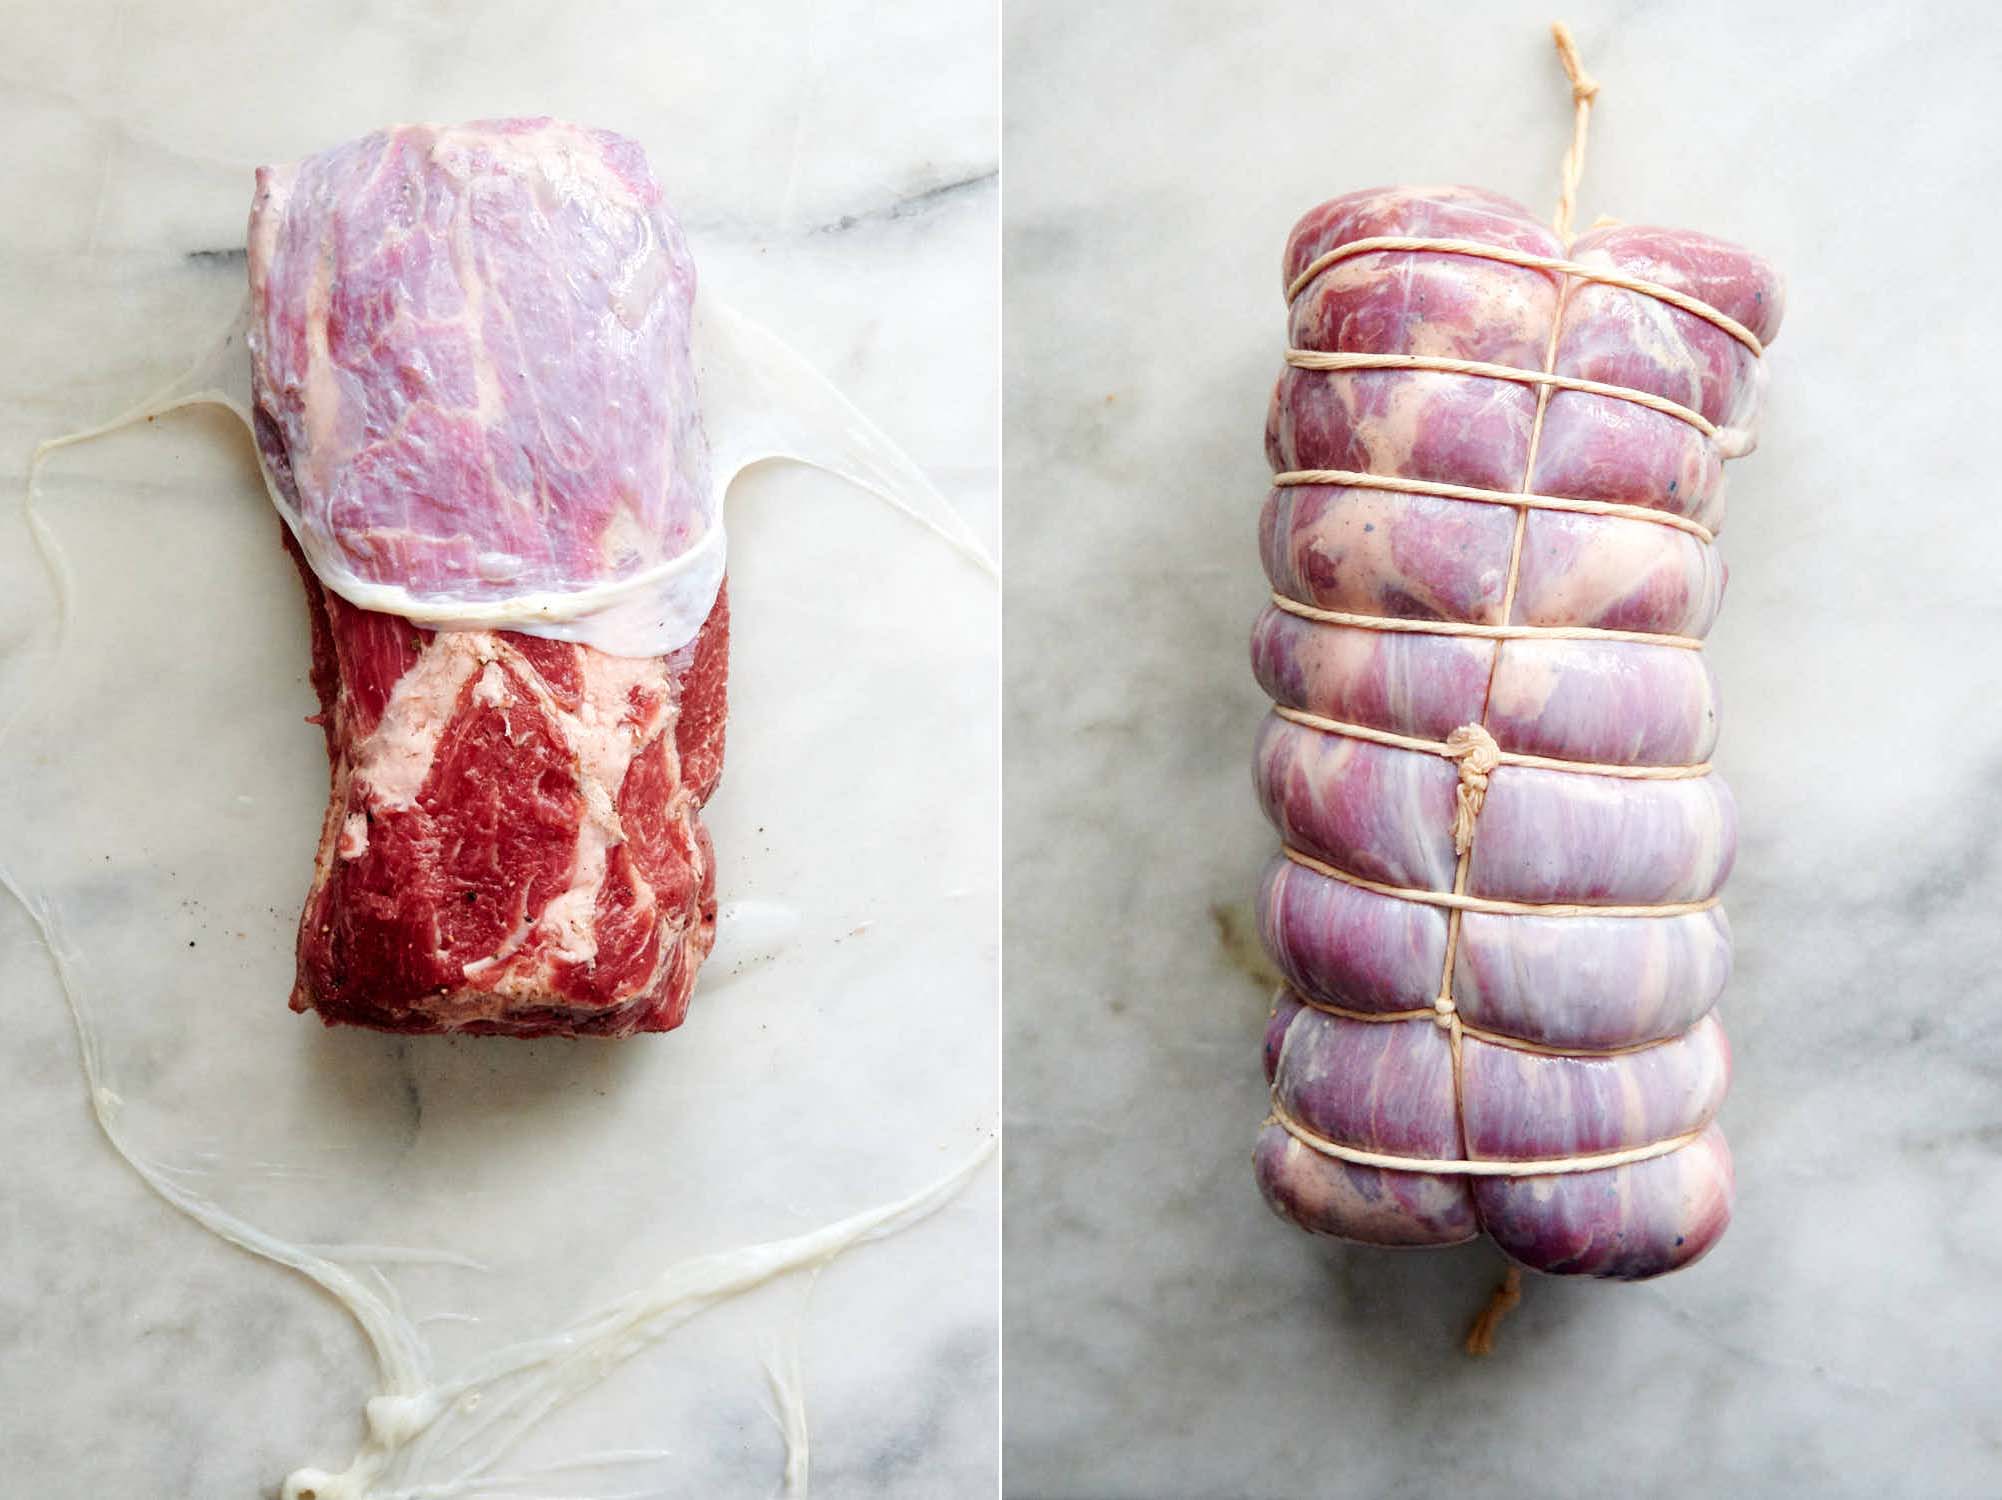
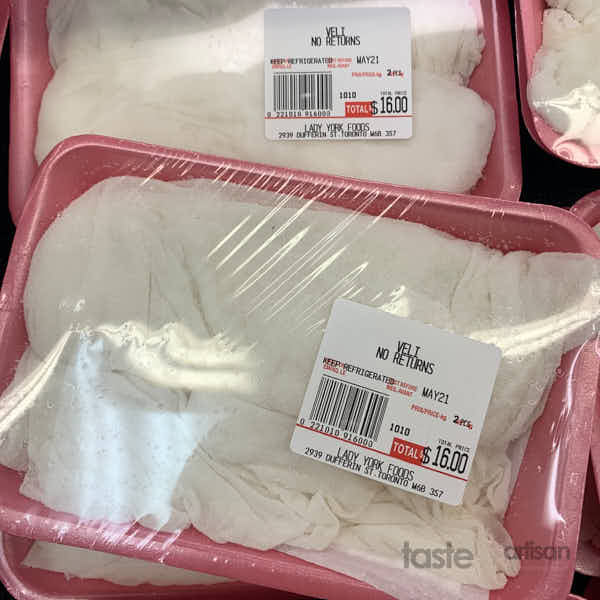
I then wrapped the coppa in salted veil. Another common approach is to a beef bung. The next step is to prickle the capicola all over with a sterilized needle and tightly tie it with twine.
I also sprayed the tied capicola with a white mold solution. I am using the naturally occurring white mold that I collected from prior batches, but you can also use Bactoferm Mold-600.
Drying
The next seven days my capicola spent in a temperature and humidity-controlled fridge. My curing chamber is occupied so this time around I used my kegerator, which for the time being I equipped with an Eva Dry dehumidifier, a 10"-20" seedling heating mat, and a mini humidifier. The humidity and temperature were controlled by Auber HD220-W humidity controller and Auber TD120-W temperature controller. This little bar fridge is not good for general maturation but, in a pinch, it does a good job at drying.
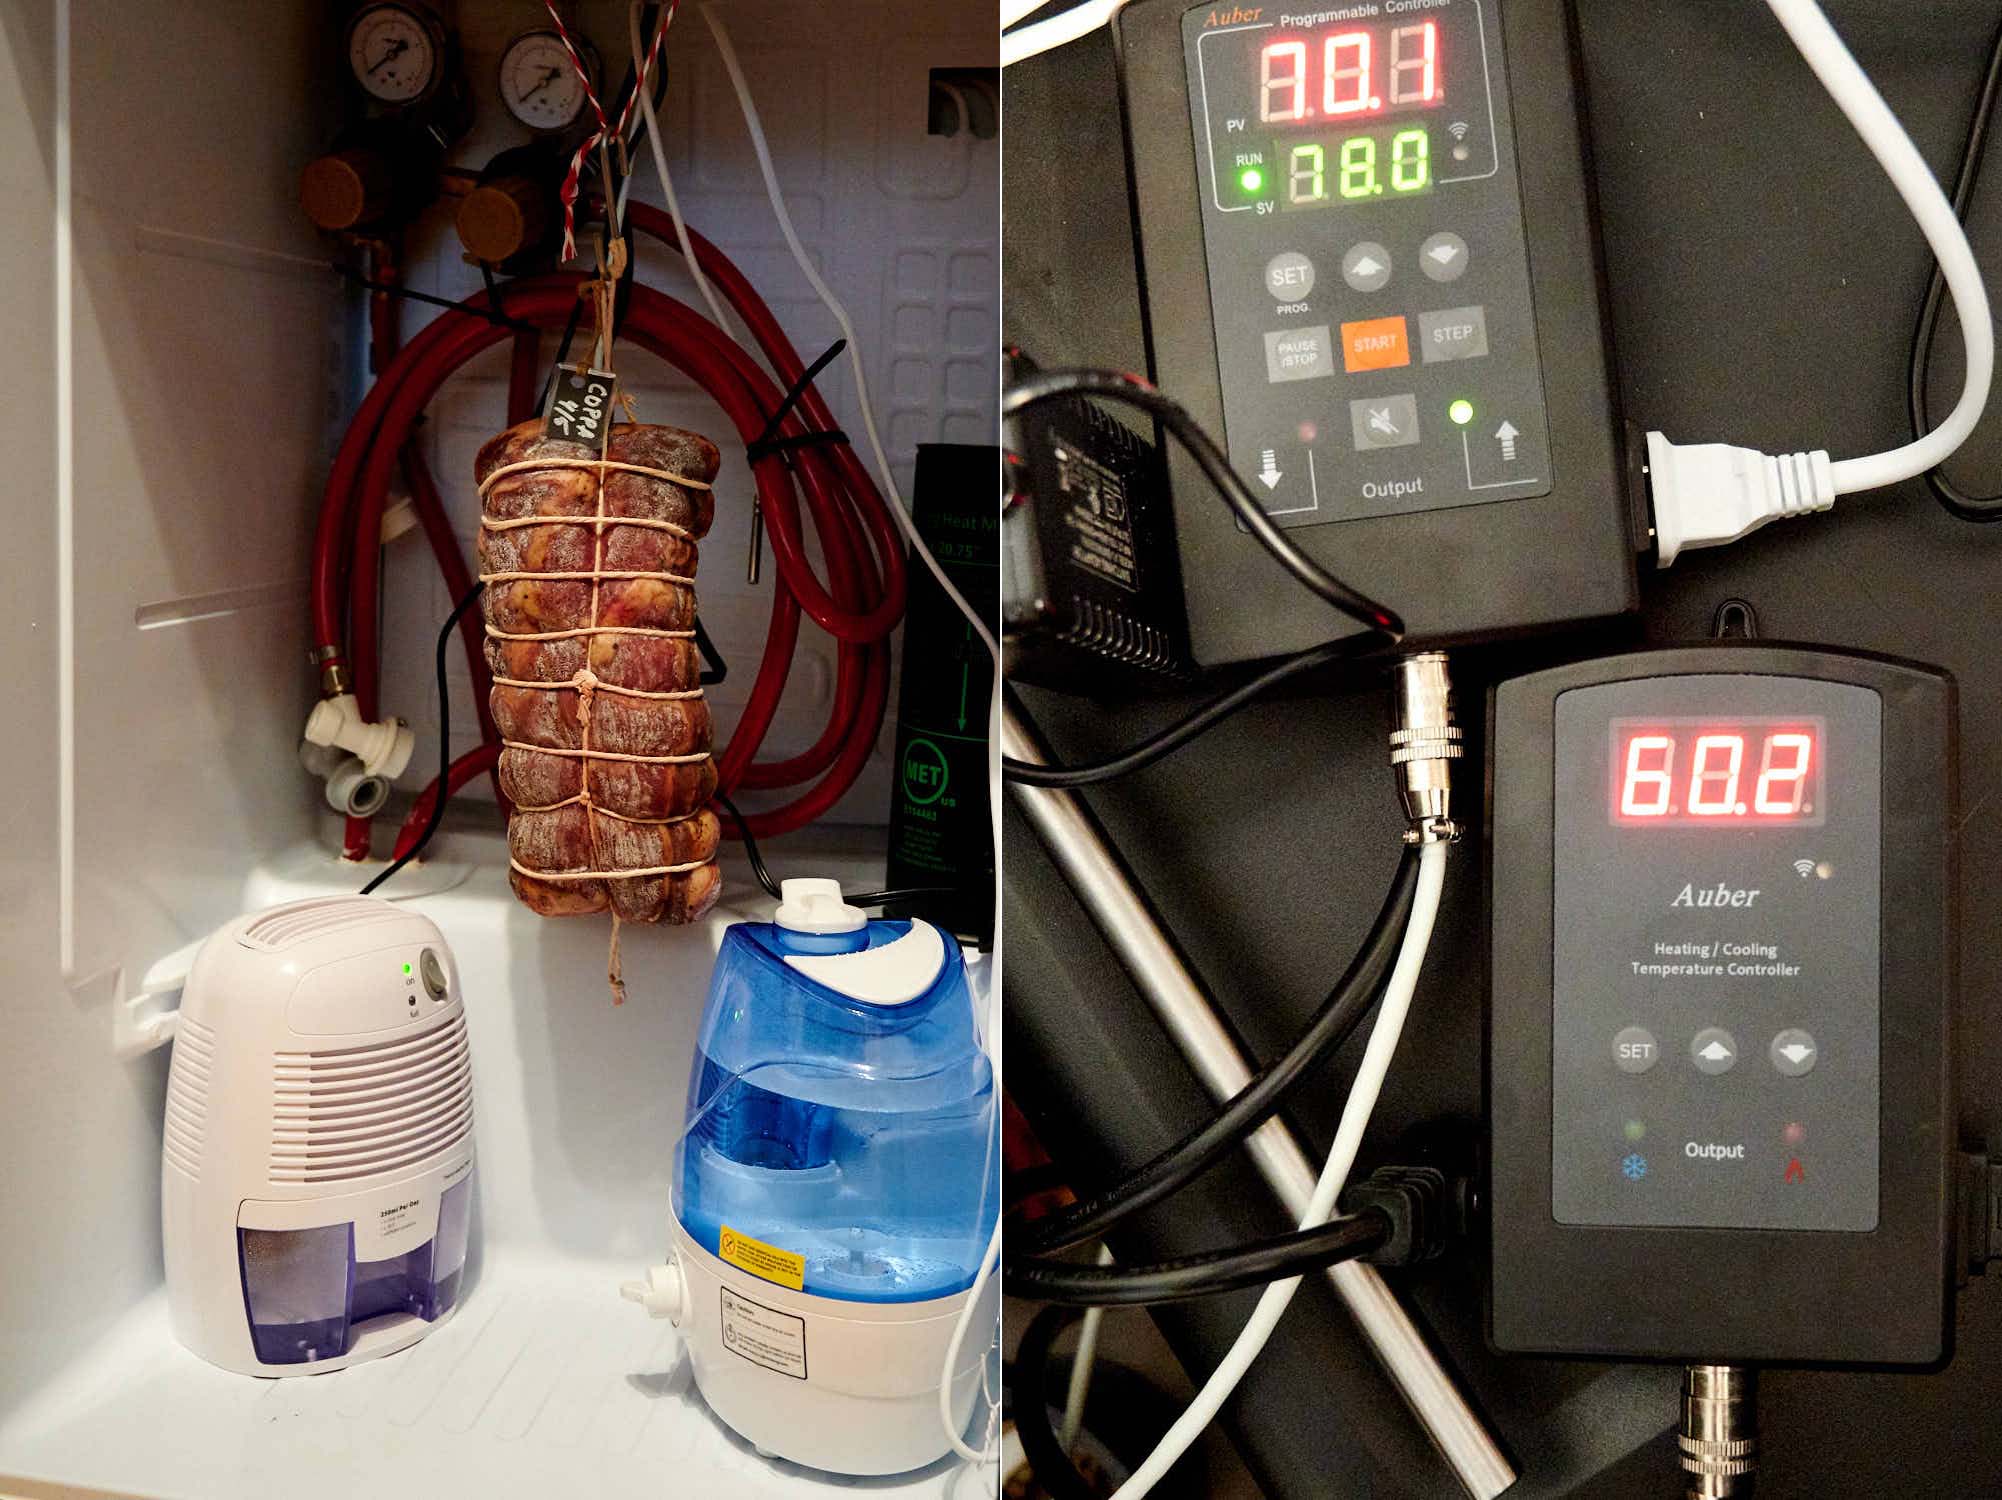
The starting temperature for drying capicola is 75F to 77F, depending on the coppa's thickness. The duration of the first step (fermentation) also increases or decreases depending on the size of the coppa. That temperature then gradually drops to 59F by the 7th day. The starting humidity is unregulated for the first 10 hours and can go as high as 99%, then it follows the specified drying protocol. For my relatively small capicola, I used the following schedule:
| Stage | Duration | Temp | RH |
|---|---|---|---|
| Fermentation | 10 hours | 75F (24C) | < 99 % |
| Drying | 15 hours | 72F (22C) | 75-85 % |
| Drying | 24 hours | 66F (19C) | 68-78 % |
| Drying | 24 hours | 64F (18C) | 65-75 % |
| Drying | 24 hours | 62F (17C) | 68-78 % |
| Drying | 24 hours | 60F (16C) | 72-82 % |
| Drying | 24 hours | 59F (15C) | 76-86 % |
Time and again, I am finding that controlling humidity in a 4.4 cubic feet bar fridge that is non-frost-free is extremely difficult. You just can't keep it steady like in a proper curing chamber. However, my make-shift drying chamber worked well for drying. The humidity followed the general direction I wanted it to go and oscillated roughly between the low and the high values as a result of the fridge cycling at regular intervals. The goal is t0 have the meat lose water quickly without drying out the skin; hence you want to alternate low and high humidity.

At the end of the 7-day fermentation/drying period, my coppa lost 16.4% of the green weight, going down from 1,640 grams to 1,370 grams. It also began to show traces of white mold development.
Maturing
After this, my coppa went into the curing chamber to mature for about 3 months. Larger, thicker capicolas can mature for up to 6 months or longer.
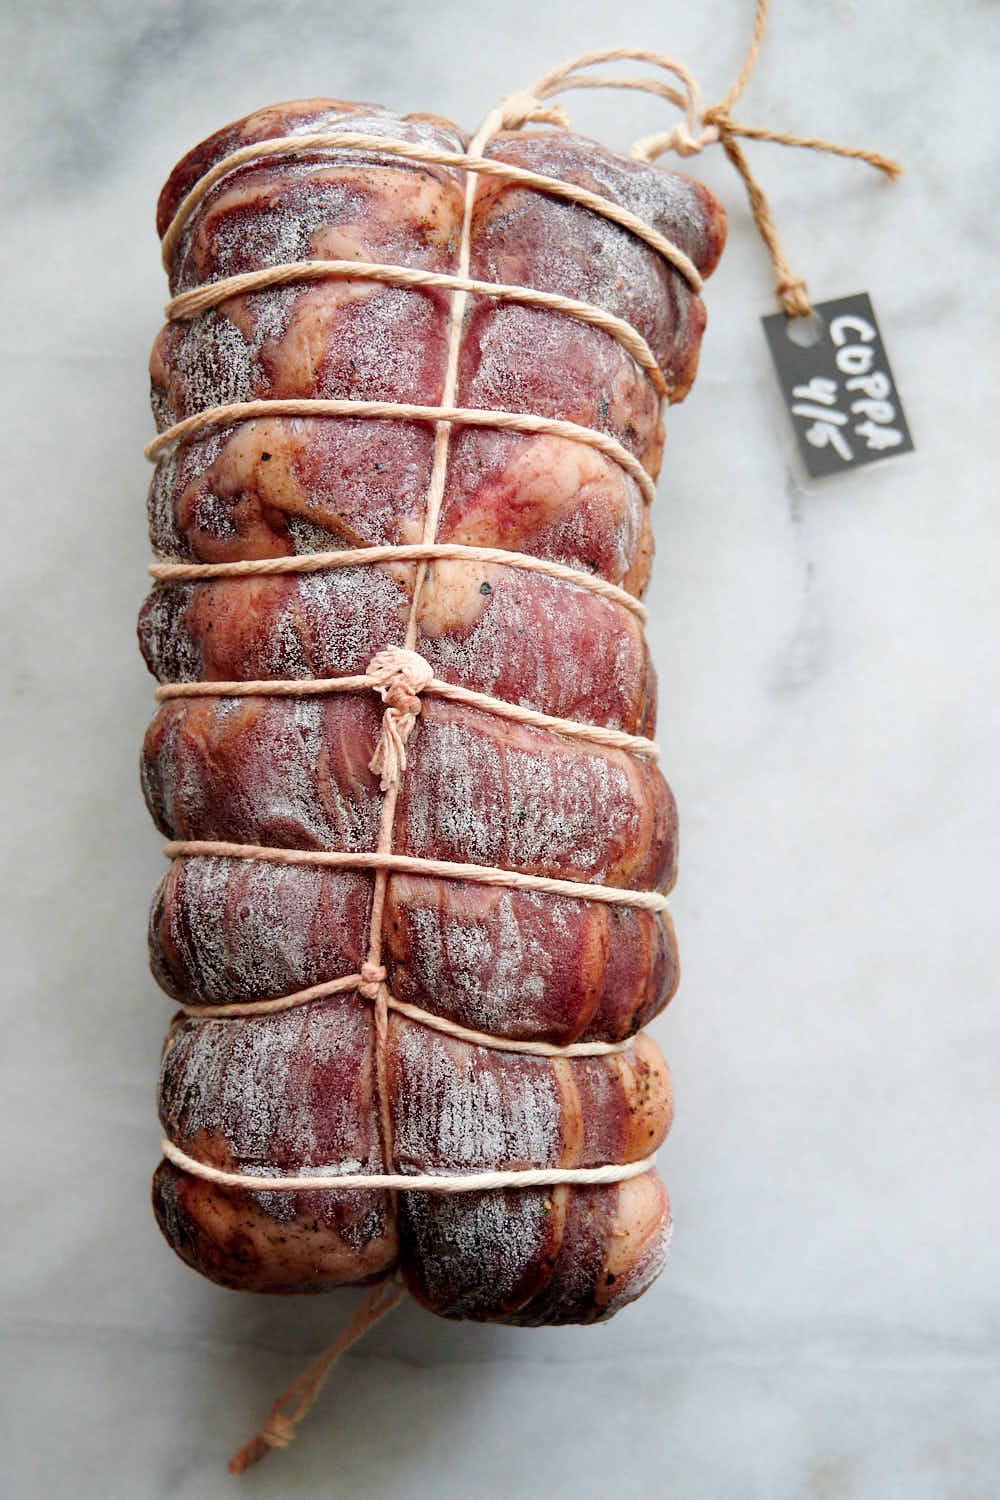
Maturing takes place at 55F - 57F and 80%-82% RH. Note the relatively higher humidity level during maturing, compared to the usual 75% RH. Since the meat already lost quite a bit of water, we want any further water loss to be low and slow. The 80%-82% RH range will ensure that and also prevent case hardening.
Weight loss progress
| Weight | Loss, g | Loss, % | |
|---|---|---|---|
| Start | 1,640 | ||
| End of Drying (7 days) | 1,370 | 270 | 16.4 % |
| 1 Month | 1,153 | 487 | 29.7 % |
| 2 Months | 1,055 | 585 | 35.7 % |
Tasting notes
I pulled this particular capicola after just two months. The reason for that is that the coppa was smaller and thinner than usual so it matured faster. I can't complain about that. But expect larger pieces of meat take longer, about 3 to 5 months.
Drying was nearly perfect, no complaints here. The meat closer to the surface is a little darker but that's normal. At 30% the meat felt a little softish inside, though the casing was noticeably harder. I let it dry for another month and cut when it lost about 37% of the original weight. The meat felt nice and firm throughout but not hard. The casing became a bit harder after 6 weeks and I was concerned that the center may not firm up due to that, but it was not the case. I am quite happy with how the uniformity of drying using this method.
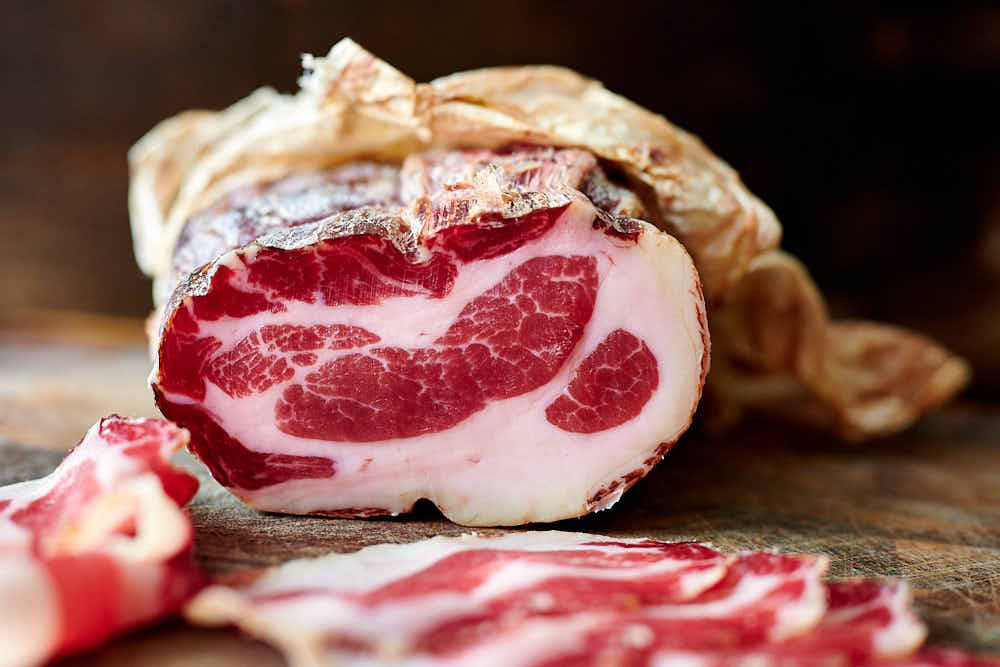
As any solid muscle salumi, it's best when sliced paper-thin on a meat slicer. Thinly sliced, this capicola just melts in your mouth. Some family members at my home don't like fat but loved this coppa when it was sliced paper-thin.
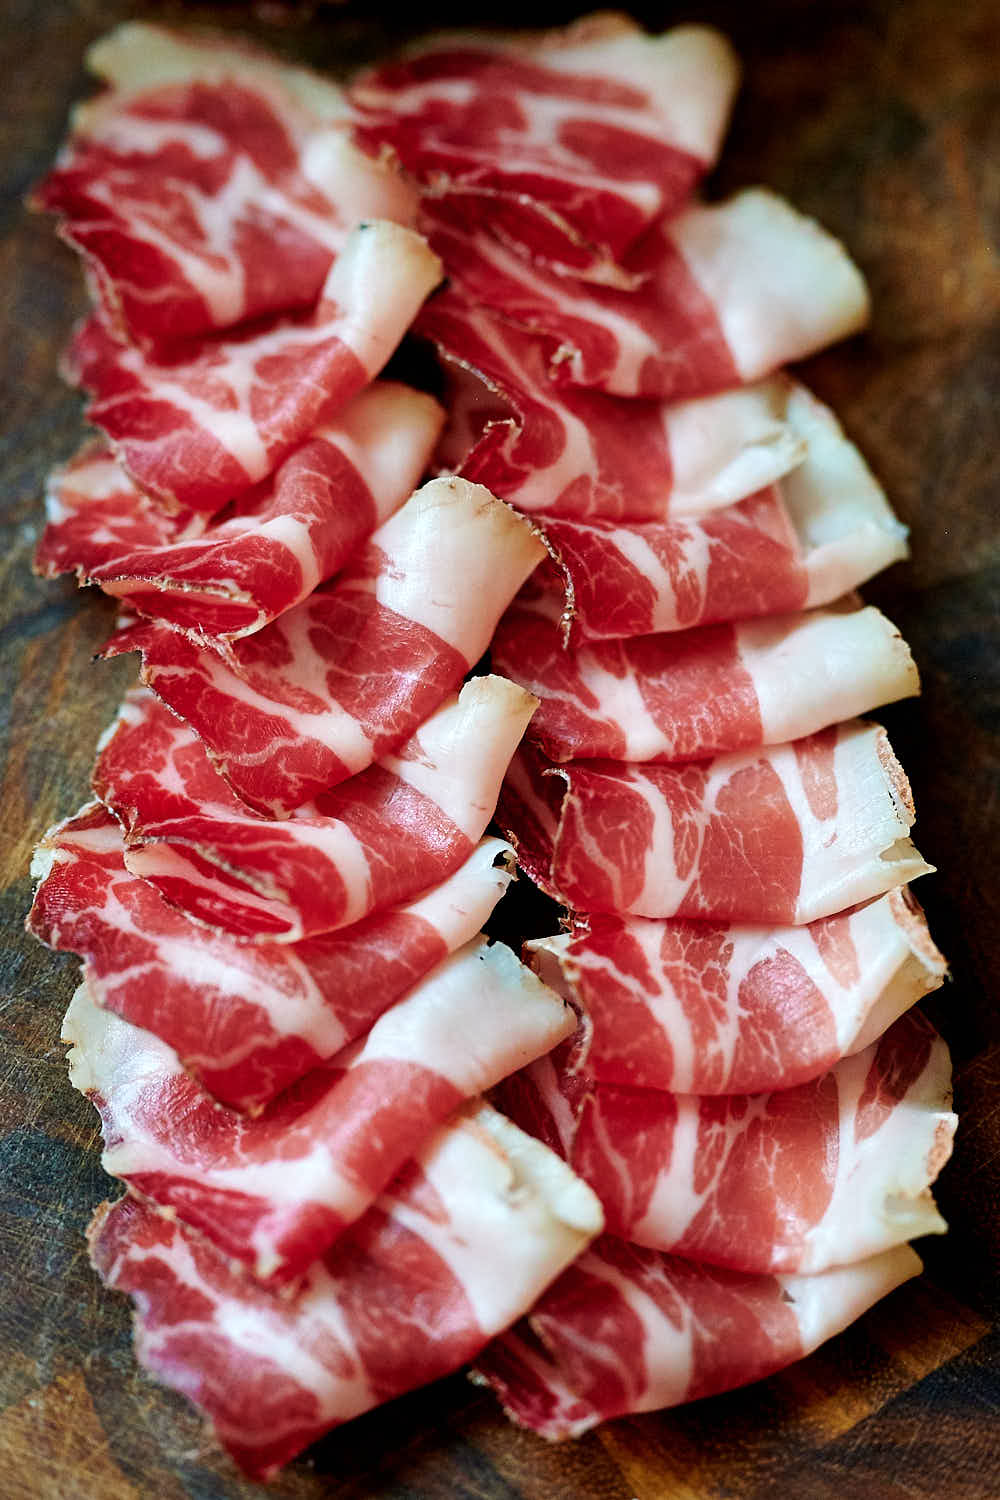
The salt at 3% was spot on. Salami that has 3% salt would be too salty for my taste but with capicola, not all of the salt will make it inside the meat and some will be removed after curing. The beauty of measuring the exact amount of salt when curing is that you will never over-salt your meat.
I should mention my impression of the seasonings as well. Often, seasonings are very personal as tastes differ. I used the spice mix used in the production of the famous Italian Coppa Piacentina. You may have noticed how tiny the amounts of the seasonings are. These spices are very aromatic so a small amount goes a long way. You won't find this capicola underseasoned for sure.
Personally, I liked this seasoning mix. The robust flavor bouquet was nice and the aromas were pleasant. Bold but not overpowering. There was plenty of complex porky flavor. There was a slight peppery bite which I liked too. I've tried various other spices over time but, to be honest, I liked this one better. I am not surprised, frankly, as this recipe has been refined for generations and has a widespread appeal. You can't easily beat something like this. Going forward, I think this one will be my favorite one for capicola.
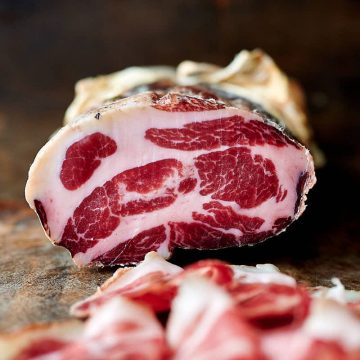
Homemade Capicola
Ingredients
- 1000 g pork neck coppa
- 27.5 g kosher salt 2.75%
- 2.5 g Cure #2 0.25%
- 0.45 g black pepper cracked; 0.045%
- 0.25 g cloves ground; 0.025%
- 0.1 g bay leaf ground; 0.01%
- 0.15 g cinnamon ground; 0.015%
- 0.1 g nutmeg ground; 0.01%
Instructions
- Trim the meat into a boneless, uniform shape. Make sure there are no cuts in the meat where bacteria could enter, and cut off any loose pieces.
- Weigh the coppa in grams. Divide by 1000, then multiply each ingredient by that number. For example, if your coppa weighs 2650 g, you need to multiply the ingredients specified above by 2.65.
- Mix all the salt and the seasonings together, and rub on the meat. Place the coppa and all the extra salt and seasonings in a vacuum-sealable bag and seal. You can also use a Ziploc bag.
- Place the bag in the fridge for 7 days. Flip the bag every day or so.
- After 7 days have passed, remove the meat from the bag and gently scrape off any excess salt and seasonings.
- Prepare the coppa for hanging by casing (veil, beef bung) and trussing. Poke a lot of small holes all over the surface with a sterilized needle to remove any trapped air.
- Spray with white mold solution.
- Weigh the meat and write it down on a tag. Attach the tag to the meat.
- Hang and dry in the curing chamber for about 7 days as per the schedule below in the note section.
- Mature in the curing chamber at 55F - 57F (13C - 14C) and 80% - 82% for 3+ months.
- When the meat is ready, remove the casing, slice as thin as possible and enjoy.
Notes
| Stage | Duration | Temp | RH |
|---|---|---|---|
| Fermentation | 10 hours | 75F (24C) | < 99 % |
| Drying | 15 hours | 72F (22C) | 75-85 % |
| Drying | 24 hours | 66F (19C) | 68-78 % |
| Drying | 24 hours | 64F (18C) | 65-75 % |
| Drying | 24 hours | 62F (17C) | 68-78 % |
| Drying | 24 hours | 60F (16C) | 72-82 % |
| Drying | 24 hours | 59F (15C) | 76-86 % |
Nutrition


Laurence Bugeja says
Dear Sir i am going to try your recipe as it looks very interesting but my main problem is that here we can't buy cure # 2 salt as we are resitrict in Europe so i am going to use salvianda as a substitute fore cure #2 salt , but i am concerned if i shall mixed it with kosher salt or only use salvianda salt only. I will be happy if you will give me an advice about this. Thank in advance for your response thanks again Laurence.
Victor @ Taste of Artisan says
Hello Laurence, I've never used it, so I had to look up what it is. It looks like it's very similar to Cure#2, except it uses Potassium nitrate instead of Sodium nitrate. It also looks like the amounts of nitrite and nitrate are smaller than in Cure#2, hence you can use more of it. In fact, it looks like when using it, you don't need to add additional salt. Here is the link on the suggested use, which is "30-55 grams per kilo for charcuterie." My total salt in this recipe is roughly 30g per kg of meat - the amounts are nitrite and nitrate are negligible, which is why they are mixed with salt before being sold to the public. That's my max as I don't like salty food. You may choose to use more. Good luck!
Tony Laguardia says
Hi Victor, firstly want to say thanks for all of your great content. I’ve used it on many occasions with great results. My question relates to fermentation and drying. I’m worried about the higher temperatures and the potential risk of spoilage with the higher temps. Can you explain why you are ok with the higher temps, does it relate to the protection you’ve created with the salt and nitrate?
Victor @ Taste of Artisan says
Hi Tony, thank you for the kind words. I am glad you found my content helpful. To answer your question about fermentation and drying, not, this will not lead to spoilage if done according to the specified schedule. This fermentation/drying schedule is an adaptation from Stagionello commercial meat curing fridges. Accelerated drying actually significantly lowers the risk of spoilage and pathogenic bacteria growth as aW (water activity) drops quickly. If you are still concerned, you can always follow the typical 55F - 70-75% Rh schedule for capicola you will find in many charcuterie books. Good luck!
Pavel says
Victor, hello, how do you store coppa after drying? Can you vacuum it in a beef casing with mold or do you need to remove the casing before vacuuming?
Victor @ Taste of Artisan says
There are several ways to do it and I pick one or the other depending on the situation. If I know it will be consumed fast, I remove the casing, vac seal and refrigerate. Sometimes I slice, lay on a foil tray and vac seal. If it's not going to be consumed soon, I wash off the mold, briefly soak in wine, dry, then wrap in butcher paper or vac seal and refrigerate or freeze. I don't like leaving mold on. You can also leave it the curung chamber, just bump up the humidity so it doesn't dry too much. Hope this helps.
Pavel says
what is the best way to wipe or wash off mold? what does soaking in wine give?
Victor @ Taste of Artisan says
It's an old Italian traditional way of doing it. Wine's both acidic and alcoholic and inhibits the growth of bad molds. You could also wash under running water... use a toothbrush to get into small crevices, then rinse with wine... or give it a short soak in wine... that's what I do.
Pavel says
Victor, thank you very much for the consultation! Today I tried some coppa according to your recipe - the taste is great!! Last question, please recommend a pH meter
Victor @ Taste of Artisan says
No problem. For meat, use this Hanna pH tester - https://www.hannainst.com/meat-ph-tester.html. I like it. I also have their HALO pH tester that connects to my phone via bluetooth. I like that one too. You can't go wrong with a Hanna pH meter. They are the industry standard. I don't know much about other brands as I haven't researched them in many years and lately the number of pH meter brands increased exponentially. I am sure there are other great ones now.
Pavel says
can i make it according to this recipe beef eye round?
Victor @ Taste of Artisan says
I think that totally possible, though I've never tried myself.
iani tzvetkov says
great result thank you
Victor @ Taste of Artisan says
Awesome! Enjoy!
MLR says
Hello Victor great post.
One questions, is it ok to wrap the coppa with stretch film instead of ziploc or vacuum bag when curing?
Thanks.
Victor @ Taste of Artisan says
I suppose you could but there is a good chance that the liquid will run off once you start massaging and flipping it. You want to keep all the liquid in contact with the meat for duration of the curing. Hope this helps.
DMoran says
Where can I find salted veil?
Victor @ Taste of Artisan says
I buy mine from a grocery store. They put it out during Christmas along with 'salami casings' and 'capicola casings' but at other times I just ask. Most butchers should have it too.
Daniel B Moran says
Thank you for your response. I love this site and have learned much from it.
My first try at a coppa in my DIY chamber came great! (unlike my pancetta tesa). I used a beef bung on the copa. However I was a bit unhappy with the diameter but made it work.
It seems I still can't seem to find salted veil for sale for the life of me. Butchers here in the DC area just shake their head and say they don't have any such thing. It seems what they are getting is already broken down into primals. All searches seem to reference Amazon and The Sausage Maker beef bung, or this exact page!
I am hoping to find a local farm that I can source better meat from and maybe the veil as well.
Best regards,
Dan Moran
Victor @ Taste of Artisan says
Glad you found my site helpful, Daniel. I find it strange that the two local stores where I live have it and if I search for it online, I can't find it anywhere. The two stores that sell it cater to the Italian community, seems like this must be a cultural thing. I have a suspicion that it may be known elsewhere under a different name. My understanding is that this is a pig's abdominal cavity lining. It's possible that butchers here simply don't harvest it. Do you have a local Italian community where you live? If you do, I'd look for it there at their butcher shops and meat departments of grocery stores.
That said, beef bungs work well too. If too big, cut it lenghtwise, then stretch and overlap before trussing.
Toni says
Hi, I'm about the replicate this one 🙂
In the Italian link there was sugar in the recipe, but i don't see that you use sugar in yours.
Should i add 15g / KG sugar in the curing process?
Victor @ Taste of Artisan says
Hey Tony, that's a very good question... Most traditional recipes that I've seen omit it or specify sugar as optional... I've never tried adding it to my capicola or any other solid muscles... would be interesting to try on a small piece though.
I do add 1.5% sugar to my pancetta, I can definitely taste the sweetness from the sugar, it's nice but I am not sure I want that in my coppa.
Good luck with your coppa.
Toni says
I'm making two at the same time, one cold smoked after curring and also cured with SafePro® EasyCure LC. I'll add some sugar to that one and leave the sugar out of the other one that would be identical to yours here.
Will come back after 3 months 🙂
Will do some pancetta and bresaola at the same time also. Just built my curring chamber and was at the butcher's today 🙂
Victor @ Taste of Artisan says
You are in for a big treat, my friend. Hope all goes well. Keep an eye on them especially the first week in the curing chamber, the drying phase. Don't let them get wet or dry, you adjust the rH as needed. Don't bother with the humidifier, it's useless for the first month or two and causes more harm than good if not careful. There will be plenty of moisture inside the chamber from the meat to keep the rH up unless you have a big hole in your fridge and/or your ambient rH is super low. It will make things easier without one. I made my recent batch of salami sticks without engaging one at all and now have a batch of 15lbs of meat in there without a humidifier on as well. It's been like that for a month and all is well.
Philip says
I am just starting this recipe and have a couple questions for you. I just have collagen sheets here so I wrapped it with that do you see any problems with that. Also you say to use the freshest pork. We raised our own pigs this year for the first time it was a great experience except my oldest son was devastated when butcher day arrived. Do you freeze your pork before making salami or other dried products or do you start it right away. I have read that freezing it for a month will kill any worms if they are present.
Victor @ Taste of Artisan says
No, I never freeze pork before curing. I guess it's a personal preference, fresh meat looks much better than defrosted. And you have to be careful handling it to prevent oxidation, freeze burn, etc. But yeah, freezing is one of the recommended methods of destroying Trichinae and some people do freeze their pork before curing. That said, dry curing itself is one method of deactivating Trichinae and other harmful bacteria.
Sal Mannella says
Hi Victor, I've read your recipe and some comments from the users. I'm impressed and would like to know if any of your products are available to purchase. Please call me if prefer to discuss further.
Sal Mannella C: 6478677636
Victor @ Taste of Artisan says
Hi Sal,
I appreciate your interest but I do this as a hobby and I am not licensed to sell food products.
Best,
Victor
FRITZ says
Hi Victor
I have 2 Coppa's that should come out of the cure today however I am not getting my Bactoferm 600 Mold until Tuesday a couple days from now. Is it still ok to apply bactoferm spray after the fermentation / dripping stage has started ? Or should I leave the coppa in the cure for an extra 3 days ?
Any thoughts would be appreciated!
Thanks!
Fritz
Victor @ Taste of Artisan says
Hi Fritz, my apologies for the delay with the response. I know, it's too late but still - it's perfectly fine to leave the meat curing for a few days more. When you measure the amount of salt you will never oversalt your meat. It's fine to apply bactoferm at a later stage as well - I have forgotten and applied later too many times and all worked out well. When you apply later, mist just a little, don't get the skin too wet. If you do, increase air circulation or decrease humidity to remove the water quickly. Hope this helps.
Rich Greenberg says
Thanks for sharing your recipe and detailed process! I just pulled my first Coppa (first ever whole muscle cure) out of the drying chamber, and it is just fantastic! I wanted to just check back in here to say thanks!!
Victor @ Taste of Artisan says
Hi Rich,
My sincere apologies for the delayed response. You are very welcome. Your capicola looks fantastic, love the rich burgundy color. It looks like it dried very evenly edge to edge, great job on that. I see a lot of pictures of capicola on the internet and very few are so perfectly dried. Amazing job. Can't wait to see more of your creations.
Victor
Alvar says
Hi, Victor
Accurate and detailed info as always, many thanks.
I'm about to try some bondiolas with this recipe (is what aprox. we called coppa in Argentina).
I was wondering -as I usually with much smaller pieces, to say about 750g or so-, if the curing and drying time shouldn't be shorter, (in my case at least) in order to avoid getting an oversalted or dried coppa, or both.
Surely I'll try bigger pieces in a near future, when drying chamber is ready.
Do you have sort of like curing-per day/per-kilo figures to calculate this?
Thanks again
Victor @ Taste of Artisan says
Hi Alvar, thank you for the kind words. The beauty of this recipe is that it requires you to measure out the exact amount of salt that you need to prevent oversalting. You can cure your coppa/bondiola for 7 even 14 days and the saltiness will be exactly the same. I suggest curing for 7 days even if your coppa is small. Is curing for too long going to result in dry meat? Not if you measure out the exact amount of salt. So, don't stress out about it, cure for 7 days and will be perfect. I would worry more about drying it evenly, which I hope my method will help you with. Mine turned out really really good. I am hoping to make another one soon and will pair it with a couple of lonzinos.
Alvar says
Well, back again,
this time with the capicola ready, (and few to go) and made with your recipe.
Which turned to be not only the best I've had so far (that's, in my life, ever),
but a completely new approach for salumi, as this article did indeed
lead me to the italian DOPS, books and careful study on the matter.
Back to the capicola, came out with a buttery texture, a complex and subtle hint of the seasoning -just perfect, by the way-, (however next day in the fridge this was even better, mixed with the pork flavours), and overall, tastes great.
I believe, the resting time in the fridge, after is ready, makes it even better.
I've used the micro-perforated paper which is normally used in Argentina for these
salumis, and even took a little mold in it. And elastic net.
This capicolas, are very small, around 350g/650g, compared to those normally can be seen... yet they are ready quite fast, with a weight loss of 30% in about 10 days and a great taste.
Thanks again Victor,
just amazing
Álvaro
Victor @ Taste of Artisan says
Hi Alvar,
your capicolas look fantastic. What a beautiful, dark red saturated color, almost beef-like. I am quite sure you used high-quality pasture-raised pork. Barely any fat, I like that. They make my mouth water. I am glad you were able to find some useful information in my post to create these beauties.
Interesting comment on how you felt the meat improved in the fridge. My view has always been that fridge temps don't really alow for any noticeable additional flavor development but I haven't really tested that. I am curious to do a side by side test.
Anyway, fantastic job! This hobby is immensely rewarding.
Martin says
That capocollo looks great. You nailed it.
Victor @ Taste of Artisan says
Thanks Martin.
Rob says
Victor, that coppa is sure a beautiful looking piece of meat, bet it will taste great! I have a couple questions:
o Where did you get the salted veil? I didn't see those on sausagemaker.com or butcher-packer.com.
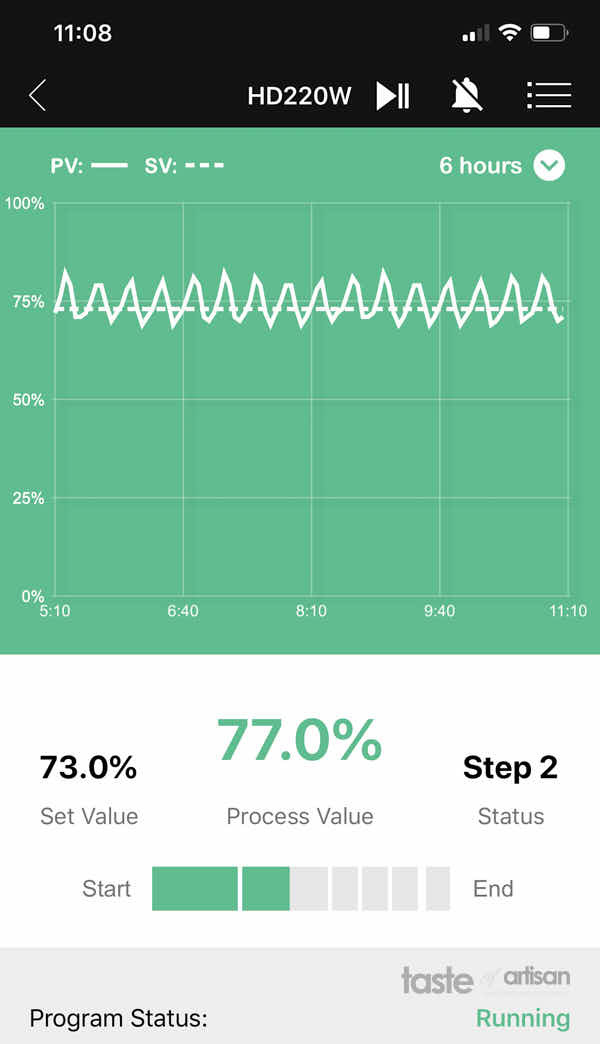
o During the 7 day drying period in your kegerator, the humidity varied (roughly between the desired daily ranges) due fridge cycling only, correct? In other words, you didn't program the HD220-W to cycle between high and low humidity settings (for example 68% for 1.5 hrs and 78% for 0.5 hrs)? With fridge cycling only, I would assume there were shorter times at lower humidity (after fridge kicks on), and longer times in the higher range (after humidity recovers and holds until the next fridge cycle). If so, I can try this method with my current non-programmable controller, although I may want to upgrade to the HD-220W later if it proves successful.
Victor @ Taste of Artisan says
Hi Rob,
thanks for the compliment. It sure is...I can't wait to cut it...
>
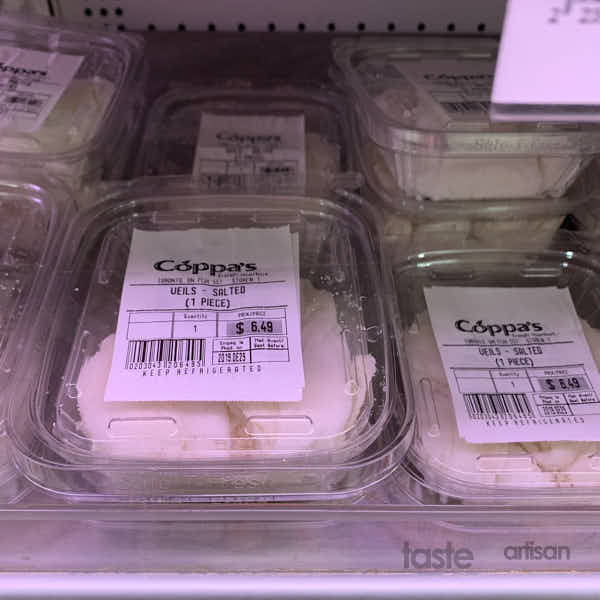
Yeah, those places don't sell it. I buy veil from Coppa, a large supermarket here in Toronto. It's a regular supermarket which is owned by Italians so they have a good selection of goods that cater to the local Italian community, including capicola and salami casings and other things. They don't normally put out veil on display so I have to ask, sometimes a couple of people as not everyone knows what the heck I am asking about. But this year they put it on display with regular hog casings. The second place that I just recently noticed to start to carry veil is Lady York, a smaller supermarket that caters to the local Italian community. I don't know if you have an Italian community near where you live, but I would imagine large butchers or salumi producers in your area should have it. It's great for curing solid muscles like capicola, lonzino, etc. We also have a commercial sausage making supplier here who sells a variety of natural casings, but they also sell to walk-in retail customers. They have great wholesale prices on things like butcher knives, 18-19mm collagen casings for beef stick and more... Their site lists barely anything so you have to inquire, and sometimes order ahead, but it's worth the effort. Perhaps you can try to find such a supplier near where you live.
>
>
Well, I did try to program it but in the 4.4 cf bar fridge it was useless. So I just set targets to where it would fluctuate around the desired high and low values. It will be possible in a large frost-free fridge though. But yes, humidity fluctuations were caused by the cycling of the fridge. One note, I am now drying speck in that little fridge before it goes into the curing chamber. I cracked open a hole at the top of the fridge where the beer tower was initially (I removed it so I can run the cables) and this lets me reign in the humidity and keep it in a tighter range. Not perfect but acceptable. I am drying speck at 75%, so I ended up setting the target at 73% which seems to average out at around 75%.
>