This sourdough bread recipe is the result of many years of tweaking, improving and simplifying. We love artisan bread and bake it on a regular basis. To be able to do that with our busy lives, the bread recipe and the process must be simple and easy to follow. Isn't it how sourdough bread has been for centuries? In our modern world there are way too many gadgets, tools, books and information, which tend to complicate things. There is no need for that, making fantastic sourdough bread at home is very simple once you learn a few basics and tips that I will show you here.
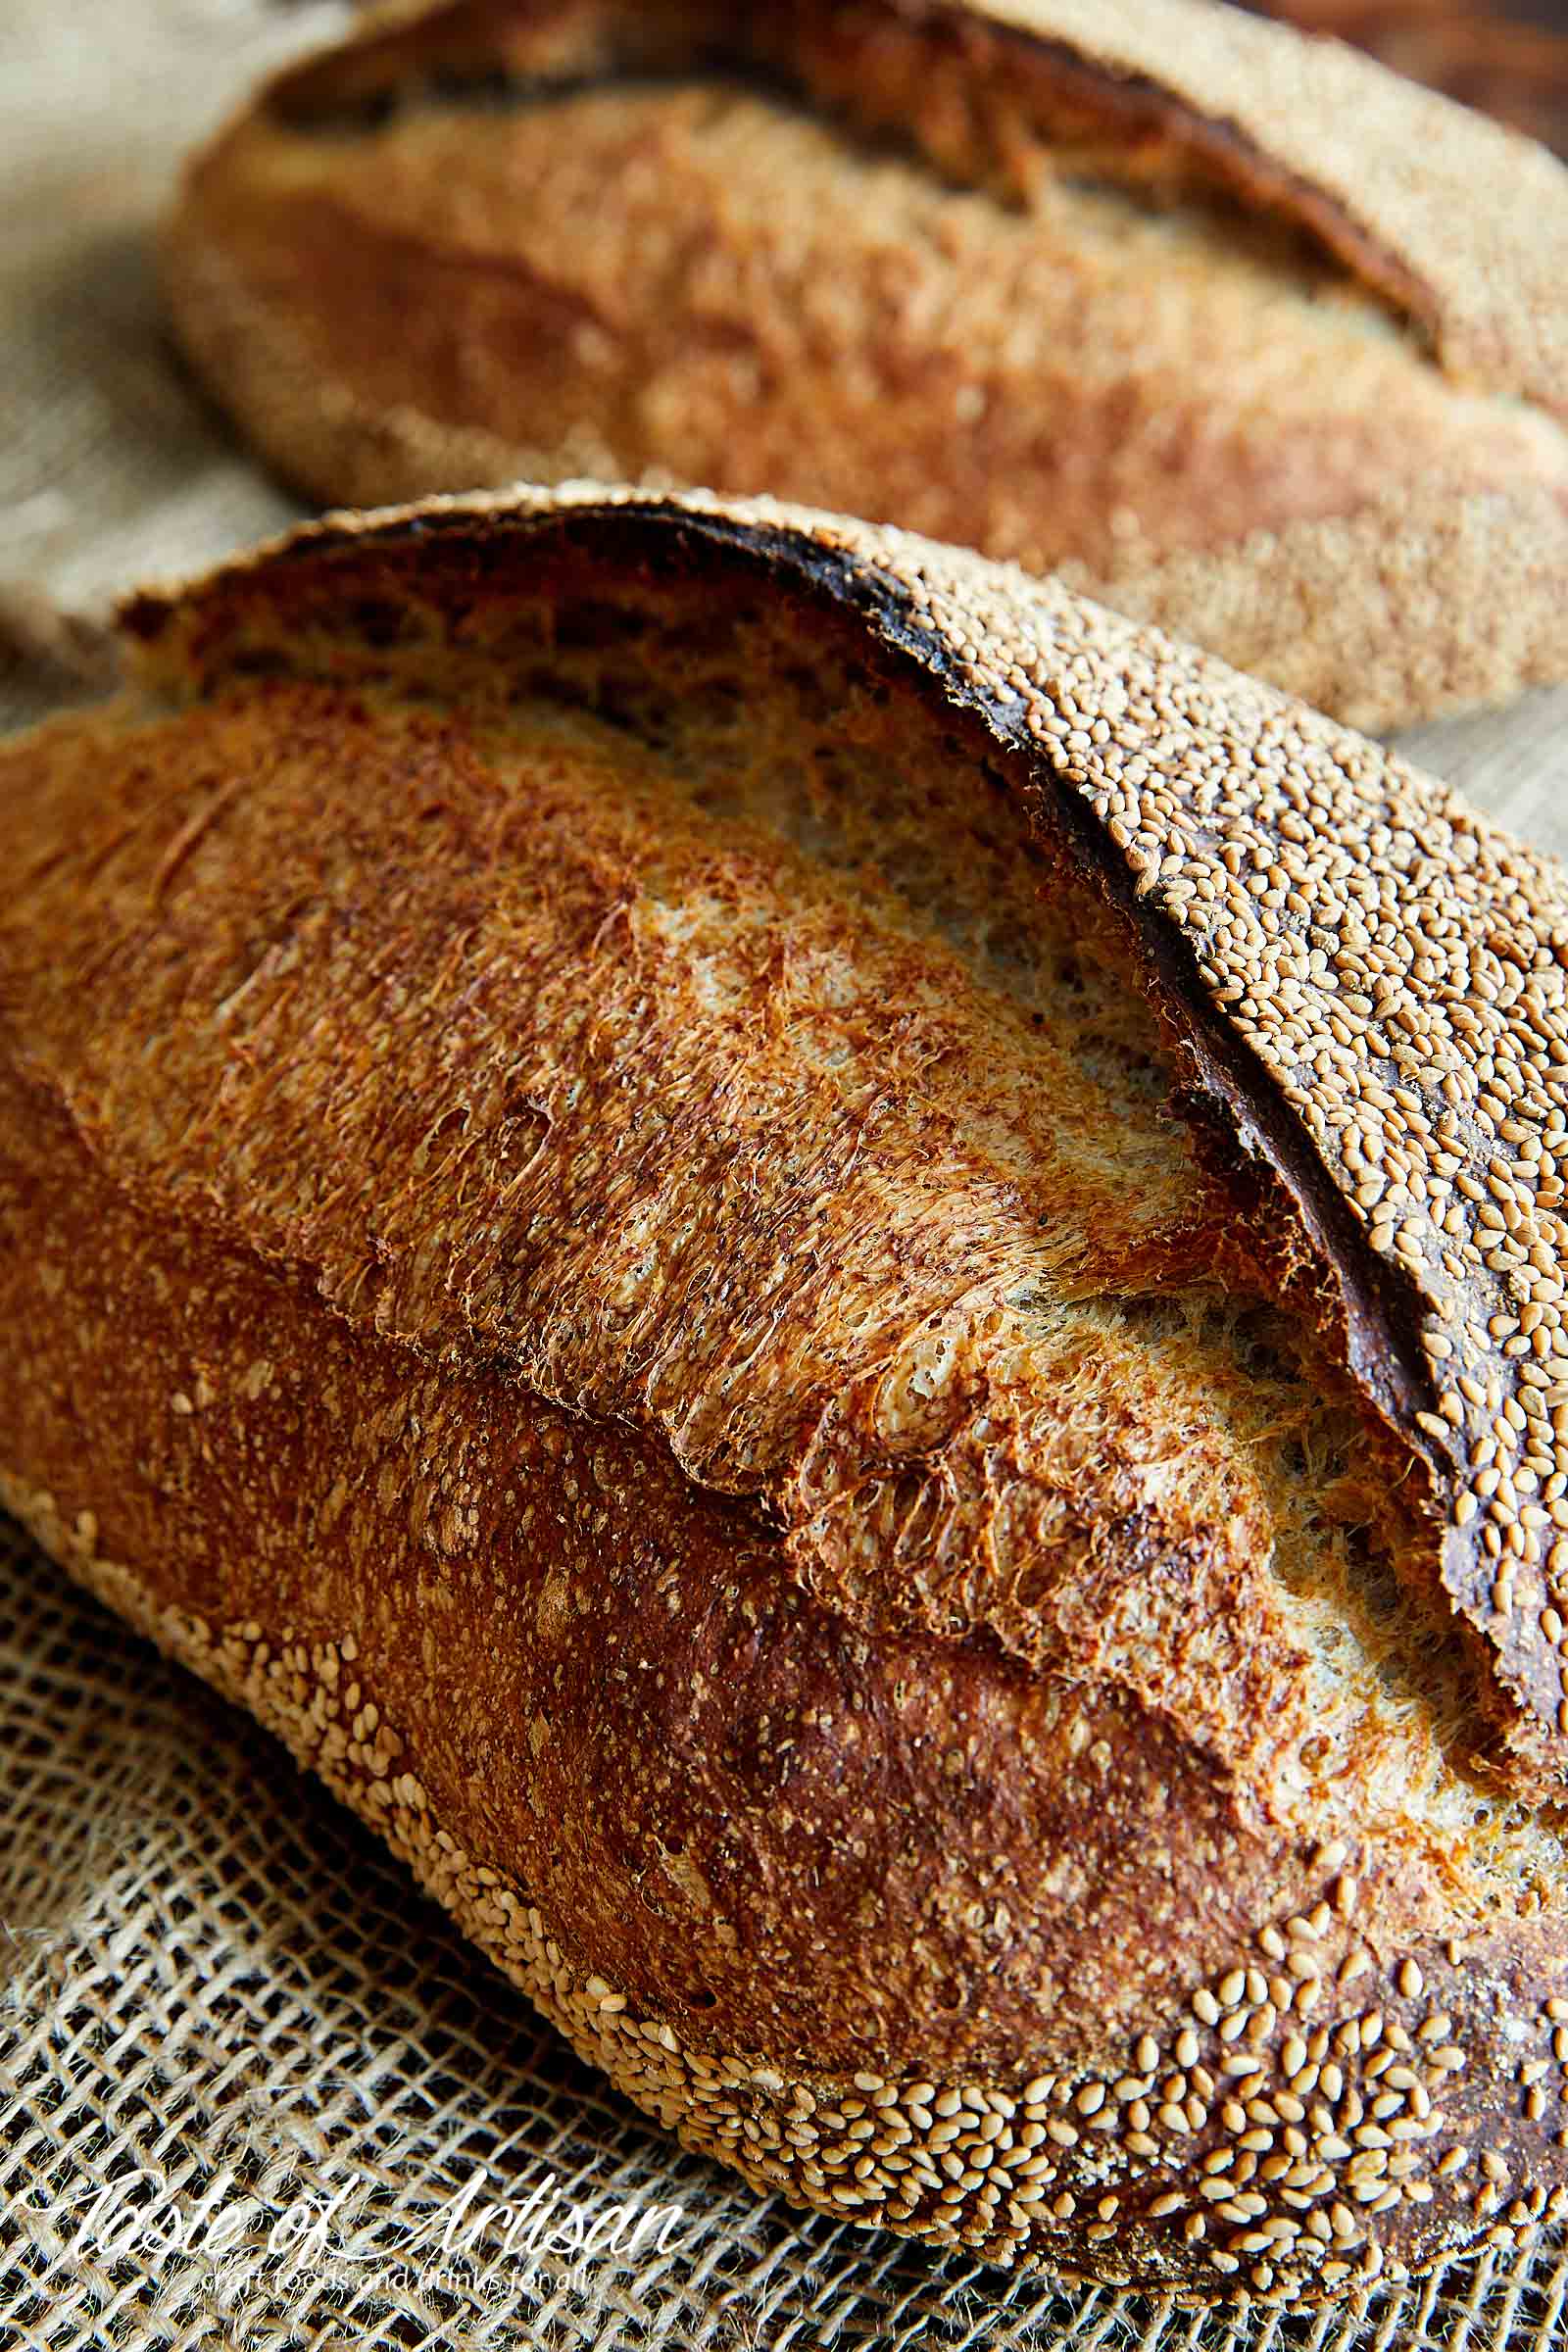
When I started out baking my own sourdough bread back about 8 years ago, I encountered numerous challenges and was never quite happy with the results for a long time. My bread didn't quite look the same as on the pictures from the bakers who inspired me. On top, the taste was not great either and often varied significantly from batch to batch.
Over time, as I gained experience and learned the 'tricks of the trade', my sourdough bread became consistently great and I was not afraid to share it with others. Many people who tasted it immediately loved its taste and texture, and were interested in learning how to bake it. I have successfully taught my method to a number of friends and family members, and I still keep getting requests. I hope this post will help all those aspiring to learn how to make amazing artisan (or artisanal if you wish) sourdough bread at home quickly and efficiently.
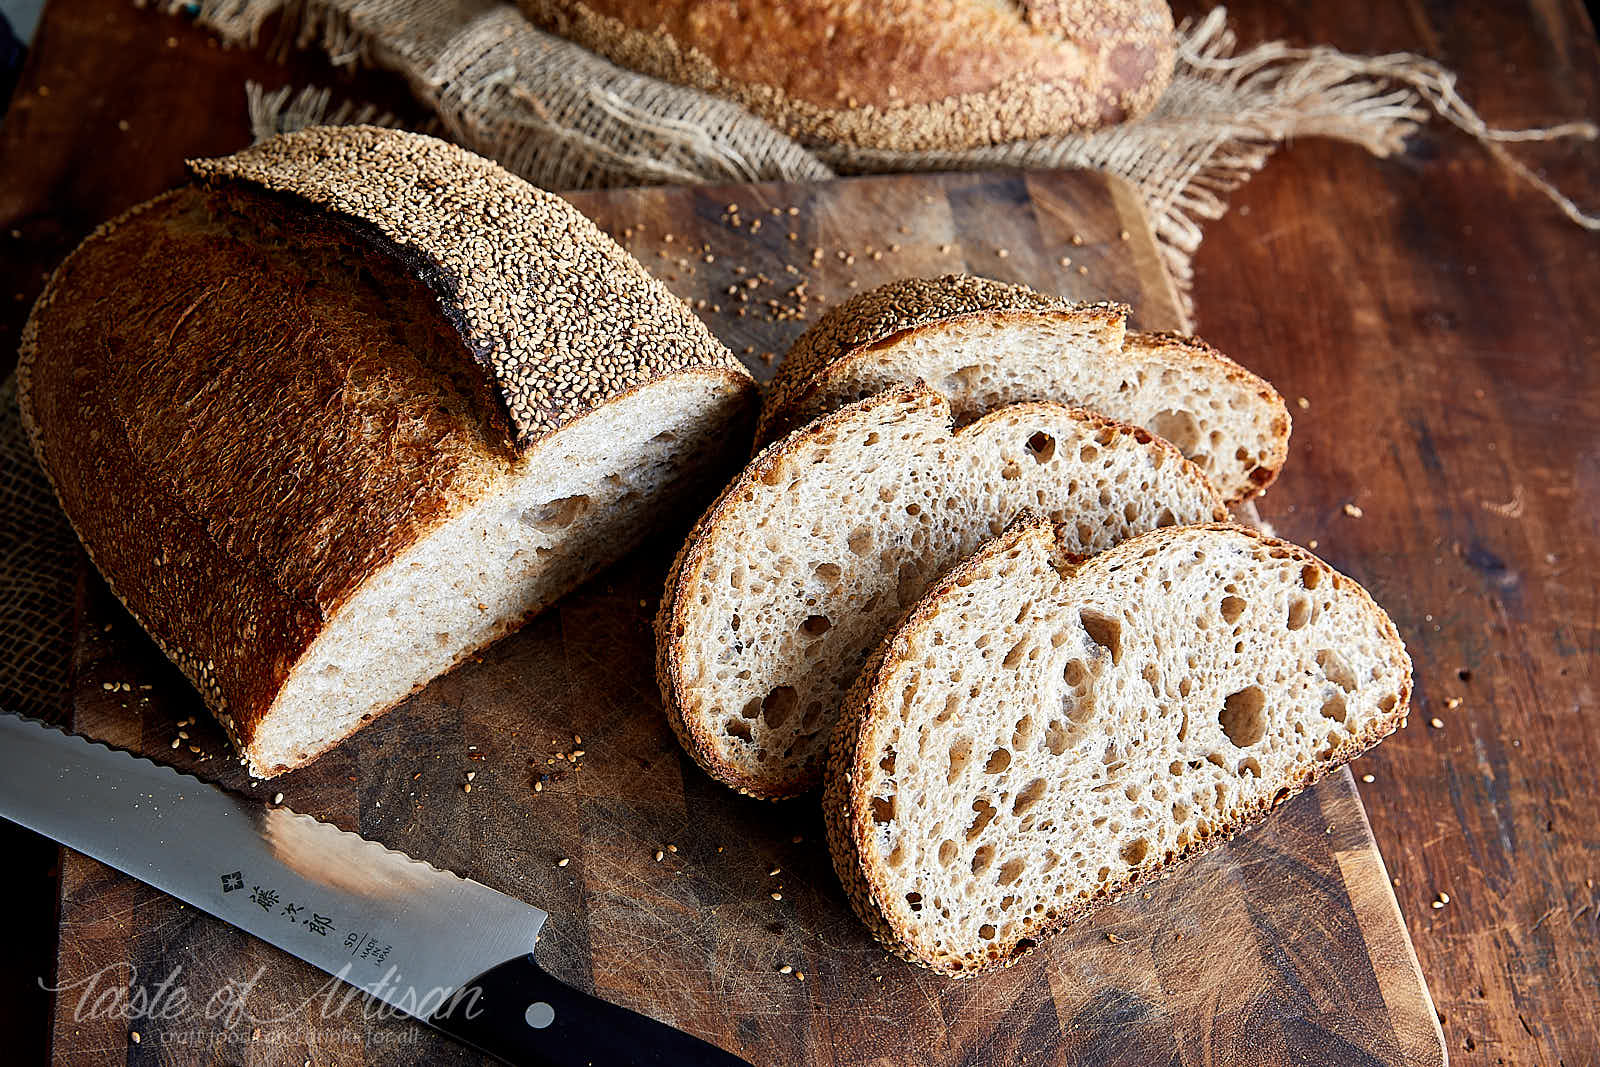
A lot has already been written about sourdough bread fundamentals. I am not going to focus on the concepts like autolysing, retarding, bulk fermentation, bench resting, proofing, steaming, scoring and baker's percentages. Knowing them hardly helped me with getting good results. Instead, I will focus on a very simple process that works very well for me, and will hopefully work for you.
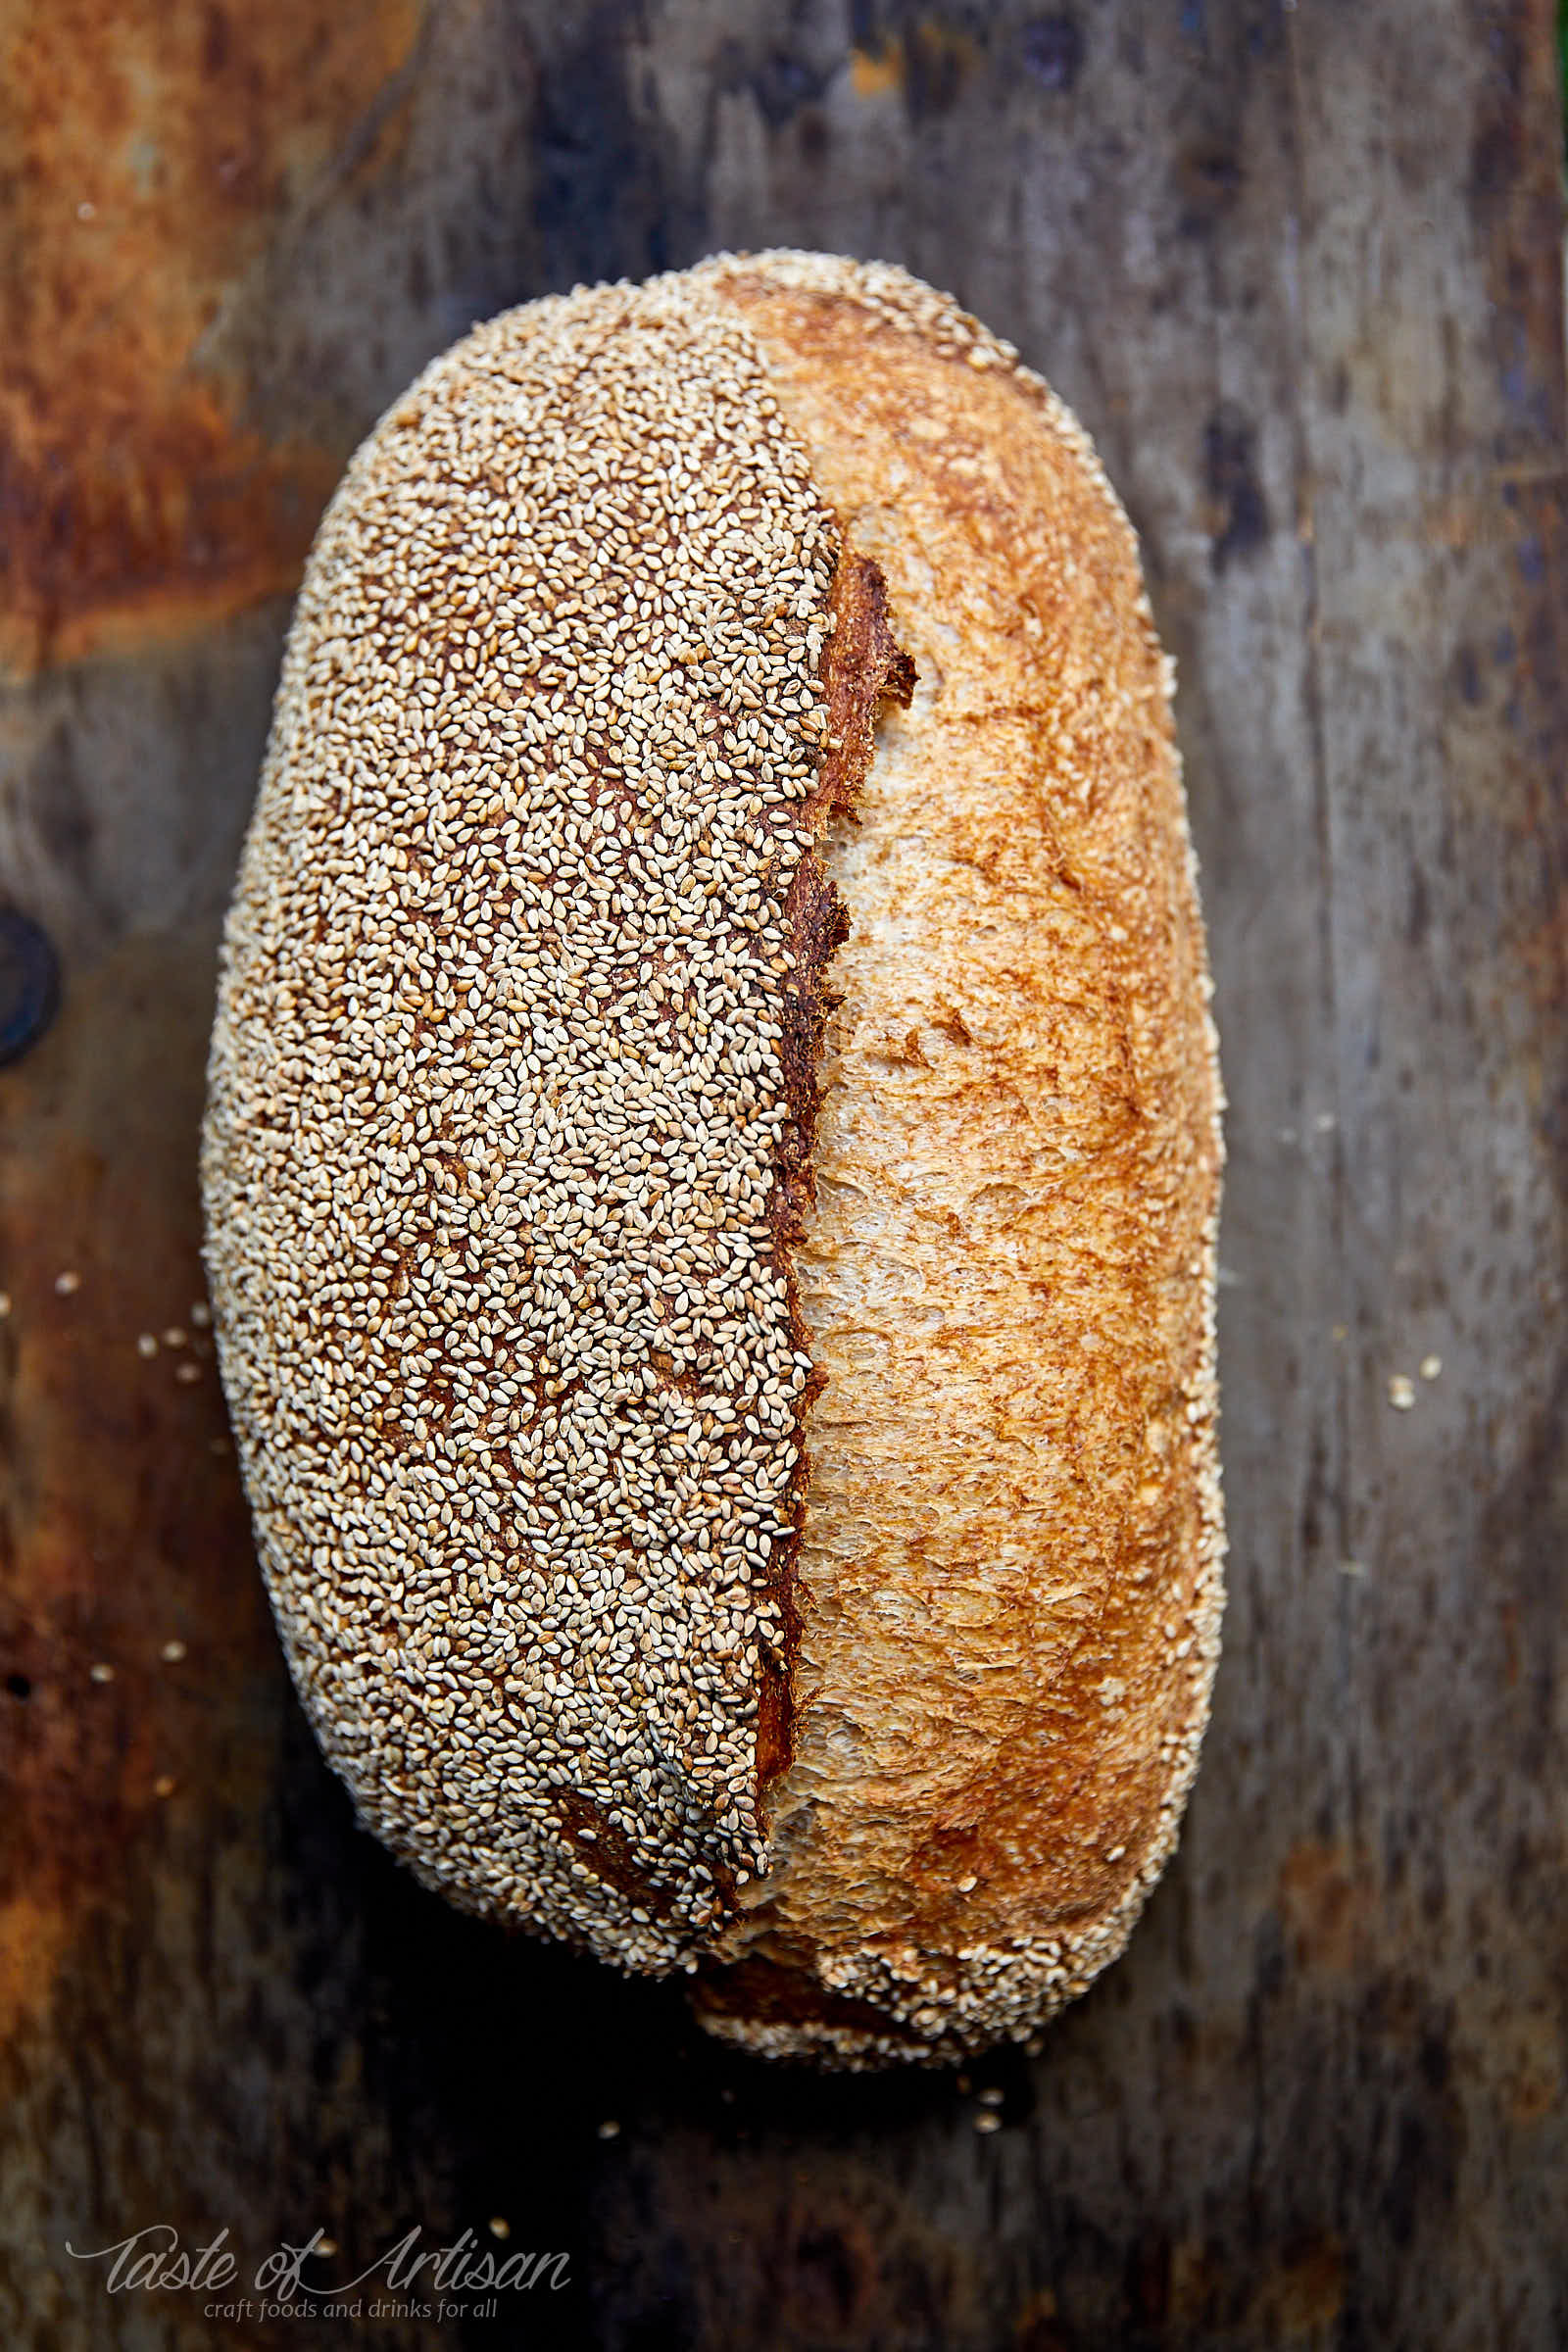
Artisan Sourdough Bread Making Process
Step 1 - prepare a healthy sourdough starter
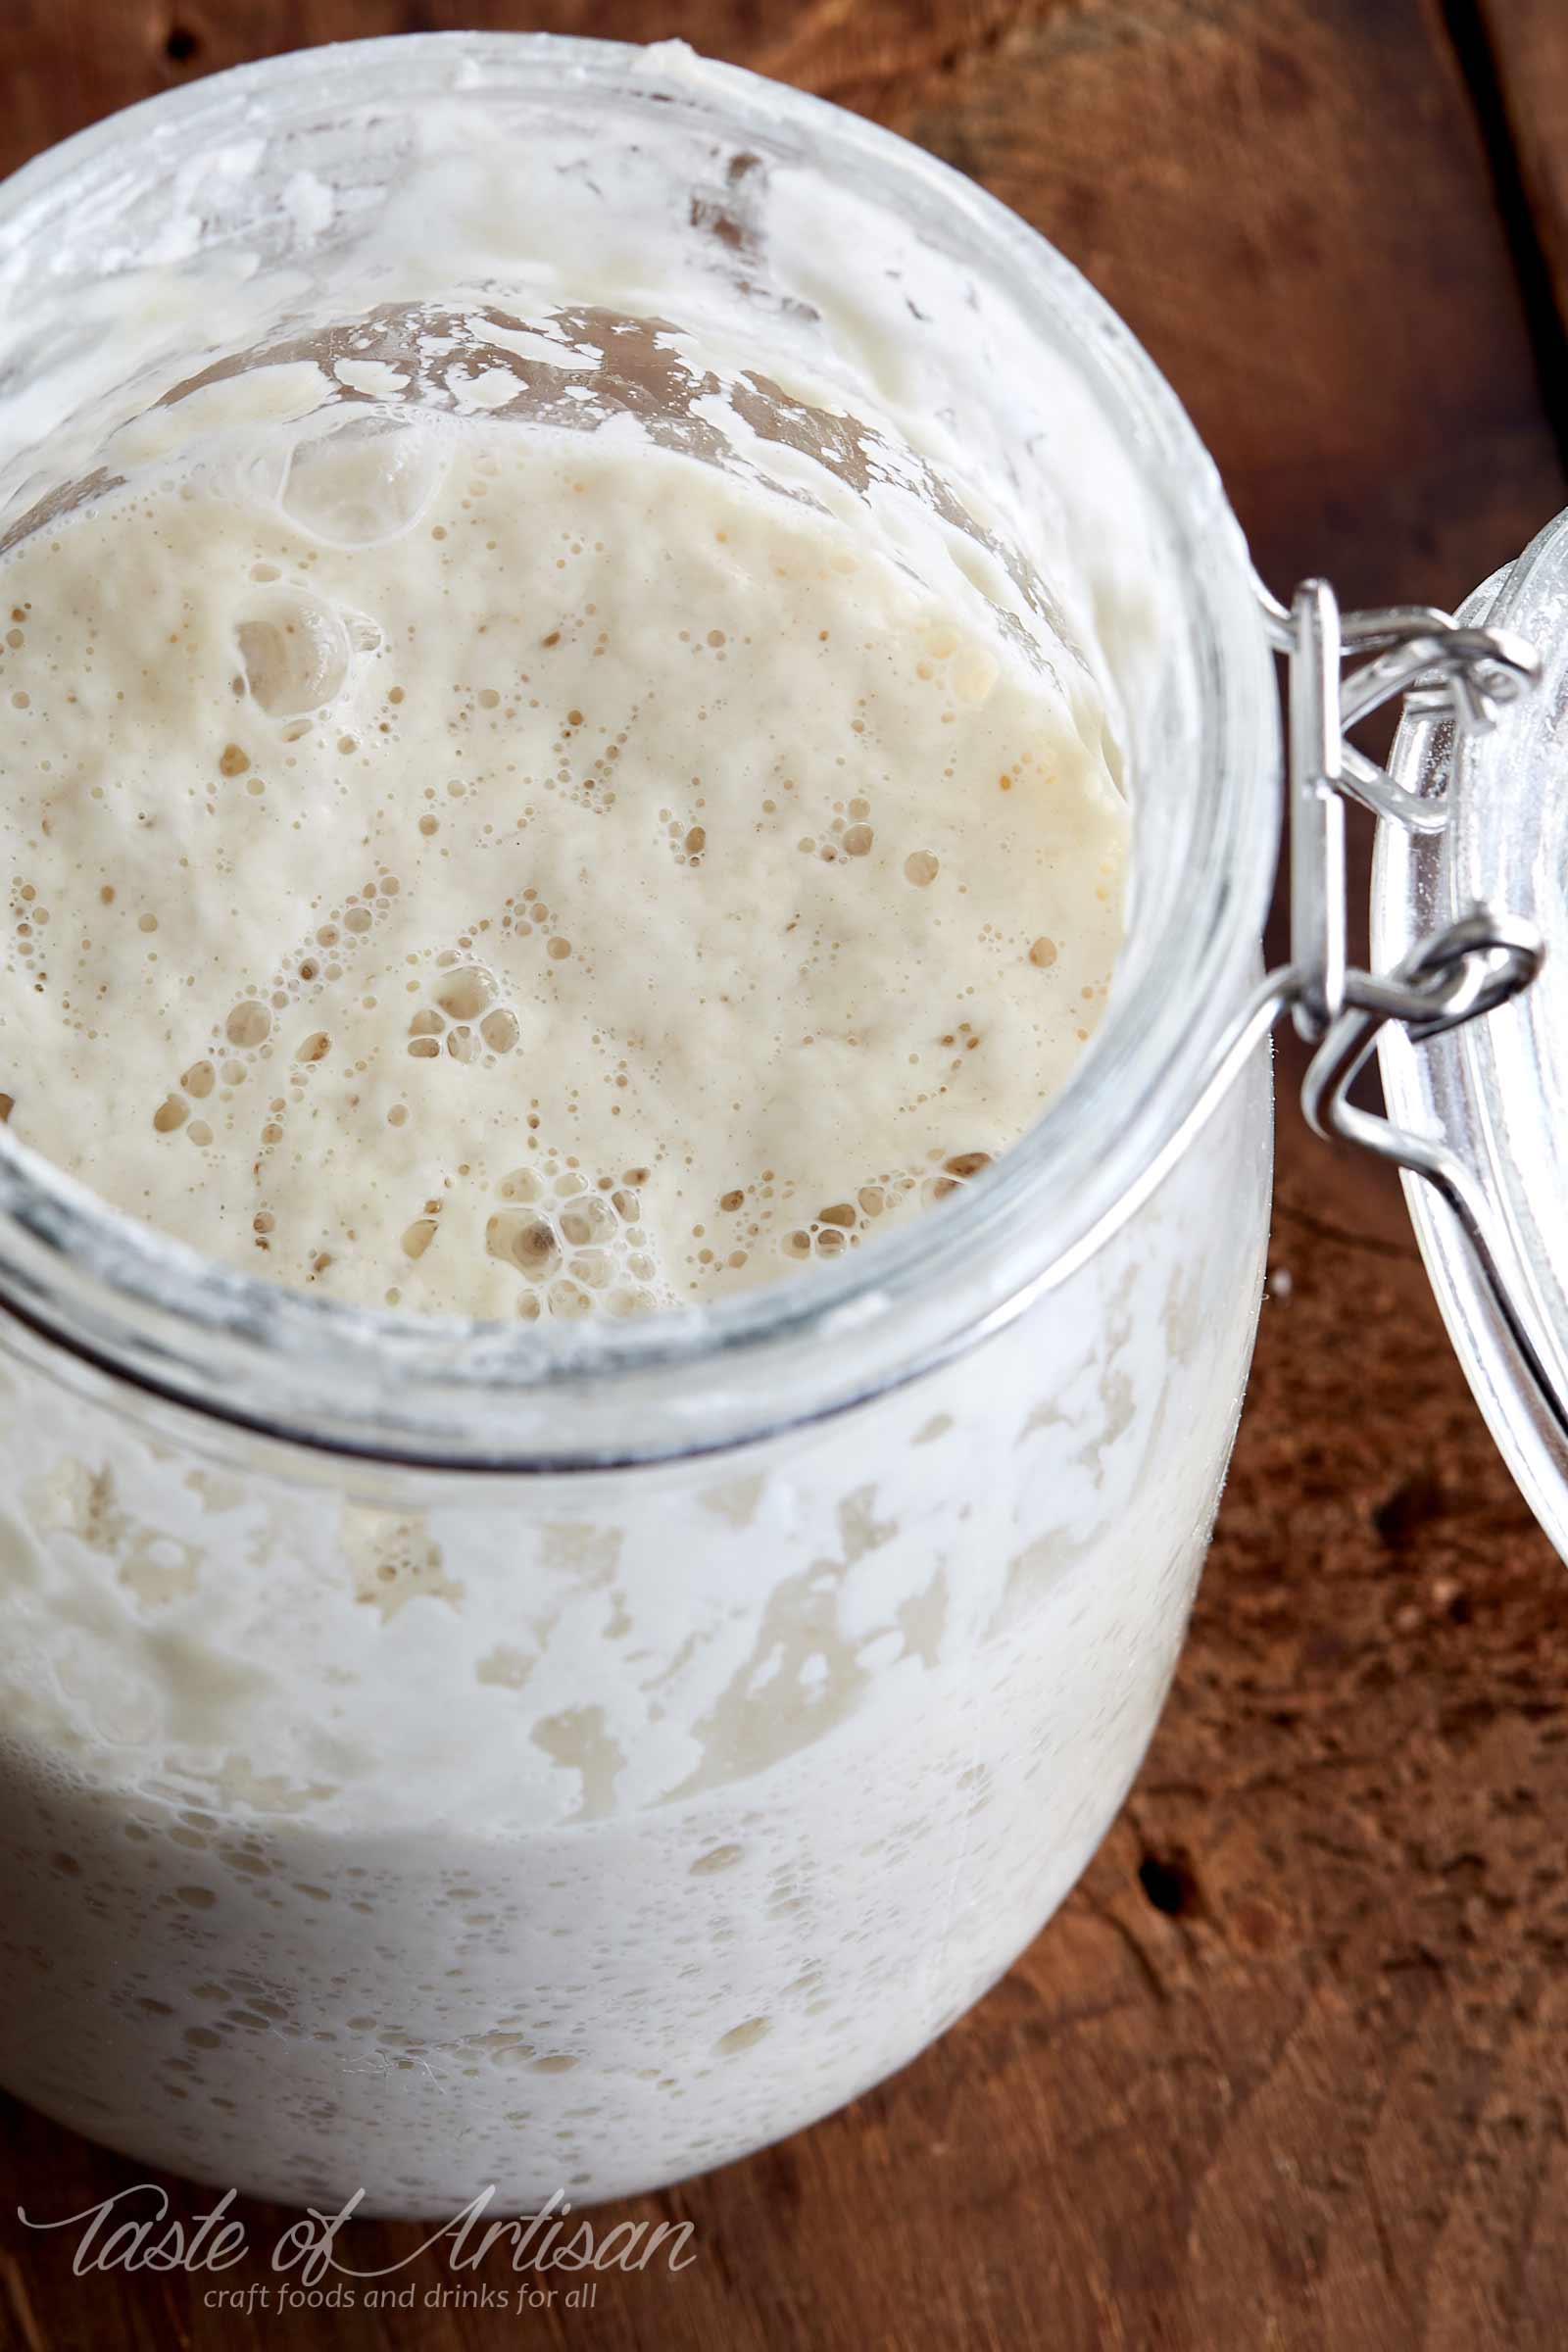
Good sourdough starter was THE MOST IMPORTANT factor to getting a decent loaf of sourdough bread for me. Get it right and your results will already be good.
There are hundreds of resources out there that tell you how to make a sourdough starter. All seem quite easy but none really worked for me. I would be able to get my sourdough starter rise and fall predictably but the bread made with it was never good. It would be dense and wouldn't get a decent oven spring. I would get huge bubbles in some spots, while other parts of the crumb would be dense and have tiny holes. It's a sign of weak sourdough starter. On top, my starter would be great initially, for the first 5-8 days, then it would get vinegary and thin. No matter how I tried to feed it, it would not live long.
What worked for me to get good sourdough starter going indefinitely:
- Buy a package of dried (organic) San Francisco sourdough starter online. Local yeast strains may not give you the results that you are looking for. I find it best to start with a known good strain of yeast.
- Follow instructions to get the starter going. Typically, all you need to do is combine one tablespoon of dry sourdough starter with a cup of flour and a cup of warm water, let it sit for a day to get the yeast going, then feed once a day.
- Feed it once a day, using a mix of white and whole wheat flour. My dry sourdough starter would turn vinegary after feeding it just white flour after about a week or so. I suspect that all purpose flour just does't have sufficient nutrients. Ever since I've started feeding my starter with whole wheat flour it looks very happy and healthy. I've had it going for the past 5 years.
- Increase the flour to water ratio in your starter. Many resources recommend a 50/50 flour to water ratio by volume when feeding sourdough starter, e.g. one cup of water to one cup of flour. I've had a much better luck with thicker starters. At 50/50 ratio by volume, my starter would again, become too sour after a few days, and, eventually, vinegary.
Step 2 - mix the ingredients
There are no tricks here, and no special steps. I just mix all of the ingredients together at the same time and let rest for an hour. You don't need to use the autolyse method in this recipe. I've tried both ways and saw little, if any, benefit. Without it, it's one step less to worry about.
[smartslider3 slider=18]
Step 3 - dough fermentation with stretches and folds
At this stage the dough will undergo what is called 'bulk fermentation', where yeast will feast on sugars and produce ethanol and other derivative chemical components that give bread its characteristic aroma. The dough in this recipe will be quite wet and slack initially, so we will need to do a series of stretches and folds to strengthen the dough.
The purpose of the stretch and fold method is to stretch and align strands of gluten, which strengthens the dough. The same can be achieved by mixing but stretching and folding is more gentle on the dough and results in larger bubbles in the crumb. I do three stretch and folds over a period of 4-5 hours. By the time I am done the dough is smooth, soft and elastic, with some blisters showing on the surface. The dough is kept at room temperature, ranging from 67F to 72F, depending on the time of year. There are no special accommodations.
For sourdough bread to develop its flavor it's necessary to slow down one of the dough development stages. It can be either bulk fermentation or proofing. It allows the dough to develop deep flavor. In this recipe, I extend proofing time as this better fits my schedule.
[smartslider3 slider=17]
Step 4 - shape the dough
After the final stretch and fold and about a 30 minute to an hour rest, I gently transfer the dough onto a smooth surface (countertop), divide into two equal pieces and shape. After the final rest in the bowl, and if you are gentle with it when transferring, the dough does not really need another rest (usually referred to as bench rest) before shaping. If I am in a rush, I shape and immediately place the dough into proofing baskets. If not, I will shape it, let it rest for 20 minutes, then give it one more fold and place into a proofing basket.
The dough in this recipe is fairly wet, but not wet enough to warrant using working flour. If you shape it on a smooth surface, there will be no sticking. However, after a while the dough will stick to the sides of the proofing basket quite easily. You can use a 50/50 mix of white flour and rice flour to prevent sticking. This helps, most of the time, but I am not a big fan of white flour on the bread's crust. Instead, I use sesame seeds. They guarantee no sticking every time and that the bread gets an additional load of toasty sesame seed flavor. I love it!
[smartslider3 slider=19]
Step 5 - proof the dough
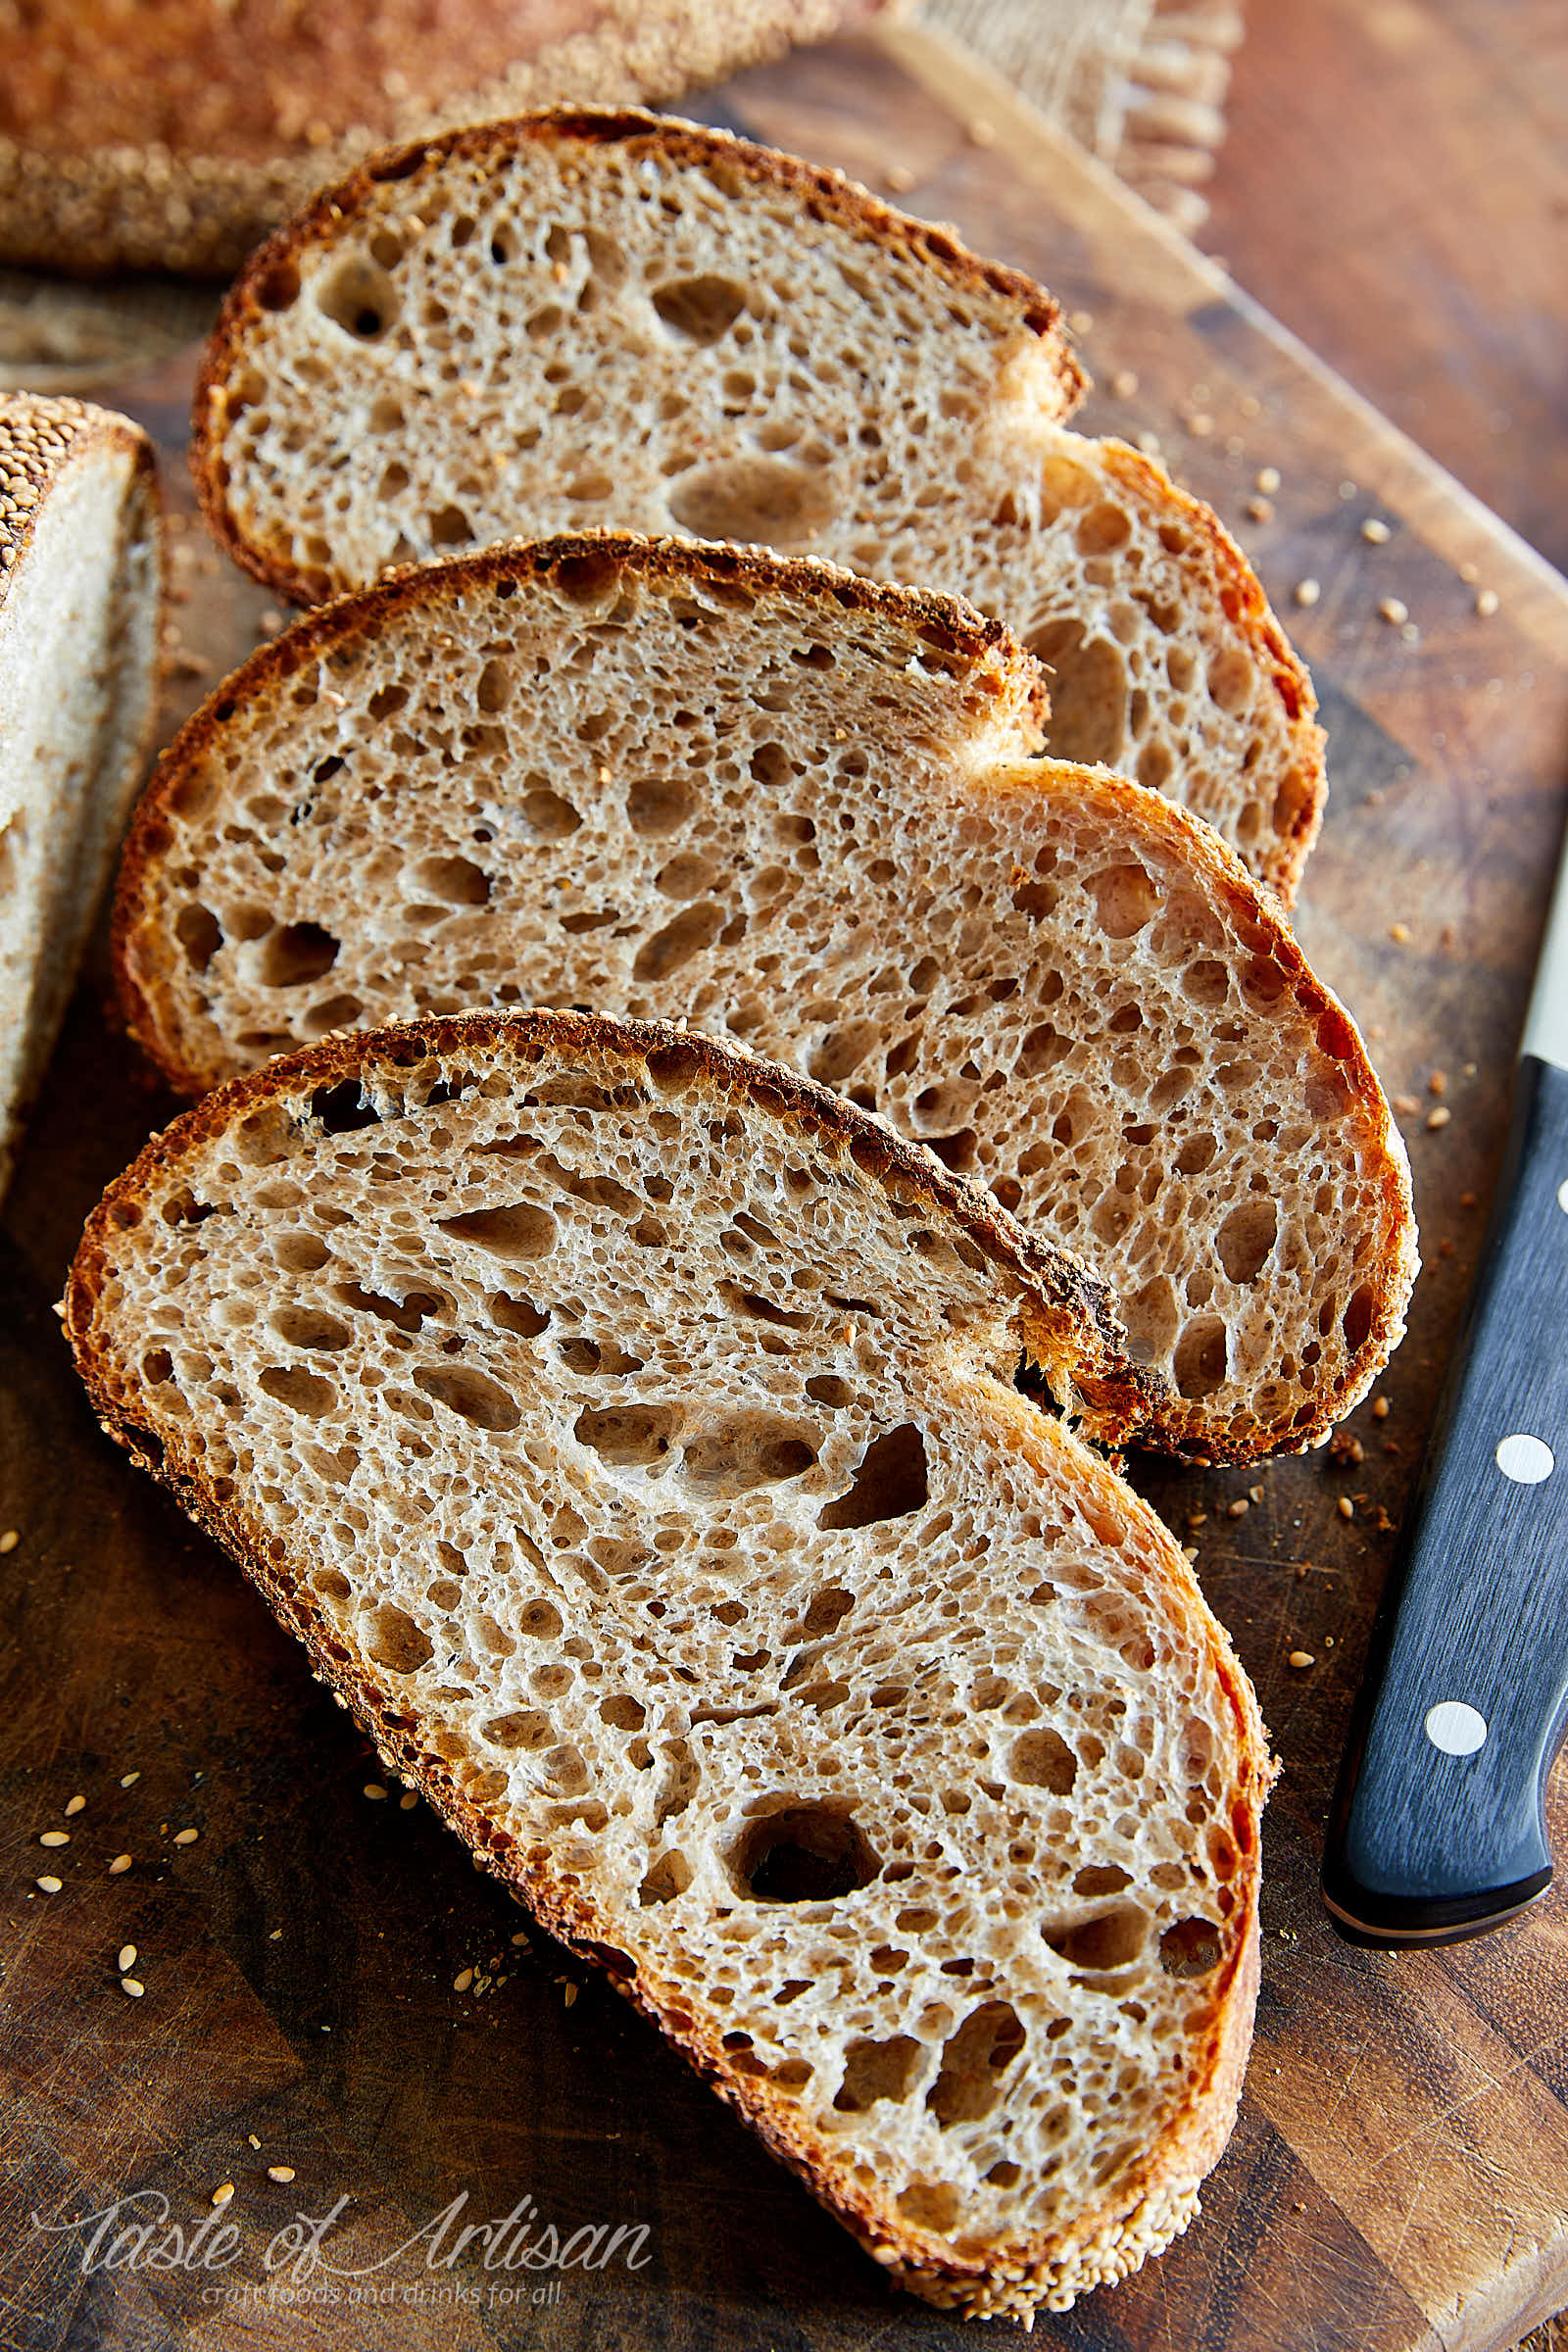
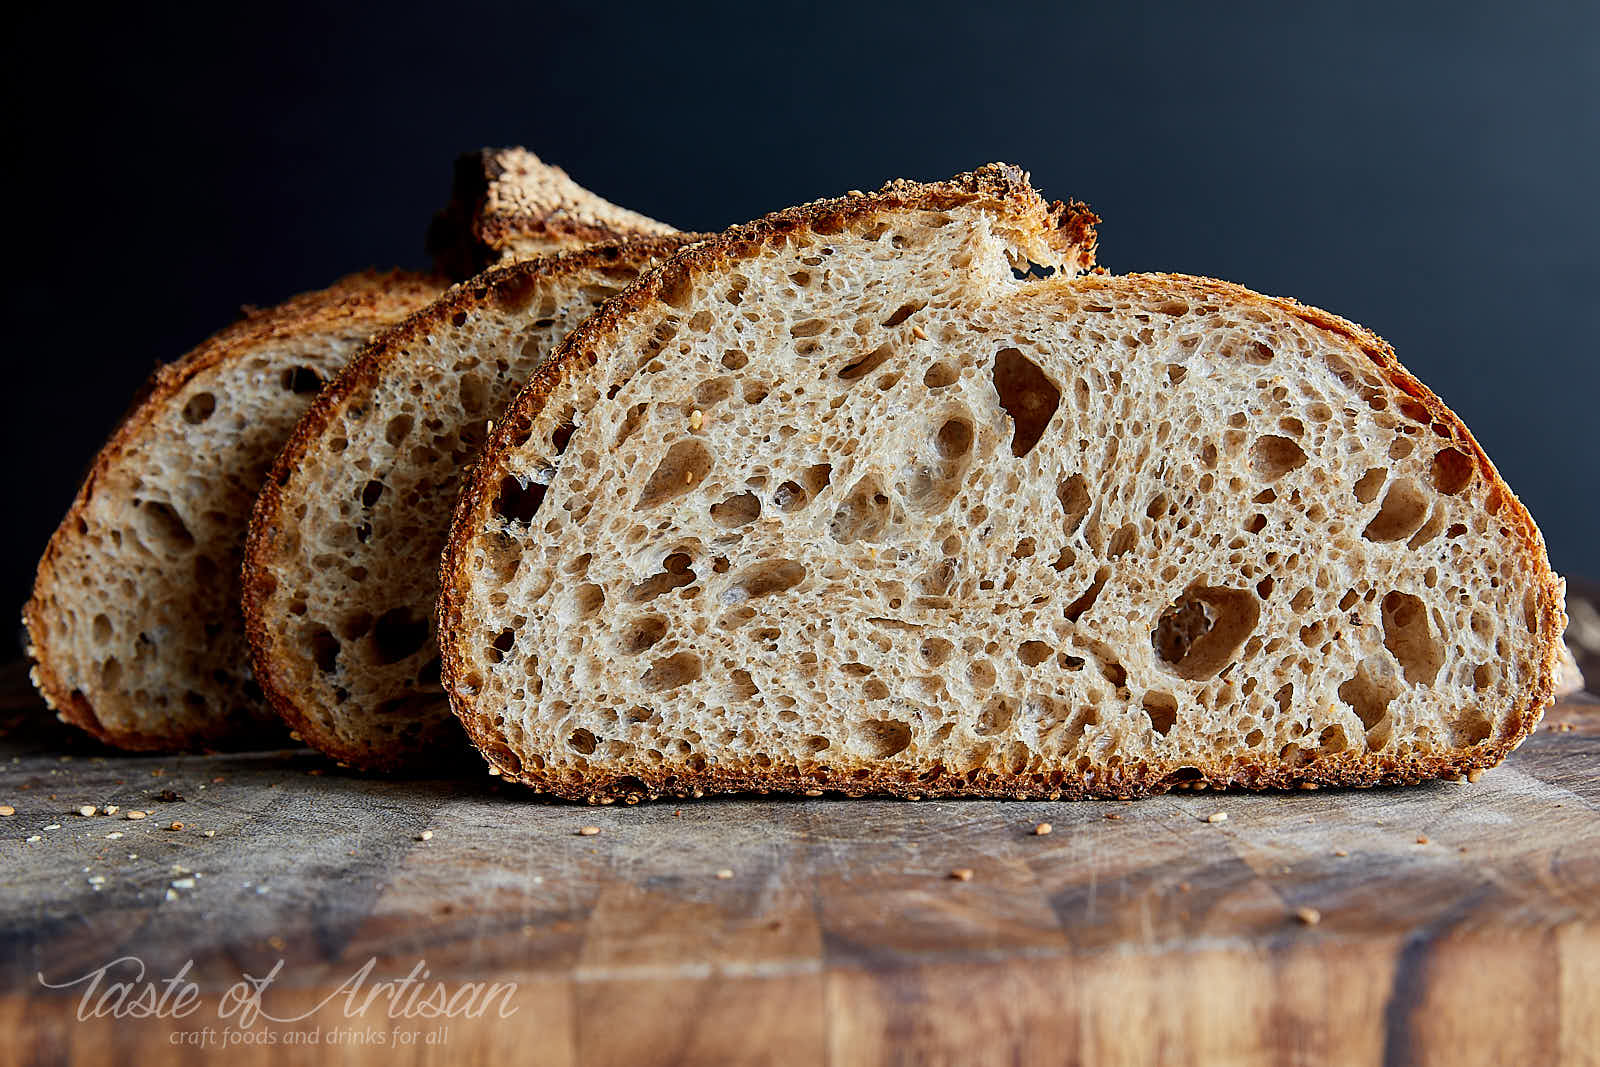
The final stage of the getting the bread dough ready for baking is proofing. This is THE SECOND MOST IMPORTANT factor to getting great bread. Under-proofed bread will be dense. It may have a nice oven spring but once you cut it you will see dense, poorly baked mass at the bottom and a few large hollow cavities at the top. Over-proofed bread will be flat and will have almost no oven spring. It will have an airy, open crumb though. A perfectly proofed dough will result in a great oven spring and an airy, open crumb.
[smartslider3 slider=20]
So, how do you tell the dough is perfectly proofed and ready for baking? If you use the same formula and the same proofing baskets long enough, you can tell that the dough is over-proofed because it's spilling out of the proofing basket. When you turn such dough onto a flat surface, it doesn't hold its shape and becomes flat. When you score it, it goes even flatter.
The best way to test the dough for readiness is to give it a gentle poke with a finger. If the dough is sufficiently proofed the indentation springs back very slowly. If it's under-proofed, the dough will spring back quickly. Over-proofed dough won't have much strength and the indentation will stay as is.
[smartslider3 slider=21]
Step 6 - score the loaves
Once the shaped loaves have sufficiently proofed, turn them over onto individual pieces of parchment paper and score to allow for a better oven spring during the initial baking stage. There are dozens of ways to do it but I have a very simple method that works wonderfully for me. All you need is a serrated knife. I use my old bread knife with serrated edge that does the job just fine. I used to use a lame with razor blades but got tired of losing the blades, cleaning them and in general, etc.
Scoring is more of an art that comes with practice. After you do it a dozen times, or more, you know how to do it right. Even then, every single score will be unique and the bread will look unique. Here are two technically identical loaves, that were score in a similar way. Yet, they look quite different. But that's the beauty of artisan bread baking.
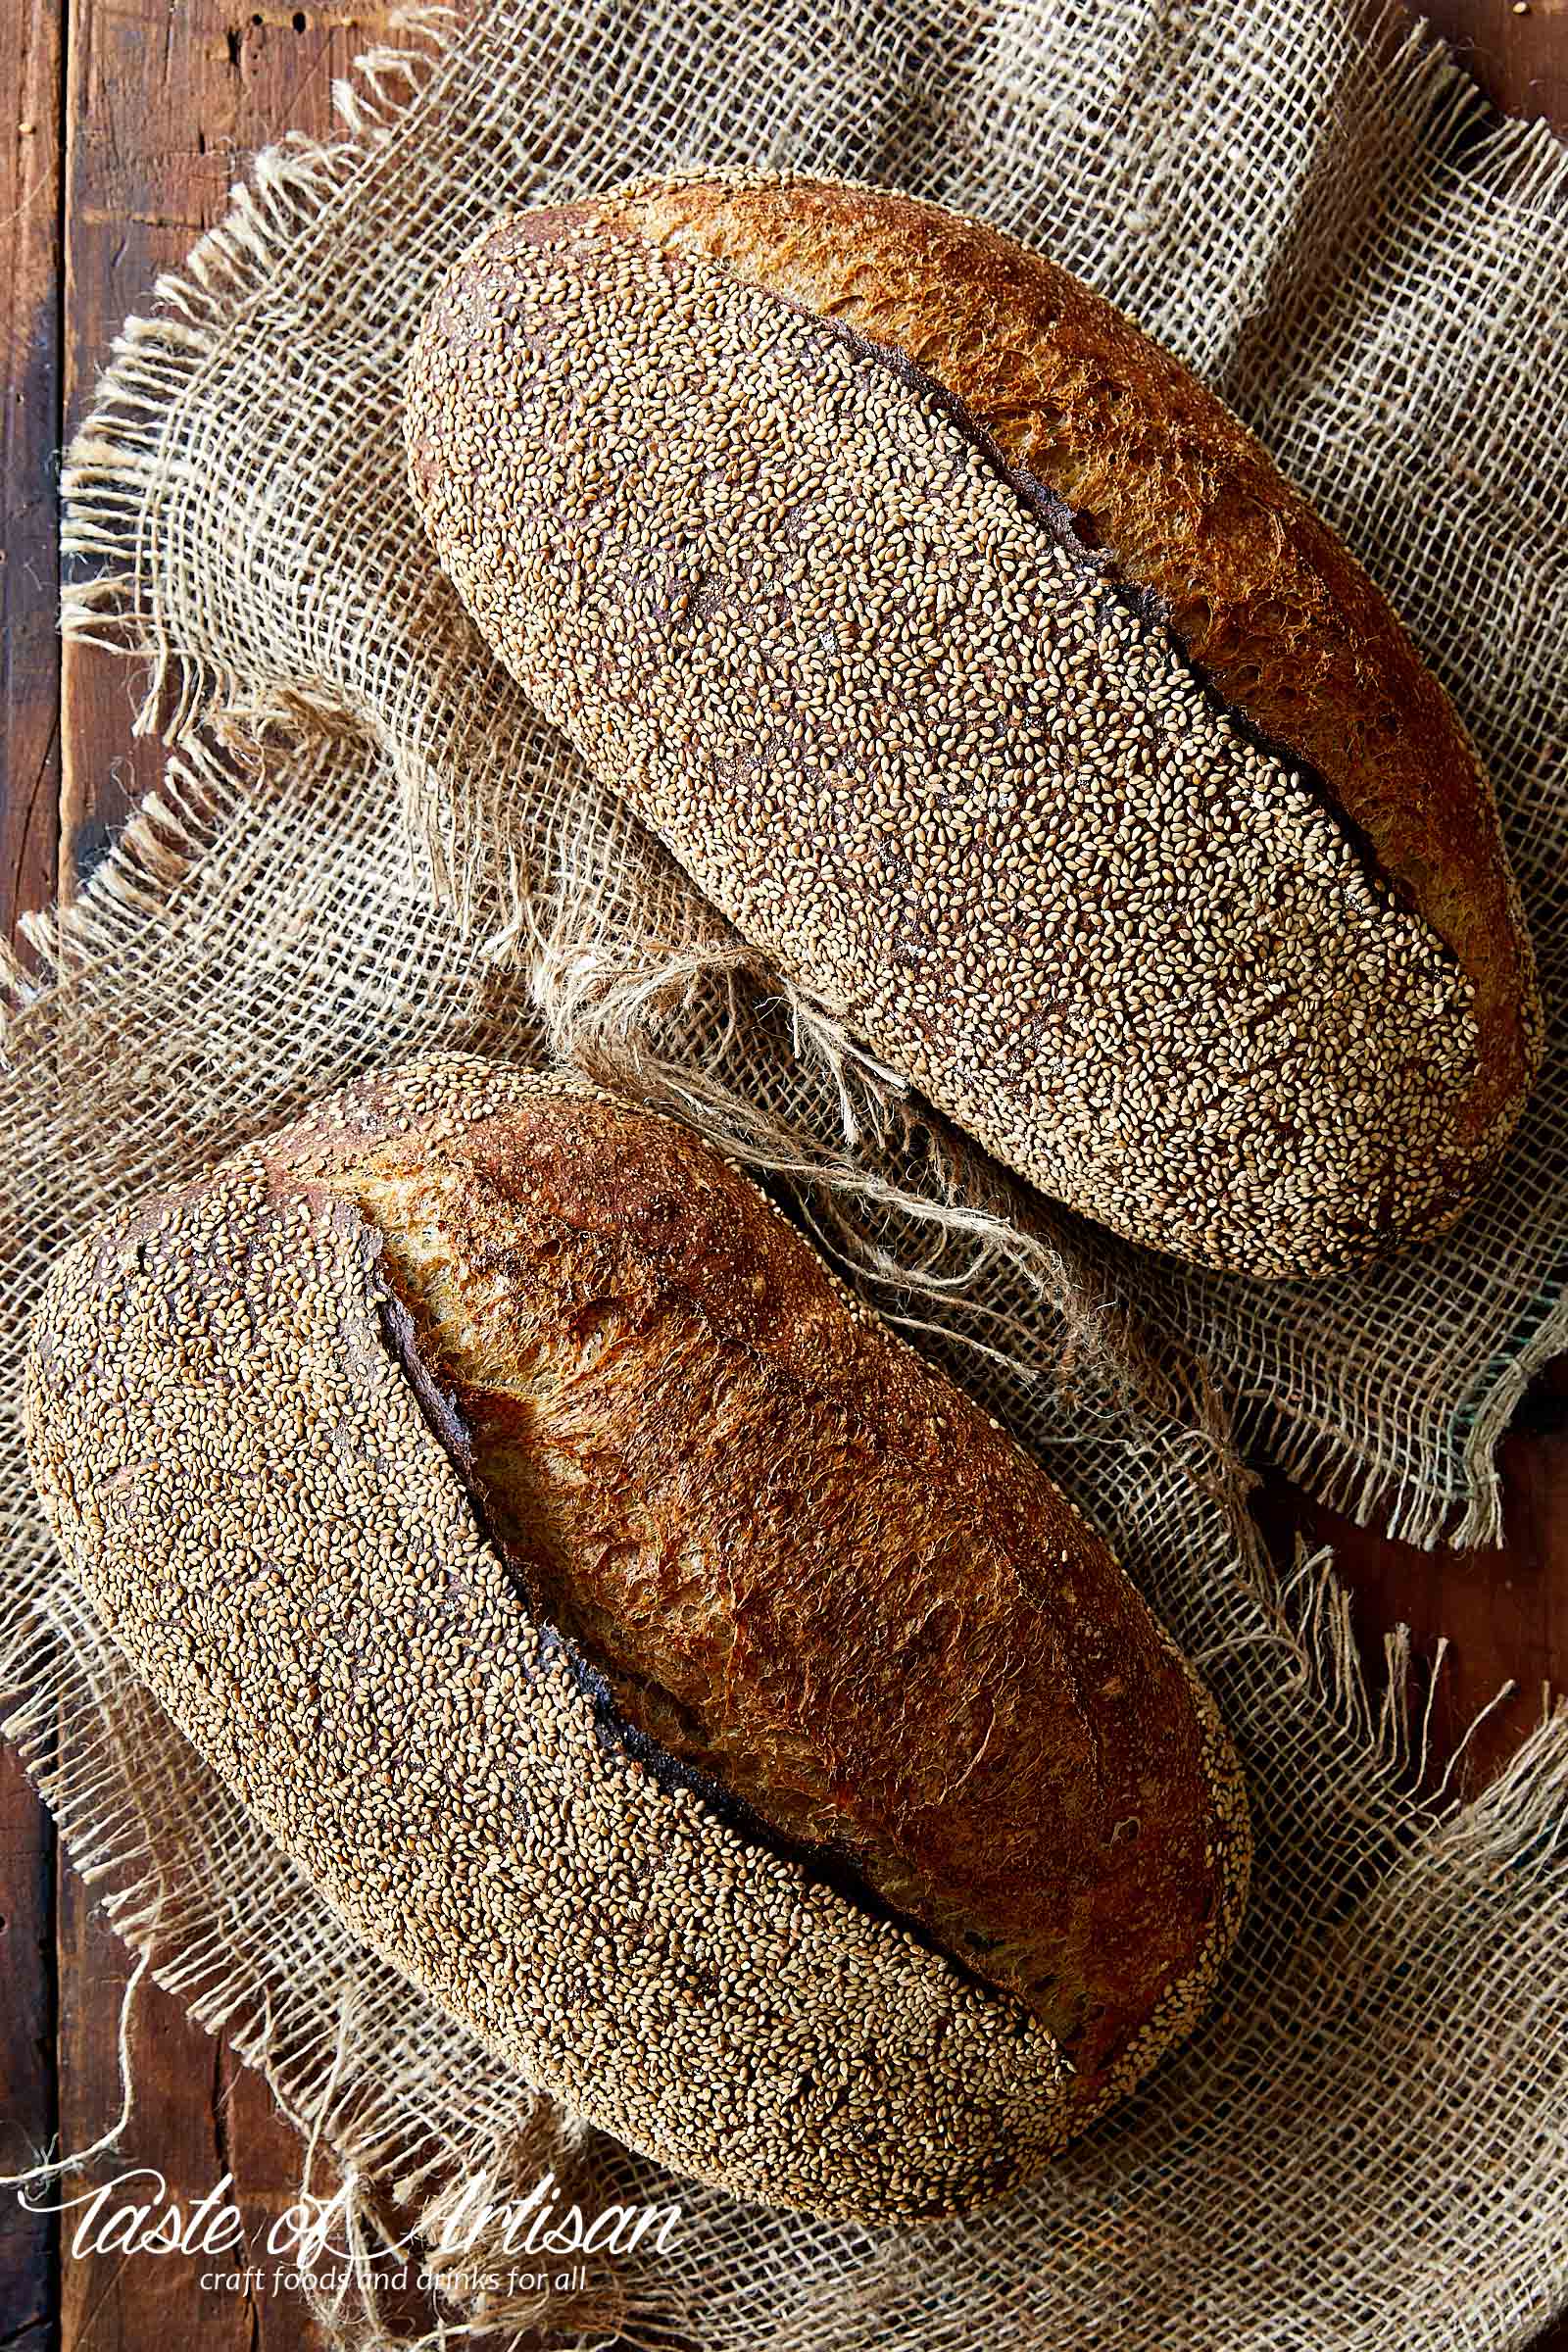
My advice is start with about a half an inch cut that goes ALMOST from one end to another. Run the score too far and the bread will go flat. Cut too deep and the dough won't spring up. You can score on top, on the side, or at any angle you desire. You can even do multiple small scores. The important part is experiment and figure out what works best. A perfect score will produce a perfect oven spring and vice versa.
[smartslider3 slider=22]
Step 7 - bake the bread
Now, grab a pizza shovel and send those loaves into an oven preheated to 500F. Bake with steam at 475F for 20 minutes and 25 minutes without steam at 450F.
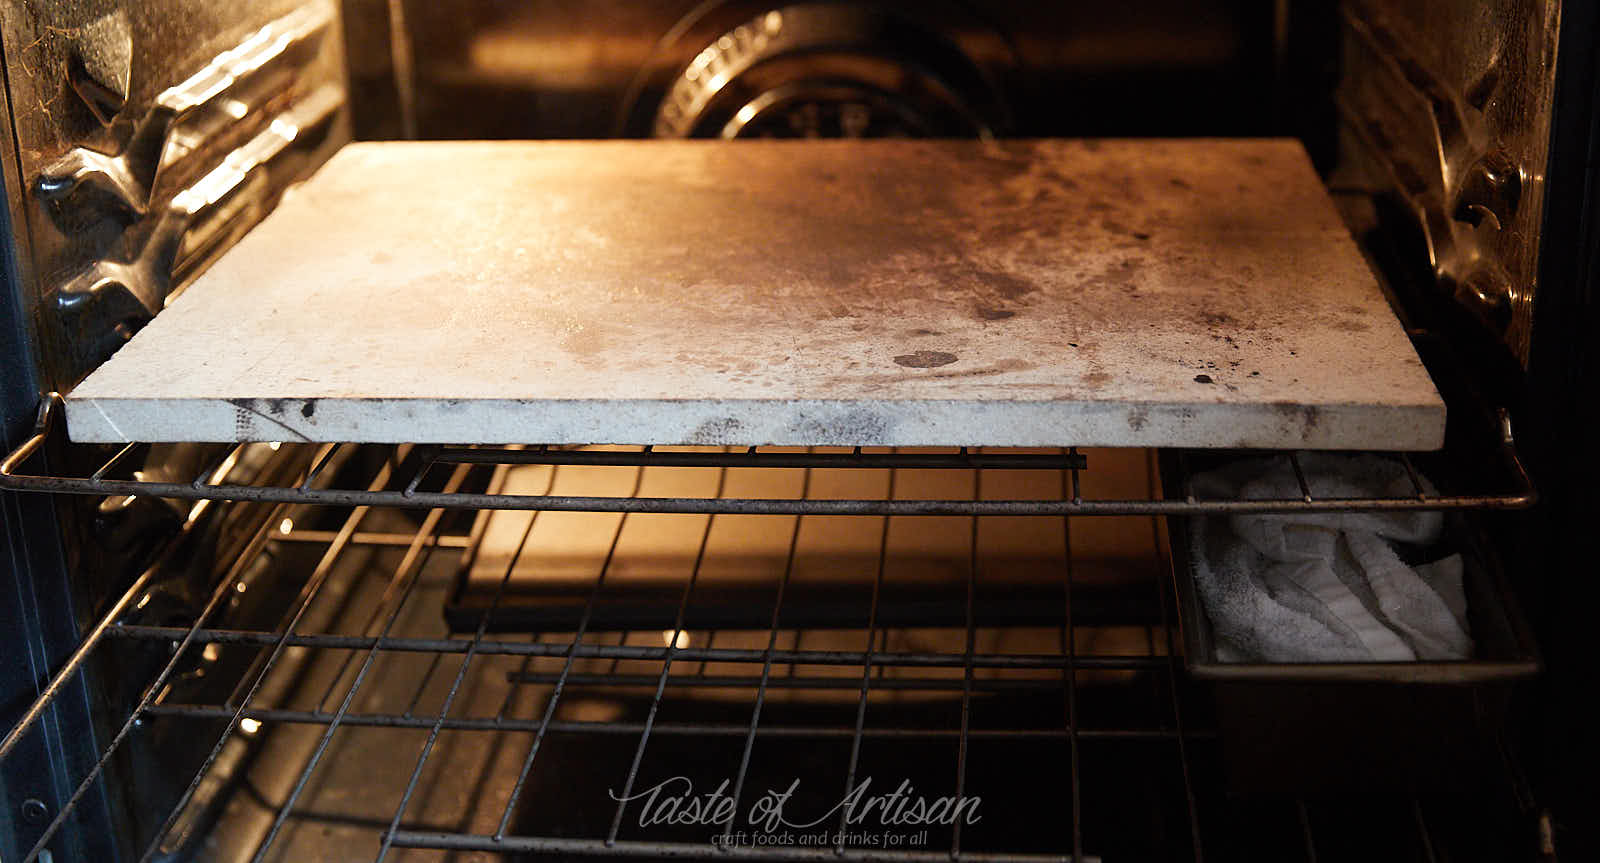
There are numerous ways to steam an oven, from simple to downright crazy complicated, or just crazy. After trying a few and killing my old oven with a 'lava rocks in a cast iron pan' steaming setup, I settled on a simple and effective method that has worked for me for years. On The Fresh Loaf, it's referred to as Sylvia's Steaming Method, in honor of the member who created it. I've deviated from it over time but the idea is the same - a bread pan filled with water and a kitchen towel thrown in it. This setup allows for a slow, continuous release of steam. I place a towel in a bread pan then fill it with hot tap water. The pan then goes in the oven when I start preheating it. 45 minutes later I have a nice, steady steam going.
A good, thick baking stone completes my bread baking setup. After a number of cracked pizza stones and not so great results, I ended up buying a 3/4" thick kiln shelf from a local pottery supply store, which cut it to 16" x 20" for me. It's heavy and therefore permanently resides in my oven. I love it. With it I get much better oven spring in my breads. Despite several spills and many years of use, it's still going strong. I can easily bake two 2-pound loaves on it.
Step 8 - cool the bread
You are supposed to cool the bread for at least 1 hour before slicing. Personally, I've been breaking this rule ever since I started baking my own bread. There is nothing like a slice of hot sourdough bread right out of the oven with some melting butter on top. There are exceptions though, like the flaxseed bread which has a gummy texture when hot.
Sourdough Bread Formulations
Levain Formula
I feed my sourdough starter every evening using the formula below, and that's what I use for levain in this basic sourdough bread recipe. There are no extra steps for building a specially formulated levain here.
| WEIGHT | INGREDIENT |
|---|---|
| 100g | Bread Flour |
| 25g | Whole Wheat Flour |
| 25g | Sourdough Starter |
| 100g | Water |
Sourdough Bread Formula
| WEIGHT | INGREDIENT | BAKER’S PERCENTAGE |
|---|---|---|
| 500g | Bread Flour | 50% |
| 450g | Whole Wheat Flour | 45% |
| 50g | Rye Flour | 5% |
| 750g | Water | 75% |
| 200g | Levain | 20% |
| 20g | Kosher Salt | 2% |
Ingredients
- 500 g bread flour
- 450 g whole wheat flour
- 50 g rye flour
- 750 g water (around 85F)
- 200 g levain
- 20 g kosher salt
Instructions
- Two nights before bakingFeed mature sourdough starter using the levain formula above.
- The night before baking, around 6:00PMMix all of the ingredients in a large bowl, cover with a plastic wrap and let rest for 30 minutes to 1 hour.
- Thirty minutes to one hour later, around 7:00PMPerform a set of stretch and folds. Cover and let rest.
- Around 7:45PM and 8:30PMPerform two additional sets of stretch and folds. Cover and let rest.
- Around 10:00PMDepending on your ambient temperature, the dough should double in size by around 10:00PM. In my case, at around 66F - 67F ambient temperature the dough doubles in size in about 4 hours. If not, wait until it does, about an hour or so.Turn the dough over onto a flat, smooth surface. Divide into two equal pieces, pre-shape, flip and let rest for 20 minutes.
- Around 10:20PMFold the loaves one more time, pinch the seams (optional), dip into sesame seeds and place into 14" oval proofing baskets, seam side up. Cover with each with a piece of paper towel, then wrap with a piece of plastic wrap. Proof in a cool place (around 66F or lower) overnight.
- The morning of baking, around 7:00AMPlace the baking stone on the rack about 3 positions from the top. Place a kitchen towel in a bread pan, or a small cake pan, fill with hot tap water and place on a rack below the baking stone, to the side of the stone. Preheat the oven to 500F.
- Around 7:45AM - 8:00AMPrepare two pieces of parchment paper slightly bigger than the proofing baskets. Turn the dough pieces onto parchment paper. Score with a serrated knife. Using a pizza shovel, transfer the dough into the preheated oven. Using a water spray, spray some water on the sides of the oven to create some extra steam, and quickly close the oven door. Drop the temperature to 475F and set the time to 20 minutes.
- 20 minutes laterRemove the bread pan with water from the oven. Drop the temperature to 450F and continue baking the bread for an additional 25 minutes.
- 25 minutes laterRemove bread from the oven and set on a cooling rack to cool down for an hour. Then slice and enjoy.


BKK says
Awesome recipe, finally a sourdough recipe I can follow along with, seems like there’s so many concepts but every other recipe seems to gloss over them.
Anyway, if I wanted to make one giant loaf out of this recipe instead of two small ones (I have a giant Dutch oven I like to use) how would I adjust the cooking time? I imagine I would bake it longer, maybe 30 minutes with the cover and then another 25 without it. Thoughts?
Victor @ Taste of Artisan says
I bake a giant loaf of that size and larger every few months for various reasons. I normally bake 20-25 minutes with steam and 30-35 without. Works well for me.
Debbie says
Hi Victor,
I made your Basic Artisan Sourdough bread recipe and it turned out pretty good! I’m brand new to sourdough baking. I started my homemade sourdough starter two weeks ago and was very happy with the results. This was my first attempt. I follow your recipe exactly. The only thing I would try to improve is the crust being very very crispy and a little hard. What could I do different to get a little softer crust??
Sincerely, Debbie
Victor @ Taste of Artisan says
Debbie, thank you for your feedback, and I am glad that you liked my recipe. The crust changes dramatically with the baking temperature. It's a matter of personal taste, so feel free to change it. The higher the temperature the harder/crisper the crust will be. Drop the baking temp by 25 degrees and it will become softer, and chewier depending on the flour. The higher the protein the chewier it will be. Bake all the way down at 375F - 400F and you will get a very soft crust, like subway bread soft. Happy baking!
Willian Isaacson says
An excellent recipe, my thanks for sharing.
Victor @ Taste of Artisan says
You are welcome.
Pete says
LOVE this recipe, can now do it from memory (though I halve everything for just one loaf) - however no matter what I do, if I use the full amount of water my loaves come out flat. I've taken to recucing the amount by around 15ml and refridgerating for an hour or so before baking - this gives me get a great shape loaf, and I like the slightly tighter texture as it means I can use the bread for sandwiches. I do wonder what I'm doing wrong, though - I dont have the best oven, and don't have a thick stone in there so wonder if that could be the problem?
Either way great recipe. Great tip on the sesame seeds, although I applied the principle to use cornmeal instead as I prefer the taste and texture it gives - but same result, easy basket extraction every time!
Mike says
Would this recipe make a 1, 1.5, or 2 lb loaf? I'm new to all this and I am trying to figure out what size proving basket to use. Thanks
Victor @ Taste of Artisan says
Mike, this recipe makes two 2-lb loaves.... or two 2.16lb loaves to be more precise.
Nat Berney says
So i went to cook the sourdough and when i turned it over to put on the stone (carefully!) it flattened and once i cooked it, it hadn't risen, could i have over proved the dough?
Victor @ Taste of Artisan says
Yes, that's what it sounds like to me. Watch it more carefully next time during proofing. You don't want the volume to increase more than about 30-50% during proofing. Target 30% to be sure. This works for me better than other methods like finger poke test, etc.
Nat Berney says
Hi there, what do you do with the levain once its been put together, fridge or leave it out? Thanks
Victor @ Taste of Artisan says
Not sure I understand the question. The levain, once it's ready and in its prime, gets mixed in with the rest of the ingredients to make the final dough. The starter, I keep it outside and feed daily. If you don't bake often, keep in the fridge and feed 1-2 times a week.
Patti says
So I decided maybe to try this bread because I like the WW and rye. At times I think the more I read the more confused I get. I have a starter that is equal parts AP, Starter, and water. So if I wanted to change mine to yours how would that work. And I only have 9 inch bannetons so could I halve the recipe and let it proof in a cloche? And the sesame seeds, put on how? If I use a banneton which I'm not sure I can do, put them right on the bottom with no towel? I f I use a cloche then what? And you do the S&Fs right in the bowl, yes?
The 5 stars are for all the recipes from you that I have made.
I'm sure you could never foresee the questions that pop into the head of a beginner.
Victor @ Taste of Artisan says
Hey Patti, take a look at the post again. Somehow the slider function got disabled on my blog so you could not see all the wonderful pictures I made to make this recipe easy to follow. That should answer some of your questions. If not, let me know.
You can use your starter, just feed it and make sure it about triples in volume, then mix the dough with it. If you want my version of the starter, use 25 grams of your starter, 25g WW flour, 100g Bread Flour and 100g Water.
9" bannetons accommodate up to 1.5lbs of dough so you should be fine. Or you can halve the recipe. You don't need to be exact, the possibilities are limitless here.
Patti says
NO, it's not at all that I want to use my starter, just trying to learn. I am going to give it a try, you will see the results good or bad! I have yet to have a bad loaf of yours though. And I will look at your photos and blog again.
Many many thanks.
Victor @ Taste of Artisan says
You are very welcome. Good luck! Send me some pics.
Myrna Wiebe says
I have been making sourdough for about a year now. I got some starter from a friend who started his using pineapple juice. He was using whole wheat and I only had white at the time. I added rye flour to the starter, it loves that! I tend to be somewhat less adventurous in trying different breads and have been making one that is our 'house' bread, used most for morning toast. We haven't bought bread for a year!! The only thing I have been wanting to do is add whole wheat and rye. Your recipe fits the bill. I'm not sure my whole wheat flour is not 'enriched', but the bread tastes fantastic. We enjoyed it with a hearty soup for dinner, my husband loves it. I used a different time schedule as that what works for me. I made up the dough and did the S&F's etc last evening, then let it rest on the cool pantry floor covered, shaping it about 12 hours later and baked. I like my loaf pan and had to get creative baking 2 loaves. I'm not sure about proofing, but the final product is good.
Victor @ Taste of Artisan says
So glad I could help, and thank you for the detailed feedback, Myrna. Happy baking! My recipes are coming in the near future so please subscribe.
Liliana says
Outstanding results - thank you!
Joanne says
Hi
I am going to try your recipe and see how things go- I love the process of sour dough but sadly I have not had good results. I hate to waste food and flour so I will attempt to cut your recipe in half the first time and try one loaf. Do you see any problems in that?
My bread looks great on outside but tends to have large holes at the top inside and is doughey. I am thinking the problem is a weak starter even though this last time I had it on the counter for 3 days and fed it daily. Do you think 3 days was not enough to get it strong? It is somewhat bubbly but not overly so - I floated when tested and thought that would be sufficient - is that not a reliable test?
Victor @ Taste of Artisan says
Hi Joanne,
my sincere apologies for responding so late... your message got lost in a pile of spam.
What you are describing points to poor fermentation, I've had my fair share of those when I was starting out in bread baking. My starter was weak and that's what I was seeing too. Ever since I bought a package of dry organic San Francisco sourdough starter and started mine from it, I've had much better results.
Are 3 days enough for a starter to get strong? Yes and no. If you have a poor starter with the wrong kind of yeast strain prevailing in it, you can feed it for 100 days and it won't get much better. A good sourdough starter - I can feed it twice and it will make bread explode in the oven.
Bean the Baker says
I’ve been baking sourdough for only a few months now and I feel that my bread needs improvement. So I’ve tried your recipe and method, I’m very pleased with the result! I did have to substitute spelt flour for the rye, and I also added 10 g high gluten flour reducing the bread flour -10g. ( I have an excess of HG that I’m trying to use up!) Started the mix same time of day in afternoon, it took about 5 hours for a full ferment. Divided dough, rest 20 min, then made up one large loaf and put it in its proofing basket outside since my inside temps were all above 68. Proofed perfectly by 7 :30 am and into oven with pan of water-soaked towel. I did bake it in my Dutch oven as I’ve like those results in the past. I did get a good spring but my “ear” burned at the top, the shelf was 2nd slot from top. I will lower it for next bake. Would love to post photo if site allows. Thank you for the great recipe and details!!
Victor @ Taste of Artisan says
You are very welcome. More bread recipes will be coming soon... have been experimenting a lot this summer and fall and have some very good stuff to share. I will email you, send me your pics and I will attach to your post.
P.S. Your bread looks AMAZING! So happy about your results. By the way, when using a cast iron baker I would also get burnt tops and/or bottoms as metal has a much higher stored heat capacity. I switched to an (Emile Henry) bread cloche and have never had this problem since. They aren't cheap but I really like them.
rhian says
hello victor, your methods have helped me a lot and the bread is improving all the time.
i really like the proofing of the dough overnight in the fridge and have been leaving it in the fridge for about 12 hours and then baking. my bread has, however, been lacking those nice, big, evenly spaced bubbles that your photos show. i'm learning how to handle the proofed dough more carefully too. this comes with practice, i think.
would it help to leave the bread to proof in the fridge for a few more hours? i want to avoid overproofing as you describe.
rhian,
wales, uk.
Victor @ Taste of Artisan says
Hi Rhian, happy to hear about your improvements. Leaving the dough in the fridge won't make over-proofed that easily because of the low temperature. It will be fine if you do. To get bigger air holes, you may want to try a few things. Make sure that the dough develops gluten properly. I like to see the dough become elastic and stretchy. Try a double set of S&Fs each time you do it, it should help. Lower the temperature of the dough/room and/or decrease the amount of sourdough starter, this will increase fermentation time and lead to bigger bubbles. When shaping, make sure there is a good tension. I flip my dough after each S&F to have that tension at that time too. Score deep enough to get a nice oven spring, without it, the holes will be smaller. If those fail, try experimenting with different flours, or increase bread flours and decrease WW flour, that should help as well. Also, try my other recipes - I incorporate different techniques/methods in different recipes so perhaps another recipe will enable you to get those elusive bigger bubbles.
rhian says
thanks for all of the tips victor. i'll be trying everything you suggest. i didn't really understand how important the tension of the dough is. also, lower room temp and more time in fridge.
i made your wonderful cinnamon buns the other day. they have been a great success with all. i had to go for a bike ride in a rainstorm to fetch some of the ingredients so it took me all day to make the buns!
many thanks for your help and support,
rhian
Victor @ Taste of Artisan says
You are very welcome. Happy baking!
Bonita says
Sounds thorough and yummy. I'll give it a try. Do you have a recipe that I can proof longer for a stronger Sourdough?
Thank you very much dear!
Victor @ Taste of Artisan says
Yes, I do. I am going to post in the next few days.
Joan says
Can you tell me if I can use your recipe to make a sandwich loaf? Thank you. This question is also for those who have used a loaf pan and got a good well risen loaf. Thank you!
Victor @ Taste of Artisan says
Sorry, I've never tried this recipe for making sandwich loaves but I don't see why not. You may need to make some tweaks but it should work in general.
Robert says
How many pounds of bread does this formula make? I need to scale it for a 7" round banneton which I think will be ok for a 1 pound boule. If that's too much, how many grams should I shoot for?
Victor @ Taste of Artisan says
It's a little more than 4 lbs in total, makes two 2-lb loaves.
Paweł says
Hello Victor,
great recipe, easy to follow, without fancy steps. I tried your baguette recipe too and the result was awesome. Thanks!
I have a question, however, regarding the starter and the levain. I got a little bit confused. In your case, you have basically a jar with levain which you feed regularly and use for baking this bread. Is that right? And this regular feeding you do by taking 25 g of this levain (sourdough starter in "levain formula" chapter) and mixing it with flour and water. Or?
I have a really strong rye starter so I used it to "start this starter". For the moment looks huge. 😀
First time I baked this bread I've noticed that in my case times should be really shorter. I don't know if it is the flour or temperature but proofing overnight ended up in big mess. 😀
Victor @ Taste of Artisan says
Hi Pawel, glad to hear about your success with baguettes and welcome to my blog.
>
Yes, that's what do with the starter, you got it right. I feed it and just use a portion of it to make the dough. I like to keep things simple. I don't normally build levain specifically for my breads, but I make sure my starter is very active.
>
Yeah, it could be one or the other, or most likely both... rye and whole wheat cause very active fermentation so you have to watch it. You can fermenent at room temp, bench rest, shape, proof for an hour at room temp then retard in a fridge. That will definitely help. Thre are many ways to make great bread. But remember, time and temperature are unspoken bread ingredients. You have to consider them too.
rhian says
thanks so much for your wonderful, easy to follow, recipes victor. you've enabled me to make a breakthrough in my sourdough bread making. my last two loaves were my best ever after following your recipe for basic artisan sourdough bread. i think the set timings have really helped me schedule the bread. i love the process of proofing the bread overnight in the fridge. mornings have always seemed the best time to bake bread. rising with the sun!
i have two loaves in the oven right now and i'm trying rye flour using the basic artisan recipe. it looks to be working well.
i also have a much closer, more active relationship with my starter, which is just like an easy to keep pet!
rhian in wales, uk.
Victor @ Taste of Artisan says
Hey Rhian, I am very happy to hear about your success and I am glad I was able to help you. Happy baking and please come back for more bread recipes, I will keep them coming.
Angela says
Hello Victor,
Thank you for sharing your knowledge. I have a timing question. According to your recipe you prepare the levain two night before baking. Let’s say 10pm Thursday night.
The recipe then says to combine all the ingredients one night before baking. Let’s say Friday at 8pm. If I’m using the levain prepared Thursday night, it has been sitting for 22 hours and flat by then. If the optimal rise is 8-10 hours, should I not have been mixing all the ingredients at around 8am Friday morning? Am I missing something?
Victor @ Taste of Artisan says
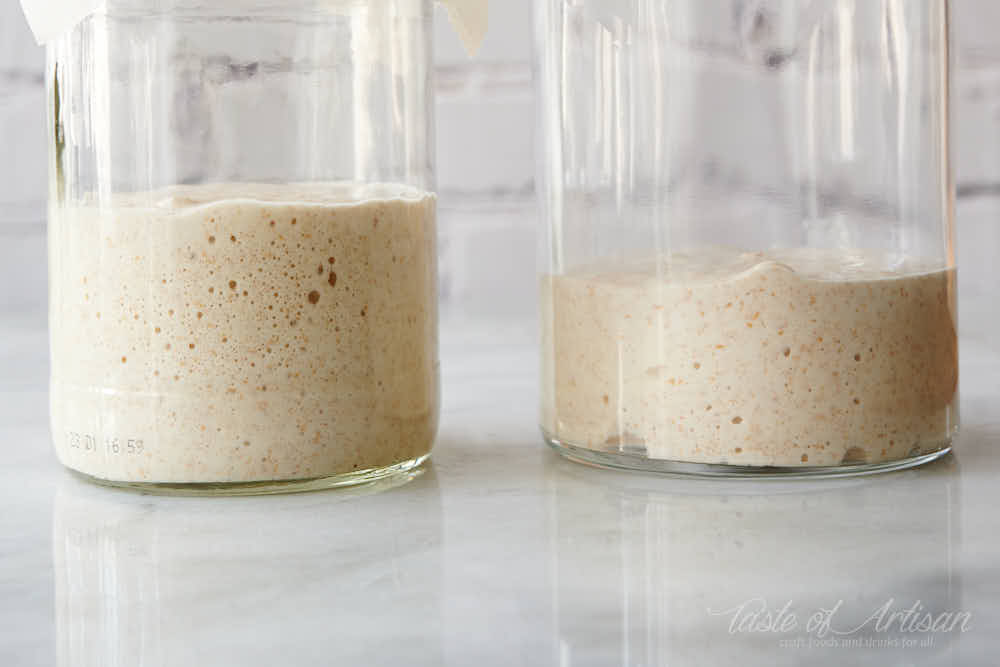
Angela, that's a good question. The answer is - it depends. If you use my formula to feed it, use a room temperature water and keep it in a relatively cool room (67F) it will be fine to use. I had no problems. If your room is warm or you use warm water when feeding, then you'd probably want to feed it 10-12 hours prior to mixing. To illustrate, here is an example of my starter fed with room temp water and warm water:
>
>
I use a slightly different starter now, you can read about it here.
Jae heon says
Thanks for the great recipe but my sourdough gets too gummy all the time.. I have no idea.. Can you help me please..
regards,
Jae heon
Victor @ Taste of Artisan says
Jae, there are several potential causes for that. Under-fermented or under-proofed dough can cause that. Weak sourdough starter. Before I built a sufficiently strong sourdough starter (follow the link to read about my experience), I would get gummy bread crumb similar to what you described. Weak starter is an interesting scenario - you get a nice volume, good oven-spring, but inside you see a few huge holes and the rest of the crumb is dense and gummy, with little holes. Underbaking is another potential cause.
Henry Kirton says
Hi Victor,
This recipe looks great. I am trying to find a way to bake bread simply by using a portion of my starter at the right time, rather than build a levain from the starter and use that.
Let's assume that the starter is carried over and fed as per your ratio, am I right in thinking that I can kick start this with starter directly from the starter jar? Essentially using that which would otherwise be discarded?
Ideally I am looking for a basic recipe to bake the same loaf from the same starter, say, twice a week. I can't get my head around why I would build a separate levain when I can surely use a portion of the starter at it's peak.
Is it because the point the starter is at its peak is not the time to feed it... thus creating a levain off shoot means managing two different timings. If I can cut down on steps and washing up then it'd help streamline the process!
Thanks so much!
Henry
Victor @ Taste of Artisan says
Hi Henry, what you described is exactly what I do: I feed my starter regularly and when I need to bake, I take 200g of active starter (8-12 hours after feeding) to mix the final dough, and I feed what's left (about a tablespoon). I've switched to a 1:1 ratio of water and flour. You can read more about my sourdough starter here.
Michelle Leondidis says
Good morning,
I put the dough in the fridge overnight as it was rising too quickly. Took it out for an hour this morning, then in the oven. It looks like it is flattening in the oven, could you tell me why?
Thank you,
Michelle 🌸
Victor @ Taste of Artisan says
Hi Michelle,
Flattening can be caused by several factors, over-proofed dough, too high of hydration, incorrect scoring, insufficient steaming, poor gluten development... those are the main factors that come to mind. It's hard to say for me without knowing what was done exactly at each step.
Linda says
Hi, if I wanted to use all bread flour only for this recipe how should I adjust the water amount?
Many thanks,
Linda
Victor @ Taste of Artisan says
Linda, I can't give you an exact number for this recipe as there are several factors at play here, including flour hydration. In general, whole wheat flour absorbs more water so when converting to bread flour, you will need to reduce hydration. I'd say start with 73% and see how the dough feels. Add a little more water if the dough is stiffer than you like. On the other hand, you can leave the water the same. A percentage or two change in hydration won't impact the difficulty of handling the dough in any significant way. Lately, I've been favoring very high hydration breads, 80% +, so I'd say the higher the better. To a point. I recommend everyone to increase hydration as you get more comfortable working with it.
Linda says
Thank you for the detailed response Victor. I made this recipe the other day and it has been my best loaf yet! Your recipe is the only one that hasn't left me with a dense loaf, the inside was perfectly fluffy and delicious.
I've been struggling with flat and dense loaves, even though my starter is active and strong and always pasts the float test. I can't figure it out, everytime I try to do a sourdough recipe that calls for the final proofing to be done in the refridgerator for many hours, my dough never looks proved when I take it out, it doesn't even look like it has changed at all. I keep my fridge at 4.5 degrees celsius, do you think my fridge is too cold and hence discouraging any yeast activity to occur in the dough and its rising process? Do you think it is possible for me to deviate from such recipes and do the final rise in room temperature? Sorry for all the questions but any advice would be much appreciated. Thank you so much!
Victor @ Taste of Artisan says
Hi Linda, good to hear about your success. I've had the same problem with the final proofing in a fridge, my temps are very similar to yours. There are several ways to deal with this, but the idea is the same - you should see an increase in volume, about 30-50%. The finger poke test doesn't work too well on cold dough. One way is finish bulk fermentation, retard overnight, then divide into two pieces, shape, bench-rest for 60 minutes, final shape and proof for about 60 minutes in proofing baskets, similar to what I do when making French baguettes. Another way is to finish bulk fermentation, shape, bench rest, final shape and into proofing baskets and refrigerate. Then 2 hours at warmer room temperature before baking, same process as described in my no-knead sourdough bread recipe. Again, if you see that the dough did not rise 30-50% during the entire process, let it sit at room temperature until it does. That will ensure a nice open crumb and a good oven spring.
Linda says
Hi Victor,
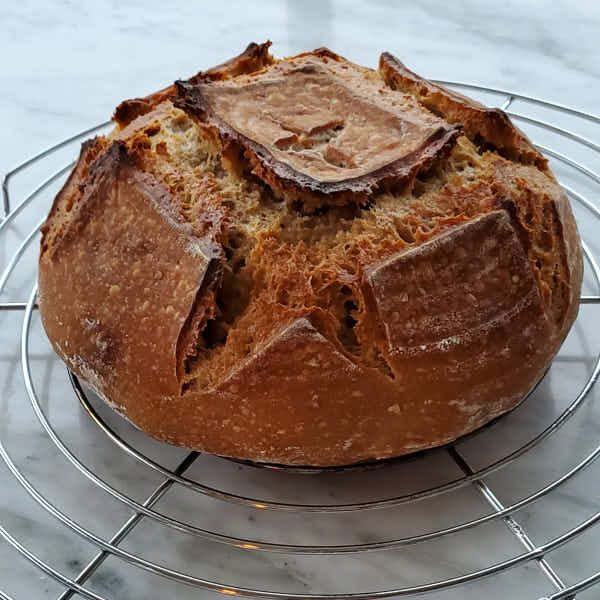
Thank you, thank you, thank you from the bottom of my heart! I've been seeking for clarification on the questions above for a long time and couldn't find any answers. It is odd that in most recipes they never tell you what to look for, especially when it comes to the final proofing. I followed your instructions today, I took my loaf out of the fridge after an 18 hour cold ferment, it did not look proofed as per usual. I put the loaf in my microwave for 1hour and 30 minutes. I would've liked to have left it longer but my scheduling was conflicted. The result was a gorgeous loaf with incredible oven spring. My crumb though, was still tight and slightly gummy. Is there a way I can post photos? I would love to show you my results. Otherwise, thank you again for all your help and your patience in replying to my redundant questions.
>
Victor @ Taste of Artisan says
Happy to heat that I could help, Linda. I am sure that after a few more tries you will have a perfect loaf. I will send you an email, reply with your pictures and I will append them to your comment.
Joanne Pritchard says
If you wanted to add linseed to your recipe what percentage or grams would you? Do you have to soak the seed? I am waiting for my starter to come from the USA. Thanks so much for sharing I really appreciate all your tips!!!
Victor @ Taste of Artisan says
Hi Joanne, if you want to use whole seeds you will need to soak them. I like using ground seeds. The amount can really vary, I've seen anywhere from a couple of tablespoons and up to 20% as in my flaxseed bread recipe for your reference. I think 10% would be a good starting point.
Pam says
If my dough isn’t sticky do I need to add more water or starter?
Victor @ Taste of Artisan says
Pam, just go with it this time, see how it turns out. Next time increase water by 1-2% points if you feel you need it.
Cameron says
Hi Victor, What would the recipe adjust to for a 9.5 inch banneton? Will definitely be giving this a go
Victor @ Taste of Artisan says
Hi Cameron, 9.5" bannetons will hold comfortably 500g to 850g of dough. Hence, 1/3 of the recipe will do the trick for you. Good luck.
Cynthia Danna says
Loved the recipe and how much easier the dough was to work with! Unfortunately I I failed to use the 14" proofing baskets, and grabbed the 9 1/2" ones..:-(... Obviously the proofing spilled over and ruined the process.. totally my fault-but I am jumping back on the horse and going to make again on Monday!!
Victor @ Taste of Artisan says
So, how did it go, Cynthia?
Cynthia Danna says
I just read thru your method and am anxious to try. My white sourdough comes out well but wanted to add wheat. ALL 4 loaves failed to rise no matter what I tried. I use King Arthur starter with all purpose flour. I didn't incorporate wheat in starter. Can I use my starter and convert by using your starter blend?? And, with the sesame seeds, do you not use a liner or towel in your forming baskets??
Thank you!!
Victor @ Taste of Artisan says
Hi Cynthia, welcome to my blog. Yes, you can start with your started and convert to my blend but give it a few days to adjust. I recommend 3-5 days.
As to using a liner in my proofing baskets for this bread, no, I don't. The dough has a fairly high hydration and normally would be very prone to sticking but not when it's covered in sesame seeds. The sesame seeds technically serve as a liner and prevent sticking 100% That's primarily the reason why I use them. Besides, they add a ton of flavor.
Cynthia Danna says
Two observations: I noticed you use bread flour when feeding the starter and it is much stiffer than the typical sourdough starter. I have yours and mine (with the substitution of 1oz wheat flour for 1 oz of the AP flour) side by side on the counter. I will use yours for your recipe and also see if the substitution of the wheat flour in mine gives me better results for my traditional sourdough recipe.
Will let you know how it goes!!
Victor @ Taste of Artisan says
Please, do let me know. I hope it works out well. Yes, my starter is quite stiff, like very thick pancake batter. This is what works for me and I've had my starter going for over 5 years. For some reason thinner starters don't live long in my house and quickly become vinegary.
Cynthia Danna says
I have asked several questions about the starter as we know- it is the backbone of the bread!
Do you use the discard for anything in particular? Waffles? Scones? Cake?
Victor @ Taste of Artisan says
I do sometimes but most of the time I just discard it. It's a lot of waste, I know, but I need the amount for when I decide to bake on a short notice. Glad I can source my flour fairly inexpensively.
daisy says
Hi,
the bread looks really delicious, but can the rye flour be replaced by usual bread flour? Or will the consistency be changed by that?
Taste of Artisan says
Yes, you can replace rye with bread flour. The bread will be fine, just the flavor profile will be slightly different. Rye adds its own character.
Rolande Arista says
I love your site design and your food content. I am a baker and enjoy cooking and baking on the weekend when time allows me to make muffins.
Tony says
Hi there. I made two loaves per your recipe this weekend and the results exceeded my expectations. Using sesame seeds is genius. I never liked leftover flour on my bread and just didn't know how to avoid it. This is best sourdough bread recipe! Thank you for the detailed instructions
Victor says
You are very welcome, Tony. Glad I could help.