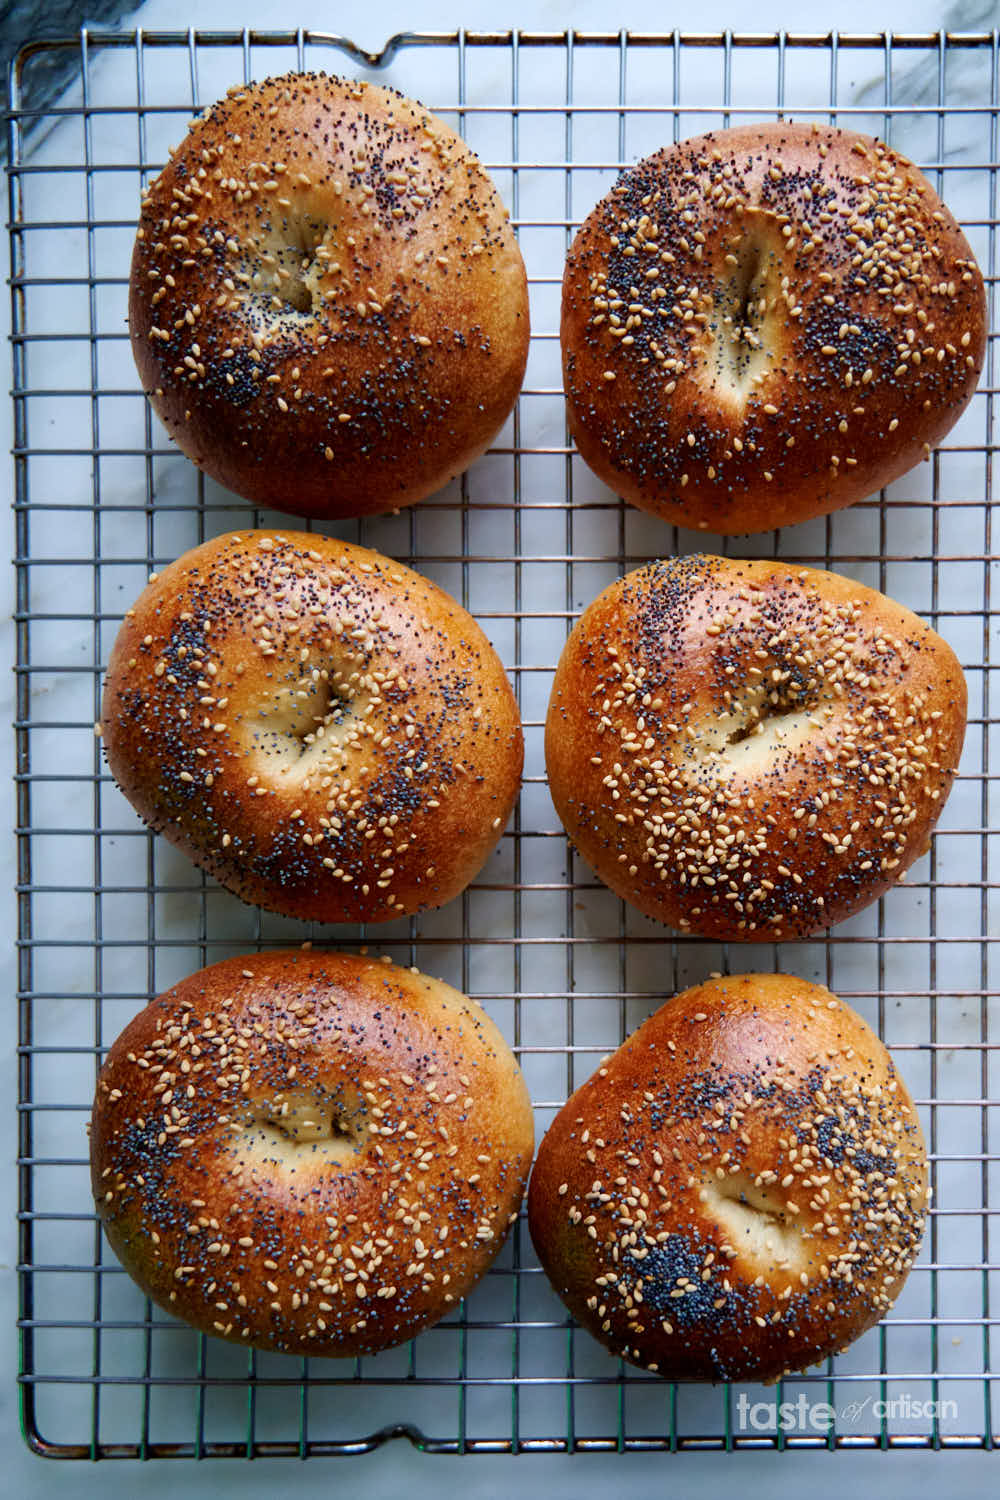
Freshly baked bagels make me feel good and happy. They remind me of childhood. French baguettes have been my all-time favorite breakfast food for years but these homemade bagels are changing that. Chewy and pillowy-soft on the inside, slightly sweet, crisp and dark golden brown on the outside, covered with toasted seeds - it's so hard to resist fresh bagels with some cream cheese.
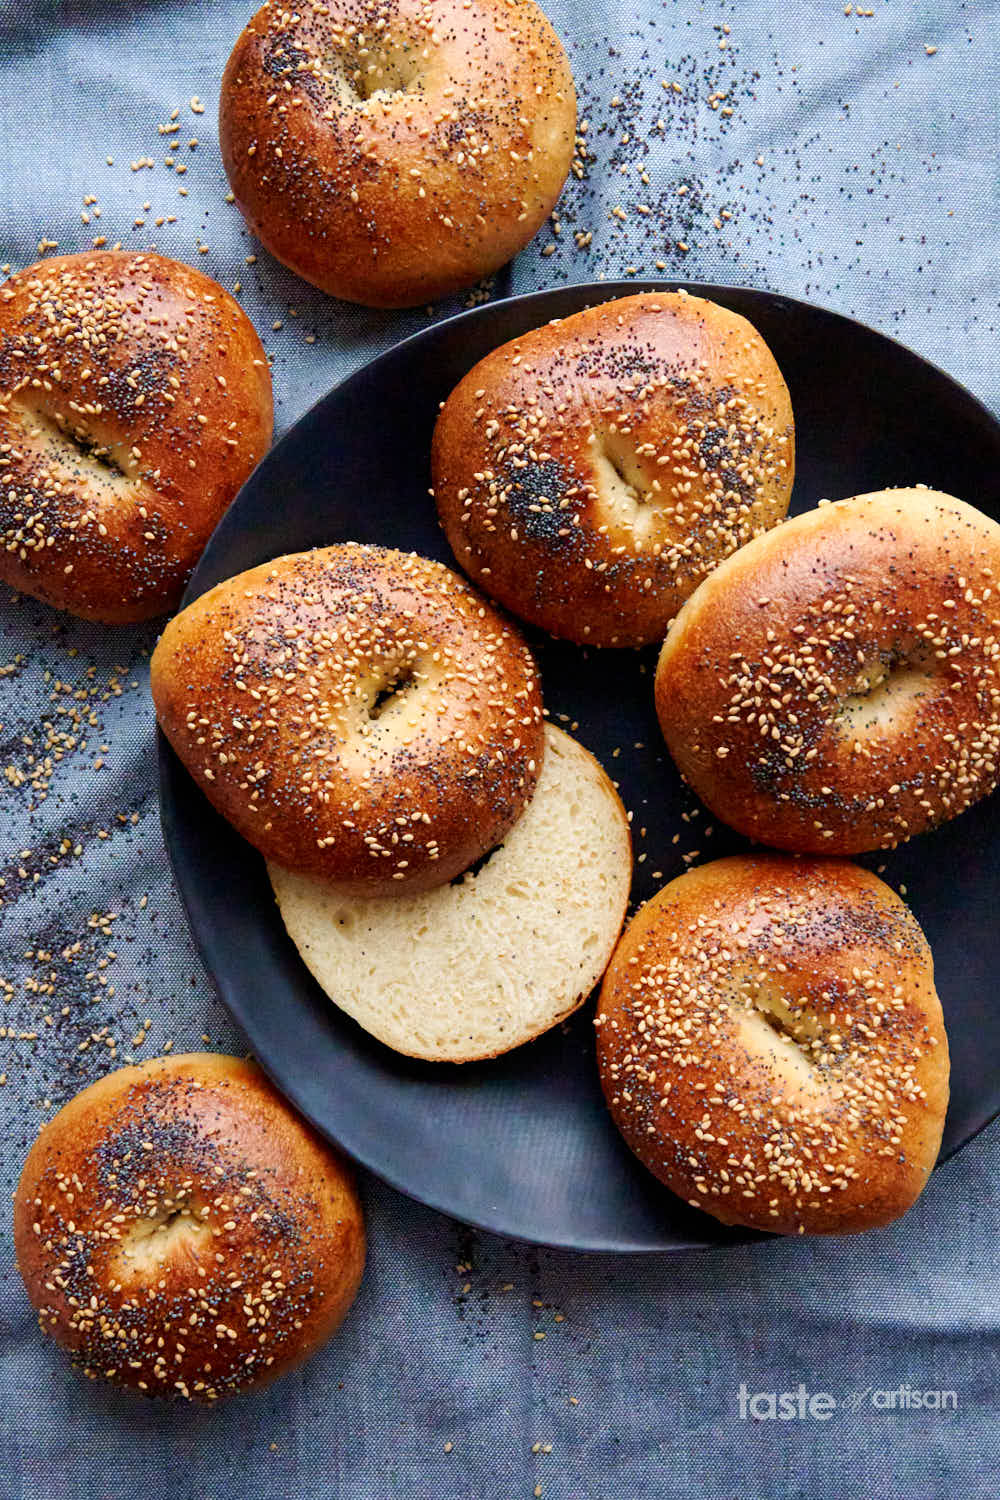
It would seem as though bagels are such a simple bread to make - and they are compared to French baguettes which took me a long time to master - yet many of my initial attempts at making them failed.
Not that my bagels tasted bad or looked bad, no, that wasn't the case. They simply were nothing to write home about. Plain. Boring. Unexciting.
The magic of exceptionally tasty, chewy bagels hides in the little details, like the amount of malt or honey and oil you use, the level of dough hydration, and how you bake them. Mind you, tastes differ so these details may vary from person to person but I have yet to meet a person who did not absolutely love these bagels.
What bagels are made of?
Unlike typical bread which consists of wheat flour, water, yeast, and salt, bagels include oil and sweeteners like sugar, treacle, honey, or barley malt syrup. Some older recipes used margarine or a combination of oil and margarine.
The sweetness makes bagels tasty and highly addictive. I like my bagels slightly sweet but not overly so. This is the reason why I am not a big fan of Montreal-style bagels which I find overly sweet.
The oil makes bagels more tender on the inside and more crisp on the outside. Fats work as tenderizers by inhibiting excessive gluten development which leads to toughness.
Bagel making process
This bagel recipe uses instant baker's yeast - also known as Quick Rise or Rapid Rise yeast - which I found to be highly effective and reliable in this recipe.
The dough undergoes several stages of fermentation and proofing at both room temperate and in the fridge to develop a proper structure and exceptional flavor.
The ingredients
A great bagel must have a great chew. The best, and probably the only good way to get that is to use high gluten flour. My favorite is King Arthur's high gluten flour, also known as sir Lancelot.
Other equivalents of this flour would be extra-strong bread flour, Italian type 1 flour, French T65 flour, and Euro 650 flour. All-purpose flour will not give you that chew that you will find in a good bagel. Even regular bread flour falls short.
The rest of the ingredients in this recipe are fairly straightforward. I would only advise using flavorless oil which wouldn't impart unwanted flavors. You can't go wrong with canola oil. Other suitable oils are corn oil, peanut oil, safflower oil, and vegetable oil.
The equipment
Unlike bread, bagels do not require any special baking equipment like a baking stone, a couche, a lame, or a cloche. Instead, bagels are baked on a baking sheet. Wood-fired oven bagels are baked on the stone bottom of a wood-fired oven so if you want, you can bake them on a pizza/baking stone. This will produce bagels with crispier bottoms.
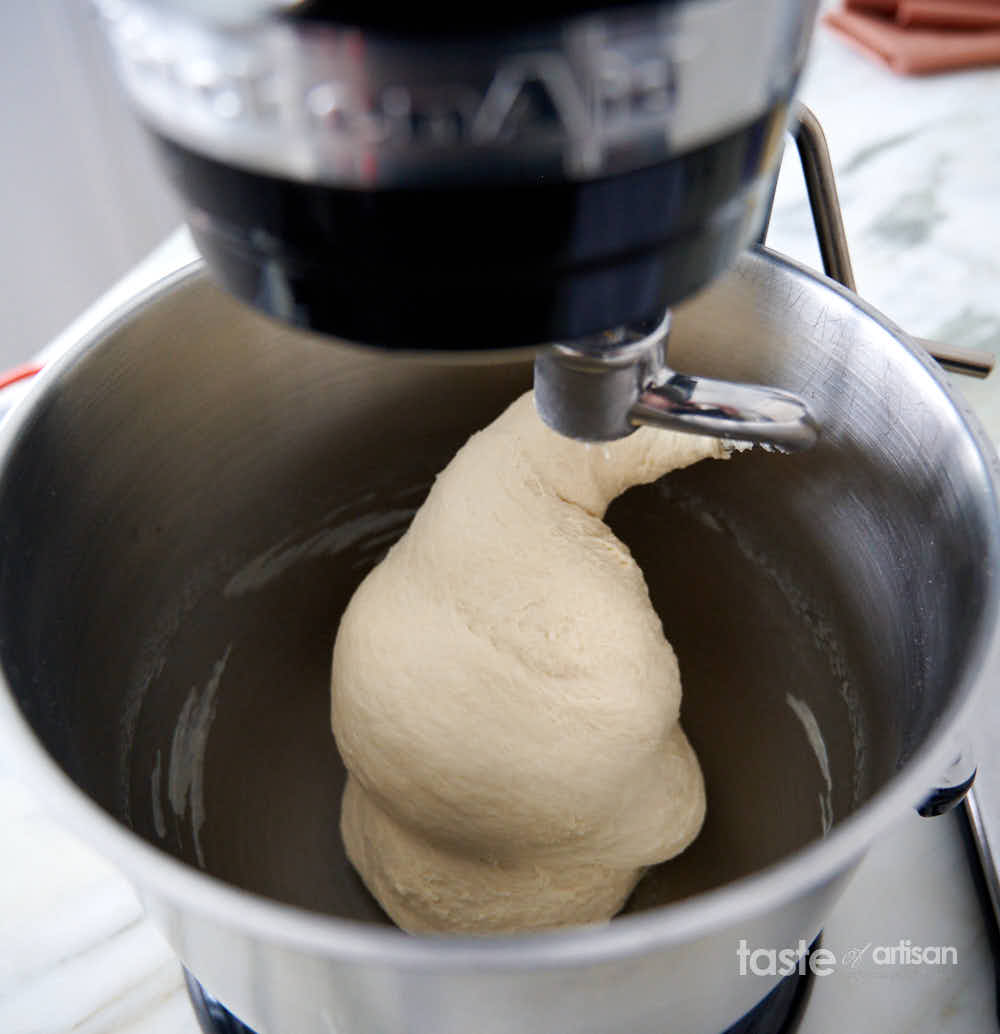
The only piece of equipment that I would highly recommend using when making bagels is a stand mixer with a dough hook. Kneading dough by hand is a chore that a stand mixer will simplify greatly.
For boiling bagels, you will need a large, wide boiling pot and a slotted spoon/skimmer, which every kitchen should have.
Mixing/kneading the dough
Bagel dough requires no stretch and folds or long bulk fermentation. All you have to do is put the ingredients into a bowl of a stand mixer and let the mixer do its thing. The dough will be ready in under 10 minutes.
You can mix and knead the dough by hand if you don't have access to a stand mixer.
Fermentation
Bagel dough fermentation consists of several steps. First, the dough undergoes a one-hour to an hour-and-a-half bulk fermentation at room temperature. Next, the dough is shaped into balls and cold-retarded in the fridge for an hour.
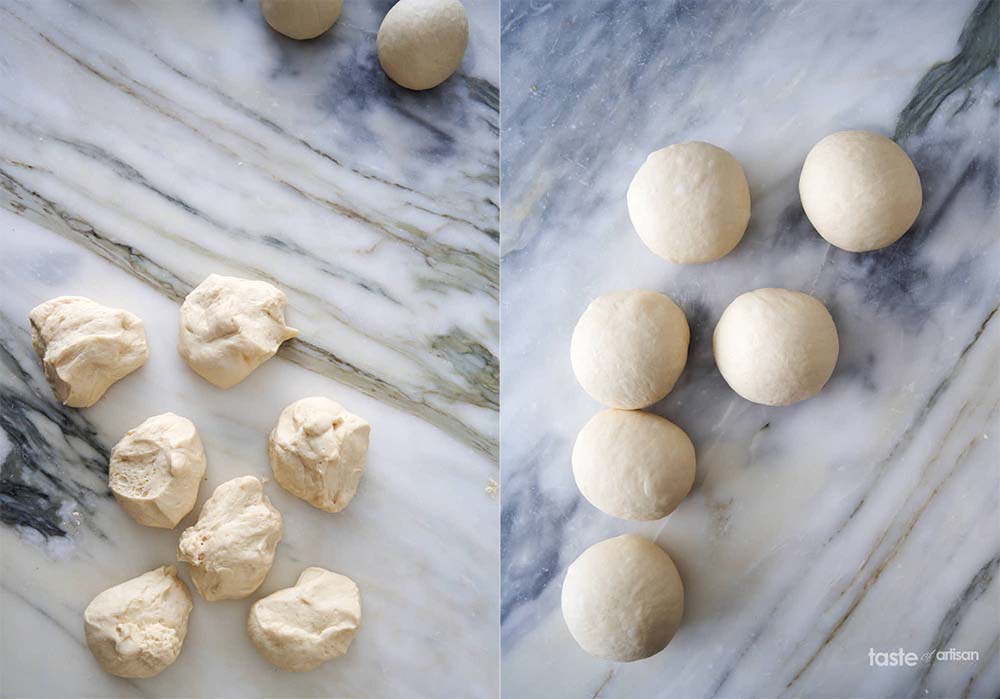
The dough should almost double in size during the first 1 - 1.5 hours.
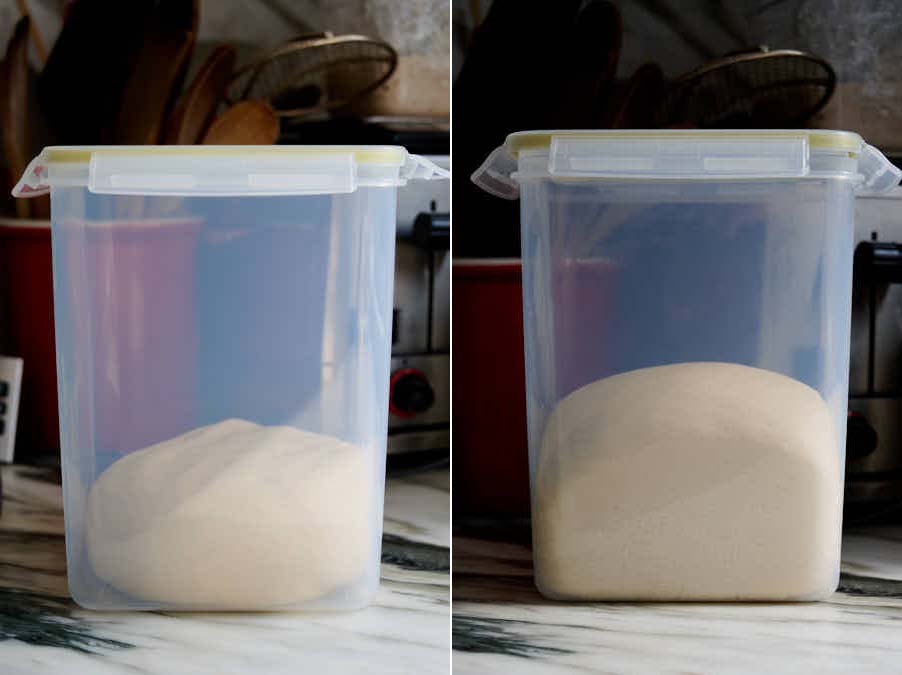
You will not see much rise during cold retarding, but this is normal. The dough will have an opportunity to rise more during the next steps.
Shaping and proofing
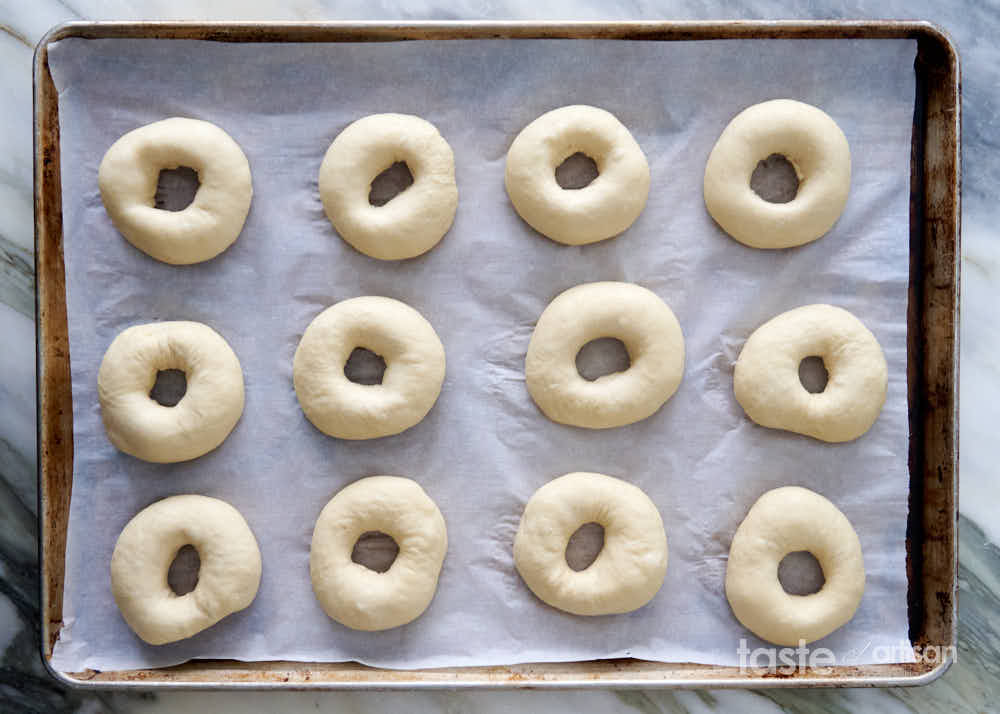
Once the dough has firmed up in the fridge, it's time to give the bagels their final shape. Using your finger, poke a hole through the center of a dough ball. Next, stretch the dough into a ring and place it on a baking sheet lined with parchment paper. Repeat with the rest of the dough balls.
Shaped bagels need to be proofed, like any other bread. You can do this two ways: leave them sitting for an hour at room temperature or refrigerate them overnight. Both methods will result in the same minor rise of the dough, the big difference being in the flavor. Cold-retarded bagels will have more of it.
Boiling
Boiling pre-shaped bagel dough in water with a little bit of baking soda effectively sets the crust before it goes into the oven. As a result, the bagel crust has a unique, peculiar sheen and smoothness to it. Pretzels are made in a similar way.
The key to boiling bagel dough is to do so in a large pot with a lot of water, so that when you drop the dough in it, the water temperature won't drop.
Often, the advice is to boil one bagel at a time. That's 30 seconds per side times 12 bagels or 12 minutes total boiling time. I boil my bagels in threes and have not found any adverse effects. Just make sure to load and unload them quickly enough so you don't over-boil some of them.
Baking
Boiled bagels are placed on a baking sheet lined with parchment papers, sprinkled with sesame and/or poppy seeds, then baked. The seeds will stick better if you sprinkle them on while the bagels are still wet.
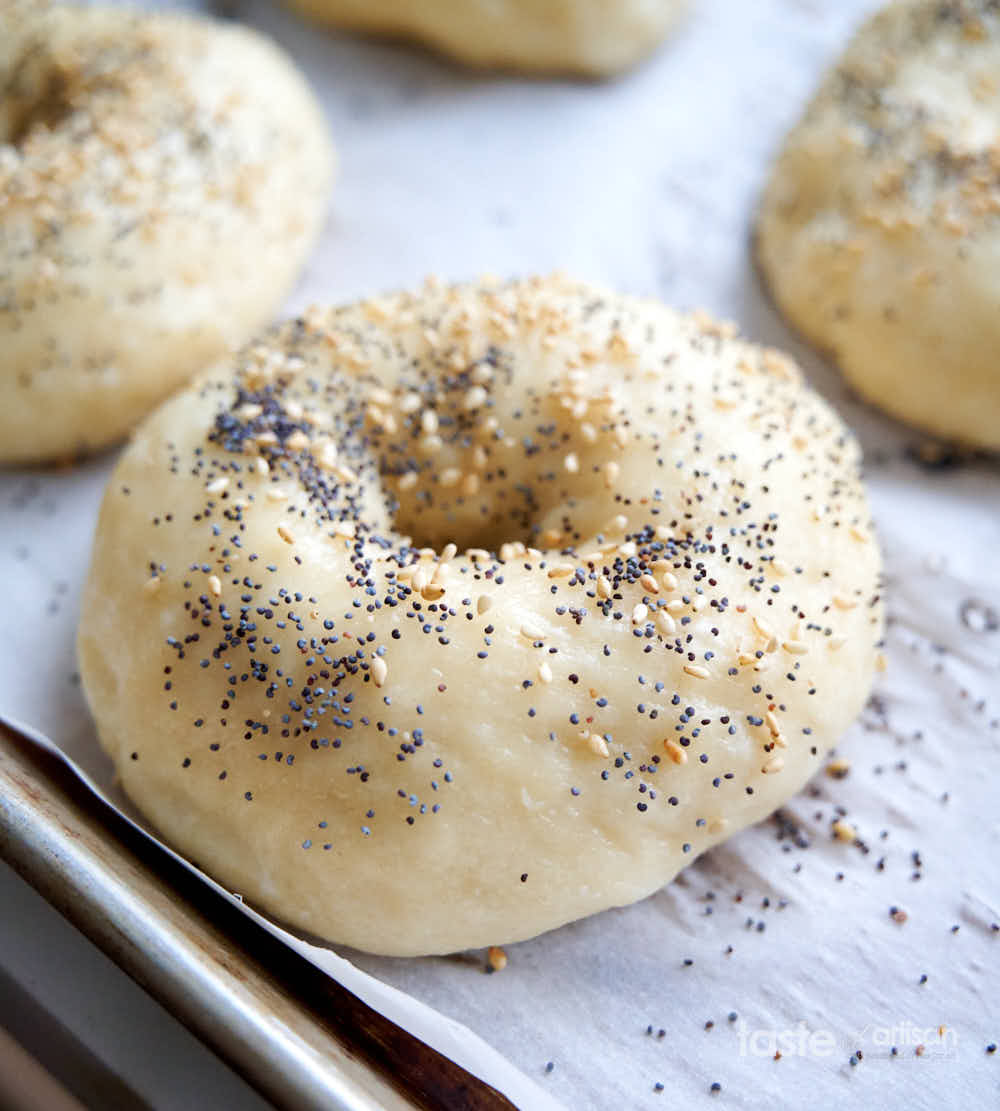
The typical baking time is 12-15 minutes at 450F (235C).
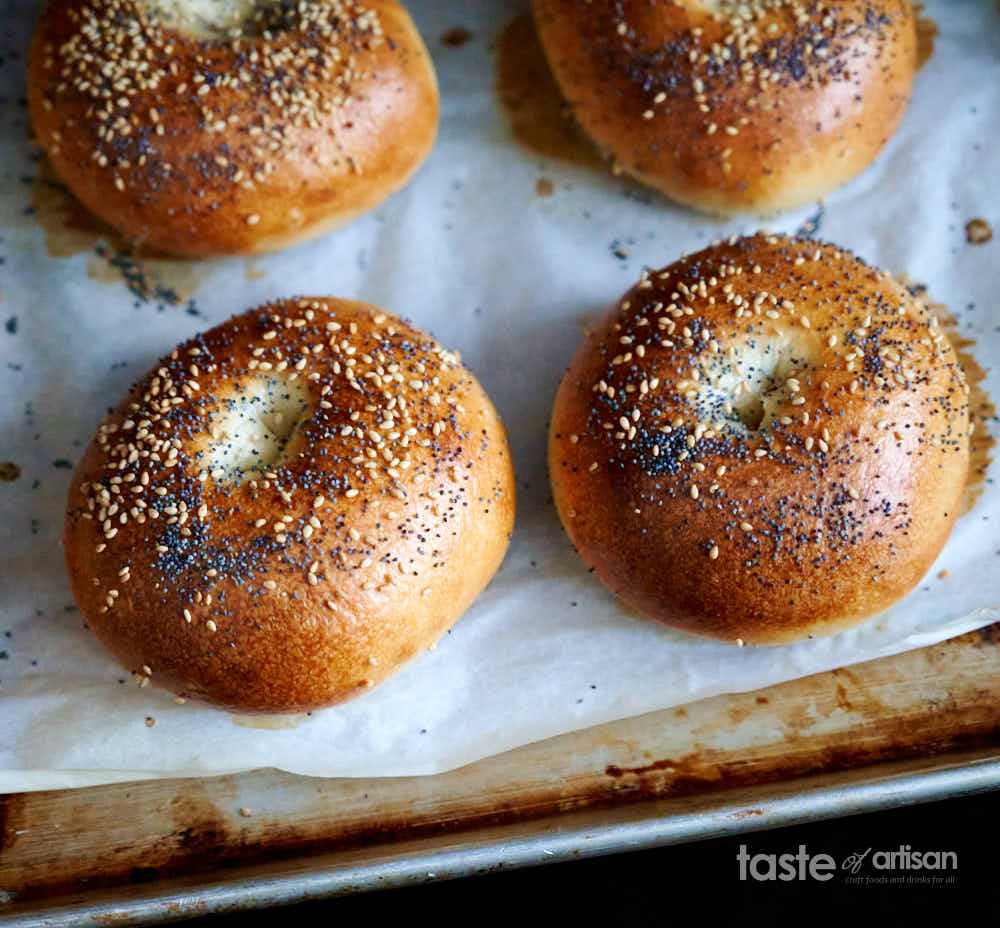
I've made this recipe in an electric and a gas oven, and I could never get that rich, dark golden brown color I like. I could bake them for longer, but that dries the bagels out, and they come out less moist and slightly tough. Using an egg wash is an option, but bagels do not use egg wash traditionally.
Instead, I bake them for 10 minutes in regular baking mode and the remaining 5 minutes with convection. That gives me the perfect texture and beautiful color.
Storing Bagels
Place hot bagels on a cooling rack and let them cool down completely. This will take a couple of hours or so depending on the ambient temperature.
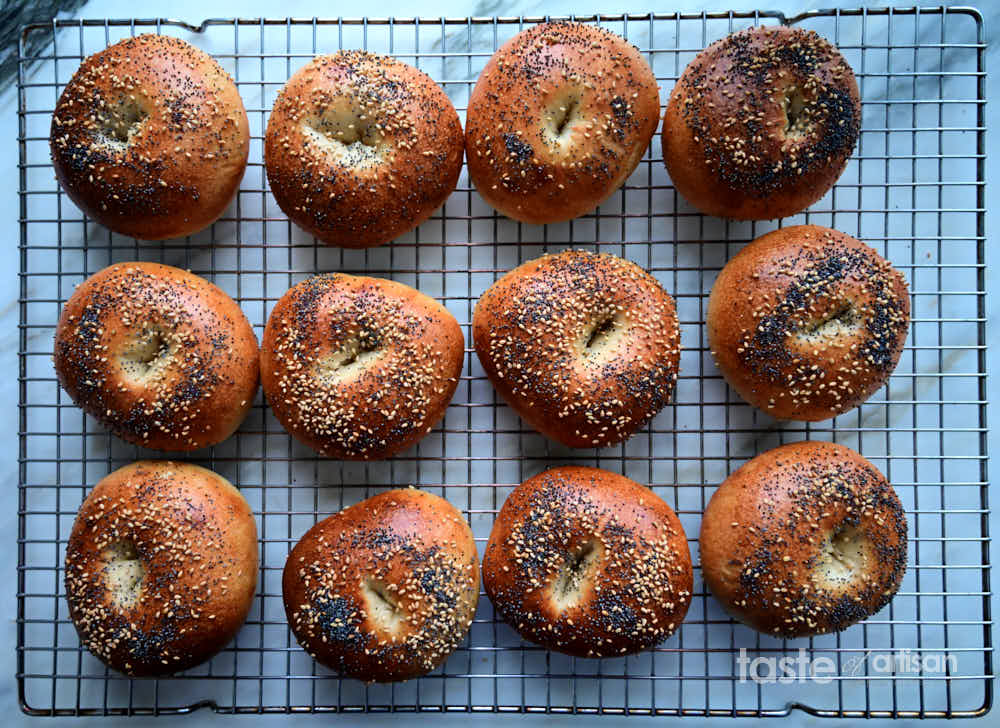
Once the bagels are cool, place them in a plastic bag, expel as much air as possible, and store them at room temperature for up to 5 days.
Do not refrigerate your bagels, as that will harden them.
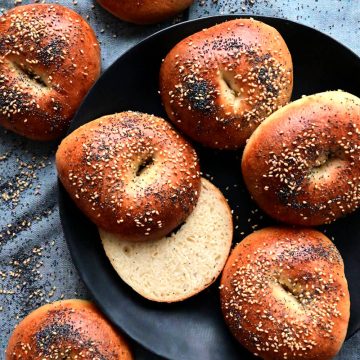
How To Make Classic Bagels (Soft, Chewy, Crisp)
Print Pin RateIngredients
- 850 g High gluten flour I bake with King Arthur's Sir Lancelot HG flour. See notes. If measuring in cups, use the 'scoop and sweep' method.
- 475 g water
- 48 g canola oil See notes.
- 36 g sugar
- 9 g instant yeast Also known as Quick Rise or Rapid Rise yeast.
- 18 g kosher salt You may also use sea salt. If measuring in tablespoons, use a level tablespoon.
- 21 g honey Use rye malt syrup if you have access to it.
- 5 g baking soda
- Poppy and sesame seeds for topping
Instructions
- To the bowl of a stand mixer fitted with a dough hook, add the following ingredients in the following order: water, yeast, salt, sugar, oil, honey (or rye malt syrup), then flour.
- Mix on the lowest speed for 2-3 minutes or until the ingredients are mixed together. Switch the speed to the second-lowest and continue mixing for another 5-7 minutes. The dough should pull away from the walls of the bowl and become strong and elastic/stretchy.
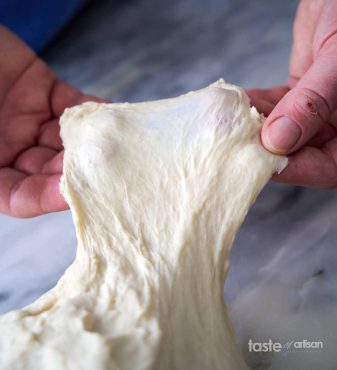
- Cover the bowl and let the dough ferment for 1 to 1.5 hours at room temperature (1 hour if the ambient temperature is warmer and 1.5 if it is cooler). The dough should almost double in volume.
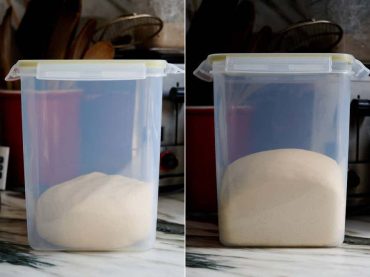
- Divide the dough into 12 equal pieces and shape them into balls. Place the balls on a baking sheet or a large platter. Cover and refrigerate for 1 hour.
- Next, take the dough balls out of the fridge and shape them into bagels. Use your finger to poke a hole through the center of each ball, then, using your fingers, stretch the dough into a ring about 5" in diameter.
- Place the pre-shaped bagels on a baking sheet lined with parchment paper. Let the bagels proof at room temperature, uncovered, for 1 to 1.5 hours. The bagels should firm up and slightly increase in volume but not much. If baking the next day, refrigerate right away until ready to bake. You can keep them in the fridge for up to 24 hours.
- Preheat the oven to 450F (235C) without fan/convection.
- Bring a large, wide pot of water to a boil. Add a teaspoon of baking soda and stir well.
- Carefully add 1 bagel to the pot. Boil for 30 seconds, flip and boil for another 30 seconds. Using a wide slotted spoon/skimmer, remove the bagel from the boiling water and place it back on the lined baking sheet. Repeat until all bagels are done. If you are comfortable with it, you can boil 2-3 bagels at a time.
- Sprinkle bagels with poppy seeds and/or sesame seeds, or any other seeds that you like, or leave them plain.
- Bake the bagels for 12 to 15 minutes in total, with the last 5 minutes with a fan/convection to give them a nice color. All ovens bake differently so keep a close eye on your bagels the first time around and make adjustments if necessary.
- Carefully transfer the bagels to a large cooling rack and let them cool for 20 or so minutes before serving.
Special Equipment
- Stand mixer with a dough hook
Notes
Nutrition


Alan B says
Excellent bagels. I made a double recipe and kneaded by hand, so it took about 13-15 minutes to get the dough where I wanted it, but what a beautiful dough! In my 70° kitchen, it took about 1:20 to ferment. I did 115g dough balls, shaped them and put the pans right into the fridge for about 14 hours. I added a little sugar to the boiling water along with the soda, and brushed them with egg white/water mixture to help the toppings adhere and to give the plain ones a gloss. I liked cooking at 450° because it gave them a great oven spring and a nice brown crust. The only thing that would have made them better would be if I hadn’t been out of malt syrup because that’s a flavor I love in a bagel, but nobody else had any complaints!
Victor @ Taste of Artisan says
Glad you liked my recipe, Alan. Thank you for the detailed feedback. Happy baking!
Sandy LeSarge says
Love this website and bagel recipe as well.
Made them many times with different inclusions-blueberry, cranberry have been great.
My lastest is Sundried tomato and basil bagels that a friend requested. They are amazing and turned out well.
I would love to post a picture!
Victor @ Taste of Artisan says
Glad to hear it, Sandy. I love blueberry bagels, one of my favorite flavors. Never tried using sun dried tomatoes and basil but sounds delicious. Do you mind sharing some details? Thank you! I emailed you, you can send me your picture and I will attach to your comment here.
Nicole says
This is an amazing recipe! I was a little skeptical about adding oil, as most bagel recipes I've tried until now didn't include it, but these are by far the best bagels I've ever made. I made a few minor adjustments- using barley malt syrup instead of honey, and I also found that increasing the amount of water to 520g worked much better for me. It could be due to the percentage of protein in the bread flour I'm using, but I wasn't able to get the right amount of stretch and my dough was very hard to mix without adding more water. I've also now tested the recipe both by doing the entire process in the same day, as well as over two days with the overnight rise and found both methods to work perfectly! The overnight rise adds delicious flavour! This is also the only recipe where I've had success with leaving the shaped bagels in the fridge overnight. With other recipes the bagels tended to overrise and balloon during the overnight process but then they would deflate when being transferred to the boiling water. I found that the oil in these makes them a lot easier to handle, and they don't deflate. My bagels looked exactly the same with both methods! I love how chewy yet soft these bagels are! Thank you for developing and sharing this delicious recipe 🙂
Victor @ Taste of Artisan says
I am very happy that you liked my bagel recipe, Nicole. You are very welcome. My family loves it, and we all also think that this recipe makes the best-tasting bagels. We all have different tastes, some people may prefer other styles of bagels or other recipes, and that's totally fine. But I get excited and happy when our tastes coincide and my dear readers enjoy what I am my family enjoy just as much. Thank you very much for your detailed feedback and the kind words.
Happy baking!
Allen Bernklau says
Thanks for the recipe but i am not getting the oven spring that you are getting on these. They arent bad just not as puffy and tall as yours. Did the overnight rise after shaping. Any help would be appreciated. Boiling continued as they were lowered in as i used a very large pot. 1st rise was good and followed instructions carefully.
Victor @ Taste of Artisan says
Allen, try this - look for 2x volume increase during fermentation, and 30-50% volume increase during proofing. I think your may have been under-proofed. I am quite sure this will help. Good luck!
Allen Bernklau says
Thank you for the comments Victor. I have been putting them in the refrigerator immediately after shaping till the next day. Should i be leaving them out for awhile before refrigeration to proof? I am afraid of overproofing and having them flatten after boiling which happened a few times with a different recipe.
Victor @ Taste of Artisan says
Hi Allen, apologies for the delayed response. You may need to experiment a little, as there are many factors at play. Temperature is one of them. Ambient temperature, fridge temperature. I would say that normally, I let the dough sit at room temp for 30-60 minutes to get the fermentation started (as in my French baguette recipe, for example). Yes, that helps sometimes. I don't find it's needed in this recipe, but it may help in some cases, like when the ambient and fridge temps are cooler. Hope this helps. Good luck.
Martha says
Thank you! Over the past two years, I have tried at least a dozen different bagel recipes. I've purchased bagel cook books too, but this is the absolute best recipe. Not only is it well written with explicit steps to assure an amateur baker will be successful, the suggestions and tips were very helpful. Absolutely delicious!
Victor @ Taste of Artisan says
Happy to hear it, Martha. I, like you, had a hard time figuring out how to make a really tasty bagel. Took me a while... but this recipe is perfect for me. It works well and the bagels are just how I like them. I am glad you liked my recipe and the instructions. Enjoy! Thank you for the detailed feedback.
Sindy says
Hello,
for what is the oil? I’ve tried a few recipes and this is the first one with oil in it.
Thank you.
Sindy
Victor @ Taste of Artisan says
Hello, it's for softer and tighter crumb.
Ioanna Pelidis says
Hi Victor! Great recipe! My absolute favourite! I was wondering if letting the first ferment happen overnight will affect the recipe or not? I want to prepare them to bake them fresh the morning of without having to do too much work in the morning. What would you recommend?
Victor @ Taste of Artisan says
Hi Ioanna, you are very welcome. To be honest, while I often retard fermentation stage when making bread, I've never tried that with bagels so I don't know if that will have an adverse effect. However, you can easily retard the proofing stage, which will make it even easier for you to bake in the morning, and that's what I've done many times with success. So, after you shape them, put them in the fridge right away, then the next morning all you need to do is boil and bake. Good luck!
Ioanna Pelidis says
Hi Victor!
Thank you so much!
Would you recommend they are covered when put in the fridge or uncovered?
Victor @ Taste of Artisan says
Hi Ioanna, humidity in the fridge is too low and that will cause forming a hard crust, so it's best to cover. Happy baking!
Rita says
These turned out amazing! I let the bagels ferment overnight and added a bit of sourdough discard to increase their shelf life but they were gone on the first day! Super tender and a bit of crisp on the outside.
Victor @ Taste of Artisan says
I am glad you liked my recipe, Rita. Enjoy!
Malin says
Best bagel recipe I’ve tested so far, and I’ve tested a few! Tried it twice now (once with regular flour as I didn’t have any bread flour at home and once again with bread flour) - both times it turned out amazing.
Victor @ Taste of Artisan says
Happy to hear it, Malin. I agree. I love this recipe and I don't care about any other bagels any more:). We have a small bakery near where we live and we used to love their bagels. Alwasy freshly baked, chewy and very tasty. They sell out like hot cakes. My daughter is a bagel girl, should could eat one for every meal if she was allowed. We used to buy bagels there regularly but once this recipe was perfected we stopped and only bake our own now. No comparison. And easy to make once you've made them two-three times.
About the flour, this recipe will work, as you noted, with different flours- AP or bread - but I love using high-gluten flour the most if you want chewy bagels; I love them very chewy. Happy baking!
Rose says
I recently made these bagels and they turned out so good! They were really simple and easy to make. I love how sweet, chewy, and soft they are. And even after a couple of days of sitting out, they were still just as good as the day they were baked. Thank you!
Victor @ Taste of Artisan says
Glad to hear it, Rose. Enjoy!
Lisa says
Should the dough rise significantly during step 3? You say the dough will ferment but don’t say anything about a change in volume. Can you be more specific?
Victor @ Taste of Artisan says
Lisa, the dough should almost double in volume. I updated the recipe with a picture, I hope that helps. Enjoy!
Lisa says
Thank you!
Victor @ Taste of Artisan says
You are welcome, enjoy!
Robert M Bell says
REAL!! bagels are NOT made by sticking your thumb through a ball of bagel dough!!! Real bagels are made by rolling the dough into a log, pinching the ends to make them smaller and then joining and tying the ends together. Anything short of that is just a poor imitation of an already poor imitation, those mass produced bread-in-the-shape-of-a-bagel "bagels" sold in grocery stores.
And I'll take a Montreal bagel over a N.Y. "bagel" any day.
[email protected],
Oakville, ON., Canada
Victor @ Taste of Artisan says
There are many ways/techniques to make a bagel, just as there are many ways to make baguettes, sourdough bread, etc. I think it's very limiting to think that there is only one right way to make a "REAL" bagel or anything else.
Oana says
Hi, I just made bagels and was the first time in my life. They look great and nice color.
Victor @ Taste of Artisan says
Glad to hear it, Oana. Enjoy! You are welcome to try my other recipe, plenty of good ones here. Happy baking!
Reva says
Hi Victor
Why does the bottom of my bread and bagels come out pale and soft. How do I get a coloured better textured underneath?
Victor @ Taste of Artisan says
No idea. But you could bake them in a lower position in the oven provided the heat source is on the bottom, or bake them on a thick pizza/baking stone. Convection may help as well. Happy baking!
SJ says
I found the same and I flipped them over for an additional 3 minutes.
I do believe the pan I used is the problem as I used an Air Bake sheet the first time around. 2nd time I used a regular, single layer sheet pan and the bottoms crisped up nicely.
Traci Sharrock says
I’ve been trying out different bagel recipes the last few weeks and hadn’t found the winner until this one. I made some with Asiago cheese and some with everything seasoning. When my husband tried it last night he told me that it was the best bagel he’d ever had and I needed to open a shop haha. That said, I would love to see some of the ingredients in tsp/tbsp also, as I don’t have a micro kitchen scale and had to try my best to convert.
Victor @ Taste of Artisan says
Traci, thank you for the feedback. I am glad to hear that you enjoyed my recipe. I will do the conversion for those who want to use imperial measures but I have to warn you, those are imprecise and results may be different. Enjoy!
Kelley says
This is the best bagel recipe I've tried and I've tried many. Seldom do I come across a recipe that just works, and let me tell you, you've hit the nail on the head with this one. It just works. I followed it to the tee and my bagels came out perfect. The best bagels I've ever tried, I am not kidding. They look so good too, I wish I could attach the picture. I'm very happy that I found this recipe, it's a keeper. Thank you so much for sharing it.
Victor @ Taste of Artisan says
Hi Kelley,
you are very welcome, glad you liked my recipe. I emailed you about the picture. Send it to me and I will attach to your comment. Enjoy!
Victor @ Taste of Artisan says
Thanks for sending a picture of your bagels, they look fantastic. Such wonderful golden-brown crust. I need to bake a batch asap;)
Anastasia says
I've made these twice already with excellent results. I really like the texture of these bagels. Haven't tried cold retarding the dough in the fridge for 24 hours but will do on my next attempt. I hope that it improves the flavor even more but they are delicious as is. This is my go to bagel recipe now. Thanks a lot of sharing.
Victor @ Taste of Artisan says
You are very welcome. Enjoy!
Stefanie says
The flavor of these is really good, and the ratio of water to flour was right for me, which I always struggled with when I tried other bagel recipes. the dough is silky and slightly tacky. Will be making these again.
Chris David says
Its really a nice recipe and mouth watering.