Top Round Roast, cooked low and slow over open fire on a rotisserie, until perfectly fork-tender. Garlic and herb-crusted, smoky and evenly cooked side-to-side, this roast is a delight to eat. Serve with roasted vegetables for a healthy, low-carb, paleo-friendly meal.
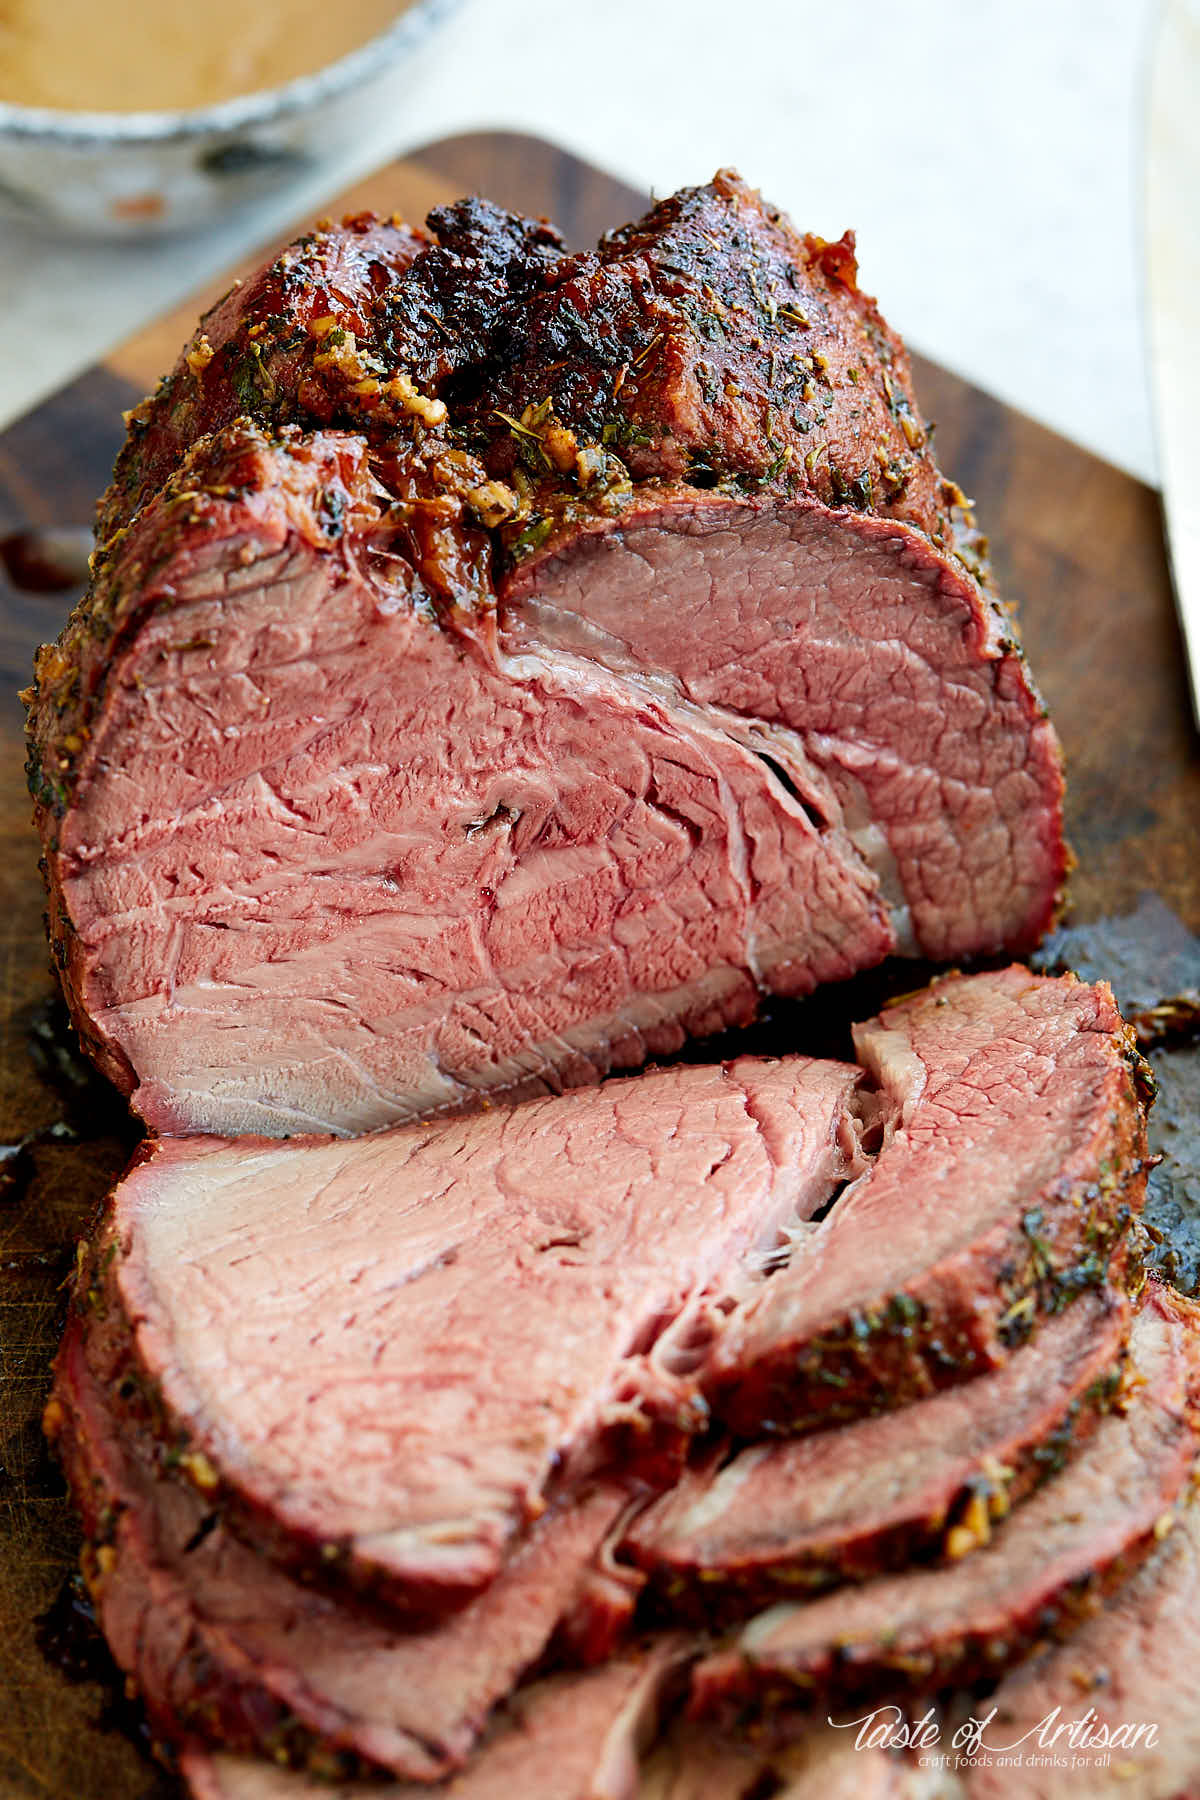
The weather has finally warmed up here up north, making it a great time for grilling and roasting over open fire. Not that cold weather ever stooped me from grilling; I just do it more often when it's nice outside. With my recent acquisition, a Joetisserie from Kamado Joe, I was able to make some ridiculously good roasted chickens and I've been dying to try it out with a beef roast.
I've heard people refer to top round roast, also known as inside roast, as a 'poor man's prime rib roast' and as being one of least flavorful beef cuts. Despite that, that's the cut that I picked for roasting. While prime rib may be the king of roasts, top round roast wins in my book by being much leaner and, therefore, healthier. It's a more economical cut, too. This looks like a win-win type of roast to me. I was convinced that I could make this cut just as tender and flavorful, just needed to pay attention to details.
I started off by picking Choice grade Certified Angus Beef top round roast. There are numerous debates out there as to whether Angus beef is any better than regular beef, but my experience is that it does tend to have slightly better, more uniform marbling. This is a desirable attribute to have for a lean cut that will be roasted.
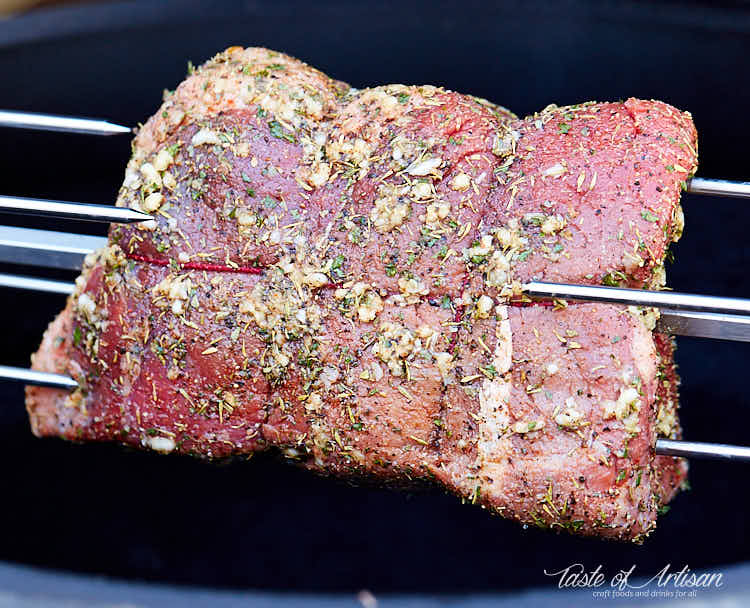
The bark on a roast is matters a lot. It adds a ton of flavor. I went with the basic salt and pepper, cayenne for some heat and a basil, thyme, and parsley combination for aromatics. Oregano is another good herb to use for roasted beef but I chose not to use it this time. To finish it off, I crusted my top round roast with 5 large cloves of minced garlic.
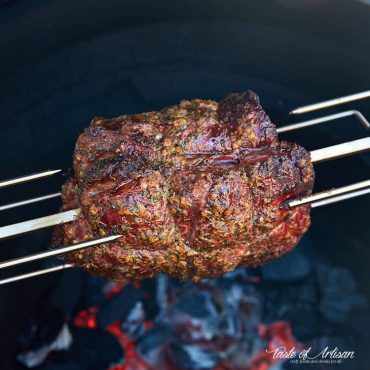
Then on the spit it went, and onto the charcoal grill fitted with JoeTisserie and preheated to 325F measured at the dome. I tried to make sure that the juices stay inside the meat as much as possible, so the forks just barely touch the meat.
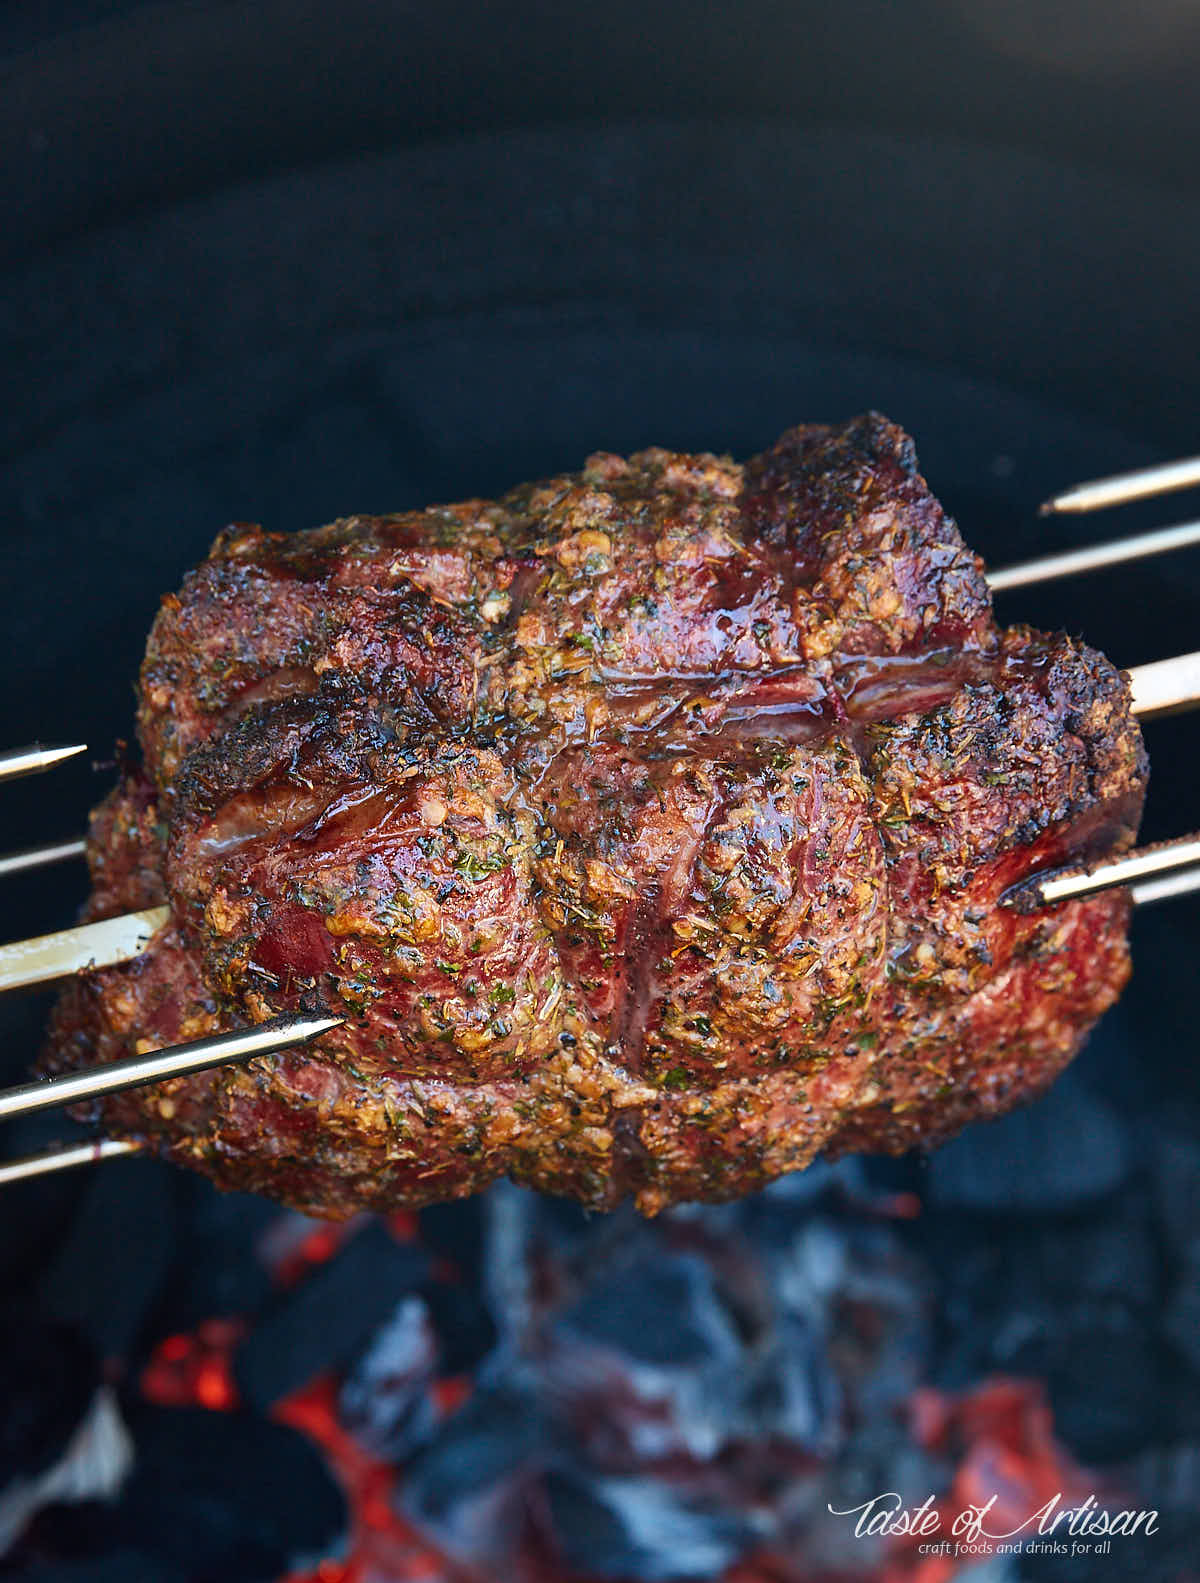
Most of the roast was done at 325F, with the temperature rising to about 350F toward the end of the roast. It took approximately 1 hour and 25 minutes for the meat to reach 135F target internal temperature. I added two wild cherry wood chunks on each side of the fire box for some smoky flavor and color.
So, what's the result? OMG! is all I can say. The outside of the roast had a beautiful, rich dark red color and was perfectly caramelized without any burning. The bark turned out very tasty and flavorful with a nice kick to it. I was a little concerned that the dry herbs would burn being exposed to open fire, but none of that happened. The self-basting that happens during roasting on a rotisserie kept the herbs moist and did not let them burn. The garlic bits came out beautifully browned and roasted, and smelled so good that it probably made the entire neighborhood hungry.
The best part is how evenly roasted side to side the meat came out. I did not expect that. The meat did not come in contact with hot surfaces, like when you cook in the oven, but I was sure direct heat would over-cook the meat at the surface. Even if a little bit. If you google for 'top round roast', or any beef roast for that matter, you will see the images of sliced roasts showing pink centers with a grey ring around near the surface. There is absolutely none of that here. The pink, moist interior is perfectly uniform from side to side of the roast. That's the magic that constant rotation of the meat brings with it. It's quite impressive.
The meat itself was perfectly fork-tender and juicy. The flavor was definitely there and nothing was missing. I will definitely be making this roast again.
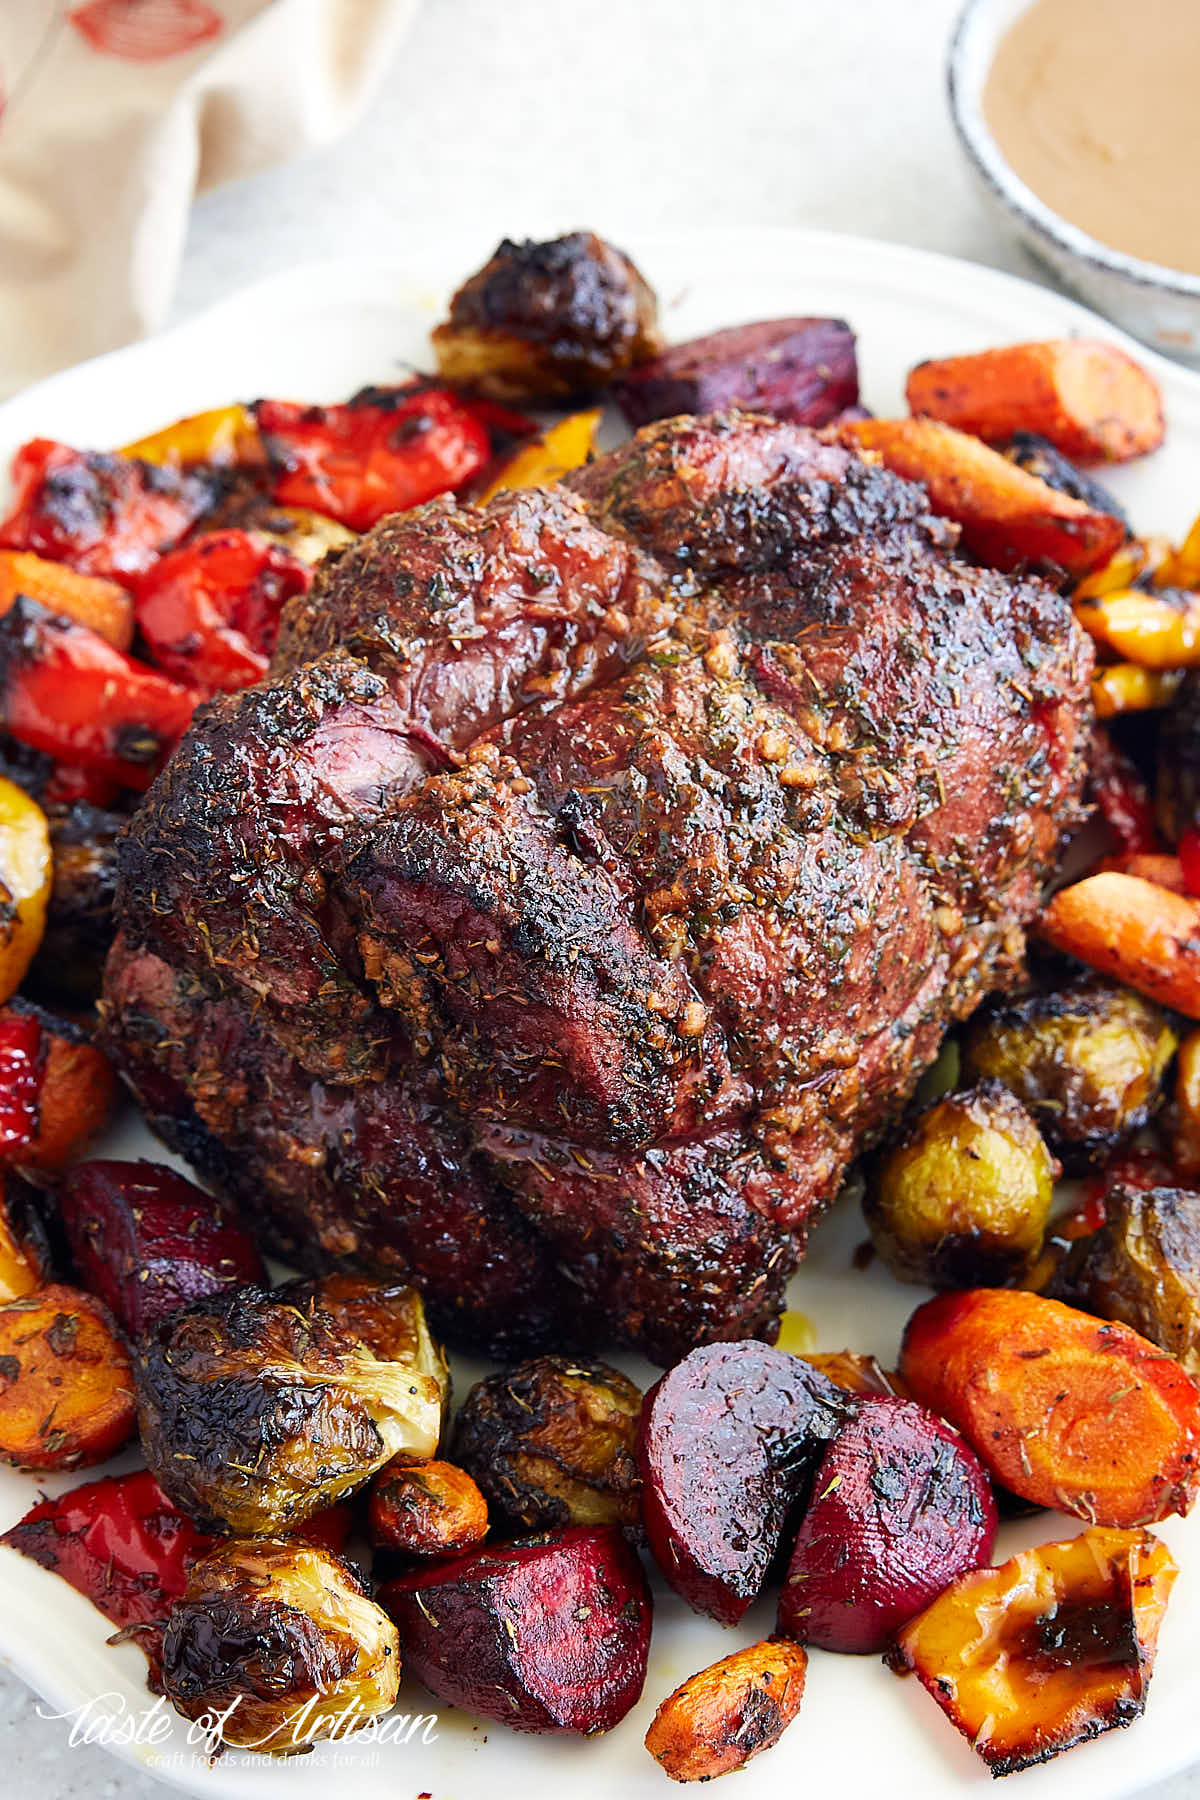
I served my top round roast with Roasted Vegetables for a healthy, vitamin and nutrient rich meal. The two paired really well. Nobody missed mashed potatoes, a popular accompaniment for a beef roast.
To be honest, I did not know how tender and juicy the roast would turn out so I prepared some gravy to go with it. While it was not necessary, it made the roast taste even better. Surprise-surprise. Similar to bacon, it makes almost everything taste better.
Rotisserie Top Round Roast With Garlic and Herbs
Print Pin RateIngredients
- 3-4 lb top round roast
- 1 Tbsp kosher salt
- 1 Tbsp dried basil
- 1 Tbsp dried thyme
- 1 Tbsp dried parsley
- 5 cloves garlic pressed
- 1 tsp cayenne pepper
- 1 tsp black pepper coarsely ground
Instructions
- Sprinkle the salt evenly all over the roast, patting it down as you go to make it stick to the meat. Repeat this step with black and cayenne peppers, followed by herbs.
- Finish by applying minced garlic evenly all over the roast and patting it down as you go.
- Secure the roast on a spit and roast over direct heat, lid closed, at 325F (at the dome), for about 1 1/2 hours, until desired doneness. I pulled my roast at 130F internal temperature for medium well doneness. Add a couple of chunks of wood for some color and smoky flavor in your grill. I used wild cherry wood for this roast.
- While the top round roast is on the rotisserie, roast some vegetables in the oven.
- Let the roast rest for about 5-10 minutes before slicing.
- Slice and serve with roasted vegetables.


Anne Proctor says
I don’t have a rotisserie or a grill. I have a vertical spit that I use for gyro meat. Can you give me directions using an oven?
Victor @ Taste of Artisan says
I am afraid I can't help you with that as I've never made gyro meat in an oven on a vertical spit. Perhaps someone who did will comment and help you with that. good luck!
Lisa says
Hi, I'll be cooking this recipe on a BBQ Rotisserie. What temperature and changes to the process are required?
Victor @ Taste of Artisan says
Lisa, I don't know what BBQ Rotisserie you have but the temp and the process shouldn't differ. I would stick what's in the recipe. Good luck!
Pam says
I love getting recipes on here. They're the best around. Can't get them out of a cookbook. Thanks
Victor @ Taste of Artisan says
Thank you for the kind words, Pam. It's very inspring and movitating to hear words like these from my readers. Happy cooking!
Tina says
Cooked this yesterday on our kamado and oh my goodness… it was just devine. Such a simple recipe and the smell and taste was just amazing. Will definitely be doing this again. Thank you for sharing. 😊
Victor @ Taste of Artisan says
You are very welcome. Enjoy!
Pablo says
I will provide an update tomorrow. Am getting ready to put a 25 lb. top round roast on to the spit as soon as I'm done here.
I just hope I don't screw things up. Thanks to the advice here, I'm expecting great success. I will let you know how it goes.
Have a great Christmas.
Victor @ Taste of Artisan says
Good luck! Hope all goes well.
Brian says
Hi there, great looking roast! I’m looking forward to trying it. With regard to your root vegetables, did you cook them in a rotisserie basket? If so, did you put them on the same time as the roast? 🥳 -Thanks, Brian
Victor @ Taste of Artisan says
Brian, no, those I cook in the oven, here is my recipe for roasted vegetables. Enjoy!
mark andrews says
tried this and followed the ditections exactly best roast I ever cooked love the rub
Victor @ Taste of Artisan says
Happy to hear it, Mark. Enjoy!
JC says
Doing this one today
Victor @ Taste of Artisan says
Good luck! Would love to know how it turns out and see some pics.
Chris says
Looks amazing im gonna try it tomorrow on my weber rotisserie. Question tho I got 2 coal baskets, should I put them on both sides or use one on 1 side?
Victor @ Taste of Artisan says
Hi Chris, a little too late but still - I'd use two coal baskets on both sides, it will cook faster and give you better browning.
Jenni Thompson says
Loved this recipe! Loved the simple ingredients and instructions and it turned out just great! We'll definately be doing this again with our rotisserie!
Victor @ Taste of Artisan says
Jenni, I have a few more really good rotisserie recipes, will be posting them in the near future.
Dan says
I have a smallish top round roast waiting for this very recipe!
Question: did you tie the roast? I can’t quite tell for sure from the pictures. But especially since you mentioned you attached it to the spit without really piercing it with the forks, it seems like it might flop around a bit without being tied…?
Victor @ Taste of Artisan says
Hi Dan, yes, I tied it. You are right, depending on the roast, it may flop around wont' look as neat, so tying is a good idea. Good luck!
Chris vollmer says
First time trying I can't wait till done it smells so good any my question is my roast when I put it on the skewers in there it's like coming apart how do I hold it together
Victor @ Taste of Artisan says
Hi Chris,
take a closer look at the picture of my raw roast, you will see a red twine there. That's what holds it together. Works well.
marianne says
Using the top round roast, I cooked it on a gas grill rotisserie using the smoker box as well. It was A M A Z I N G ! ! !
Hussey says
Thank you for ur recipe im doing a roast on my bbq now and i had to put a tray under the meat as the juices were dropping onto the flames and was catching on fire! So how do u brown the outside to get the crust without having direct flame on it? As again I had to put the plate back on to put ta tray to catch juices!??
Thank you in advanced.
Hussey
Perth
Western Australia
🤘🤘
Victor @ Taste of Artisan says
Hm... mine is fine over direct heat. Trim excess fat, that should help. What kind of rotisserie do you have? It's hard to make advice without knowing what we are dealing with here.
Lenny says
I always use a propane torch. Have for years. I use it on all of my meats for searing, sealing in juices and making a good bark.
Victor @ Taste of Artisan says
Never tried a propane torch on meat but would imagine the results would be quite different from rotisserie cooking due to the difference in heat intensity and how the heat is applied.
Sean says
What do you think of cooking the roast veg in the drip pan below the roast? If it needs a bit more cooking, can finish off while the meat rests.
Victor @ Taste of Artisan says
Sean, it's a good idea but the implementation will depend on your setup. I can't really place anything below the meat on my BGE. I do something similar though, I wrap vegetables in two foil pouches and hang them on the opposite sides of the spit. It works great, though the veggies cook faster than the meat. One other consideration is the placement of the heat source in your setup. Mine is at the bottom. If I place a drip pan below I would block the heat. But I like roasting over low direct heat, it produces the most delicious, crispy bark/crust on the meat. If your heat source is on the side, it should work well.
M C says
What are the cooking instructions if you cannot close the lid over the rotisserie?
Victor @ Taste of Artisan says
Without the lid on cooking time will be longer and you will burn through more charcoal if using a charcoal grill. Other than that, it should be the same. Just make sure to add charcoal a little at a time to prevent flareups.
Marty says
Delicious!!!
Jim Stevens says
Thank you Victor. I can't wait to see how it turns out. I may put it on my electric deli slicer and cut some super thin slices and make French dip sandwiches with part of it. Thanks again.
victor says
No problem, Jim. First time around I was trying to make it perfect, later it's just throw it on the spit and grill. It always comes out great. I've done beef, chickens, turkey and pork butt - every single one was a dynamite.
Jim Stevens says
Getting ready to do this today. Did you let the meat come to room temp before putting it on the rotisserie?
victor says
I normally don't, I believe it makes a crispier skin. If you want a more uniform cooking edge to edge, you should.