There are dozens of recipes out there for making fermented apples to suit just about any taste. This one was shared with me by a family member who has been making fermented apples for ages. I like it a lot... it makes super aromatic apples, with a good texture and a balanced taste. They are so good that you could eat a dozen at one sitting.
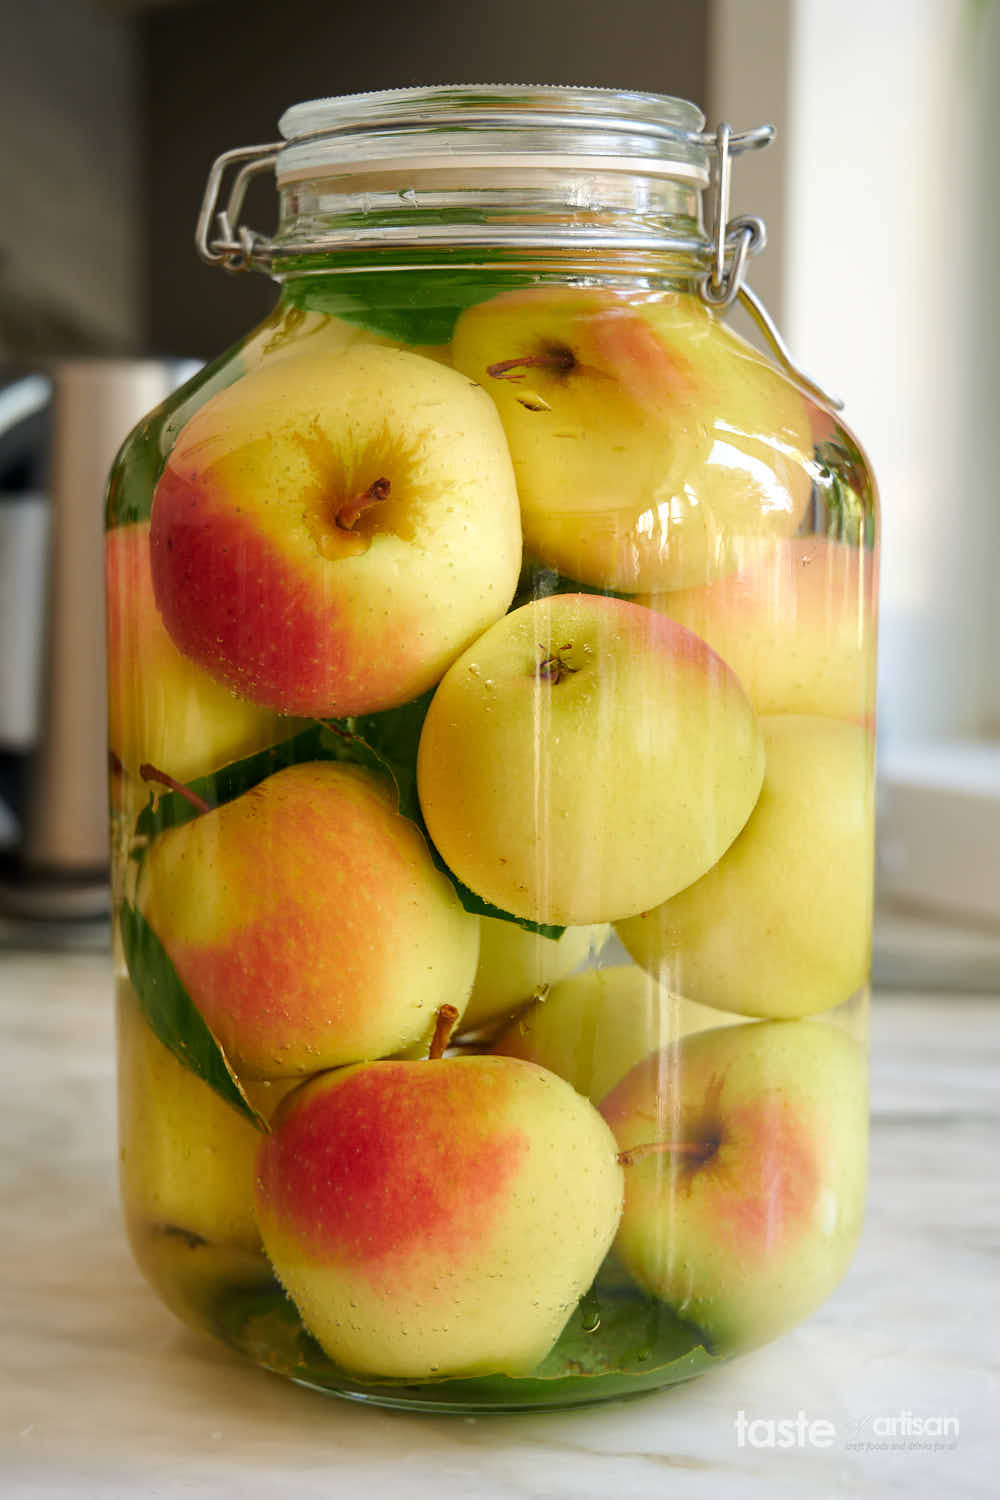
Fermentation jars for apples
It's hardly practical to ferment apples in small jars so you will need something larger, about a gallon-size ideally. These are called storage jars and you can buy them at many places, including Amazon. My favorite one to use is the spacious 5-liter/129-oz Italian-made Bormioli Rocco storage jar. You can find those in specialty stores like TJ Maxx, Winners, HomeSense and Marshalls.
Picking apples for fermenting
Summer apples are too soft hence they are not well-suited for fermentation and longer-term storage. It's best to pick fall or winter apples instead. They are denser, store well, and make the best fermented apples.
The apples should be firm and free of bruises, blemishes or cuts.
Tip: If possible, let the apples sit at room temperature for a week or even two. They will lose some of their water which means that during fermentation they will more eagerly absorb the brine.
Fermentation brine
Three tablespoons of white sugar and one teaspoon of pickling salt per quart of water is all that's needed. Make sure to use clean, drinking water. Dissolve the sugar and the salt in room temperature water using a whisk. Make enough brine to fill whatever jar/jars you have. For example, my 5-liter / 5.28-quart glass jar requires 3 quarts of brine to fill it almost to the brim.
Some Eastern European recipes like adding rye flour to start fermentation but that's not necessary as apples will contain enough yeast on their surface. Just make sure not to scrub the apples, a gentle wash will do.
Additives
These are not strictly required but highly recommended. Grape and black currant leaves are commonly added to preserve the crunchy texture of the apples. These leaves contain tannins that inhibit a naturally occurring enzyme in apples that cause them to soften. Oak and cherry leaves will work too though some say that they add bitterness. I've used them and never noticed that.
Apple fermentation process
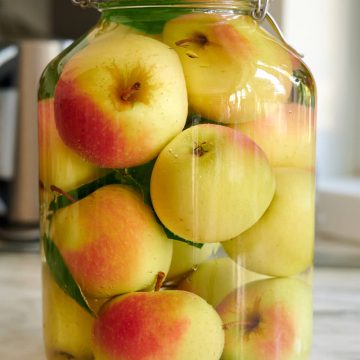
Fill jars with apples. Add the cherry and/or black currant leaves when filling the jars with apples. Add the brine leaving about a 1/3" headspace. Close with lids and ferment at room temperature for 10 days. You should see fermentation start after a day or two.
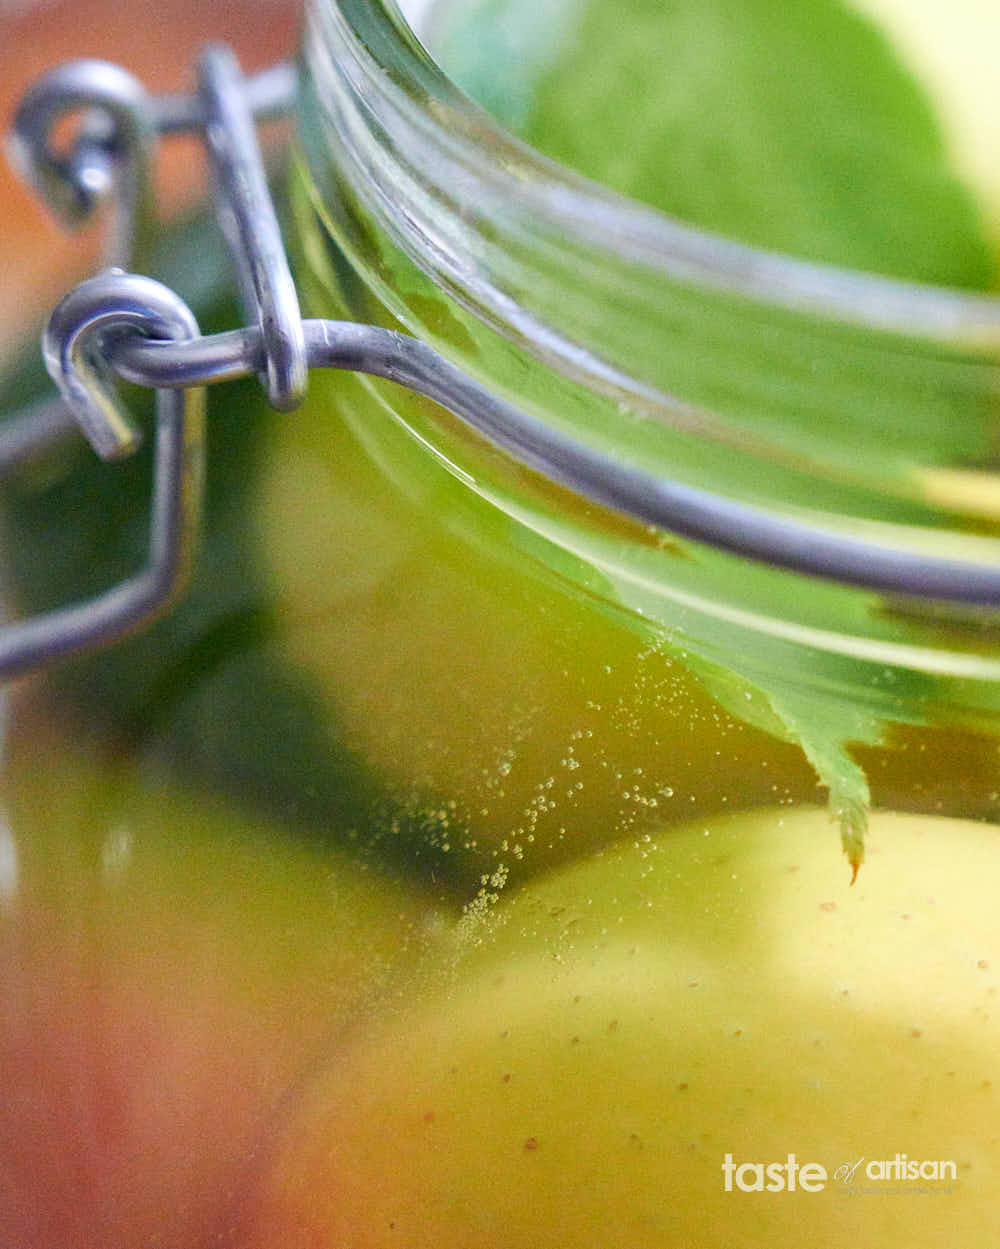
If you close the jar with a tight lid, you may not see any obvious fermentation activity. Crack the lid open, immediately you will see bubbles ascending to the top. Keep the lid closed. You can use a lid with an airlock but that's not absolutely necessary as fermentation is anaerobic by nature. You can vent the accumulated CO2 out by cracking open the lid every couple of days. While you are venting the jar, smell it... fermenting apples smell like candy, so delicious. It's a good idea to pick very aromatic apples.
Keep checking the apples and make sure that they stay submerged at all times. Add more brine if needed.
Ferment apples for 10 days at room temperature. Fermentation will not be completed by the time 10 days have passed, but we don't want apples to be sour. We want to be just slightly tangy. If you taste the brine after 10 days, it will be slightly sweet, with a touch of salt and slightly tangy. You will also notice that the brine has become a little cloudy and the apples and the leaves (if using) have lost some color.

Maturing
After 10 days, top up the jars with more brine as apples will absorb some of it, move the jars to the fridge and keep them there for 30 days. I call this process maturing, just like when making salami. Richer, more complex flavors will develop during this time and all the parts of an apple will get soaked with the brine. Fermentation will stop and the apples won't get any sourer. After that, the fermented apples are ready for consumption. Prepare to be blown away by how amazing they taste.
These apples will store in the fridge for months, 3-6 months easily and the taste will continue to improve for a few more months.
Enjoy!
Ingredients
- medium apples firm fall or winter variety; enough to fill your fermentation jar
For the brine
- 1000 ml clean drinking water at room temperature
- 38 g white sugar
- 5 g pickling salt or Morton kosher salt
- 2 cherry and/or black currant leaves optional
Instructions
- Rinse the apples (do not scrub) and the leaves (if using), and place them in a clean storage jar.
- Make enough brine to fill the jar full of apples. It will be approximately half to 2/3 of the volume of the jar. In a large bowl, combine the water with salt and sugar and whisk until dissolved.
- Pour the brine into the jar all the way to the top, leaving about a 1/3" (1cm) headspace.
- Ferment the apples at room temperature (68F-70F / 20C-21C) for 10 days.
- Next, move the jar to the fridge and mature the apples for 30 days.
- After 30 days in the fridge, fermented apples are ready for consumption.
Special Equipment
- A clean glass storage/fermentation jar

Catherine says
Bonjour,
Je n'ai pas trouvé les mesures en poids de sucre et de sel par litre d'eau. Pouvez vous me les redonner ?
Merci
Victor @ Taste of Artisan says
Done!
[email protected] says
I made these and I want to add one to my jarred applepie moonshine. The jars are hot water bathed; I can't imagine these would ruin my moonshine, any insights?
Victor @ Taste of Artisan says
Sounds like a cool idea, but I have no experience hot water bath canning fermented apples in alcohol. I know for pickles the brine needs to be 5% salt and the pickles need to be full sour to eliminate the risk of botulism poisoning. Not sure what the formulation needs to be with alcohol and fermented apples.
James Tinker says
How can you use these apples once fermented? Recipe ideas?
Victor @ Taste of Artisan says
We eat them mostly as is, but you can slice them and add to salads or you could serve them with pork or chicken. There might be other ways to use them but I am not aware of those. Enjoy!
laurence britt says
was wondering; what would it be like to eat after just the 10 days?
many thanks 🙂
Victor @ Taste of Artisan says
harder, no sufficiently fermented... once they do, the texture changes, becomes softer... But it's OK to eat them after 10 days... I can eat pickles after 3 days and love them...
laurence britt says
d'ya think most of the fruits sugars will have been used up? or is still taste a bit sweet?
Thanks for reply 🙂
Victor @ Taste of Artisan says
I think they have a touch of sweetness left in them. All I can say, they taste fabulous to me. I enjoy them a lot.
Sarah Spizale says
What is the shelve life after 30 days of making it?
Victor @ Taste of Artisan says
I've had them last me a few months in the fridge. I don't have apples, but I still have fermented cucumbers and tomatoes from last summer and they are still very good. Enjoy!
Gina says
Can you do anything with the brine after you polish off the apples?
Victor @ Taste of Artisan says
Gina, I don't do anything special with it... but you can use it as a mother stater culture to ferment other fruit and veggies. You can drink it, it's full of probiotics... as is or as base to make a more sophisticated drink. Not talking about anything fancy, just add some honey, maybe lime juice to make more tart... some ice.. you get the idea. Enjoy!
Laurent Cornu says
and with so little salt plus sugar added, the fermentation does not become alcoolic?
Victor @ Taste of Artisan says
Nope. Not at all.
Jesse Glessner says
IF the fermentation is complete and the apples have been in the fridge for 30 days can they then be pulled from the fridge and set on a shelf in the pantry for much later consumption?
Victor @ Taste of Artisan says
Hi Jesse, no, they need to be refrigerated. You may get away with storing them in a cold room at 50-55F but I'd recommend refrigerating.
Karen says
I followed the directions exactly and had mixed results. Some of the apples were firm, crisp, and very tasty with a fermented tang. Some were translucent, odd looking but still tasty. Still others had shriveled, sunken places. Not anything I wanted to eat. All were submerged completely in the brine. What dis I do wrong?
Victor @ Taste of Artisan says
Karen, it's hard for me to say what caused that as I've never experienced that... or didn't bother to notice. It could be the apples as some were quite good as you said. In general, I think softer, bruised apples may show those problems. My only issue has always been apples floating to the top if I let them and turning brown/oxidizing. I hope your next batch turns out much better for you. Good luck!
Nausicaa says
Hello
During maturing, i should crack the lid every 2 days as well as during fermentation?
Victor @ Taste of Artisan says
No need to. Fermentation will halt at fridge temps. I don't.
Cynthia Copeland says
could you please provide weight measures for the sugar and salt? Not all are the same and it's easier to work with weight so I can swap in a different sugar/salt.
Victor @ Taste of Artisan says
Done. Enjoy!
Margeth says
can the juice be used for apple cider vinegar?
Victor @ Taste of Artisan says
Technically, you could but it has salt in it, don't know if you'd want it in your vinegar.