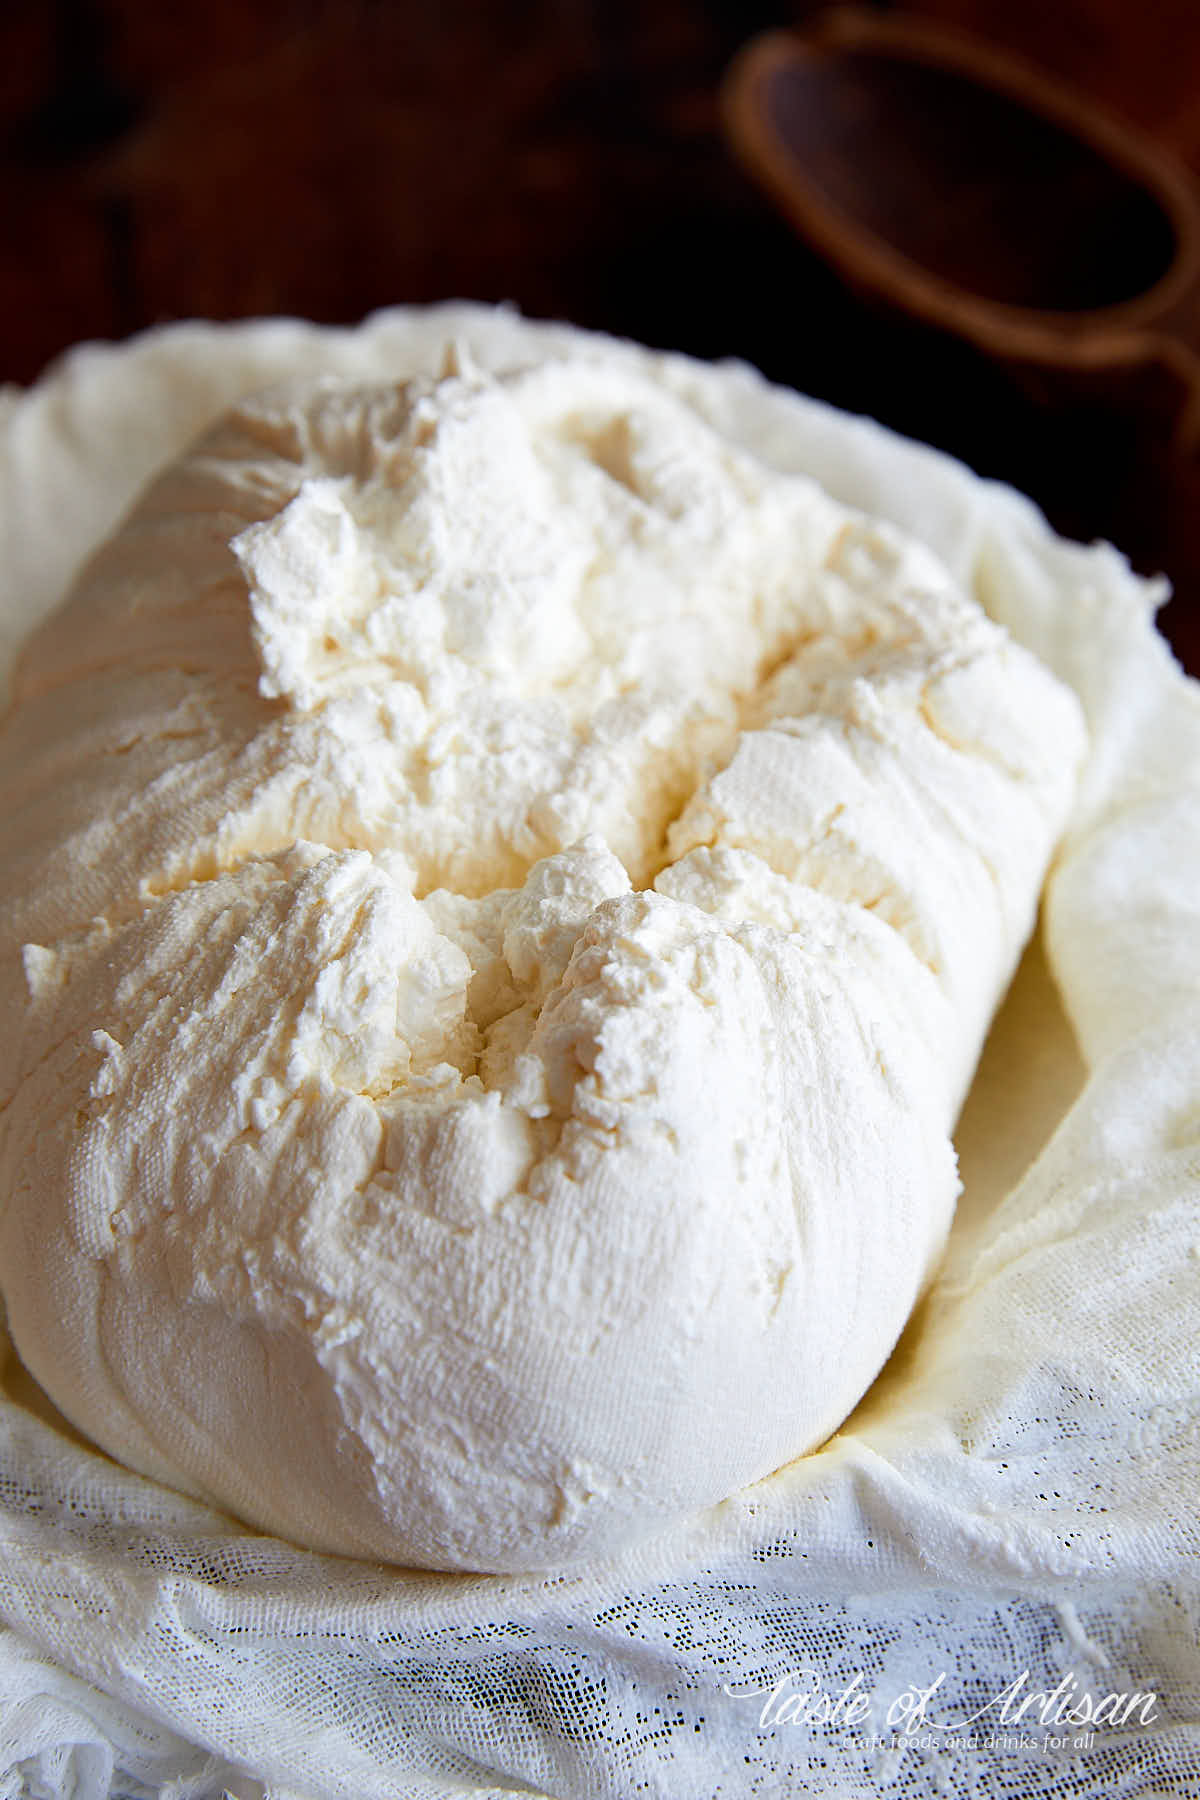
Cream cheese is an easy cheese to make at home. I much prefer homemade cream cheese to store bought as it's lighter and less dense. It has a richer flavor and just tastes better. It's not as smooth as Philadelphia cream cheese and has a touch of graininess to its texture. The reason for that is that commercial cream cheese contains stabilizers such as xantan gum, guar gum and carob bean gum which give the cheese its super smooth texture. But that's hardly a problem. Once you try homemade cream cheese it will be hard to go back to the store-bought one.
Making cream cheese
Cream cheese, as you can guess from the name, starts with cream or a mix of milk and cream. The more cream you start with the creamier the cheese will be. On the other hand, commercial cream cheese these days is made of low fat milk and a load of stabilizers which give cream cheese a similar mouth feel and taste as if it were made of cream.
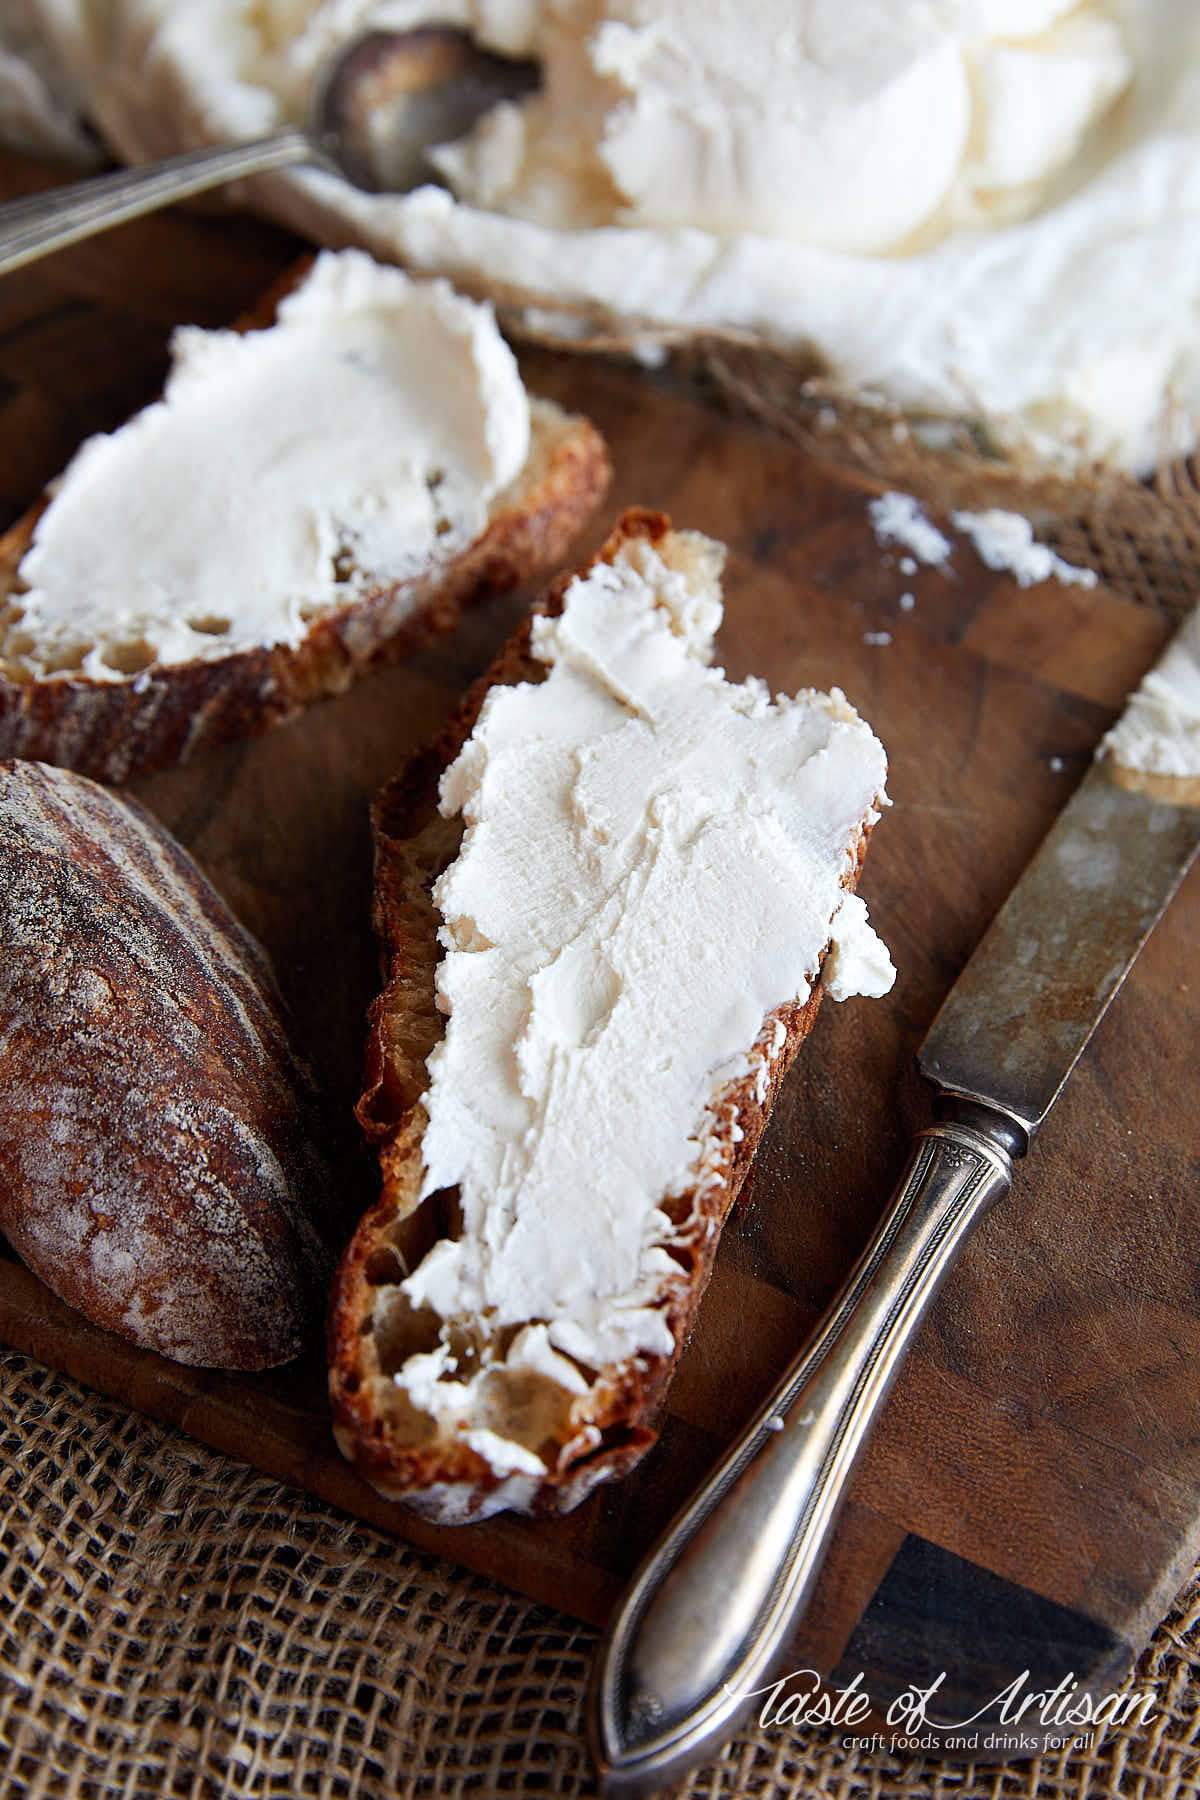
The mixture of milk and cream is warmed and combined with a mesophilic starter culture, liquid rennet and calcium chloride. After about 12-16 hours the mass gets quite thick and is then strained to turn it into a thick, spreadable cheese. It's delightful on a slice of freshly made sourdough bread or baguette.
Selecting milk and cream
Every resource I've checked suggests using milk that is not ultra-pasteurized. The cream, on the other hand, can be ultra-pasteurized. This needs to be clarified, however.
The reason why you want to use not ultra-pasteurized milk is that it contains undamaged proteins that are necessary for curd formation. Ultra-pasteurized milk is heated to higher temperatures which damages the proteins. That said, you must use either non ultra-pasteurized milk or cream, or a combination of non ultra-pasteurized milk and ultra-pasteurized cream.
If using only half and half or heavy cream, it must not be ultra-pasteurized for the reason mentioned above.
Finally, when using heavy cream only, it may be quite challenging to drain the cheese and get it to desired consistency. Hence, I always recommend a combination of milk and cream for making cream cheese.
The ratio of milk to cream
The ratio of milk to cream is a personal choice. Some recipes suggest a couple of cups of cream per gallon of milk while others recommend an equal amount of milk and cream. You can also make cream cheese from cream only. Just remember, the more cream you use the richer and smoother the cream cheese will be. The more milk you use the lighter and grainier the cheese will be.
My favorite ratio is 1 quart of heavy cream to 3 quarts of whole milk which makes tasty, light-textured and smooth cream cheese. Below are other ratios from trusted resources that you may wish to try out.
- One quart of whole milk to one quart of heavy cream. Source: Artisan Cheese Making at Home. Yield: 3/4 pound or 1 1/2 cups. A similar ratio is described in Home Cheese Making.
- One quart half and half to 1 cup whipping cream. Source: Making Artisan Cheese. Yield: 2 cups or 1 pound.
- One gallon whole milk to one pint heavy cream. Source: The Beginner's Guide to Cheese Making. Yield: 4 cups or 2 pounds.
- One gallon whole goat or cow milk and no cream. Source: Homemade Cheese. Yield: 3/4 pound or 1 1/2 cups. A similar ratio is described in Home Cheese Making.
- Four cups heavy cream to 1/2 cup whole milk. and Source: The Modern Cheesemaker. Yield: 5 oz.
Using a starter culture
The starter culture for cream cheese can be as simple as buttermilk or as elaborate as a mesophilic cheese culture. Initially, I went the simple way and used buttermilk for the starter. After a few botched and a few successful batches I eventually switched to commercial starter cultures. You can't beat their predictability and the consistent results they produce. Taste-wise, I prefer the results when using commercial starter cultures which definitely add flavor and result in a lighter texture.
So, which starter culture to use? My favorite is the Biena Mesophilic Aroma Type B. I use it for making creme fraiche, sour cream, goat cheese, buttermilk and cottage cheese as well. The most economical places to get it from are the cheesemaking.com and glengarrycheesemaking.on.ca. Another culture that I tried with great results is the Danisco MM 100 Mesophilic Starter Culture.
If using buttermilk, use about 1/2 cup per gallon of milk.
Ripening
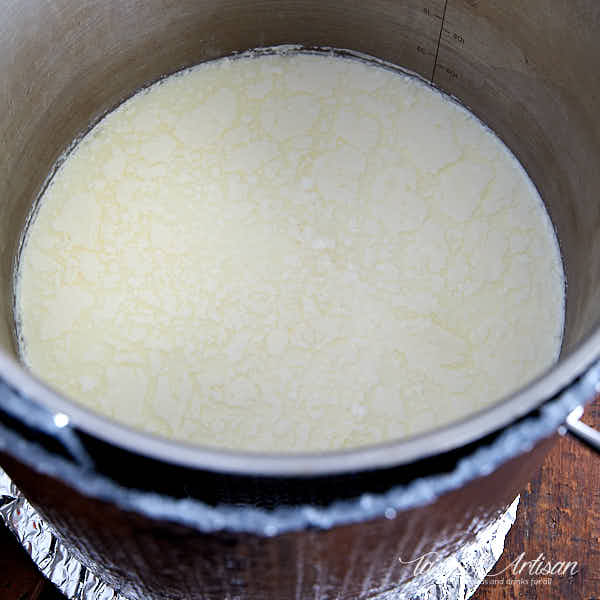
The milk and cream mixture ripening should start at about 75F-76F, the optimal temperature to activate the mesophilic culture. Though, European-style Swiss and French cream cheeses described in Home Cheese Making recommend starting and ripening at 65F and 70F respectively for 24 hours.
How long the ripening takes depends on the strength of the culture and the temperature but typically it takes about 12 to 16 hours. At lower ambient temperatures ripening may take longer, up to 18-24 hours.
Letting the temperature of the mix drop to room temperature over time is completely acceptable but if the temperature drops too fast the ripening may take much longer. There is nothing wrong with that and you may even get a richer flavor.
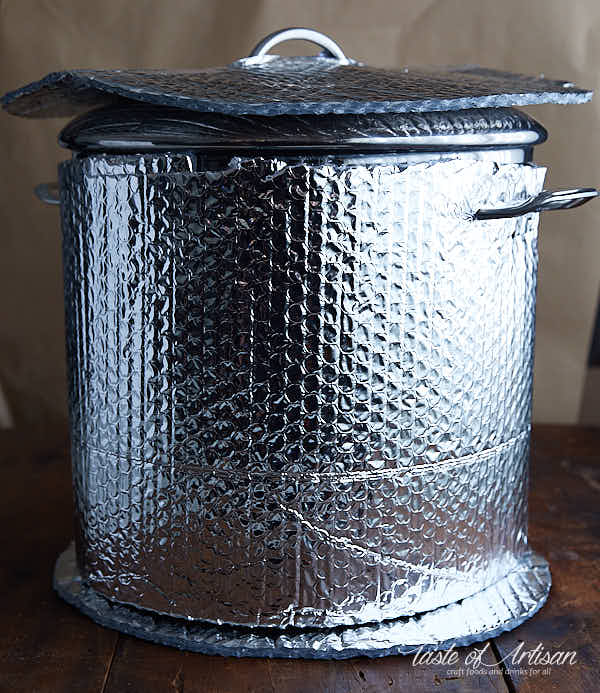
However, if your ambient temperatures are very low and you want the ripening to complete within 12 hours or so, you can wrap the pot with a couple of large towels or a blanket to slow down the heat loss. Better yet, wrap the the pot with Reflectix insulation blanket, throw a towel over the lid and it will help keep the heat in for many hours.
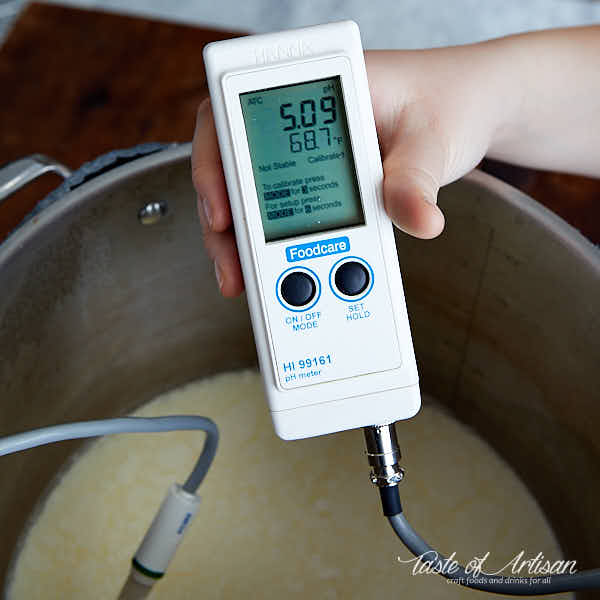
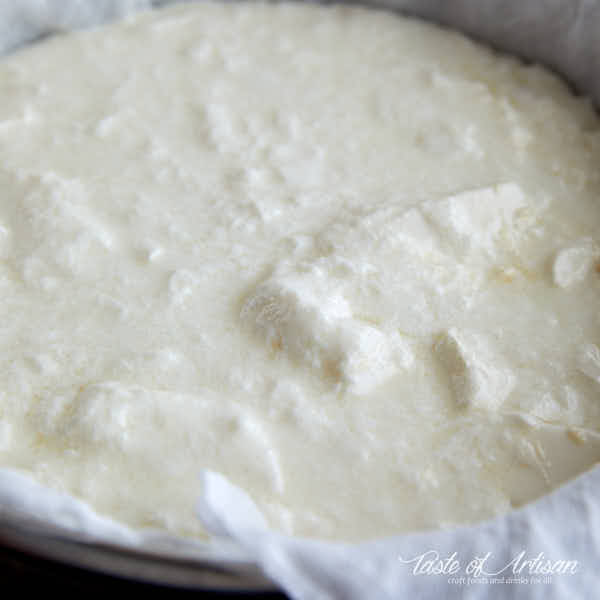
By far the biggest challenge for me has been telling when ripening is done. Not sufficiently ripened curd will lack acidity and be runny and hard to drain. Over-ripened cheese will be overly acidic.
Some sources suggest looking for separation of whey from the curd and formation of whey pools as shown below.
The most fool-proof method for me has been to test the acidity level with a pH meter. Properly ripened mixture will have the pH of 4.9 to 5.1. I highly recommend this method as it eliminates any guesswork. You can get fairly reasonably priced pH meters nowadays that do the job. A pH meter is also very useful when making fermented sausages, jams, vegetable preserves and more.
Draining the cheese
After over a dozen of batches of cream cheese I have yet to see a batch where the curd is all solid and can be easily ladled out of the pot.

I typically get a solid curd on top and a lot of tiny curds mixed with whey below. I don't know if it's the milk or something else. That said, knowing that the pH level is optimal and the curd is sufficiently ripe, I've learned to accept that. It's not a big deal after all.
What I do is set up two large colanders lined with double layer of muslin over large bowls. I ladle out as much curd into the first one as I can.
The rest I slowly pour into the second one.
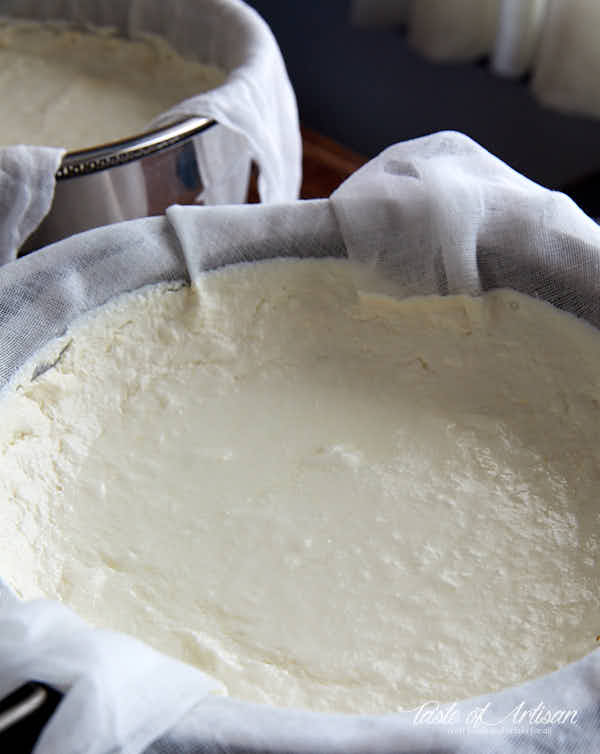
After a couple of hours of draining I combine the two.
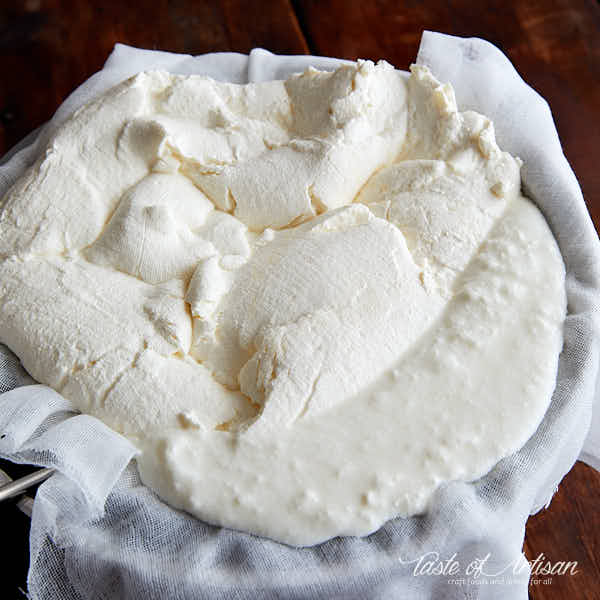
Then tie the four corners of the muslin and hang on a stick over a bowl that collects drippings.
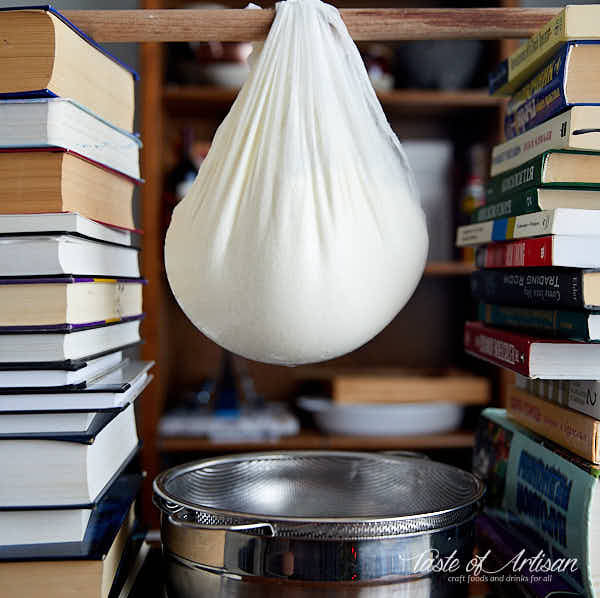
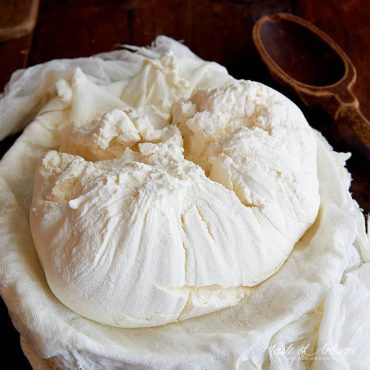
To ensure faster and more even draining I gently roll and flip the cheese ball inside every few hours. You can also use a spoon to gently mix the cheese.
Final steps and storing cream cheese
Once the cheese has the desired consistency, add a teaspoon of salt and mix well. Transfer to a clean container, close with a lid and refrigerate. In my experience this homemade cream cheese will keep fresh for up to 2 -3 weeks. I've had a batch that stayed in the fridge for almost 5 weeks and still looked and smelled good. I used it to make a cheesecake.
How to soften cream cheese
Over time cream cheese, especially if not properly sealed, will lose moisture and become hard. I find that the best way to soften it is to add a little bit of milk or cream and mix thoroughly with a spoon. If you have one, use a hand blender. Start with with a teaspoon or two and blend well. Keep adding until you get the desired consistency and softness.
Freezing cream cheese
After making a two-pound batch of cream cheese a natural question is can you freeze it to last longer. The short answer is 'no'. Freezing and thawing results in separation of water from fat in cream cheese resulting in a gritty texture. If you do not intend using two pounds of cream cheese within a few week, it's best to make a smaller batch.
Ingredients
- 3 quarts whole milk not ultra-pasteurized
- 1 quart heavy cream ultra-pasteurized or not ultra-pasteurized
- 1/4 tsp calcium chloride diluted in 2 Tbsp non-chlorinated water
- 1/4 tsp mesophilic starter culture or use the amount instructed on the packaging
- 4 drops liquid rennet single strength; diluted in 2 Tbsp non-chlorinated water
- 1 tsp kosher salt
Instructions
- Pour the milk and the cream into a large pot and slowly bring to 86°F, stirring every once in a while.
- Add the calcium chloride and stir well.
- Sprinkle the starter culture over the milk and let it soak for 5 minutes.
- Add the rennet and stir well for 20 seconds.
- Cover the pot and let the milk ripen for 12-16 hours, until the whey begins to separate from the curds and smalls pools of whey begin to form (pH level reaches about 4.9-5.1).
- Transfer the curds with a slotted spoon to a large colander lined with double layer of cheese cloth and positioned over a large pot. Allow most of the whey to drain off for 2 hours.
- Gather the four corners of the cheese cloth and tie to a knot. Hang on a stick and position over a large bowl. Let drain more for 10-20 hours at room temperature, slightly mixing with a spoon every 2-3 hours, until the desired consistency is achieved.
- Add the salt and mix once again. Transfer to a clean container, close with a lid and refrigerate for up to 2-3 weeks.

Perl says
Hi Victor, Thank you for this beautifully compiled article! I just made creamcheese 1:1 milk and cream and all went very well. Now I made a cheesecake and unfortunately it split. Do you know of a way to use the home made creamcheese for baking without adding stabilizers? regards from London
Victor @ Taste of Artisan says
Hi Perl, my apologies for the delayed response. I assume that you've made your cheesecake recipe with store-bought cream cheese and it didn't split but with homemade it did? I've had my cheesecakes split even with storebought cream cheese, I don't think stabilizers necessarily help against splitting. There are ways, however, to prevent splitting. You may have tried already, but here are the common tricks - don't overbake, bake in a water bath, don't bake high in the oven, run a knife around the edge after baking, butter the pan really well. Hope this helps.
Steve Denvir says
Hey Victor, I think there may just be some limitations with the home made cream cheese. I absolutely love it, and make it regularly. But my wife tried to use it for cream cheese icing on a carrot cake, and the icing really sagged, without its usual integrity. I think the same way that the tubs of Philly are different from the bricks of Philly, the home made stuff may be the best possible cream cheese to eat, but baking? Maybe not so much.
I don’t ever recall complaining about something having enough emulsifiers and other chemicals 🙂
Victor @ Taste of Artisan says
Hi Steve! You may be right... I can't recall how my cheesecake turned out with homemade cream cheese, I know we made it once but it's been a long while. If that's the case, the only solution I see is a no-bake cheesecake. Those can be quite good, my neighbor once made it for us, it was delicious.
Cathy says
Hi Victor, You can also leave the cheesecake in the oven, as the oven cools. I’ve used this method with store bought cream cheese only, but it has alway worked for me.
Victor @ Taste of Artisan says
Thank's, Cathy... I will try that, hope it won't overcooks.
Puipui Hmar says
Hello,
I'm in India where heavy cream is not sold. But i do have access to fresh raw-milk. So i can make the cream myself. But I do not know how?Do you have a recipe for getting cream from raw milk? Also, can I use thermophilic culture instead of mesophilic culture?
Victor @ Taste of Artisan says
Hi, heavy cream is made from the high-fat part of fresh milk. When fresh milk is left to stand, a heavy cream rises to the top and can be scraped off. That's all there is to it.
You can also make cream cheese with just milk. Use 1 gallon / 4 liters of whole milk instead of 3 quarts milk / 1 quart heavy cream. The cream cheese will be slightly less smooth and less creamy. I've made it that way and it was very good.
Thermophilic culture should work as it will activate and grow at the temperatures specified in the recipe but I've never tried it. It likes higher temperatures but temps in the recipe fall within it's lower end temps. If it doesn't, I suppose you could activate and ripen at higher temps but the process will be shorter and the taste may be different. It's hard to say for me without doing some testing.
Steve Denvir says
Hi guys, I made cream cheese from raw buffalo milk, no cream, and it was fabulous.
Sadly, the buffalo mozzarella wasn’t so successful. I’ll try again next time.
Steve
Victor @ Taste of Artisan says
Hi Steve, glad to hear about your success with the buffalo milk cream cheese. I have yet to drive up to the farm to get some buffalo milk before I can attempt making cheese with it. Very eager though. What was the problem with the mozzarella?
Steve Denvir says
Hey Victor, I’m not sure. I think I let the ph get away from me. I also took on an overly complicated recipe. Next time I’m gonna keep it simpler.
https://www.seriouseats.com/2015/10/how-to-make-fresh-mozzarella-from-scratch.html
If you do decide to go out to Stirling, you almost have to drive by our door to get there. Please feel free to drop in and say hi if you have the opportunity.
Just drop me a note at [email protected]
Victor @ Taste of Artisan says
I see. Nailing the pH can be challenging. I now have 3 pH meters believe it or not for my cheese and sausage making needs. Pretty useful for canning and even making jams and make things simpler (more scientific and predictable) for sure. Thank you for the invitation, I will definitely reach out if/when I do go there.
Rick says
wow,Instant respect for anyone that milks a buffalo!
Steve Denvir says
Hey Victor, I’ve got a bout 10 lbs of summer sausage going into the smoker tomorrow, courtesy of your recipe.
But I’ve got a question about the cream cheese. Have you got a recommended brand of milk/cream? We’ve run into problems before trying to make fresh mozzarella. In theory the milk was organic and not ultra pasteurized, but it still didn’t come together.
If you’ve got a reliable supplier, I’d love to find out who they are.
As always, thanks in advance
Steve
Victor @ Taste of Artisan says
Hi Steve, good luck with your summer sausage. Organic milk is almost always ultra pasteurized so make sure that you what you buy is certainly not UHT pasteurized. I use Wegmans store brand milk or Sealtest when buying in Canada. Can't remember the brand of cream but the one I buy also not ultra pasteurized. I haven't really noticed much of a difference between different brands as long as the product is not ultra-pasteurized.
Steve Denvir says
Made it a couple of days ago and it was fabulous. Used 2L of Kawartha Dairy Homogenized and 1L of Natrel 35% cream.
Ended up with way too much, but as a result, I have some very happy/impressed friends.
And I just discovered that there’s a water buffalo farm about an hour east of us in Stirling. One that sells milk to the public.
Guess what we’re making next? 🙂
Steve Denvir says
And sorry, but I forgot. Thanks again.
Steve
Victor @ Taste of Artisan says
Happy to hear that, Steve. This stuff is never too much but yeah, your friends will be very happy. Homemade cheese, even if it doesn't turn out perfect, still blows anything mass produced out the of the water. So, mozzarella is next? I've never used water buffalo milk but I am quite interested. My younger daughter loves bocconcini I would love to make those for her. Stirling, Ontario? Could you email me the address of the farm?