
For those who are into making beer or hard cider, a kegerator is godsent. There are those who still stick to bottling their beers, but for me a kegerator is indispensable.
What is a kegerator?
In simple terms, a kegerator is a beer dispensing device. It is a refrigerator that has been specifically designed or modified to chill, store and dispense contents of kegs. The word kegerator was cleverly derived from “keg” and “refrigerator.” A part and parcel of a kegerator is a CO2 tank which allows beer to be force carbonated and then dispensed under pressure.
The CO2 tank can be located both inside and outside of a kegerator. Depending on the type of beer served, the CO2 gas may be replaced with a beer gas or pure nitrogen. Beer gas is a 75%/25% mix of nitrogen and CO2 gas. Nitrogen and beer gas require a different from CO2 gas tank due to a higher pressure they are stored at.
Why build a kegerator?
There are many other reasons why you should build a kegerator. No beer bottle bombs from over-carbonation. No under-carbonation. Kegs are much easier to handle than bottles. Some may call me crazy, but I feel like beer from a keg tastes differently. It tastes better. I don't like the taste of bottled beer. And don't get me started on canned beer.
It's fast. You can have your beer carbonated and ready for dispensing within a day. Bottled beer will take its sweet time to adequately carbonate.
Finally, don't forget the coolness factor of having a beer dispenser in your dining room. It's a guest magnet. For better or for worse.
On top, kegerators are not just for dispensing beer. I built a single tap, 2-keg kegerator specifically for carbonating and dispensing carbonated water. You can read more about it in my How to Make Carbonated Water post. My family loves it. The ongoing cost of homemade carbonated water is only pennies per gallon. This is huge given that you will pay a couple of dollars per bottle of carbonated water at your local grocery store.
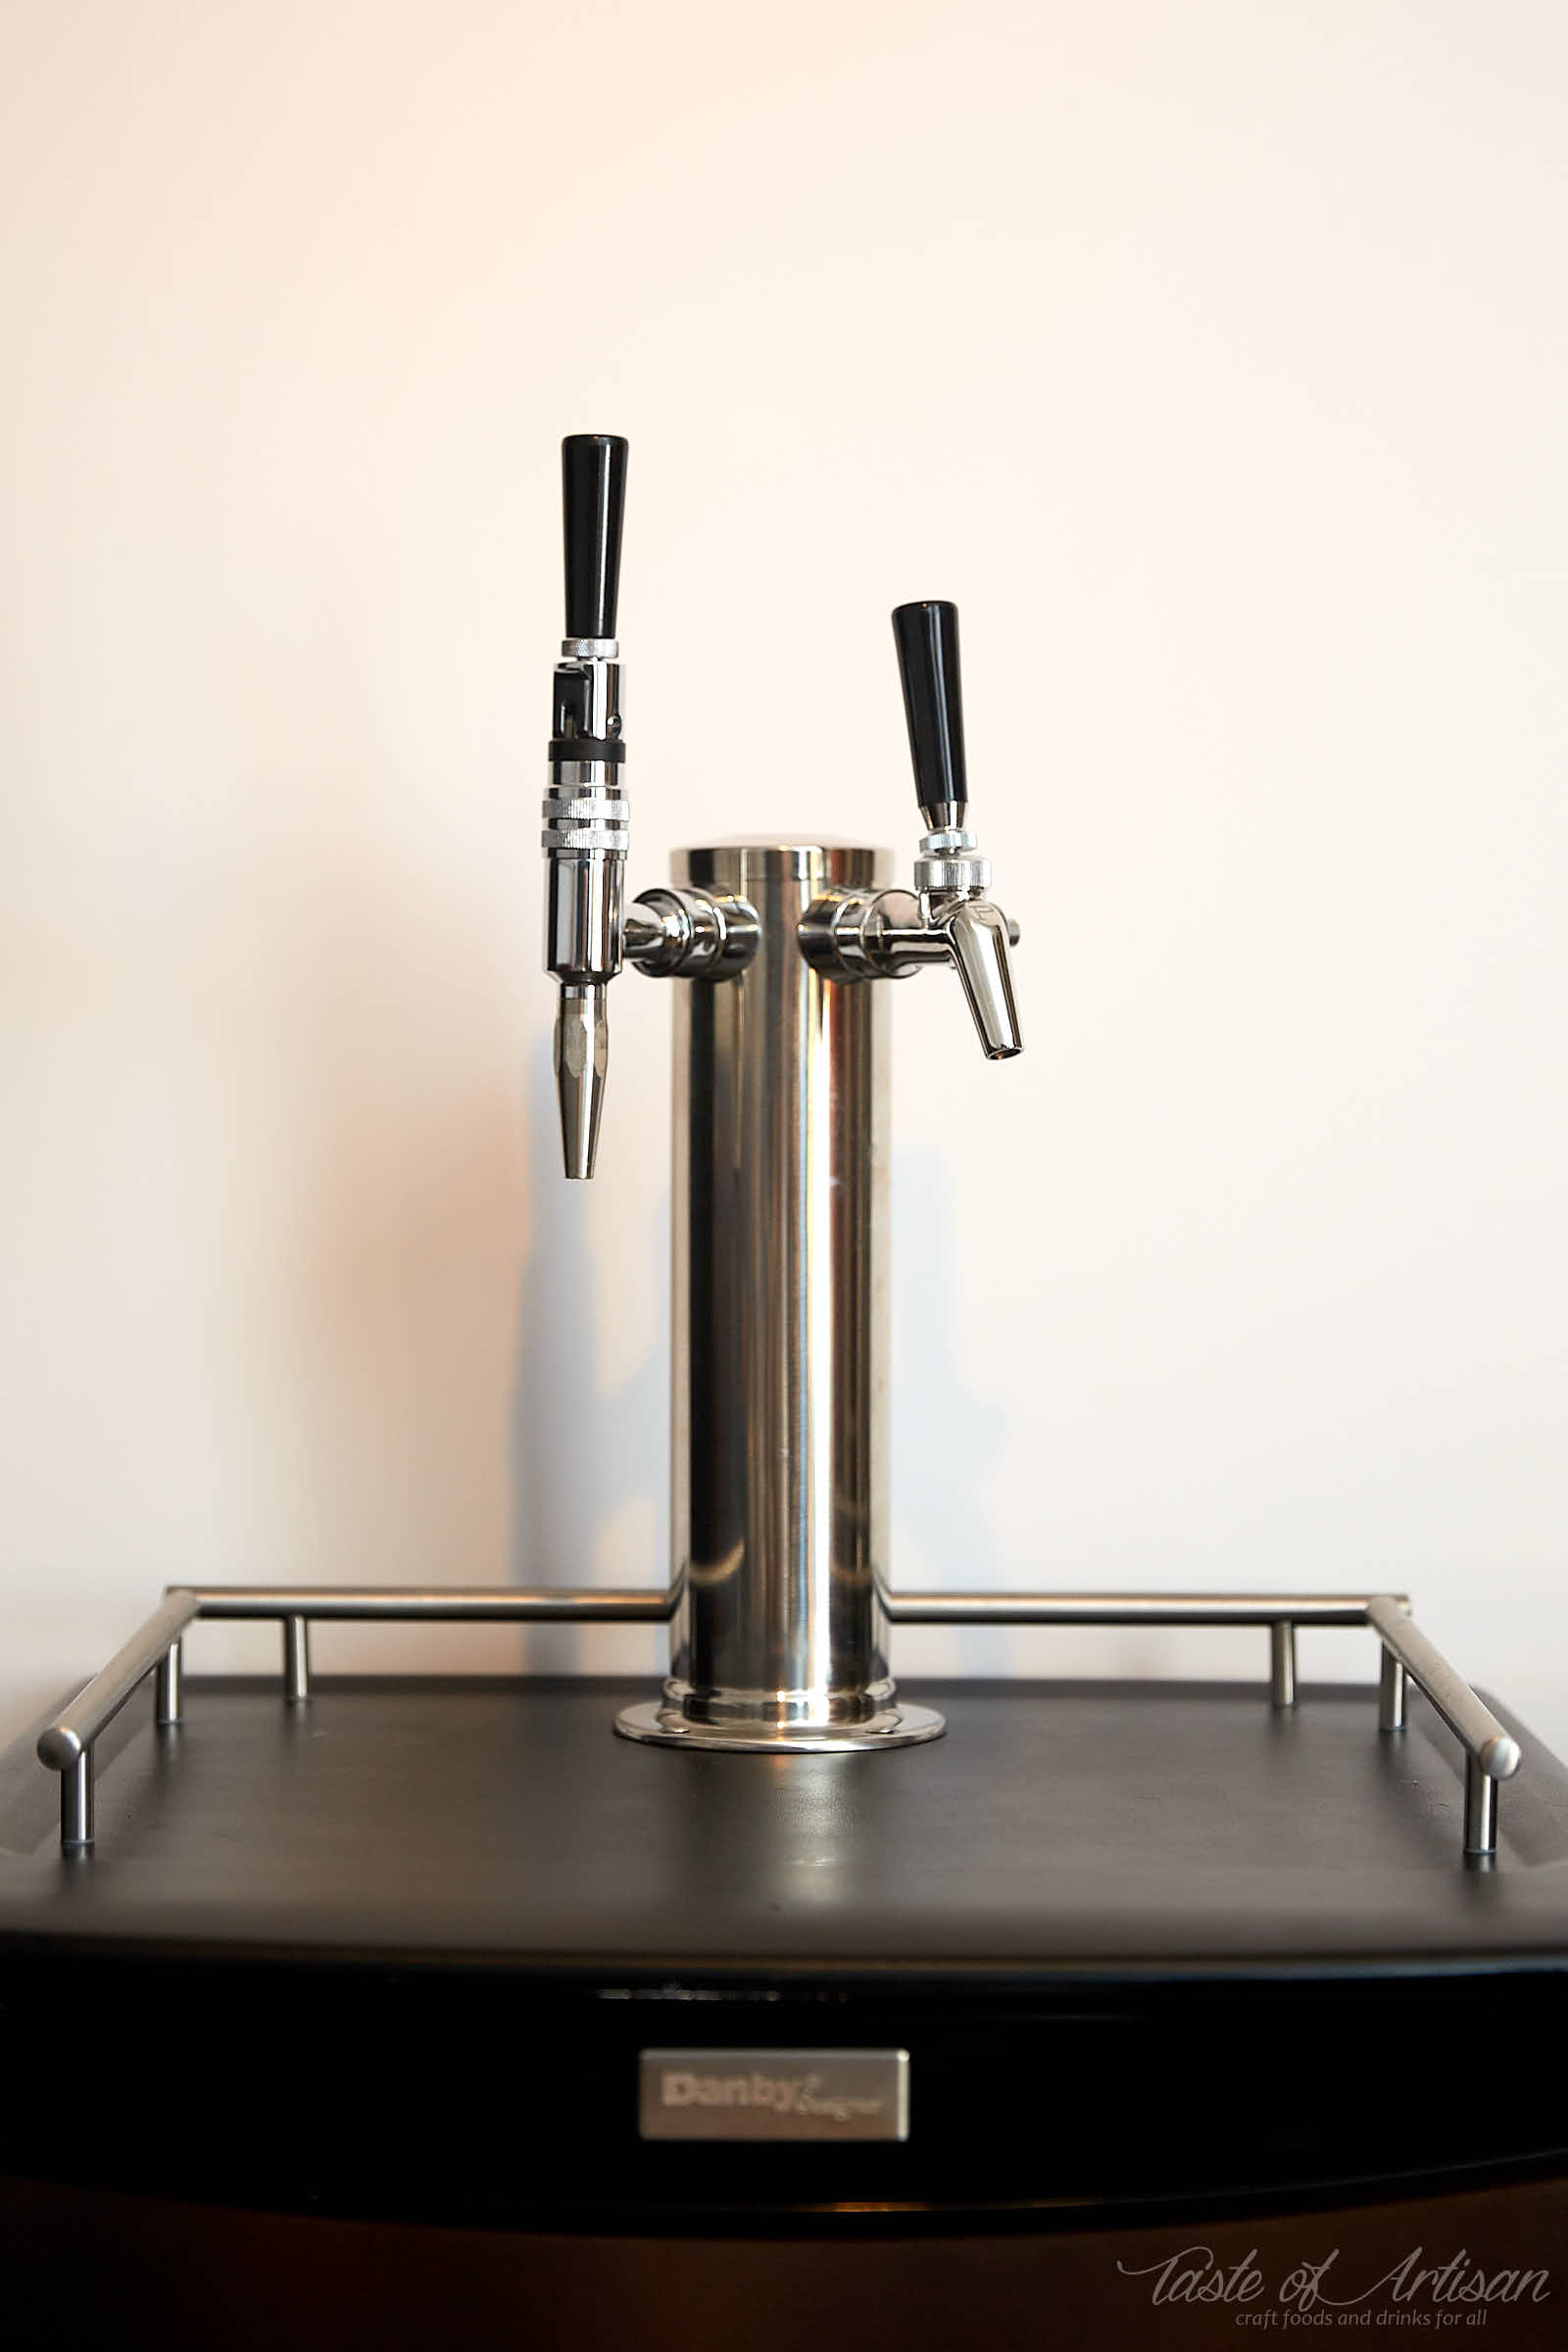
How hard is it to build a kegerator?
As I mentioned above, it's a lot easier than many people would think. Having built 5 kegerators by now, I would say the hardest part about building a kegerator is figuring out what parts you need and making sure you have everything you need. It can get pretty frustrating when you realize in the middle of the build that you are missing something. If you have all the parts, tools and supplies on hand, the actual build should take about 3-5 hours at the most. I built my second kegerator in a little over 2 hours.
DIY kegerator size
Kegerator size matters. The size is what you start with to define what is the best home kegerator for you. If you plan on dispensing 3 or more beers at a time, it's best to build a large kegerator. A regular size fridge will fit 4 kegs. It's a good option for a basement, but won't look great in a dining room. Unless, of course, you are single or want to be single.
A keezer, a chest freezer kegerator, with a custom finish would work best as it can be made to look very attractive, doesn't stand too tall, and can fit multiple kegs. For an average person, a small kegerator that fits two kegs is all that's needed. The focus of my post will be just that, how to build a small kegerator. Though, the same idea applies to any fridge or freezer you pick.
Picking the best keg fridge
As I implied above, the best keg fridge is the one that will cater to your specific needs. So, choose accordingly.
Assuming a 2-keg setup is what you are looking for, you will need to find a fridge that will fit 2 kegs. Some compact fridges will allow that, some won't. When picking a compact fridge look for the following:
- No freezer compartment
- 4.4 cubic feet or larger
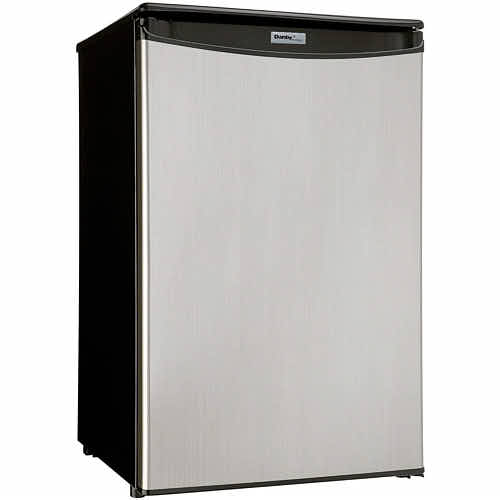
- It's a Danby designer compact, 4.4 cubic feet fridge
Yes, Danby fridges work really well for kegerator conversion and thousands of people use them. I have two DIY homemade kegerators built based on Danby compact refrigerators.
Danby fridges are also a good choice because they cheaper than many other brands and are commonly available. You can buy them new for less than $200, or used for around $100. The curious thing is, used standard size fridges cost less used than these compact fridges. At least, this has been my experience.
Best place to buy kegerator parts
In my experience local home brew stores are the worst places for that due to ridiculous prices. Reputable online sellers like Keg Works, Keg Connection and Midwest Home Brew Supplies are a good option. Amazon is a great place to buy too. I mostly buy parts from Amazon as when you factor in their free shipping and a no-questions-asked return and exchange policy where Amazon pays for return shipping, it wins most of the time in my book. The online retailers I mentioned above also sell their merchandise on Amazon.
Picking the right kegerator parts
When I say the right parts I don't only mean the parts that will work, I mean the parts that will work well and won't need to be upgraded soon after you build your kegerator and realize you've made a mistake.
1. A fridge that can fit two standard 5-gallon Cornelius kegs
For example, this Danby 4.4 Cubic Feet Compact Refrigerator:
Money saving tip
Look for these Danby fridges on Craigslist.com or Kijiji.ca if you are in Canada. You can get them practically new for around $100, sometimes less. The best time to buy is April-May. Guess why. (Answer: students are getting rid of them when moving out of dorms).
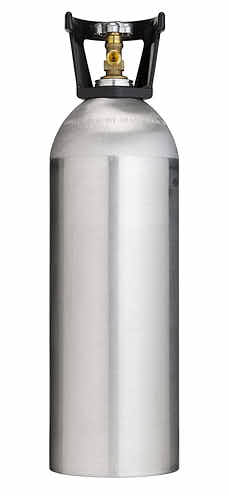
2. A kegerator CO2 tank
For example, this 5-lb Aluminum CO2 tank, or this 20-lb Aluminum CO2 tank:
Money saving tip
Go with the largest CO2 tank you can buy and live with. I started off with a 5-lb tank, progressed to 10 and 15-lb tanks and now have settled on two 20-lb CO2 tanks. It's nice to keep the CO2 tank inside the kegerator, but only a 5-lb tank with the regulator attached will fit in the back if you have two kegs. Depending on how you use it, a 5-lb tank will last about 10-15 kegs, or even more according to this source here. A 20-lb tank will last 4 times that. That may translate into going to refill your tank once every 5-6 months vs every two years.
The cost of refills should also be considered. The place where I refill my tanks charges $18.50 for a 5 lb tank, $22.50 for a 15 lb tank, and $25 for a 20 lb tank. I use a lot of CO2 as I also make carbonated water. For me it's also a 30 minute drive each way. I figure with the cost savings I realize by switching to 20-lb CO2 tanks I will break even on investing in them in about 5 years. Not bad, but I wish I knew all this before I bought smaller tanks and then sold them at a loss.
3. A kegerator regulator
Such as this Taprite Regulator with WYE'd dual check Valves:
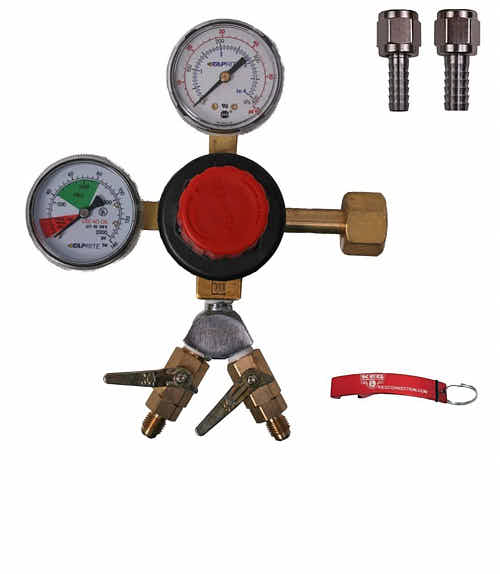
This regulator will allow feeding CO2 gas to two kegs at the exact same pressure. Alternatively, you can use this Taprite Dual Gauge High Performance Regulator:
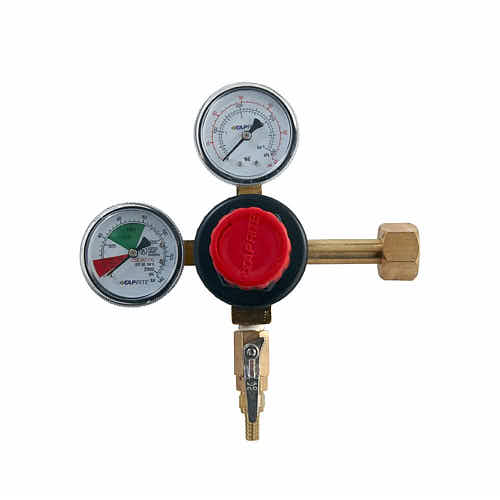
To feed CO2 to two kegs with this regulator, you will need a device called a manifold or CO2 distributor, such as this 2 Way CO2 Distributor:
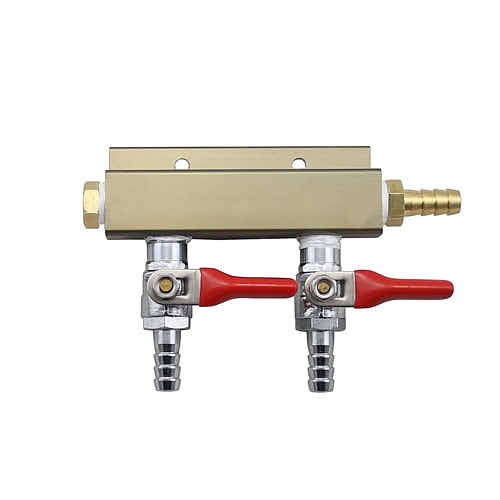
With the regulator above and the manifold you will be able to carbonate two at the exact same pressure. This may be too limiting if you plan on having two different beers on tap that require different carbonation/serving pressures.
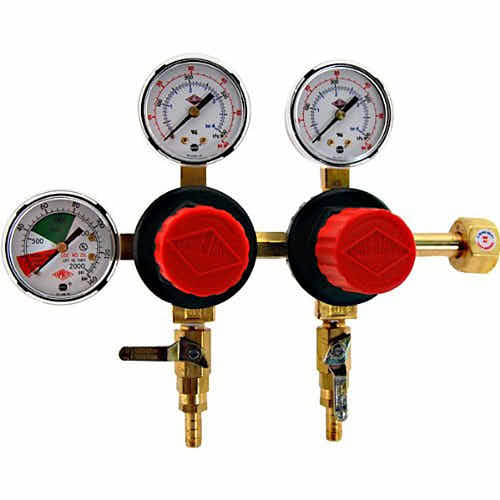
In that case, a Taprite T752HP Two Product Dual Pressure Kegerator CO2 Regulator will be a better alternative:
Or you can go with a single pressure regulator chained to a 2-Way Secondary Regulator:
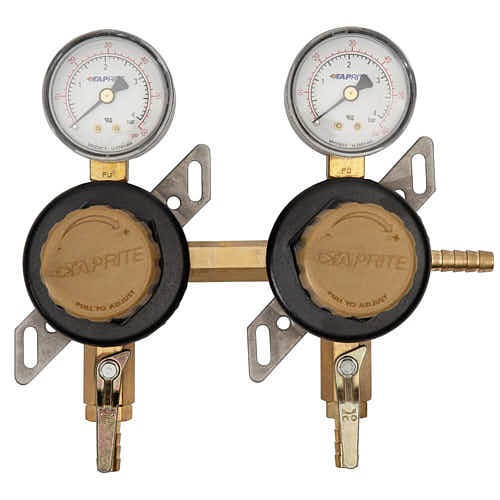
Which way should you go? It depends on what components you already may have, and what you plan on doing in the future. If you think you may be expanding your system to 4 kegs or more, a dual pressure regulator will provide the most flexibility at the minimum price. If not sure, but now you want to carbonate and serve beers at different pressure levels, go with a single pressure regulator and a 2-way secondary regulator.
4. A CO2 Air Tank Wrench
Like this Learn To Brew CO2 Air Tank Wrench:
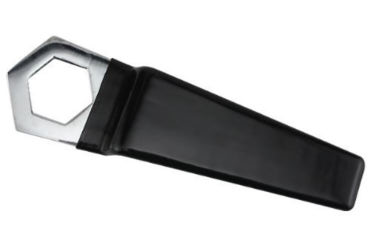
5. A gas hose
Such as this high quality Gas/Air Hose, 5/16 ID, 9/16 OD:
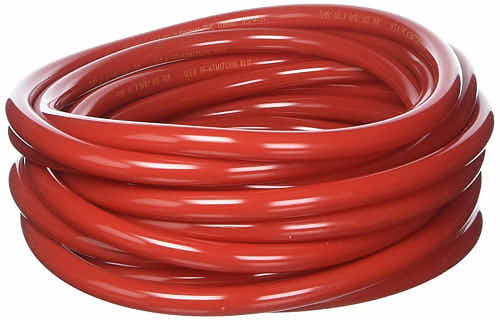
You will need about 12 feet minimum with the CO2 tank on the outside, possibly more depending on your configuration and the distance to the CO2 tank.
6. Two gas ball lock quick disconnects

Tip
There are good quality quick disconnects, like CMB Becker, made in Germany and assembled in USA, and there knock offs which tend to stick, leak, break prematurely and generally piss us, homebrewers, off. Don't be cheap. Spend a few dollars more and get the quality stuff.
with two Barbed Swivel Nuts with 1/4"MFL connection to 5/16" Barb:

Tip
Be very careful buying these. 1/4" MFL to 1/4" barb are too thin for the 5/16" gas line, even though descriptions try to (incorrectly) convince you that they are fine for 5/16" inch lines. They are not. You need a 5/16" barb for the 5/16" ID gas line I linked above to fit perfectly.
7. Two liquid ball lock quick disconnects

with two Barbed Swivel Nuts, 3/16" ID:

Tip
Beer towers come with hex nut assemblies suited for commercial kegs. Like shown on the picture below.

What you will need to do is cut these hex nuts off and reconnect the beer lines to liquid ball lock quick disconnects mentioned above. The beer lines are 3/16" ID. 1/4" ID barbs will fit, I am using them, but it's a super tight fit and you will need to push really hard to get those barbs fit in. A better approach would be to get quick disconnects with MFL (threaded) connectors and swivel nuts with 3/16" barbs.
8. Two ball lock beer kegs
Like this AEB 5 Gallon Ball Lock Keg with Dual Rubber Handle or this 2-keg deal at a very good price:

Tip
AEB kegs are the highest quality kegs, made in Italy. I started off with 4 AEB kegs in 2009, and now I have a total of 6, adding another two just recently. I love them. They look great, the quality of craftsmanship is top-notch.
When buying my last two kegs, I went with AMYCL, India made kegs. They look very similar to the AEB kegs on the picture and I fell for the cheaper price. When I saw them I immediately felt disappointed. The quality was just not there, the lid opening mechanism felt awkward. I packed them and immediately sent them back to Amazon. So, know what you are buying especially if you are new to this.
Money Saving Tip
Instead of buying new kegs you may want to buy reconditioned kegs for about half-price and save a bunch of money. Nothing wrong with that and many folks do that. Just be careful about what you are buying. Many reconditioned kegs come in poor shape and may not perform as expected.
9. A stainless steel dual tap tower
Like this awesome Kegco Double Faucet SS Draft Beer Tower w/Perlick 650SS Faucets.

Money saving tip
Beer line balancing to get a perfect beer flow without too much foam was my most frustrating beer dispensing experience. Calculating perfect line lengths, throwing out 5-foot long beer lines that came with the tower and buying new, longer ones... Then realizing the stock chrome plated faucets are junk and upgrading to stainless Perlick 630SS faucets, then finally upgrading to Perlick 650SS with flow control and getting rid of a mess of long beer lines inside the kegerator. What a waste of time, effort and hard earned money!
Granted, when I was just starting out 650SS's did not exist. Now they do. Do yourself a favor, just buy a dual faucet tower with Perlick 650SS pre-installed from the get-go. This will save you a lot of frustration and money in the long run. You will thank me later.
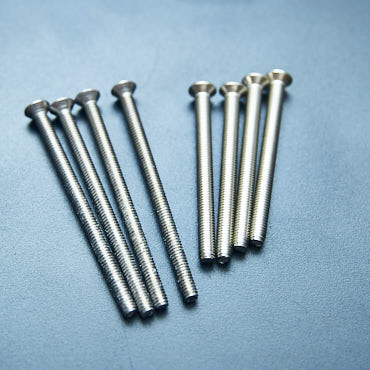
10. A set of longer beer tower fastener bolts
Such as this Fastener Bolt Set for Draft Beer Towers from KegWorks.com (pictured below on the left). The bolts that come with towers are generally shorter than what you would need for the Danby fridge (pictured below on the right). From what I recall, people have had the same issue with other fridges, so keep that in mind.
11. A Kegerator temeprature controller
Such as this Inkbird Pre-Wired Dual Stage Digital Temperature Controller:

This is a very welcome addition to my kegerator and I absolutely love it, especially for the price. I used to think that beer must be ice cold to be good. But, once you switch to drinking home-brewed craft beers you learn that different beer styles are best appreciated at specific temperatures, from 38F all the way to 55F. A digital temperature controller sure comes in handy for that.
12. A kegerator tower cooler (optional)
There are many solutions for chilling beer in the hoses that go inside the tower, from really inexpensive ones, such as using copper pipes, to using computer fan that blow air up the tower, to using uber expensive glycol chilled towers. I use neither and am quite happy with the results. You decide for yourself.
13. Beer mug rails (optional)
After a lot of search I settled on these beautiful LANSA stainless steel drawer handles from Ikea that look amazing on both of my kegerators. They come in pairs and you will need the 13" (for the sides) and the 17"(for the back) sets.

Kegerator conversion kits - good or bad?
I see dozens of kegerator conversion kits sold everywhere. Should you go with a kit instead of buying parts separately? If you have to ask this question, go back and read my tips above. The answer will become obvious.
My recommendation is to forget about the kegerator conversion kits and buy quality parts separately. Kits are only attractive by their low price. The attraction ends there. Parts that go inside kits are usually low in quality and performance. They are designed to get people going at a lower price, but soon they all start feeling the limitations and start buying better parts.
Requred modifications, tools, materials and supplies
In this guide, I will use Danby 4.4 cubic feet compact fridge as an example. This should be very similar to other compact fridges.
Required modifications
- Drill a 2" hole for the beer tower
- Drill 4 small holes for beer tower bolts
- Remove plastic shelves from the door as they will interfere with properly closing the door when the kegs are inside.
Optional modifications
- Drill a 7/8" - 1" hole for the gas line. Perhaps even two holes side by side depending on your needs (more on that later). This is needed if the CO2 tank will be kept outside the fridge.
- Drill 6 or more small holes in the fridge cover for the mug rails, if you are adding them
- Drill a 1/2" hole for the drip tray, if you are adding it
As for the tools, material and supplies, this is what you will need:
Tools
- An electric drill
- A 2" hole saw (don't use a dull hole saw, it won't cut through steel)
- Drill bits
- A Phillips screw driver
- A utility knife
- A spray bottle with soap water
- Oetiker Standard Jaw Pincers
Additional materials and supplies:
- Silicone caulk (depending on the model of the fridge)
- A sheet of white plastic (depending on the model of the fridge)
- 4 feet of 3/8" thick wood planks
- Aluminum tape
- Sandpaper
- 4x of the following size washers: 1-1/4", 3/4" and 7/8"
- 4-6 Oeticker Stainless Steel Single Ear Hose Clamps size 5/8" or 15.7mm (for the 5/16" gas line)
- 2 Oeticker Stainless Steel Single Ear Hose Clamps size 1/2" or 13.3mm (for the 3/16" beer lines)
Tip
It's best to buy Oeticker stepless hose clamps in bulk as they are much cheaper that way. At my local homebrew store they are a buck a piece. And when you need them while changing the system configuration or fixing leaks and such, it's nice to have them handy.
If your fridge is not a Danby that I am using as the example, do yourself a favor and check out your fridge's schematics to make sure you don't accidentally drill into some important stuff, like cooling lines or electric wires. Part Select is a good place to start.
Preparing the fridge for the build
All the pictures were taken after the fact, so they may not necessarily reveal all little details and intricacies. If something is not clear, just ask in the comment section at the bottom of the post.
MAKE SURE THE FRIDGE IS UNPLUGGED BEFORE YOU START!
Step 1 - move the fridge light assembly out of the way
- Unscrew two screws in the front of the assembly and one in the back.
- Pull whole assembly down and to the right.
The wires are rigid and it will stay put and out of the way from where you will be drilling. If you want to be more careful, disconnect and remove the assembly while you are drilling.

Step 2 - drill a 2" hole for the beer tower
- Tape masking tape over the area where you will be drilling to avoid scratching the top
- Mark the center where you will be drilling. I centered the hole 5 inches from the back of the fridge. I did not remove the lid before drilling. You can center the hole about 5-1/4" to 5-1/2" from the back and still be fine. This will move the back tower fastener bolts away from cooling plate a little more and provide more space for the larger washers.
- Drill the hole from the top down. You will be drilling through plastic top, white foam board, steel sheet, insulation foam, then white plastic sheet. Cutting through steel is the most difficult part. Make sure to use a sharp hole saw.


Step 3 - drill 4 small holes for the beer fastening tower bolts
- Place your beer tower over the 2" hole. Center and align as needed.
- With the beer tower in place, mark on the masking tape where the holes for the beer tower fastening bolts are.
- Drill the holes for the tower fastening bolts.
Step 4 - drill a 2" hole and 4 small holes in the wood plank
- Remove the top from the fridge.
- Place a wood plank under the lid and mark where the holes you just drilled are
- Drill the same holes in the wood plank
- (Optionally) drill a hole for the drip tray, if installing


Step 5 (optional) - attach rails to the top
- With the top off, drill the holes for the rails
- Attach the rails by fastening to the fridge top

Step 6 - clean up, tape the hole with aluminum tape, put the top back on
- With the top off, clean up the mess and smooth out rough edges.
- Align the wood plank with the holes in the fridge.
- Re-attach the lid and fasten with screws
- Tape the sides of the hole with the silver tape

Step 6 - Drill hole(s) for the gas lines
If you will be using a larger CO2 tank or just want to keep it outside the fridge, you will need to drill one or two holes (depending on your configuration) for your gas lines. Pictures below are my older and newer model of Danby 4.4 cubic fridge. If you are using a different fridge, you may have to drill elsewhere, depending on the schematics of that particular fridge.
- Drill the hole(s) over or near the drain hole, using a 1" drill bit.
- Smooth out edges with sandpaper.


Step 7 - Remove plastic shelves from the door
The molded plastic shelves on the door will interfere with the closing of the door with two kegs inside the kegerator. There are three ways to deal with that.
- If you have an older version of the Danby fridge, you can simply unscrew the whole panel, replace it with a similar size sheet of plastic from Home Depot and be done with it.
- Cut the whole panel out around the door perimeter with a utility knife , then attach a similar size sheet of plastic from Home Depot.
- Cut out only the bumps that interfere with the closing of the door, then cover them with silicone caulk. I actually prefer this method. This way the light will still work otherwise you will have to remove the bulb or it will on all the time until the bulb burns out.


Step 8 - Cut off the shelf guides on the side walls (optional)
The newer Danby fridges have plastic shelf guides that stick out and make it very tight for two kegs to fit in. I did not bother shaving them off. Yes, it's a tight fit but they still fit and it doesn't bother me. If you want, cut them off with a utility knife and seal with silicone caulk.
Kegerator Assembly and Adjustment
Step 1 - install the tower
- Fasten the beer tower to the kegerator using the longer screws from KegWorks.com. Some people like to install a wood board on the inside for stability, but my approach work well for me and I've never had any tower stability problems.


Step 2 - attach liquid quick disconnects
Step 3 - run gas lines and attach gas quick disconnects
- If the gas tank is outside the fridge, run gas line(s) through the hole(s) in the fridge.
- Connect gas line(s) to the CO2 regulator.
- Connect CO2 regulator to the manifold or secondary regulator, if using.
- Attach gas quick disconnects to the lines going to the kegs.
Example 1 - 4-way manifold

Example 2 - secondary regulator


Step 4 - connect CO2 tank to the CO2 regulator
- Using CO2 air tank wrench, connect CO2 regulator to the CO2 tank.

Step 5 - connect liquid and gas disconnects to the beer kegs
- Connect gas disconnects to filled up beer kegs.
- Connect liquid disconnects to filled up beer kegs.
Step 6 - turn on the system and adjust pressure
- Open the valve on the CO2 gas tank
- Adjust the pressure on the CO2 regulator to the desired level
- Test the system for leaks with soap water (very important!)
Step 7 - adjust flow control on the faucet
This is it, your homemade kegerator build is completed. It wasn't too hard, was it?
Enjoy your beer!
This post was updated on January 26, 2019


Luke Connolly says
Hi there,
I am using your guide, pretty much to the letter, to do a carbonated water kegerator with a Danby 4.4 and a dual-outlet regulator. Thank you sincerely for the detailed writeup, it's a huge help and our house drinks a lot of seltzer, so it's fantastic.
If I set up 2 kegs inside with 2 gas lines, I assume I should just use a single tap on top of the fridge, and when one keg runs out, just switch the water line to the tap to the "full" keg?
What I'm wondering is, once I do the above water line swap, and refill the "spent" keg, will it be OK to reconnect to the second gas line? Will both kegs (including the "new" in-use keg) continue to get sufficient pressure to stay carbonated?
I guess I am trying to minimize the amount of disconnecting / reconnecting and optimize the gas usage without having varaible carbonation levels after I swap.
I apologize if this question has been answered, or if it's missing something about how it works...
Victor @ Taste of Artisan says
Hi Luke, you are very welcome. I am glad that my post helped you.
You can have a single tap setup and switch the lines once one keg runs out of water. That's what I used to do. In my new setup, I have a 4-keg, 3-tap setup. I only have two kegs but I also store the CO2 tank inside the kegerator to make the whole setup a little neater. Each keg inside the kegerator is connected to its own tap, so technically, you can use either. I've been running this setup for over a year and it seem to be working fine. Meaning, we never ran into a situation where both kegs were emptied at the same time and we had to wait for a couple of days for the water to carbonate again.
If you do the switching as you described, yes, it's OK to reconnect the second gas line once you refill the keg. Both kegs will have the same pressure and adding a new, uncarbonated, keg will not affect the older keg with carbonated water. This is because the headspace in each of the kegs will be at the equal pressure. The only difference is that one will have carbonated water and the other one will take about 48 hours to get fully chilled and carbonated. I think this is the best way to do it and the is no need to do anything extra to get optimal performance. Hope this helps.
Luke says
Unreal! I was hoping that... basically I can just swap the water line, take the empty out, refill it, and reconnect the gas, and not have to do much more "line swapping" than that.
One tiny extra question. I have been getting greedy, and wondering (once I test the setup and get it all working properly) if there would be any complications in storing the fridge / kegs / co2 in the basement (directly below the kitchen sink) and running the water line directly up to the tap (ideally in the countertop). Would running the water line, say 10' vertically to the kitchen cause any drop in flow / carbonation? I'm not too worried about temperature loss, but I'd probably use an insulated line just to help reduce it. What would be the best way to "extend" the water line from the ~5' line that comes with the tap?
Friends are definitely gonna think I'm crazy but they'll also probably love the end result.
Victor @ Taste of Artisan says
Correct. That's how I've been doing it for many years.
That sounds cool. If you want to extend the line, just buy yourself 12-15 feet of beer line from a place like More Beer, Northern Brewer, etc. and replace the short one that came with the tower.
You won't have a drop in pressure / carbonation at this length. Should you notice a drop in carbonation, and you most likely won't, all you have to do is to bump up the PSI on your CO2 regulator.
Pat Cummins says
I decided to finally build a kegerator after about 1.5 yrs of home brewing. While I eventually got my bottling process down, I was sick of the time it took to bottle big batches of beer (almost discouraging). I also like hoppy beers and bottling was killing the delicious beers I was creating. This project was SUPER fun and I kegged my first beer today - it was so easy and fast!
Victor @ Taste of Artisan says
Awesome!
Robert says
Will a 5lb CO2 cylinder with regulator fit inside the Danby with two kegs? Or do you have to go down to one keg? The write up insinuates that it will fit but in your response to Brian’s question March 2019 you said “ I kept mine inside the keg too and only moved it out so I could add a second keg.”
Thank you!
Victor @ Taste of Artisan says
Robert, I should have been a bit more clear on that. Mine was a 10 pounder at the time. You won't fit two kegs with a 10lb tank inside, but a 5lb tank will fit just fine, assuming a 4.4 cf bar fridge like my Danby. Coincidentally, I just sold my 10lb tank which had been sitting in a closet for many years. I had upgraded to 2 20lb tanks and still have one 15lb tank. If your family drinks a lot of carbonated water, refilling a 5lb tank will become a very frequent and tiresome chore.
Robert says
Thank you for your prompt response. Here is my situation: I already own a 20lb cylinder, and am trying to keep this kegerator system all contained within the fridge. Could it make sense to use the 20lb cylinder to carbonate a fresh keg of water at room temperature, then transfer the keg into the kegerator and use a 5lb for the last bit of carbonation?
Thank you for your time and insight!
Victor @ Taste of Artisan says
No problem. The frequency of refilling smaller tanks will certainly be less of an issue if you are dispensing beer vs dispensing water. I do both so I am speaking of both interchangeably in a way, I should be more clear on that. So, if you are carbonating water and the family drinks a lot of water, a couple of large (20lb) tanks are a must. For beer, you will be carbonating at a much lower pressure and you won't be dispensing nearly as much, so a smaller tank will last longer, can be much longer. I'd say, if your consumption is not huge then a 5lb-er may work. That said, if you want to carbonate outside of the fridge, it may or may not be possible, depending on what you want. Are you carbonating water or beer? Different PSIs. Beer - yes, you can do it outside. Water - you will need a much higher PSI than your pressure relief valve can withstand. Then again, it depends on how carbonated your water you want to be. I wrote about the issue of carbonating outside in my comments in the How to Make Carbonated Water post, dated December 30, 2019 and January 22, 2020.
Matt says
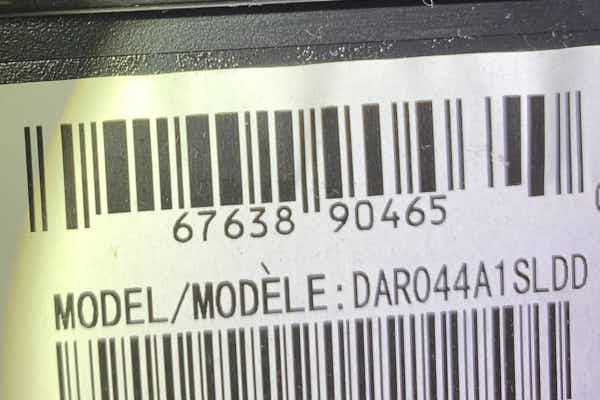
Hi what is the exact model of the fridge you used? I found the Danby 4.4 Designer at Lowe's at it's model DCR044A2BDD. Just want to make sure it's the same model as yours so I could just use your measurements. Thanks so much for the awesome post!
Victor @ Taste of Artisan says
You are welcome, Matt. I have two kegerators, here are the model numbers:
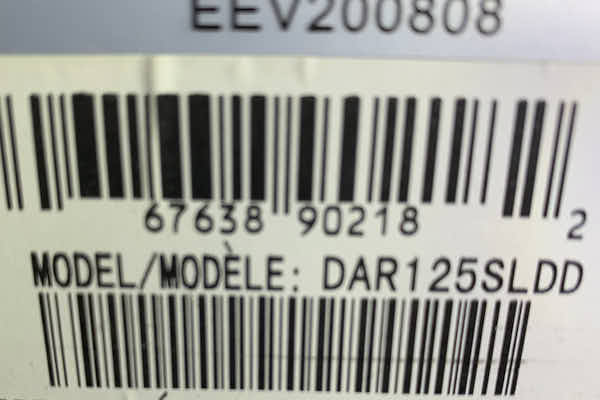
>
>
Matt says
The Danby one I was looking at on homedepot is model #DCR044A2BDD-3. Do you know if this one would work? I'm going to try and see if anyone has used this.
Victor @ Taste of Artisan says
I think it will. I've seen someone using a similar one with a freezer, just can't remember where I saw it.
Polar says
Hello,
Thanks for the great post. We drink lots of carbonated water in our house and I would love to make this. Ideally I would like to keep the fridge in the basement and run a line up to the kitchen. What issues do you see with having a long line run?
Thanks for your help.
Victor @ Taste of Artisan says
The only issue I see is the amount of water in the line between the fridge and the tap getting warm. I would try to make the line as short as possible and insulate it well. That will minimize the impact. Frequent use (drinking) will also help with that. The carbonation level will not be affected.
Polar says
Thanks.
That is what I thought might be the issue. Have a great new year!
Mark
Victor @ Taste of Artisan says
No problem. Have a great New Year too!
Cody Smith says
I have purchased a new Danny 4.4 cu ft fridge. DCR044A2WDD. It has an all steel top. If I use your measurements for the 2" hole for the tower, do you think I will be ok? I was hoping to have Canadian on tap but I believe it is only available in the 58.5L size. I have already bought a keg tap. Do you know if it will fit inside or should I plan to find a beer in the 20l size I like?
Victor @ Taste of Artisan says
Cody, are you referring to the steel sheet under the plastic cover on the top of the fridge? If so, both my kegerator fridges have those. I had to drill through steel. The design seems similar.
Now, I checked your your model online and it shows that it has a freezer section. If yours does too, it's a whole new challenge there. It will be very hard, maybe impossible, to make it work.
To fit a 58.5L keg you will need a pre-made kegerator, like this one.
Cody Smith says
I originally saw this conversion https://youtu.be/gnKJ8cHcuKg . The freezer is held into place with 4 small screws, so it's easily removed. I noticed the thermostat sensor slides into the bottom of the freezer. I would relocate it out of the way on the top. It's looking like I'll have to find a beer I like in the 20L size. I'm ok with that.
Victor @ Taste of Artisan says
That seems easy enough. Best of luck with the conversion.
Alex says
Hi, I am planning to add a triple secomday regulator to my Danby. I think with the slim torpedo kegs I'll be able to add a third keg. I wanted to ask how you mounted your regulator on the cold plate. is it just some large paper clamps and some S hooks? Would love to know more! Thanks
Victor @ Taste of Artisan says
Hi Alex, yes, I used large paper clips and 'S' hooks. I am sure there are more elegant solutions but this one works fine for me.
Brian says
Is it possible to fit 3 kegs in the Danby fridge if the CO2 is outside the fridge? Is it not advisable to have the CO2 outside? Our family goes through a ton of carbonated water so I can see the need for having 2 kegs so I don’t have to wait the 2 days to carbonate but I’d also like a keg of beer on tap. Thanks.
Taste of Artisan says
Brian,
it won't matter if it's in or out. There is not enough space in it to fit in three kegs.
Is it advisable to keep co2 outside? No. I have not seen any evidence that supports that. Initially, I kept mine inside the keg too and only moved it out so I could add a second keg.
Now, beer and carbonated water... I think you should plan on getting a second kegerator. Likewise, my family goes through a lot of water, a keg every two-three days in summer now. I barely keep up with refilling them but we always have carbonated water. It's not possible with one keg. You can read about my water kegerator here. I though I could beer and water in one but ended up with two kegerators.
Steve says
Thanks so much for this guide, this is exactly what I was looking for! Since this is for daily drinking of water, any thoughts on filtering the CO2? It seems hard to find much information on beverage/food grade CO2, all the CO2 suppliers I talked to don't seem to do any cleaning procedures for the food grade CO2 refills.
https://www.micromatic.com/filters/in-line-co2-purifier-770sg-l1300
victor says
Steve, I never had this problem so I know nothing about purifying CO2. The product that you linked seems legit and should do the job. Kind of expensive but hey, it will pay for itself times and times again. We here go through a keg of water every 3-4 days, a couple of days in summer. I'd go broke if I had to buy it at the store.
Whereabouts are you? Perhaps you missed the right place for food grade CO2. Here in Toronto we have a big supplier of food grade CO2, beer gas, oxygen, helium and other gases that supplies the whole city. There are probably others but I know this one is very reliable and inexpensive. Every food retailer needs CO2, so there's got to be something where you live. I used to work at Wendys' as a student. We served pop out of machines that had syrup mixed with carbonated water at the time of dispensing. The water was carbonated by CO2 tanks. They've got to be filled somewhere locally otherwise it would get very expensive. You must have one of those. They would be advertised as servicing restaurants. Like this one in Toronto - http://www.camcarb.com/.
Steven Gorski says
Good point. I did some digging, and found a beverage grade CO2 place in my area (San Diego). I just had bad luck with some welding shops that claimed it was beverage grade but didn't have any certifications to prove it. I read online somewhere that a true beverage grade CO2 canister would be glass-lined for the cleaning of it between fills, but I could not find anyone selling those so I'm not sure if that is a thing.
victor says
I would certainly avoid welding shops. I know many guys who brew beer at home use them but that doesn't mean it's a good choice. I've never heard about about glass-lined CO2 tanks and cleaning in between fills. Frankly, this sounds like a nonsense to me as it would drive the cost of refills sky high.
I don't know if you've got your CO2 tank/tanks yet, but if you haven't, you may want to consider getting a couple of 20lb tanks like I did. Not sure about your situation, but my CO2 place charges per refill plus a small markup for the size. Refilling a 10lb-er costs only something like $17.50, 15lb-er - $20, and a 20lb-er - $22.50. I started with a 10 and 15 lb tanks a long time ago when began brewing hard cider, then when I added water carbonation I had to refill tanks much more often. I figured the new tanks will pay for themselves within a few years, considering cost savings on refills, and the gas cost to drive back and forth more often. You can get away with one tank but when you run out you must go and refill the same day.
John says
Hi, I’m just exploring the idea of building a kegerator, and your design and instructions are the best I’ve seen. I would like mine to have two taps, one for beer and the other for carbonated water. Can I do this? Would I have to have separate co2 bottles and other separate parts?
Thanks
victor says
Hi John, thank you for the compliment about kegerator guide. Yes, you sure can but with some limitations.
Limitation 1 - you will have to have your water and beer at the same temperature. If you like your beer cold, that's not a biggie. You'd typically want about 38F for light beer. You can go a couple of degrees lower.
Limitation 2 - when you run out of water, you will need to refill the keg and wait for two days for it to carbonate. That's the reason I run a two-keg kegerator for water only. Read about it here: https://ifoodblogger.com/how-to/make-carbonated-water/
Other than that, it's very simple. You will only need one CO2 tank. You will need a dual Dual Pressure Kegerator CO2 Regulator (described in the post), one will carbonate your water at say 40PSI and the other one will be for your beer (8-10PSI). No need for other parts. If you happened to already have a single pressure regulator, you'd want to add a 2-Way Secondary Regulator (also described in the post) to supply different pressures to different kegs. That's all.
labib says
Hi Vic,
First off, thanks for putting your guide together. It's incredibly detailed and has given me the confidence to go forward with my project.
I plan to follow your instructions to build a seltzer only kegerator.
In the homebrew community, I see discussions around keg sanitization with Star-san or some other cleaning product.
If I'm using brand new kegs, do you think this is necessary?
victor says
You don't need a sanitizer for water carbonation, sanitizer (basically an acid) is used when brewing beer to prevent harmful bacteria from getting inside and feasting on beer when it's added. I would only clean the keg to remove any manufacturing residue. If you have PBW, use that, it's a very good cleaner. If you don't use a some kind of mild soap and rinse multiple times.
Marko says
Hey Vic,
thanks for the comprehensive guide. I built a kegerator following your design and could not be happier with it. Just tapped a keg and all is good. Now, I am only using CO2 but I am thinking of adding a one nitro tap, similar to what I see on your picture at the top. Do you think it's worth it?
victor says
Good to hear, Marco. Yes, Nitro is totally worth it. I like malty beers and they all benefit from Nitro - love the cascading effect and the velvety-smooth mouth feel it lends to beer. I could never go back. Now, light beers are a different story - not much benefit there.
Mark says
This is by far the most detailed and thoughtful kegerator build guide I've seen. Thanks a lot. A quick question. What is the thickness of the wood planks that you used? Does the length of the planks matter? I am building my first ever kegerator this weekend and want to make sure I've got everything I need.
victor says
I used 3/8" thick planks and they were the exact same thickness as the foam board that used to be there. The length does not matter, you just need to cover most of the area, that's all. Good luck with your build.